
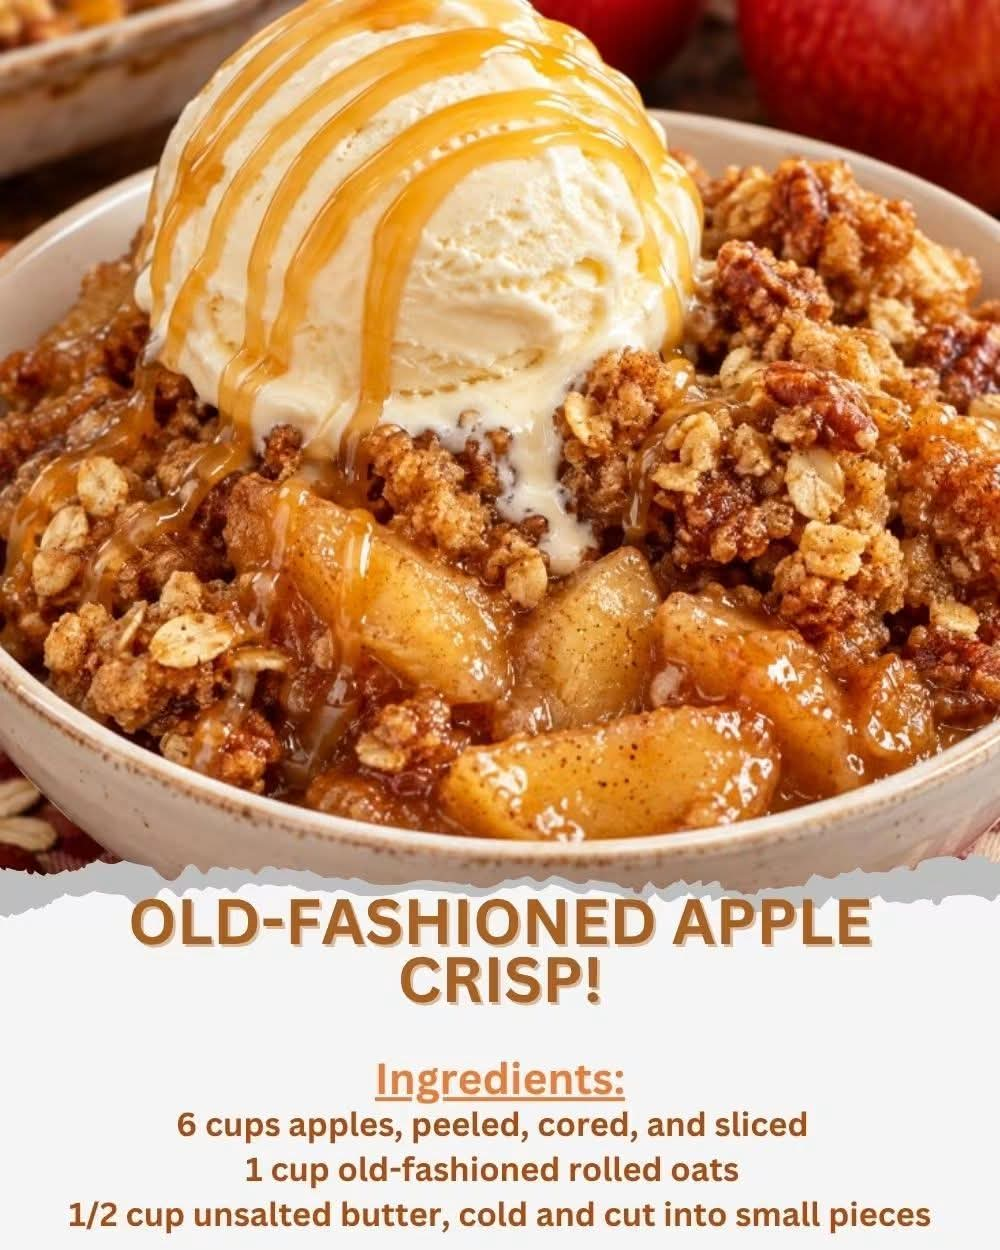
Old-Fashioned Apple Crisp
Introduction
Old-Fashioned Apple Crisp is one of those timeless homemade desserts that brings together everything people love about classic comfort food: tender baked apples, warm cinnamon and nutmeg, and a buttery, golden oat topping. It is simple enough for an ordinary weeknight but special enough to serve after a family dinner, holiday meal, or Sunday gathering.
Unlike a traditional apple pie, this dessert does not require rolling or shaping pastry. The apples are simply prepared, seasoned, placed in a baking dish, and covered with a crumbly mixture of oats, flour, brown sugar, and cold butter. As the crisp bakes, the apples become soft and juicy while the topping turns golden, crunchy, and fragrant.
Served warm, especially with vanilla ice cream, this apple crisp is the kind of dessert that feels familiar from the very first bite.
Ingredients
For the Apple Filling
- 6 cups apples, peeled, cored, and sliced
- 1 tablespoon fresh lemon juice
- 1/2 cup granulated sugar
- 1/2 teaspoon ground cinnamon
- 1/4 teaspoon ground nutmeg
For the Crisp Topping
- 1 cup old-fashioned rolled oats
- 1/2 cup all-purpose flour
- 1/2 cup packed brown sugar
- 1/4 teaspoon salt
- 1/2 cup unsalted butter, cold and cut into small pieces
Optional Additions
For additional flavor, you can add a small amount of vanilla extract to the apple mixture, a pinch of ground cloves, or a handful of chopped pecans or walnuts to the topping. These additions are optional and can be adjusted according to taste.
Choosing the Apples
The apples you choose can make a noticeable difference in the finished dessert. Tart apples such as Granny Smith are particularly suitable because their acidity balances the sweetness of the sugar and brown-sugar topping.
You can also combine different varieties of apples. A mixture of tart and naturally sweet apples creates a more complex flavor and gives the filling different textures.
Choose apples that remain reasonably firm during baking rather than varieties that quickly turn completely soft.
Instructions
Step 1: Prepare the Oven
Preheat your oven to 350°F (175°C). Lightly grease a 9-by-9-inch baking dish with butter or cooking spray.
Preparing the dish before making the filling makes assembly quick and easy.
Step 2: Prepare the Apples
Peel, core, and slice the apples into relatively even pieces. Try to keep the slices similar in thickness so that they bake at approximately the same rate.
Place the apples in a large mixing bowl. Add the lemon juice, granulated sugar, cinnamon, and nutmeg.
Gently toss everything together until the apples are evenly coated.
Step 3: Arrange the Filling
Transfer the seasoned apples to the prepared baking dish. Spread them into an even layer.
Do not press the apples down too firmly. Leaving them naturally arranged allows the heat to circulate and helps the fruit cook evenly.
Step 4: Prepare the Topping
In a separate bowl, combine the rolled oats, all-purpose flour, brown sugar, and salt.
Mix the dry ingredients thoroughly so that the brown sugar and seasonings are distributed throughout the oats and flour.
Step 5: Add the Butter
Add the cold butter pieces to the oat mixture.
Using a pastry cutter, fork, or clean fingertips, work the butter into the dry ingredients until the mixture resembles coarse crumbs.
There should still be small pieces of butter throughout the mixture. Avoid mixing it into a smooth dough because the uneven pieces help create the characteristic crumbly texture of an apple crisp.
Step 6: Assemble the Crisp
Scatter the prepared topping evenly over the apples.
Try to cover most of the surface while keeping the topping loose rather than pressing it down. This helps it become crisp and golden as it bakes.
Step 7: Bake
Place the baking dish in the preheated oven and bake for approximately 40 to 45 minutes.
The crisp is ready when the topping is golden brown, the apples are tender, and the filling is bubbling around the edges.
If the topping begins to brown too quickly while the apples still need additional cooking time, loosely cover the dish with aluminum foil and continue baking.
Step 8: Rest Before Serving
Remove the apple crisp from the oven and allow it to rest for approximately 10 to 15 minutes.
This short resting period allows the hot apple juices to thicken slightly and makes the dessert easier to serve.
Method
The method behind a successful apple crisp is based on creating a contrast between the soft fruit filling and the crisp, buttery topping.
First, the apples are coated with lemon juice, sugar, cinnamon, and nutmeg. The lemon juice adds brightness while also helping balance the sweetness. Cinnamon provides the familiar warm spice, while nutmeg contributes a deeper background flavor.
The topping is made separately by combining oats, flour, brown sugar, and salt. Cold butter is then worked into the mixture until coarse crumbs form.
During baking, the butter melts into the oats, flour, and sugar. The topping gradually becomes golden and crisp while the apples release their juices underneath. The result is a dessert with a soft, fragrant center and a crunchy, buttery surface.
The History of Apple Crisp
Apple crisp belongs to the long tradition of baked fruit desserts that developed as practical alternatives to more elaborate pies and pastries.
Apple desserts have a particularly strong history in North American home cooking because apples were widely cultivated, stored well, and could be used in many different dishes. Families could transform a basket of apples into pies, cakes, sauces, cobblers, and baked desserts.
The crisp became especially appealing because it required no pastry crust. Instead, fruit could be topped with a simple mixture made from ingredients commonly found in the pantry.
Different versions developed over time. Some use oats, while others rely mainly on flour, sugar, and butter. Nuts, spices, raisins, and other fruits may also be added depending on the family recipe.
The exact origins of every individual apple crisp recipe are difficult to trace because variations have been passed from one household to another for generations. What makes the dessert enduring is its simplicity and adaptability.
Formation and Texture
The formation of this dessert happens in two distinct layers.
The bottom layer consists of seasoned apples. As the apples heat, their natural moisture combines with the sugar and lemon juice, creating a fragrant, syrupy filling.
The upper layer is the crisp topping. The cold butter creates small pockets throughout the oats and flour. In the oven, those pockets melt and help produce a rich, crumbly texture.
The brown sugar caramelizes slightly during baking, contributing color and a deeper sweetness.
For the best texture, avoid cutting the butter into the topping until it disappears completely. Small pieces of butter are desirable because they contribute to the crumbly structure.
How to Serve
Old-Fashioned Apple Crisp is traditionally served warm.
A scoop of vanilla ice cream is an especially popular accompaniment because the cold, creamy ice cream contrasts beautifully with the warm apples and crisp topping.
You can also serve it with:
- Whipped cream
- Vanilla yogurt
- Caramel sauce
- A light dusting of powdered sugar
- Chopped toasted pecans
- A drizzle of maple syrup
For breakfast-style leftovers, a small portion can even be served with plain or vanilla yogurt.
Tips for the Best Apple Crisp
Use firm apples that hold their shape during baking.
Slice the apples evenly so they cook at approximately the same rate.
Do not skip the lemon juice. It helps brighten the flavor of the apples and balances the sweetness.
Keep the butter cold when preparing the topping. Cold butter helps create a crumbly rather than dense topping.
Do not overmix the topping. Stop once coarse crumbs have formed.
Spread the topping evenly across the apples so every serving receives a good combination of fruit and crisp topping.
Allow the dessert to rest briefly after baking. The filling will thicken as it cools.
For an especially crunchy topping, add a small handful of chopped pecans or walnuts.
Make-Ahead Method
The apple filling and topping can be prepared separately ahead of time.
Prepare the apples and place them in the baking dish. Cover and refrigerate them. Prepare the topping in a separate container and keep it refrigerated.
When ready to bake, scatter the cold topping over the apples and bake as directed.
Because the ingredients may be cold from the refrigerator, the dessert may require a little additional baking time.
Storage
Allow leftover apple crisp to cool before covering and refrigerating.
Store it in the refrigerator and enjoy within several days for the best quality.
To reheat, place individual portions in the microwave for a quick serving, or warm the entire dish in the oven until heated through. Reheating in the oven can help restore some of the crispness of the topping.
Recipe Information
Preparation time: 15 minutes
Cooking time: 40 to 45 minutes
Total time: Approximately 1 hour
Servings: 6
Approximate calories: 320 calories per serving, depending on the apples and exact ingredients used
Baking temperature: 350°F (175°C)
Baking dish: 9-by-9-inch
Conclusion
Old-Fashioned Apple Crisp proves that a memorable dessert does not have to be complicated. With a handful of familiar ingredients, fresh apples, warming spices, and a buttery oat topping, you can create something that tastes homemade, comforting, and wonderfully traditional.
The beauty of this recipe is its flexibility. You can keep it simple with Granny Smith apples and cinnamon, or personalize it with mixed apples, nuts, vanilla, or caramel. No matter how you prepare it, the combination of tender fruit and golden crisp topping makes it a dessert that is easy to return to again and again.
For Apple Crisp Lovers
For anyone who loves traditional homemade desserts, this recipe is particularly appealing because it captures the comforting flavors of baked apples without the work of making a pie crust.
It is wonderful for family dinners, autumn gatherings, Sunday meals, potlucks, and holiday tables. The aroma of apples and cinnamon filling the kitchen while the topping turns golden in the oven is part of the experience itself.
The best way to enjoy it is simple: serve a generous spoonful while it is still warm, add a scoop of vanilla ice cream, and let the ice cream slowly melt into the buttery apple filling and crisp topping.
That combination is the heart of a truly classic Old-Fashioned Apple Crisp.