
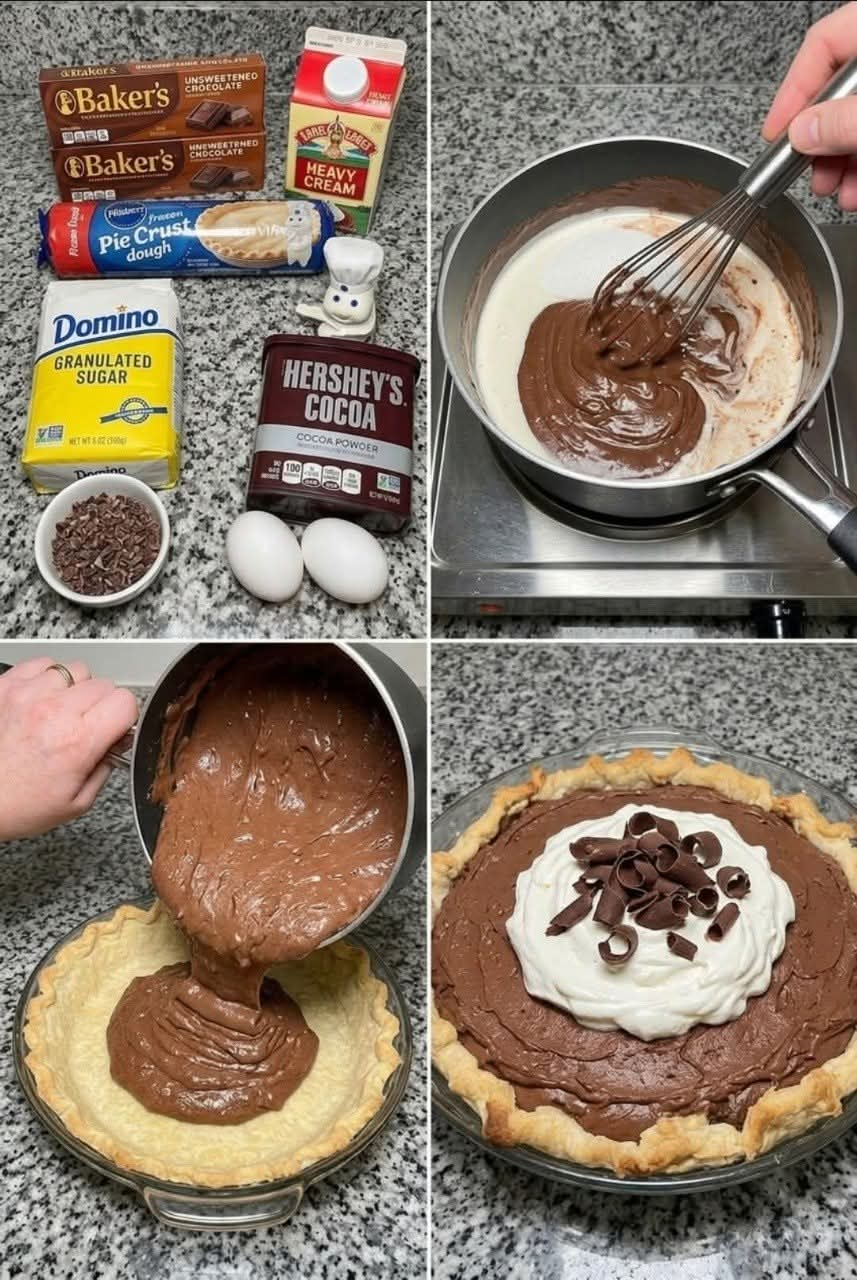
Grandma’s Chocolate Pie
Introduction
Grandma’s Chocolate Pie is the kind of old-fashioned dessert that brings back memories of family dinners, Sunday afternoons, holiday gatherings, and homemade treats cooling on the kitchen counter. It is simple, comforting, and deeply chocolatey without requiring complicated ingredients.
The filling is made from basic pantry staples: sugar, cocoa powder, flour, milk, egg yolks, and salt. When gently cooked together, these ingredients transform into a smooth, thick chocolate custard that is poured into a baked pie crust and chilled until perfectly set.
This pie is especially delicious when served cold with a generous spoonful of whipped cream. The contrast between the crisp pastry crust and silky chocolate filling makes every bite wonderfully satisfying.
Ingredients
For the Chocolate Filling
- 1 cup granulated sugar
- 1/4 cup unsweetened cocoa powder
- 1/4 cup all-purpose flour
- 1/4 teaspoon salt
- 3 cups whole milk
- 3 large egg yolks
- 1 teaspoon vanilla extract
- 2 tablespoons unsalted butter
For the Pie Crust
- 1 prepared 9-inch pie crust, homemade or store-bought
- Pie weights or dried beans, for blind baking if needed
For Serving
- Whipped cream
- Chocolate shavings, optional
- Light dusting of cocoa powder, optional
Instructions
Step 1: Prepare the Pie Crust
Preheat the oven to 375°F (190°C).
Place the pie crust into a 9-inch pie dish and gently press it into the bottom and sides. Trim and crimp the edges as desired.
Prick the bottom of the crust several times with a fork. Line it with parchment paper and add pie weights or dried beans.
Bake for approximately 15 minutes. Carefully remove the parchment and weights, then continue baking for another 5 to 10 minutes, or until the crust is lightly golden.
Allow the crust to cool completely before adding the chocolate filling.
Step 2: Combine the Dry Ingredients
In a medium saucepan, whisk together the granulated sugar, cocoa powder, flour, and salt.
Whisk thoroughly so that the cocoa and flour are evenly distributed. This helps prevent lumps from developing when the milk is added.
Step 3: Add the Milk
Gradually pour the whole milk into the dry mixture while whisking constantly.
Continue whisking until the mixture is smooth and there are no visible pockets of flour or cocoa.
Step 4: Cook the Chocolate Custard
Place the saucepan over medium heat.
Cook the mixture slowly, whisking frequently and scraping the bottom and corners of the pan. As it heats, the flour will begin to thicken the milk and the filling will gradually become creamy.
Continue cooking until the mixture reaches a gentle simmer and becomes thick enough to coat the back of a spoon. This usually takes several minutes.
Do not rush this stage by using extremely high heat. Gentle cooking produces a smoother custard and reduces the chance of scorching the milk.
Step 5: Temper the Egg Yolks
Place the three egg yolks in a separate bowl and whisk them lightly.
Slowly add about 1 cup of the hot chocolate mixture to the yolks while whisking constantly. This gradually raises the temperature of the eggs and helps prevent them from scrambling.
Once combined, slowly pour the egg mixture back into the saucepan while whisking continuously.
Step 6: Finish the Filling
Return the saucepan to medium-low heat.
Continue cooking and stirring until the chocolate custard becomes thick, glossy, and smooth. It should have a pudding-like consistency.
Remove the saucepan from the heat and immediately stir in the butter and vanilla extract.
Mix until the butter has completely melted and the filling is silky.
Step 7: Fill the Pie
For an especially smooth pie, pour the chocolate custard through a fine-mesh strainer before filling the crust.
Pour the warm chocolate filling into the cooled baked pie crust.
Smooth the surface gently with a spatula.
Step 8: Chill the Pie
Allow the pie to cool at room temperature for a short time, then transfer it to the refrigerator.
Refrigerate for at least 4 hours, preferably overnight.
The chilling time allows the custard to fully set so that the pie can be sliced neatly.
Traditional Method
The traditional method for this pie is based on slowly cooking a simple chocolate custard on the stovetop.
The sugar provides sweetness, cocoa creates the chocolate flavor, flour gives the custard structure, and whole milk creates its creamy consistency. Egg yolks add richness and help produce the smooth texture associated with classic custard pies.
The key is patience. The filling should be cooked gradually while being stirred frequently. Once thickened, butter and vanilla are added at the end to give the filling a richer flavor and smoother finish.
The Formation of the Pie
The finished pie develops several layers of texture.
The crust provides a delicate, slightly crisp foundation. Above it sits the thick chocolate custard, which becomes creamy and sliceable after refrigeration.
As the pie chills, the flour and egg yolks help the filling hold its shape. The result should be firm enough to slice but soft enough to melt pleasantly in your mouth.
A layer of whipped cream on top adds lightness and balances the richness of the chocolate.
History and Old-Fashioned Inspiration
Chocolate custard pies belong to the long tradition of American homemade pies made from inexpensive and readily available ingredients.
Before modern convenience desserts became common, home cooks frequently prepared custard fillings on the stovetop using milk, eggs, sugar, flour, and flavorings. Cocoa powder made it possible to create a rich chocolate dessert without needing expensive bars of chocolate.
Recipes like this became especially popular because they were practical. A family could prepare a satisfying dessert from ingredients already available in the pantry.
The phrase “Grandma’s Chocolate Pie” captures that nostalgic tradition. While individual family recipes vary from kitchen to kitchen, the basic idea remains the same: a baked crust filled with homemade chocolate custard and served chilled.
Tips for the Perfect Chocolate Pie
Use unsweetened cocoa powder so you can control the sweetness of the filling.
Whisk the dry ingredients together before adding the milk. This helps distribute the flour and cocoa evenly.
Add the milk gradually rather than all at once. Constant whisking helps create a smooth mixture.
Temper the egg yolks carefully. Adding hot custard directly to cold egg yolks can cause them to cook too quickly.
Cook the filling over moderate heat. High heat can cause milk to scorch or the custard to become lumpy.
Strain the finished filling if you want an exceptionally smooth texture.
Allow the pie to chill completely before slicing. A properly chilled pie will hold its shape much better.
For the best flavor, prepare the pie several hours before serving.
Serving Suggestions
Serve each slice chilled with freshly whipped cream.
For a more decorative presentation, add chocolate curls or a light dusting of cocoa powder.
You can also serve it with fresh berries, a drizzle of chocolate sauce, or a small scoop of vanilla ice cream.
For a holiday table, pipe whipped cream around the edges of the pie and add a few chocolate shavings to the center.
Variations
Chocolate Meringue Pie
Instead of whipped cream, top the chilled or cooled chocolate filling with homemade meringue and lightly brown it in the oven.
Extra-Rich Chocolate Pie
Replace a portion of the whole milk with heavy cream for a richer and more luxurious custard.
Chocolate Cookie Crust
For a different texture, use a chocolate cookie crumb crust instead of traditional pastry.
Peanut Butter Chocolate Pie
Spread a thin layer of sweetened peanut butter over the cooled crust before adding the chocolate filling.
Chocolate Coconut Pie
Add a small amount of toasted shredded coconut to the filling or sprinkle toasted coconut over the whipped cream.
Common Mistakes to Avoid
Do not leave the custard unattended while cooking. Milk-based fillings can scorch quickly.
Do not add the egg yolks directly to the boiling mixture. Tempering them first is important.
Do not cut the pie while it is still warm. The filling needs time to firm up in the refrigerator.
Do not use too much flour. The correct amount produces a thick but creamy custard rather than a heavy, doughy filling.
Do not skip the vanilla. Even a small amount can make the chocolate flavor taste fuller and more balanced.
How to Store
Cover the finished pie loosely with plastic wrap or foil and refrigerate.
It is best enjoyed within 3 to 4 days.
Because the filling contains milk and eggs, keep the pie refrigerated and avoid leaving it at room temperature for extended periods.
Conclusion
Grandma’s Chocolate Pie is proof that some of the most memorable desserts do not need complicated ingredients or elaborate techniques. A handful of simple ingredients can become a silky, deeply chocolatey custard tucked inside a golden pie crust.
The most important part of making this dessert is taking your time with the custard. Gentle heat, constant whisking, and careful tempering of the egg yolks are the secrets to achieving that classic smooth texture.
Once chilled and topped with whipped cream, this pie becomes a beautiful homemade dessert suitable for Sunday dinners, family celebrations, holidays, or simply satisfying a chocolate craving.
For Chocolate Pie Lovers
Chocolate pie lovers will appreciate this recipe because it delivers the comforting flavor of an old-fashioned homemade dessert without relying on complicated ingredients.
It is creamy, rich, nostalgic, and wonderfully satisfying. The chocolate custard is smooth enough to feel luxurious, while the pastry crust provides the perfect contrast.
For anyone who grew up eating homemade pies, this recipe has the familiar character of a dessert that could have been prepared in a grandmother’s kitchen years ago.
Sometimes the simplest recipes become the ones families remember the longest.