
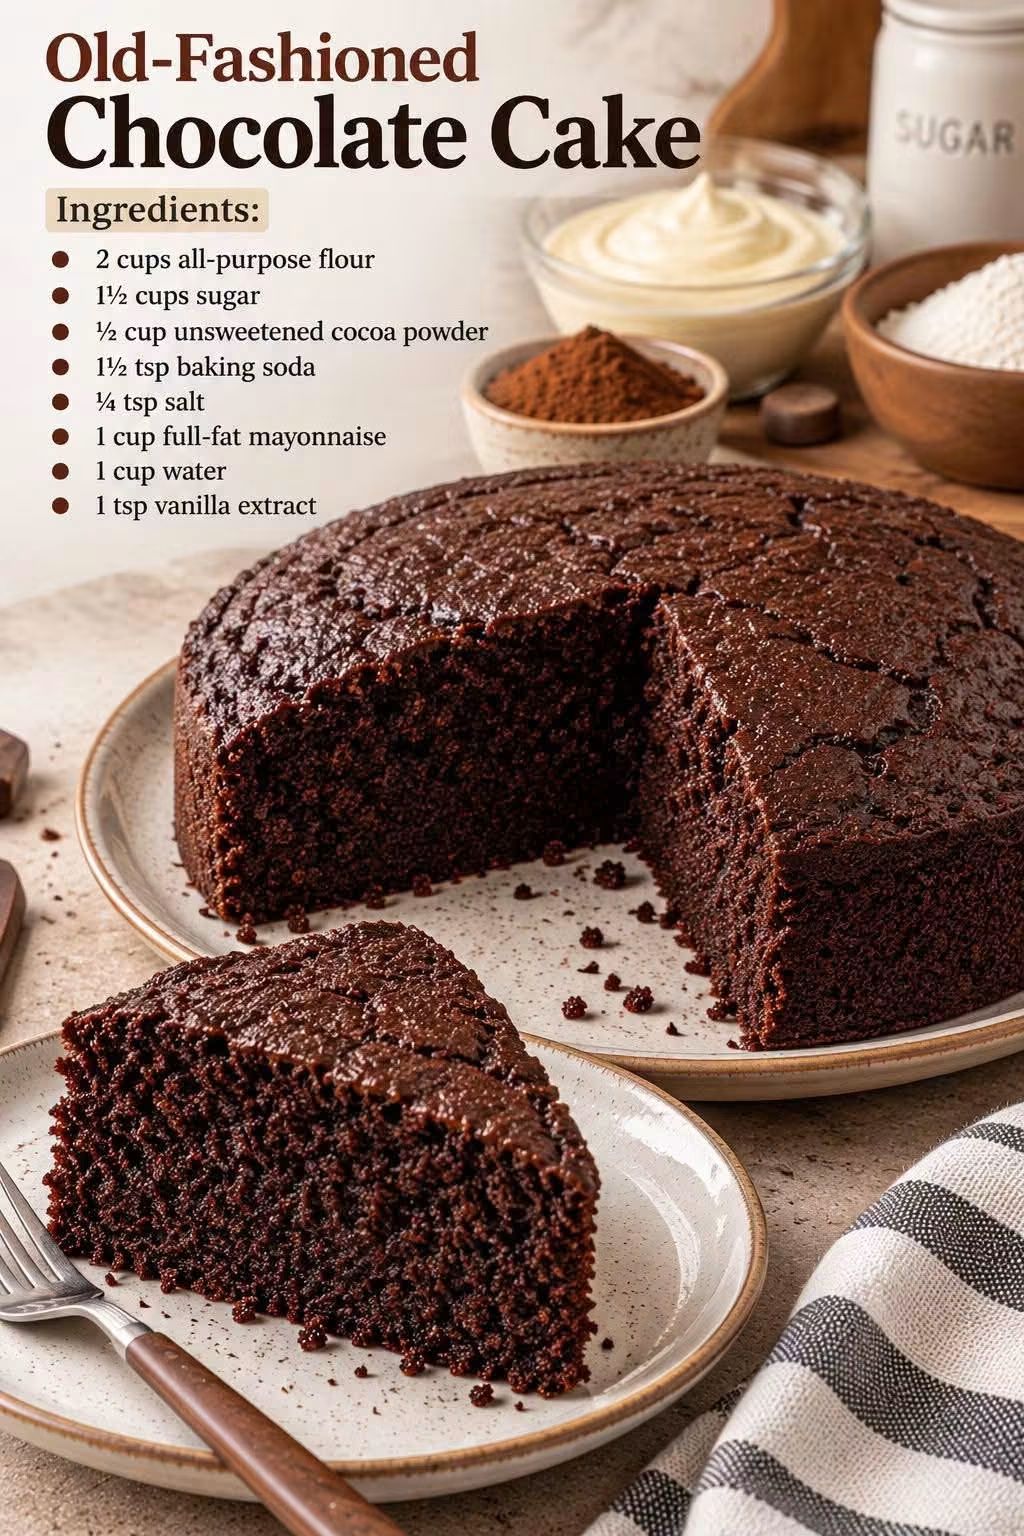
Old-Fashioned Chocolate Cake
Introduction
Old-Fashioned Chocolate Cake is a wonderfully simple dessert with a rich chocolate flavor and an exceptionally moist, tender crumb. It is the kind of homemade cake that feels familiar from the very first bite: soft, chocolatey, lightly sweet, and easy enough to prepare without complicated techniques.
The secret to this cake is full-fat mayonnaise. Although it may sound unusual in a cake recipe, mayonnaise is made primarily from eggs and oil, two ingredients commonly used in traditional baking. It helps create a soft, moist texture while allowing the cocoa flavor to remain the star of the dessert. Once baked, there is no mayonnaise flavor in the finished cake.
This recipe is especially useful when you want a delicious chocolate cake without making several layers or preparing an elaborate frosting. The cake can be served plain, dusted lightly with powdered sugar, topped with whipped cream, or enjoyed with a scoop of vanilla ice cream.
Ingredients
For the Chocolate Cake
- 2 cups all-purpose flour
- 1 1/2 cups granulated sugar
- 1/2 cup unsweetened cocoa powder
- 1 1/2 teaspoons baking soda
- 1/4 teaspoon salt
- 1 cup full-fat mayonnaise
- 1 cup water
- 1 teaspoon vanilla extract
Optional Serving Ideas
- Powdered sugar for dusting
- Whipped cream
- Vanilla ice cream
- Fresh berries
- Chocolate sauce
- Simple chocolate frosting
- Chopped nuts
Instructions
Step 1: Prepare the Oven and Pan
Preheat the oven to 350°F (175°C).
Grease a deep cake tin thoroughly with butter, shortening, or cooking spray. Lightly dust the inside with flour, tapping out any excess. This helps the finished cake release easily after cooling.
If using a particularly deep pan, make sure it is not filled more than about two-thirds full so the batter has enough room to rise.
Step 2: Combine the Dry Ingredients
In a large mixing bowl, whisk together the all-purpose flour, granulated sugar, unsweetened cocoa powder, baking soda, and salt.
Whisk for a minute or two to distribute the cocoa and baking soda evenly throughout the flour. Breaking up any cocoa lumps at this stage will help produce a smoother batter.
Step 3: Add the Wet Ingredients
Add the full-fat mayonnaise, water, and vanilla extract to the dry ingredients.
Using a whisk or wooden spoon, gently mix everything together until the batter becomes smooth and evenly combined.
Do not overmix. Once there are no large pockets of dry flour remaining, stop mixing. A little gentle mixing is all this cake needs.
Step 4: Fill the Cake Tin
Pour the chocolate batter into the prepared cake tin.
Use a spatula or the back of a spoon to spread the batter into an even layer. If necessary, gently tap the pan on the counter once or twice to remove large air pockets.
Step 5: Bake
Place the cake in the center of the preheated oven.
Bake for approximately 35 to 45 minutes. The exact baking time will depend on the size and depth of your cake tin.
Begin checking around the 35-minute mark. Insert a toothpick into the center of the cake. It should come out clean or with a few moist crumbs attached.
Avoid waiting until the toothpick is completely dry, because overbaking can make the cake less moist.
Step 6: Cool
Remove the cake from the oven and place the pan on a wire rack.
Allow the cake to cool completely in the pan before attempting to remove it. The cake is delicate while warm and can break if handled too soon.
Once completely cooled, carefully loosen the edges with a thin knife and turn the cake onto a serving plate.
Step 7: Serve
This is a beautiful single-layer cake and does not require filling or layering.
For a simple presentation, serve it plain or dust the top with powdered sugar. For a richer dessert, add whipped cream, chocolate sauce, or a scoop of vanilla ice cream.
Method
The method behind this cake is straightforward and relies on simple mixing rather than complicated baking techniques.
First, the dry ingredients are thoroughly combined so that the cocoa, baking soda, sugar, and salt are evenly distributed. The mayonnaise, water, and vanilla are then added directly to the dry mixture.
Mayonnaise contributes both fat and egg components to the batter. The fat helps create tenderness and moisture, while the eggs help contribute structure. The water provides the liquid necessary to bring the ingredients together.
Baking soda provides leavening, helping the cake rise and develop a soft texture. Because the batter is mixed only until combined, the finished cake remains tender rather than becoming tough.
The most important part of the method is avoiding overbaking. Chocolate cakes can continue to firm up as they cool, so removing the cake when the toothpick shows a few moist crumbs helps preserve its soft texture.
The History of Chocolate Mayonnaise Cake
Mayonnaise cakes are associated with American home baking traditions, particularly recipes that became popular during the 20th century. The idea was not necessarily to create a cake that tasted like mayonnaise. Instead, mayonnaise could serve as a convenient source of fat and eggs in a chocolate cake.
Chocolate cakes themselves have a much longer history, evolving as cocoa and chocolate became increasingly accessible for household baking. Home cooks developed countless variations using cocoa powder, melted chocolate, butter, oil, eggs, milk, and other everyday ingredients.
Mayonnaise cake recipes became memorable because they demonstrated an important principle of traditional home cooking: familiar ingredients could sometimes be used in unexpected ways to create a delicious result.
The combination of cocoa and mayonnaise works particularly well because chocolate has a strong flavor capable of balancing the richness of the mayonnaise. Once baked, the mayonnaise does not create a noticeable mayonnaise flavor.
Formation and Texture
The finished cake should have a deep chocolate color, a soft crumb, and a moist interior.
The texture is one of the defining characteristics of this recipe. It should not be dry or crumbly. Instead, each slice should feel tender and moist while still holding together neatly.
The exterior may develop a slightly firmer surface during baking, while the center remains soft and rich.
Because this recipe is designed as a single cake rather than multiple layers, it is especially convenient for everyday desserts, family dinners, afternoon coffee, or casual gatherings.
Tips for the Best Results
Use Full-Fat Mayonnaise
Full-fat mayonnaise is recommended because its fat content contributes to the cake’s moist texture. Reduced-fat mayonnaise can produce a different result.
Measure the Flour Correctly
For the most consistent texture, spoon flour into a measuring cup and level it rather than packing it tightly into the cup.
Do Not Overmix
Once the ingredients are combined and the batter is smooth, stop mixing. Excessive mixing can develop gluten and make the cake tougher.
Use Unsweetened Cocoa
Unsweetened cocoa powder provides the concentrated chocolate flavor needed for this recipe. Avoid substituting sweetened cocoa drink mixes.
Watch the Baking Time
Every oven and pan is different. Start checking the cake near the lower end of the suggested baking time.
Let It Cool Completely
Cooling allows the crumb to stabilize and makes the cake much easier to remove from the pan without breaking.
Serving Suggestions
There are many ways to serve this old-fashioned chocolate cake.
For a simple homemade dessert, serve each slice at room temperature with a glass of milk or a cup of coffee.
For a more indulgent presentation, add a scoop of vanilla ice cream and a drizzle of chocolate sauce.
You can also spread the cooled cake with a simple chocolate buttercream, chocolate ganache, or vanilla frosting.
For a lighter option, top individual slices with fresh strawberries or raspberries and a small spoonful of whipped cream.
The cake can also be served slightly warm, although it is important to allow it enough time to cool and set before slicing.
Why Chocolate Cake Lovers Enjoy It
Chocolate cake lovers appreciate this recipe because it delivers a rich chocolate experience without requiring a long ingredient list or complicated preparation.
The cocoa gives the cake its familiar chocolate character, while the mayonnaise helps keep the crumb moist and tender. The result is a comforting dessert that feels homemade rather than overly elaborate.
It is particularly appealing to anyone who enjoys traditional cakes that can be prepared in one bowl and baked in a single pan.
Storage
Store the completely cooled cake in an airtight container at room temperature for a short period, or refrigerate it if you have added a perishable frosting or topping.
If refrigerated, allow slices to sit at room temperature for a little while before serving so the texture becomes softer again.
The cake can also be wrapped well and frozen for longer storage. Thaw it completely before serving.
Conclusion
Old-Fashioned Chocolate Cake is a wonderful example of simple home baking. With flour, sugar, cocoa, baking soda, salt, mayonnaise, water, and vanilla, you can create a soft and moist chocolate dessert without complicated layers or elaborate preparation.
The unexpected mayonnaise ingredient is what makes this classic recipe particularly interesting. It contributes richness and moisture while allowing the chocolate flavor to remain front and center.
Whether served plain, topped with powdered sugar, paired with ice cream, or finished with chocolate frosting, this cake is an easy dessert that belongs in every collection of comforting homemade recipes.
It is simple enough for an ordinary afternoon and delicious enough to bring to a family gathering, potluck, birthday celebration, or holiday dessert table.
Classic Christmas Butter Cookies
Introduction
These classic Christmas butter cookies are the kind of homemade treat that disappears almost as quickly as you put them on the cookie tray. Simple ingredients, a buttery texture, and a wonderfully rich flavor make these cookies a favorite for holiday baking.
They are especially perfect when you need to make a large batch for Christmas gatherings, cookie exchanges, family celebrations, or homemade gifts. The recipe is uncomplicated, but the finished cookies have that special old-fashioned taste that makes people reach for another one.
If you are baking for a crowd, this recipe can also be multiplied easily. Once the dough is prepared, the cookies can be shaped, baked, cooled, and stored ahead of time, making them a practical choice for a busy holiday kitchen.
Ingredients
- 1 cup unsalted butter, softened
- 1 cup granulated sugar
- 1 large egg
- 2 teaspoons pure vanilla extract
- 2 1/2 cups all-purpose flour
- 1/2 teaspoon salt
- 1/2 teaspoon baking powder
Optional Decorations
- Powdered sugar for dusting
- Colored sugar
- Holiday sprinkles
- Melted white or semi-sweet chocolate
- Simple vanilla icing
- Chopped nuts
Instructions
1. Prepare the Oven
Preheat your oven to 350°F (175°C).
Line baking sheets with parchment paper or silicone baking mats. This helps prevent sticking and makes cleanup much easier.
2. Cream the Butter and Sugar
Place the softened butter and granulated sugar in a large mixing bowl.
Beat them together for approximately 2 to 3 minutes, until the mixture becomes light, creamy, and fluffy. Properly creaming the butter and sugar helps create a tender cookie with a pleasant texture.
3. Add the Egg and Vanilla
Beat in the egg until fully incorporated.
Add the vanilla extract and mix again until everything is smooth.
Scrape down the sides of the bowl so that the ingredients are evenly combined.
4. Combine the Dry Ingredients
In a separate bowl, whisk together the flour, salt, and baking powder.
Gradually add the dry ingredients to the butter mixture.
Mix just until a soft cookie dough forms. Avoid overmixing because too much mixing can make the cookies tougher instead of tender.
5. Shape the Cookies
For simple round cookies, scoop small portions of dough and roll them gently into balls.
Place them on the prepared baking sheets, leaving approximately 2 inches between each cookie.
Flatten them slightly with the bottom of a glass or with your fingers.
For a more decorative Christmas cookie, you can also roll the dough out on a lightly floured surface and cut it into stars, circles, Christmas trees, hearts, or other holiday shapes.
6. Add Decorations
If desired, sprinkle the unbaked cookies with colored sugar or holiday sprinkles.
You can also leave them plain and decorate them after baking and cooling.
7. Bake
Place the baking sheet in the preheated oven.
Bake for approximately 9 to 12 minutes, depending on the size and thickness of the cookies.
The edges should be lightly golden while the centers remain relatively pale.
Do not overbake. These cookies are best when they remain tender in the center.
8. Cool
Allow the cookies to cool on the baking sheet for about 5 minutes.
Then carefully transfer them to a wire rack and allow them to cool completely.
Once completely cool, decorate with icing, powdered sugar, melted chocolate, or additional holiday sprinkles if desired.
Method
The secret to these cookies is keeping the preparation simple while paying attention to a few important details.
The butter should be softened but not melted. Soft butter creams properly with the sugar and helps produce the desired texture.
When adding the flour, mix only until the dough comes together. Overworking the dough can develop too much gluten and result in a firmer cookie.
For consistent Christmas cookies, use a small cookie scoop so every portion is approximately the same size. This ensures that the cookies bake evenly.
If you are preparing hundreds of cookies, work in batches. Keep the unused dough covered while the first batches are baking so that it does not dry out.
The History and Tradition
Butter cookies belong to a long tradition of European-style baking in which simple ingredients such as butter, flour, sugar, and eggs are transformed into delicate holiday treats.
Cookies like these became especially popular during Christmas because they were inexpensive to prepare, easy to store, and perfect for sharing. Families could prepare large quantities several days before Christmas and keep them in tins until guests arrived.
Over time, every family developed its own version. Some added vanilla, almond extract, nuts, spices, chocolate, or colorful decorations. Others kept the cookies completely plain, allowing the buttery flavor to remain the star.
That simplicity is part of what makes this style of cookie so special. It does not require complicated ingredients or elaborate techniques to create something memorable.
Formation and Texture
The dough should be soft enough to shape but firm enough to hold its form.
When baked correctly, the cookies should have lightly golden edges with a tender, buttery center. They should not be overly hard or dry.
For a softer cookie, avoid baking beyond the point where the edges are lightly golden.
For a slightly crispier cookie, allow them to bake for another minute or two, watching carefully so they do not become too dark.
Tips for Making a Large Christmas Batch
If you are making hundreds of cookies for Christmas, organization makes the process much easier.
Prepare your ingredients before beginning and make sure the butter is softened.
Use a cookie scoop to keep the cookies uniform in size.
Bake one tray at a time if your oven does not heat evenly with multiple trays.
Allow each batch to cool completely before stacking.
If decorating, set up a separate area for icing and sprinkles so you can decorate several cookies at once.
For a very large quantity, prepare the dough in manageable batches rather than trying to mix an enormous amount in one bowl.
Make-Ahead Instructions
These cookies are excellent for holiday preparation.
The baked cookies can be made several days ahead and stored in an airtight container at room temperature.
You can also prepare the dough in advance. Wrap it tightly and refrigerate it until ready to use.
If refrigerated dough becomes too firm to handle, allow it to sit at room temperature briefly before shaping.
For longer storage, properly wrapped cookie dough can be frozen. Thaw refrigerated dough before shaping and baking.
Storage
Once completely cooled, place the cookies in an airtight container.
For the best texture, keep them away from moisture and excessive heat.
If you are stacking decorated cookies, place parchment paper between the layers to help prevent decorations from sticking together.
These cookies also make wonderful homemade Christmas gifts. Arrange them in festive tins, boxes, or clear bags tied with ribbon.
Serving Ideas
Serve these cookies with:
- Hot coffee
- Tea
- Hot chocolate
- Warm milk
- Eggnog
- Christmas punch
They are also perfect alongside a holiday dessert platter containing brownies, fudge, gingerbread cookies, shortbread, and other Christmas favorites.
Variations
Vanilla Sugar Cookies
Add a little extra vanilla for a stronger classic flavor.
Almond Butter Cookies
Replace part of the vanilla extract with almond extract for a delicate almond flavor.
Chocolate-Dipped Cookies
After the cookies have completely cooled, dip half of each cookie into melted chocolate and allow the chocolate to set.
Holiday Sprinkle Cookies
Roll the shaped dough lightly in colored sugar before baking.
Nutty Christmas Cookies
Add finely chopped pecans or walnuts to the dough for extra texture.
Jam-Filled Cookies
Shape the dough into small balls, create a small indentation in the center, and fill each one with a little raspberry, strawberry, or apricot jam before baking.
Why Cookie Lovers Love Them
Cookie lovers appreciate these cookies because they deliver exactly what a classic Christmas cookie should: buttery flavor, a tender texture, simple preparation, and plenty of possibilities for decoration.
They are not complicated or intimidating. They are the type of cookie that beginners can make successfully and experienced bakers can produce by the hundreds.
Most importantly, they are made for sharing.
A large container of homemade cookies sitting on the kitchen counter has a way of bringing everyone into the room. Someone takes one with their morning coffee. Someone else grabs another while passing through the kitchen. Before long, the cookie tin that looked completely full is suddenly almost empty.
Conclusion
Classic Christmas butter cookies prove that some of the most beloved holiday recipes do not need complicated ingredients or fancy techniques.
With butter, sugar, flour, egg, vanilla, and a few simple pantry staples, you can create a batch of cookies that is crisp around the edges, tender inside, and full of nostalgic homemade flavor.
Whether you are making a small batch for your family or preparing hundreds for Christmas celebrations, these cookies are a dependable holiday favorite.
They are simple enough for everyday baking, beautiful enough for a Christmas cookie tray, and delicious enough to become a tradition that families return to year after year.
If you love old-fashioned Christmas baking, this is the kind of recipe worth keeping in your holiday collection.
A Little Love for the Recipe
There is something special about a recipe that has been made so many times that the process becomes part of the holiday tradition.
The mixing, shaping, baking, cooling, decorating, and finally filling the cookie tins all become memories of Christmas.
That is why these simple cookies can be more than just dessert. They can become the cookies people remember from family gatherings, cookie exchanges, Christmas mornings, and evenings spent together in the kitchen.
If this recipe becomes part of your holiday baking tradition, make plenty. These are the cookies that tend to disappear long before Christmas is over.