
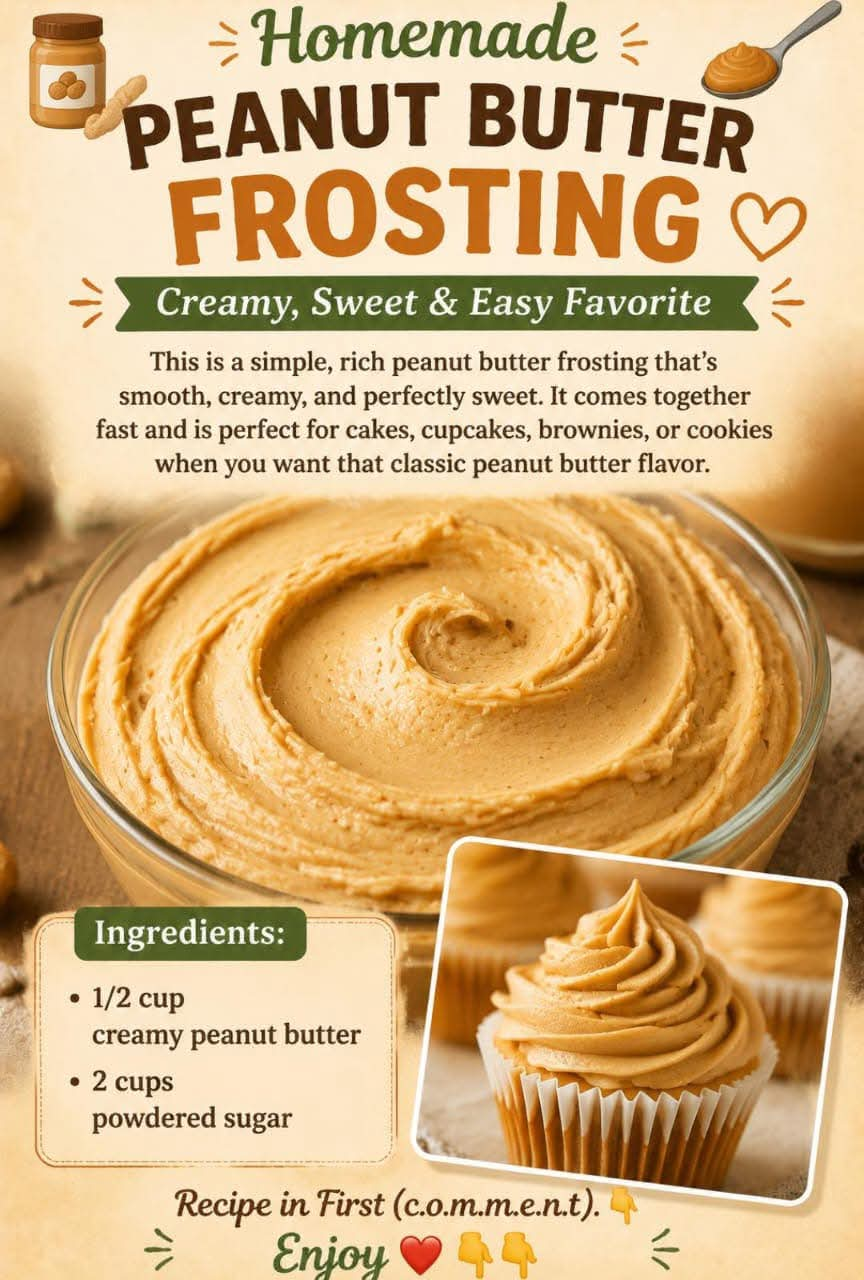
Homemade Peanut Butter Frosting
Introduction
Homemade Peanut Butter Frosting is a rich, creamy, and wonderfully smooth frosting that brings together the unmistakable flavor of peanut butter with the sweetness of powdered sugar. It is one of those simple recipes that can transform an ordinary cake, cupcake, brownie, cookie, or dessert into something special.
This frosting requires only a few basic ingredients and comes together quickly without complicated techniques. The finished texture can be made soft and spreadable for cakes or slightly thicker for piping onto cupcakes and cookies.
The combination of creamy peanut butter and powdered sugar creates a classic sweet-and-salty flavor that pairs especially well with chocolate, vanilla, banana, spice, and caramel desserts.
Ingredients
Main Ingredients
- 1/2 cup creamy peanut butter
- 2 cups powdered sugar
- 1/2 cup unsalted butter, softened
- 1 teaspoon vanilla extract
- 3 to 5 tablespoons milk or heavy cream
- Pinch of salt, optional
Optional Additions
- 1 tablespoon honey for extra sweetness
- 1 to 2 tablespoons additional peanut butter for a stronger peanut flavor
- 1 tablespoon cream cheese for a slightly tangy frosting
- 1 to 2 tablespoons cocoa powder for a chocolate-peanut butter variation
Instructions
Step 1: Prepare the Butter
Place the softened butter in a large mixing bowl. Beat it with an electric mixer for about 2 to 3 minutes until it becomes pale, light, and fluffy.
Using properly softened butter is important. It should be soft enough to press easily with a finger but should not be melted.
Step 2: Add the Peanut Butter
Add the creamy peanut butter to the whipped butter. Beat the mixture until the peanut butter is completely incorporated and the mixture looks smooth and creamy.
Scrape down the sides of the bowl as needed so everything combines evenly.
Step 3: Add the Powdered Sugar
Gradually add the powdered sugar, about 1/2 cup at a time. Mix on low speed after each addition to prevent the sugar from flying out of the bowl.
Once all the powdered sugar has been incorporated, increase the mixer speed and beat until the frosting becomes fluffy.
Step 4: Add Vanilla and Milk
Add the vanilla extract and a small amount of milk or heavy cream. Beat again until smooth.
Add more liquid one tablespoon at a time until you reach your desired consistency.
For a thick frosting suitable for piping, use less liquid. For a softer frosting that spreads easily over a cake, add slightly more.
Step 5: Beat Until Fluffy
Continue beating the frosting for another 2 to 3 minutes. This extra mixing time helps create a lighter, smoother texture.
Taste the frosting and adjust the sweetness or peanut butter flavor if necessary.
Method
The key method for this frosting is to cream the butter first, then incorporate the peanut butter before gradually adding the powdered sugar.
Starting with softened butter creates a smooth foundation. Peanut butter is then added to provide the main flavor and creamy texture. Powdered sugar provides sweetness while also helping the frosting become thick enough to spread or pipe.
Adding milk or cream gradually gives you control over the final consistency. This is particularly useful because different peanut butters can have slightly different textures.
Texture and Consistency
For a spreadable cake frosting, aim for a soft and creamy consistency that easily moves across the surface of the cake.
For cupcakes, make the frosting slightly thicker so it holds its shape when piped.
For cookies or brownies, a medium-thick consistency works well because it can be spread without becoming runny.
If the frosting is too thick, add milk or cream one teaspoon at a time.
If the frosting is too thin, add additional powdered sugar a few tablespoons at a time.
How to Use It
This peanut butter frosting can be used in many different desserts.
Spread it between layers of chocolate cake for a classic chocolate and peanut butter combination. Pipe it onto vanilla or chocolate cupcakes, spread it over brownies, or use it as a filling between soft cookies.
It also works beautifully on banana cake, spice cake, chocolate sheet cake, blondies, and homemade sandwich cookies.
For an especially indulgent dessert, finish the frosted cake with chopped roasted peanuts, chocolate shavings, mini chocolate chips, or a thin drizzle of melted chocolate.
A Brief History of Peanut Butter Desserts
Peanut butter became an increasingly popular ingredient in American kitchens during the late nineteenth and early twentieth centuries. Its creamy texture and rich roasted flavor made it useful in sandwiches, cookies, candies, cakes, and other desserts.
As home baking became more widespread, peanut butter naturally found its way into frostings and fillings. The pairing of peanut butter and chocolate became particularly popular because the salty, nutty character of peanut butter balances the sweetness and richness of chocolate.
Today, peanut butter frosting remains a familiar homemade favorite because it is inexpensive, simple to prepare, and versatile enough for many different baked goods.
Formation and Structure
A successful frosting depends on the balance between fat, sugar, and liquid.
Butter and peanut butter provide richness and create the creamy base. Powdered sugar gives the frosting body and sweetness. Milk or cream loosens the mixture and makes it easier to spread.
The amount of liquid should always be adjusted gradually. Adding too much at once can make the frosting softer than desired.
Whipping the finished frosting also incorporates air, giving it a lighter and more luxurious texture.
Tips for the Best Peanut Butter Frosting
Use creamy peanut butter for the smoothest result.
Make sure the butter is softened before mixing.
Sift the powdered sugar if it contains noticeable lumps.
Add liquid gradually rather than all at once.
Beat the frosting thoroughly after all ingredients have been combined.
Taste before frosting your dessert and adjust the sweetness or peanut butter flavor if needed.
If the frosting becomes too soft, refrigerate it for 10 to 20 minutes and then beat it briefly before using.
Storage
Store leftover frosting in an airtight container in the refrigerator for up to several days.
Before using refrigerated frosting, allow it to soften slightly at room temperature and beat it again until creamy.
Frosted cakes and cupcakes should also be stored according to the requirements of the other ingredients in the dessert.
Variations
Chocolate Peanut Butter Frosting
Add 1 to 2 tablespoons of unsweetened cocoa powder for a deeper chocolate-peanut butter flavor. You may need a small amount of additional milk to maintain a smooth consistency.
Cream Cheese Peanut Butter Frosting
Replace a portion of the butter with softened cream cheese. This creates a slightly tangy frosting that pairs especially well with chocolate and banana cakes.
Honey Peanut Butter Frosting
Add a small amount of honey for a naturally sweet flavor and a slightly softer texture.
Crunchy Peanut Butter Frosting
Use crunchy peanut butter instead of creamy peanut butter if you enjoy small pieces of roasted peanuts throughout the frosting.
Serving Suggestions
Use this frosting on:
- Chocolate cake
- Vanilla cake
- Chocolate cupcakes
- Brownies
- Banana bread
- Banana cupcakes
- Peanut butter cookies
- Chocolate cookies
- Blondies
- Sheet cakes
- Sandwich cookies
- Layer cakes
Conclusion
Homemade Peanut Butter Frosting is a simple recipe with a wonderfully rich result. With creamy peanut butter, butter, powdered sugar, vanilla, and a little milk or cream, you can create a smooth frosting that is easy to spread, pipe, and customize.
Its versatility makes it especially useful when you want to turn a basic homemade dessert into something more indulgent. Whether layered between chocolate cake, piped onto cupcakes, or spread over brownies, this frosting delivers a familiar peanut butter flavor that works beautifully with many classic desserts.
For Peanut Butter Frosting Lovers
If you love the combination of creamy peanut butter and sweet desserts, this frosting is an excellent recipe to keep in your collection. It is quick enough for everyday baking but rich enough for birthdays, family gatherings, holidays, and special occasions.
The best part is that you can adjust the consistency and flavor to suit your dessert. Make it thick for decorative piping, soft for spreading, or add chocolate for an extra-rich combination. Once you have this basic recipe, there are countless ways to use it.
Three-Ingredient Cheesecake Fluff with Fresh Raspberries
Introduction
After going more than three weeks without sweets, sometimes you reach a point where you simply want something creamy, comforting, and satisfying without spending hours in the kitchen. That is exactly where this simple Cheesecake Fluff comes in.
This easy dessert is made with just three basic ingredients and has the rich, creamy flavor of cheesecake without the need for a crust, oven, or complicated preparation. The texture is light and fluffy while still being wonderfully creamy, making it perfect for a quick dessert, afternoon treat, or something sweet to enjoy after dinner.
Adding a few fresh raspberries makes it even more special. Their natural tartness balances the creamy sweetness of the fluff and gives every spoonful a fresh berry flavor.
If you love cheesecake but want something quick and simple, this recipe is one to keep close.
Ingredients
For the Cheesecake Fluff
- 8 ounces cream cheese, softened
- 1 cup whipped topping, such as prepared whipped cream or whipped topping
- 2 to 4 tablespoons powdered sweetener or powdered sugar, adjusted to taste
Optional Raspberry Addition
- 1/2 to 1 cup fresh raspberries
- Additional raspberries for serving
For a lower-sugar version, use a powdered sugar substitute that fits your dietary preferences.
Instructions
Step 1: Soften the Cream Cheese
Remove the cream cheese from the refrigerator and allow it to soften at room temperature. Soft cream cheese is important because it will blend much more easily and produce a smoother final texture.
Place the softened cream cheese in a medium mixing bowl.
Step 2: Beat Until Smooth
Using a hand mixer, beat the cream cheese until it becomes completely smooth and creamy.
Scrape down the sides of the bowl as needed. Take a little extra time during this step because any lumps left in the cream cheese will remain noticeable in the finished fluff.
Step 3: Add the Sweetener
Add the powdered sweetener or powdered sugar a little at a time.
Beat again until the mixture is smooth and the sweetness is to your liking. Starting with less sweetener gives you more control over the final flavor.
Step 4: Fold in the Whipped Topping
Add the whipped topping to the cream cheese mixture.
Gently fold it in with a spatula until everything is evenly combined. Avoid overmixing because the goal is to keep the mixture light and fluffy.
The finished mixture should be creamy, airy, and thick enough to hold its shape on a spoon.
Step 5: Add the Raspberries
For a simple presentation, spoon the cheesecake fluff into individual serving dishes and top each one with fresh raspberries.
You can also gently fold a few chopped raspberries into the mixture. Be careful not to overmix, as the berries can release juice and turn the entire dessert pink.
Step 6: Chill
Cover the cheesecake fluff and refrigerate for at least 30 minutes before serving.
Chilling allows the flavors to come together and gives the dessert an even thicker, creamier texture.
Method
The method behind this dessert is extremely simple. The softened cream cheese provides the rich cheesecake base, while the whipped topping creates the light, fluffy texture. Powdered sweetener adds sweetness without introducing a grainy texture.
The key to getting the best consistency is making sure the cream cheese is fully softened before mixing. It should be smooth before the whipped topping is incorporated.
Fresh raspberries are best added shortly before serving. This keeps their texture fresh and prevents excess berry juice from thinning the cheesecake mixture.
A Little History
Cheesecake has a long history, with early forms of cheese-based cakes dating back to ancient civilizations. Over the centuries, different cultures developed their own versions using cheese, sweeteners, eggs, and various crusts or toppings.
Modern cheesecake became especially popular in the United States, where cream cheese became an important ingredient in many classic cheesecake recipes.
Cheesecake-inspired desserts eventually expanded beyond traditional baked cakes. No-bake cheesecakes, cheesecake dips, mousse-like desserts, and cheesecake fluff became popular because they deliver familiar cheesecake flavors with much less preparation.
This three-ingredient version follows that simple tradition: take the recognizable creamy flavor of cheesecake and turn it into an easy spoonable dessert.
Formation and Texture
The beauty of cheesecake fluff comes from the contrast between its ingredients.
The cream cheese creates richness and body. The whipped topping introduces air into the mixture, making it lighter than traditional cheesecake. The sweetener brings the ingredients together and gives the dessert its familiar cheesecake-like sweetness.
When chilled, the mixture becomes thicker and more scoopable while remaining soft and creamy.
Fresh raspberries add another layer of texture. Their juicy, slightly tart flavor cuts through the richness of the cheesecake fluff, creating a balanced bite.
Serving Ideas
Cheesecake fluff can be served in many different ways.
Spoon it into small dessert cups for individual portions. Top each serving with fresh raspberries for a simple presentation.
You can also add:
- Fresh strawberries
- Blueberries
- Blackberries
- Sliced peaches
- A few chopped nuts
- Unsweetened coconut
- A small amount of lemon zest
- Sugar-free fruit topping
For an especially attractive dessert, layer the cheesecake fluff with berries in a clear glass. The creamy white filling and colorful fruit create a simple dessert that looks much more complicated than it actually is.
Tips for the Best Cheesecake Fluff
Use softened cream cheese. Cold cream cheese is difficult to beat smoothly and can leave small lumps throughout the dessert.
Do not add too much sweetener at once. Taste the mixture after adding a small amount and adjust according to your preference.
Fold in the whipped topping gently. This helps preserve the airy texture.
Keep fresh fruit separate until serving if you plan to store the fluff for later.
Allow the dessert to chill before serving. Even a short refrigeration period improves the consistency and flavor.
For a stronger cheesecake flavor, add a small amount of vanilla extract or a little fresh lemon zest.
Storage
Store the cheesecake fluff in a covered container in the refrigerator.
For the freshest texture, enjoy it within a few days. If using fresh raspberries, keep the berries separate until serving whenever possible.
Because this dessert contains dairy, it should remain refrigerated and should not be left sitting at room temperature for an extended period.
Why People Love This Recipe
There is something especially appealing about a dessert that requires almost no work.
There is no crust to prepare, no oven to preheat, and no complicated baking process. Everything comes together in one bowl, making this recipe ideal for busy evenings or those moments when you want something sweet without making an entire cake.
The creamy texture makes it feel indulgent, while the fresh raspberries add brightness and freshness.
It is also easy to customize. You can make it sweeter, less sweet, more berry-filled, or completely plain depending on what you have available.
Conclusion
Three-Ingredient Cheesecake Fluff is proof that a simple dessert can still feel special.
With its creamy cheesecake flavor, light texture, and fresh raspberry topping, it makes an easy treat for anyone who loves cheesecake but does not want to spend hours preparing a traditional cheesecake.
Whether you are looking for a quick weeknight dessert, a simple party treat, or a creamy sweet snack, this recipe is worth keeping.
Sometimes the best recipes are the ones that require only a few ingredients, a bowl, and a little time in the refrigerator.
For Cheesecake Lovers
If cheesecake is one of your favorite desserts, this fluff gives you many of the flavors you love in a much simpler form. It is creamy, rich, sweet, and incredibly easy to prepare.
The raspberries are especially delicious because their natural tartness balances the creamy cheesecake mixture.
Once you make it, you may find yourself keeping cream cheese and whipped topping in the refrigerator just so you can make another batch whenever the craving strikes.
A simple dessert, three main ingredients, and a handful of fresh berries can create something that tastes like a special homemade cheesecake without all the work.