
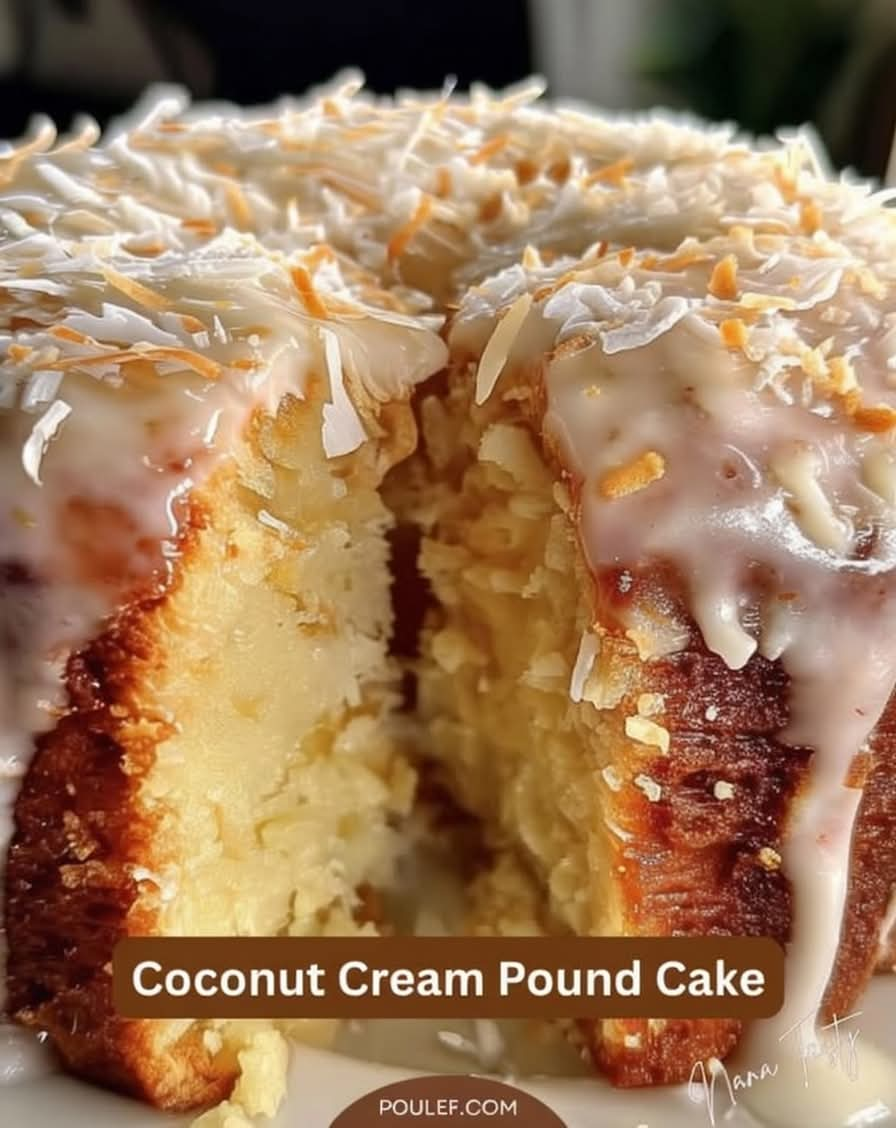
Old-Fashioned Coconut Cream Pound Cake
Introduction
There are certain cakes that are more than just dessert. They carry memories of family kitchens, holidays, celebrations, and the comforting smell of something wonderful baking in the oven. Old-Fashioned Coconut Cream Pound Cake is one of those cakes.
This rich, buttery cake is inspired by the kind of homemade dessert that often appeared on Easter tables, at family gatherings, and during Sunday dinners. It has a beautifully golden crust, a dense yet tender crumb, and a warm coconut flavor that becomes even more delicious when paired with a sweet coconut glaze.
The combination of butter, coconut milk, and sweetened shredded coconut gives this pound cake a wonderful depth of flavor. The coconut is not simply sprinkled on top; it is incorporated throughout the cake so that every slice has a delicate coconut texture and aroma.
A simple glaze poured over the warm cake adds another layer of sweetness. Toasted coconut on top provides a lightly crisp contrast to the soft cake underneath.
Whether you make it for Easter, a birthday, a potluck, a family dinner, or simply because you want your kitchen to smell like something homemade, this coconut pound cake is a beautiful dessert to have in your recipe collection.
Ingredients
For the Coconut Pound Cake
- 1 cup unsalted butter, softened
- 2 cups granulated sugar
- 4 large eggs, room temperature
- 1 teaspoon vanilla extract
- 1 teaspoon coconut extract, optional
- 3 cups all-purpose flour
- 1 teaspoon baking powder
- 1/2 teaspoon salt
- 1 cup coconut milk
- 1 cup sweetened shredded coconut
For the Coconut Glaze
- 1 1/2 cups powdered sugar
- 3 to 4 tablespoons coconut milk
- 1/2 teaspoon vanilla extract
- 1/2 teaspoon coconut extract, optional
- Pinch of salt
For the Toasted Coconut Topping
- 1/2 to 1 cup sweetened shredded coconut
Instructions
1. Prepare the Oven and Pan
Preheat the oven to 325°F (165°C).
Generously grease and flour a 10-inch Bundt pan or tube pan. Make sure you coat the center tube, corners, and decorative areas of the pan thoroughly so the finished cake releases easily.
For additional insurance, you can lightly spray the greased pan with baking spray containing flour.
2. Prepare the Coconut
If you want an especially rich coconut flavor, lightly toast the coconut before adding some of it to the cake.
Spread the shredded coconut in a dry skillet over medium-low heat. Stir frequently until it becomes lightly golden and fragrant. Remove it from the heat immediately and allow it to cool.
Do not let the coconut become dark brown, because it can continue cooking from residual heat.
You may also use the coconut directly from the package if you prefer a softer, more traditional coconut texture.
3. Cream the Butter and Sugar
Place the softened butter in a large mixing bowl.
Beat the butter for several minutes until it becomes smooth and creamy. Gradually add the granulated sugar and continue beating until the mixture becomes noticeably lighter and fluffy.
This step is important for the texture of the pound cake. Properly creamed butter and sugar help create a tender crumb while still maintaining the characteristic richness of a pound cake.
4. Add the Eggs
Add the eggs one at a time.
Beat well after each addition, scraping down the sides of the bowl as necessary. Allowing each egg to become fully incorporated before adding the next helps maintain a smooth batter.
Add the vanilla extract and coconut extract, if using.
5. Combine the Dry Ingredients
In a separate bowl, whisk together the flour, baking powder, and salt.
This distributes the baking powder and salt evenly throughout the flour and helps prevent pockets of either ingredient in the finished cake.
6. Combine the Batter
Add approximately one-third of the flour mixture to the butter mixture and mix gently.
Add half of the coconut milk and mix until just combined.
Continue alternating the remaining flour mixture and coconut milk, beginning and ending with the dry ingredients.
Do not overmix the batter. Once the flour has disappeared, stop mixing.
Fold in the shredded coconut gently with a spatula.
The finished batter should be thick, creamy, and evenly distributed.
7. Fill the Pan
Spoon the batter into the prepared Bundt pan.
Smooth the top gently with a spatula and lightly tap the pan against the counter once or twice to remove large air pockets.
Do not fill the pan completely to the top. Leave enough room for the cake to rise during baking.
8. Bake the Cake
Place the cake in the center of the preheated oven.
Bake for approximately 70 to 85 minutes, depending on your oven and the shape of your pan.
Begin checking around the 65-minute mark. Insert a long wooden skewer or cake tester into the thickest part of the cake. It should come out clean or with only a few moist crumbs attached.
The cake should have a deep golden color and a firm surface.
If the top begins browning too quickly while the center still needs more time, loosely cover the cake with aluminum foil.
9. Cool the Cake
Remove the cake from the oven and allow it to rest in the pan for about 10 to 15 minutes.
Carefully run a thin knife around the edges if necessary, then invert the cake onto a wire rack.
Allow it to cool completely before glazing if you want a neat, defined glaze. For a glaze that soaks more deeply into the cake, allow the cake to cool slightly while it is still warm.
10. Prepare the Coconut Glaze
Place the powdered sugar in a bowl.
Add the coconut milk one tablespoon at a time, whisking continuously until the glaze reaches a smooth, pourable consistency.
Add vanilla extract, coconut extract if desired, and a small pinch of salt.
The glaze should be thick enough to coat the cake but fluid enough to slowly run down the sides.
If it is too thick, add a little more coconut milk. If it becomes too thin, add additional powdered sugar.
11. Toast the Coconut Topping
Place the additional shredded coconut in a dry skillet over medium-low heat.
Stir frequently until lightly golden and fragrant.
Transfer it to a plate immediately so that it stops cooking.
12. Glaze and Finish the Cake
Pour the coconut glaze slowly over the cooled or slightly warm pound cake.
Allow the glaze to run naturally down the sides and into the ridges of the Bundt cake.
While the glaze is still sticky, sprinkle the toasted coconut over the top.
Allow the glaze to set before slicing.
Method
The secret to a successful coconut pound cake is patience during preparation.
Start with properly softened butter rather than melted butter. The butter should be soft enough to beat easily but should still hold its shape.
Cream the butter and sugar thoroughly before adding the eggs. This creates the foundation for the cake’s texture.
When adding the flour and coconut milk, mix only until the ingredients are incorporated. Excessive mixing can develop too much gluten and result in a heavier or tougher cake.
Coconut milk provides moisture and a gentle coconut flavor, while shredded coconut contributes texture and additional richness.
Baking the cake at a moderate temperature allows the large pound cake to cook evenly from the outside toward the center. Because Bundt cakes are thick, rushing the baking process by using a very high temperature can cause the outside to brown before the middle is fully baked.
The glaze should be added while the cake is still slightly warm if you want some of it to absorb into the crust. If you prefer a more decorative white glaze, wait until the cake has cooled completely.
The History and Tradition of Coconut Pound Cake
Pound cake has a long history in home baking. Traditional pound cakes were originally associated with a simple proportion of ingredients, often using equal amounts of flour, butter, sugar, and eggs.
Over generations, home cooks adapted the basic formula by adding ingredients such as vanilla, citrus zest, sour cream, cream cheese, extracts, and coconut.
Coconut became especially popular in American baking because sweetened shredded coconut was convenient to use in cakes, pies, cookies, candies, and holiday desserts.
Coconut cakes and coconut pound cakes became particularly associated with celebrations and family gatherings. The ingredient’s naturally rich flavor also pairs beautifully with butter and sugar, making it an excellent addition to a classic pound cake.
Recipes like this are often passed from one generation to another, with each family making small changes. One baker may use coconut extract, another may add extra shredded coconut, while another may prefer a simple powdered-sugar glaze.
That flexibility is part of the charm of old-fashioned baking.
Formation of the Cake
The structure of this cake comes from the combination of creamed butter, sugar, eggs, flour, and a small amount of leavening.
The butter and sugar create the initial base of the batter. The eggs provide structure and richness, while the flour creates the framework that holds everything together.
Coconut milk contributes moisture and flavor, while shredded coconut gives the cake its distinctive texture.
During baking, the outside of the cake develops a golden crust while the interior remains moist and tender. The result is the classic pound-cake texture: substantial enough to hold its shape when sliced, yet soft enough to enjoy with a fork.
The glaze adds sweetness to the crust and creates a slightly sticky finish. Toasted coconut provides additional aroma and a gentle crispness.
Tips for the Best Coconut Pound Cake
Use room-temperature eggs and softened butter. This helps the ingredients combine more evenly.
Measure flour carefully. Too much flour can make the pound cake unnecessarily dry and heavy.
Do not overmix after adding the flour.
Use full-fat coconut milk for the richest flavor and texture.
If using coconut extract, add it gradually. Coconut extract can be quite concentrated.
Let the cake rest before removing it from the Bundt pan. Trying to turn out a very hot cake can cause it to break.
Toast the topping coconut carefully because it can go from golden to burnt quickly.
For an even stronger coconut flavor, brush the warm cake lightly with a few tablespoons of coconut milk before adding the glaze.
Serving Suggestions
Serve slices of coconut pound cake at room temperature with coffee, tea, or a glass of cold milk.
For a special dessert, serve each slice with whipped cream and fresh berries.
You can also add a spoonful of vanilla ice cream beside a slightly warmed slice of cake.
For Easter or spring gatherings, the cake can be decorated with additional toasted coconut and small pastel-colored decorations.
For a simple family dessert, however, the cake needs very little decoration. Its golden crust, coconut aroma, and sweet glaze are enough.
Storage
Store the completely cooled cake in an airtight container at room temperature for up to three days.
For longer storage, refrigerate it in a tightly covered container for approximately five to seven days. Allow slices to come closer to room temperature before serving for the best texture.
The cake can also be frozen without the glaze. Wrap it tightly in plastic wrap and then place it in a freezer-safe bag or container.
Freeze for up to three months. Thaw at room temperature, then prepare and add the glaze before serving.
Why Coconut Lovers Will Enjoy This Cake
Coconut lovers will appreciate that the flavor appears in several layers.
There is coconut milk inside the batter, shredded coconut throughout the cake, and optional coconut extract for an even more pronounced flavor.
The toasted coconut topping adds another dimension, while the sweet glaze brings everything together.
The result is not simply a vanilla pound cake with coconut sprinkled over it. Coconut is part of the cake’s character from beginning to end.
Conclusion
Old-Fashioned Coconut Cream Pound Cake is the kind of dessert that brings a little nostalgia to the table.
It has the rich texture expected from a traditional pound cake, combined with the fragrant flavor of coconut and the sweetness of a simple glaze. The golden crust, tender center, and toasted coconut topping make every slice feel special without requiring complicated decorating or difficult techniques.
It is perfect for Easter, holidays, birthdays, potlucks, Sunday dinners, family celebrations, or an ordinary afternoon when you want something homemade.
Most importantly, this is the kind of cake that creates memories. The smell filling the kitchen, the first warm slice, the little crumbs left on the cutting board, and the requests for another piece are all part of what makes traditional home baking so special.
Sometimes the best recipes are not the newest or most complicated ones. They are the recipes that remind us of home.