
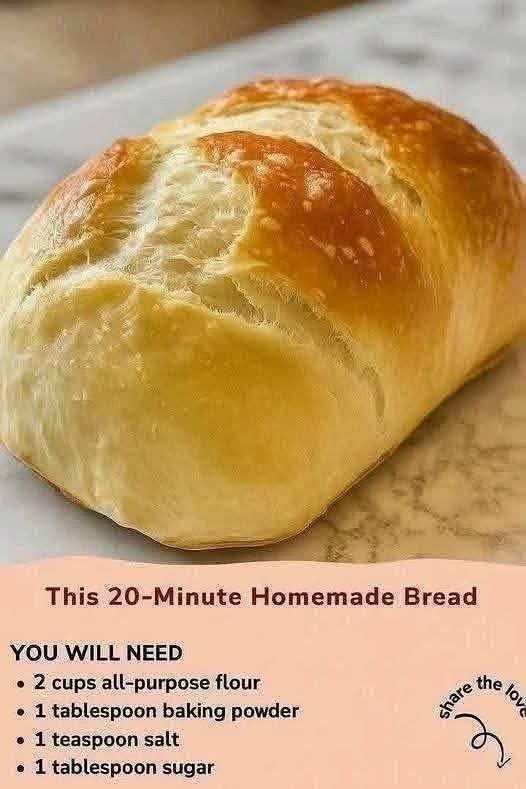
20-Minute Homemade Bread
Introduction
There is something wonderfully comforting about homemade bread, especially when you can prepare it quickly without waiting hours for yeast to rise. This 20-Minute Homemade Bread is simple, affordable, and perfect when you want warm, fresh bread without complicated steps.
Made with everyday pantry ingredients, this bread has a lightly crisp exterior and a soft, tender inside. It is delicious served warm with butter, cheese, soup, eggs, or your favorite spread. Because it comes together so quickly, it is also an excellent recipe for busy mornings, quick lunches, or last-minute family meals.
Ingredients
- 3 cups all-purpose flour
- 2 teaspoons baking powder
- 1 teaspoon salt
- 1 tablespoon sugar
- 1 cup warm water
- 2 tablespoons olive oil
For serving, you can use:
- Butter
- Olive oil
- Cheese
- Honey or jam
- Garlic butter
- Your favorite savory spread
Instructions
1. Prepare the Dry Ingredients
Preheat the oven to 425°F (220°C).
In a large mixing bowl, combine the all-purpose flour, baking powder, salt, and sugar. Whisk or stir well so the baking powder and salt are evenly distributed throughout the flour.
2. Add the Wet Ingredients
Make a small well in the center of the dry ingredients. Pour in the warm water and olive oil.
Using a wooden spoon or your hands, gradually mix everything together until a soft dough begins to form.
3. Form the Dough
Transfer the dough to a lightly floured work surface. Knead gently for about 1 to 2 minutes, just until the dough becomes smooth and holds together.
Do not over-knead the dough. Since this recipe uses baking powder rather than yeast, it does not require a long kneading or rising period.
If the dough feels too sticky, add a small amount of flour. If it feels too dry or crumbly, add a teaspoon of warm water at a time until it comes together.
4. Shape the Bread
Shape the dough into one large round loaf or divide it into several smaller portions for individual breads.
Place the shaped dough onto a lightly greased or parchment-lined baking sheet.
For a traditional homemade appearance, lightly score the top with a sharp knife. You can make a simple cross or a few shallow lines across the surface.
5. Bake
Place the bread in the preheated oven and bake for approximately 15 to 20 minutes, or until the surface is lightly golden and the bread sounds hollow when gently tapped.
The exact baking time can vary depending on the size and thickness of your loaf.
6. Rest and Serve
Remove the bread from the oven and allow it to rest for a few minutes before slicing.
For the best texture, serve it warm with butter, olive oil, cheese, soup, eggs, or your favorite topping.
Method
The secret to this quick bread is the use of baking powder instead of yeast. Baking powder provides the lift needed to give the bread a lighter texture without requiring a traditional fermentation or rising period.
The dough should be mixed only until combined and gently kneaded. Overworking the dough can make the finished bread tougher.
Warm water helps bring the ingredients together smoothly, while olive oil contributes moisture and tenderness. The small amount of sugar adds a subtle balance to the flavor and can also help with browning during baking.
Formation
The formation of the bread is intentionally simple. Once the dough has been mixed, gently shape it into a round loaf rather than spending time developing a highly elastic dough.
If you prefer individual portions, divide the dough into 6 to 8 pieces and flatten each piece slightly. These smaller breads can be baked until golden and make wonderful additions to breakfast, lunch, or dinner.
For a rustic appearance, leave the surface slightly textured and score the top before baking.
History
Quick breads have a long tradition in home cooking because they offer a practical alternative to yeast-leavened bread. Unlike traditional yeast bread, which requires fermentation and rising time, quick breads rely on chemical leavening agents such as baking powder or baking soda.
This style of bread became especially useful for home cooks who wanted freshly baked bread without having to plan several hours ahead. Simple ingredients such as flour, water, salt, and a leavening agent made these recipes economical and accessible.
This modern 20-minute version follows that same practical idea: simple ingredients, minimal preparation, and fresh bread on the table quickly.
Helpful Tips
Use warm rather than hot water. Very hot water is unnecessary for this recipe.
Measure the flour carefully. Adding too much flour can result in a dry, dense loaf.
Do not over-knead the dough. A short, gentle kneading is enough.
For a softer crust, brush the freshly baked bread with a little olive oil or melted butter.
For extra flavor, add dried herbs, garlic powder, grated cheese, or a small amount of chopped fresh herbs to the dough.
For a crispier exterior, bake the bread directly on a preheated baking sheet or baking stone.
Serving Ideas
This bread is delicious while still warm and can be served in many different ways.
Serve it alongside soups and stews for dipping.
Slice it and spread with butter or cream cheese.
Serve it with scrambled or fried eggs for breakfast.
Pair it with cheese, vegetables, and roasted meats for lunch.
Brush slices with garlic butter and toast them for a quick homemade garlic bread.
For a sweeter version, serve warm slices with honey, jam, or fruit preserves.
Conclusion
This 20-Minute Homemade Bread proves that making fresh bread does not always have to involve yeast, long rising times, or complicated techniques.
With only a handful of basic ingredients and a few simple steps, you can create warm homemade bread whenever the craving strikes. It is quick enough for a busy weekday but comforting enough to serve at a family dinner.
Once you make it successfully, you can easily customize the recipe with herbs, garlic, cheese, seeds, or other favorite flavors.
For Bread Lovers
If you love homemade bread but do not always have time to wait for yeast dough to rise, this recipe is worth keeping in your collection.
It is especially appealing to bread lovers who enjoy a rustic homemade loaf without complicated preparation. The warm, freshly baked aroma, tender center, and lightly golden crust make it difficult to resist serving a second slice.
Save this recipe carefully and share it with someone who loves homemade bread. And if you enjoy receiving simple, comforting recipes like this, leave a little “Thank you” so more recipes can keep coming your way.