
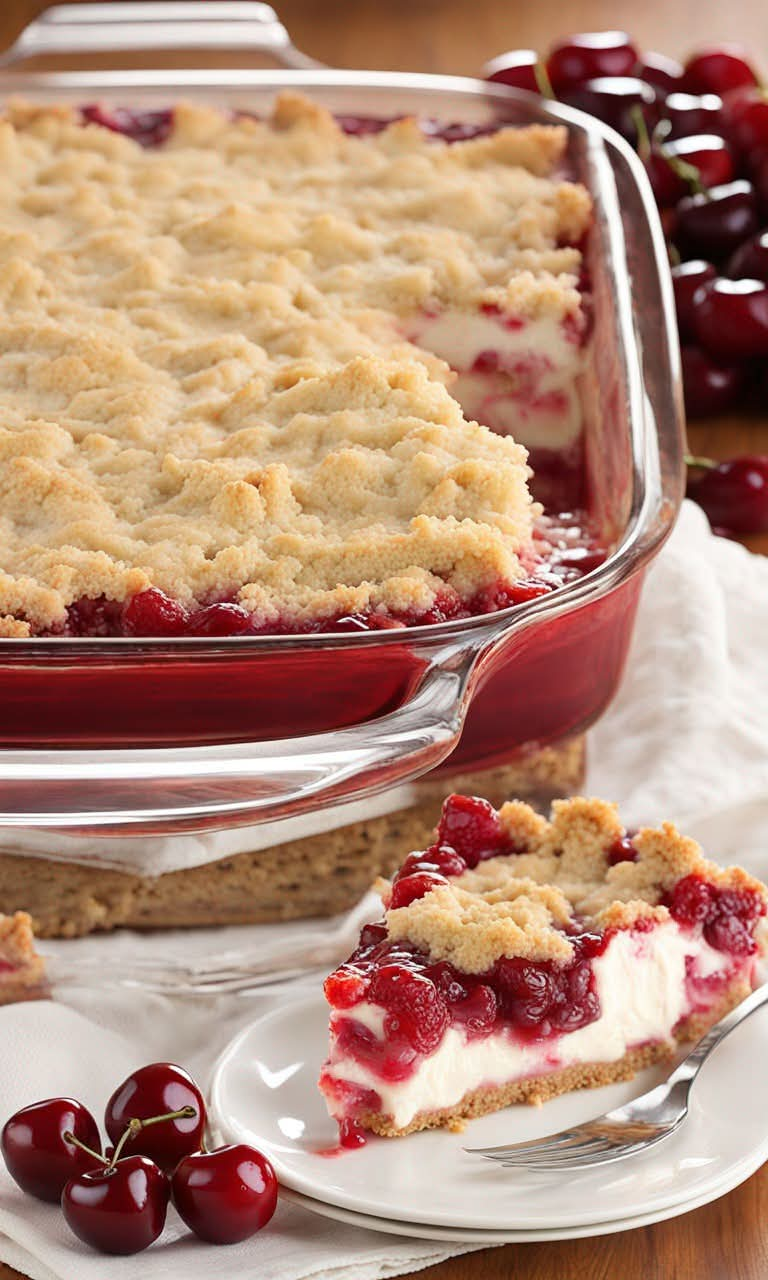
Old-Fashioned Cherry Dessert Bars: A Sweet Ending to Family Supper

Introduction
Some desserts are more than something sweet to enjoy after supper. They become part of the memories we make around the family table, bringing everyone together for one more cup of coffee, another little slice, and a conversation that lasts longer than anyone planned.
I brought out this beautiful cherry dessert after we had cleared the supper dishes. My sister slid her coffee cup aside to make room, and before long, we were all reaching for another piece. The buttery crust, sweet cherry filling, and delicate golden topping made every bite feel like a little taste of home. We stayed at the table talking long after the last crumbs were gone.
This old-fashioned cherry dessert is wonderfully simple to prepare, yet it looks and tastes like something special. With its rich buttery base, luscious cherry center, and lightly crisp topping, it is perfect for Sunday suppers, holiday gatherings, potlucks, afternoon coffee, or any evening when you want to make an ordinary moment memorable.
The best part is that you do not need complicated ingredients or professional baking skills. A few pantry staples and a can of cherry pie filling are all you need to create a dessert your family will ask you to make again.
Ingredients
Preparation: 20 minutes · Baking: 35–45 minutes · Servings: 12–16
For the buttery crust and topping
- 1 cup unsalted butter, softened
- 1 cup granulated sugar
- 2 large eggs
- 1 teaspoon vanilla extract
- 2 cups all-purpose flour
- 1/2 teaspoon baking powder
- 1/4 teaspoon salt
- 1 teaspoon lemon zest, optional
For the cherry filling
- 2 cans cherry pie filling, approximately 21 ounces each
- 1 tablespoon lemon juice
- 1/2 teaspoon almond extract, optional
For the simple vanilla glaze
- 1 cup powdered sugar
- 1–2 tablespoons milk
- 1/2 teaspoon vanilla extract
Instructions
Step 1: Prepare the oven and baking pan
Preheat your oven to 350°F (175°C). Grease a 9-by-13-inch baking pan lightly with butter or nonstick cooking spray. You can also line the pan with parchment paper, leaving a little overhang to make removing the dessert easier.
Gather your ingredients before beginning. Make sure the butter is softened enough to cream easily, but not melted.
Step 2: Make the buttery dough
In a large mixing bowl, beat the softened butter and granulated sugar together for approximately 2–3 minutes, until the mixture becomes pale, creamy, and fluffy.
Add the eggs one at a time, beating well after each addition. Stir in the vanilla extract and, if desired, the lemon zest.
In a separate bowl, whisk together the flour, baking powder, and salt. Gradually add the dry ingredients to the butter mixture, mixing just until a soft, thick dough forms.
Avoid overmixing. The dough should be soft enough to spread but firm enough to hold its shape.
Step 3: Prepare the cherry filling
Place the cherry pie filling in a bowl. Stir in the lemon juice to balance the sweetness and give the cherries a brighter flavor.
For a subtle bakery-style flavor, add the almond extract. Almond and cherry complement one another beautifully, but you can leave it out if you prefer a more traditional vanilla flavor.
If the filling looks especially runny, use a spoon to transfer the cherries and a moderate amount of their sauce into the dessert. Too much liquid can make the base soggy.
Step 4: Build the bottom layer
Transfer approximately two-thirds of the dough into the prepared baking pan.
Using a spatula or lightly floured fingers, spread the dough evenly across the bottom. Press gently into the corners to create a uniform base.
Bake the crust for about 10–12 minutes, just until it begins to set. It should not be deeply browned at this stage.
Remove the pan from the oven and let it rest for a few minutes.
Step 5: Add the cherry layer
Spread the cherry filling evenly over the partially baked crust. Make sure the cherries reach close to the edges so that every piece has a generous amount of fruit.
Spoon the remaining dough over the top in small dollops. You can leave spaces between the dollops so the red cherry filling peeks through, creating a beautiful homemade appearance.
Alternatively, gently crumble the remaining dough over the cherries for a more rustic, crumb-topped finish.
Step 6: Bake until golden
Return the pan to the oven and bake for approximately 25–35 minutes, or until the top is lightly golden and the edges are set.
The cherry filling should bubble gently around the edges. If the topping begins browning too quickly, loosely cover the pan with foil for the remaining baking time.
Remove the dessert from the oven and place the pan on a cooling rack.
Step 7: Make the vanilla glaze
Once the dessert has cooled for at least 20–30 minutes, prepare the glaze.
In a small bowl, combine the powdered sugar, vanilla extract, and one tablespoon of milk. Stir until smooth. Add a little more milk, a few drops at a time, until the glaze is thin enough to drizzle but thick enough to remain visible on the surface.
Drizzle the glaze over the dessert in thin lines.
For neat bars, allow the dessert to cool completely before cutting. For a softer, warm dessert, serve it with a spoon while it is still slightly warm.
Methods for Perfect Cherry Dessert Bars


The creaming method
Creaming the butter and sugar incorporates air into the mixture, helping create a tender, cake-like crust. Softened butter is important because melted butter can change the texture and make the dough greasy.
The layering method
Partially baking the bottom crust helps it remain firm beneath the juicy cherry filling. Spreading the fruit evenly prevents some pieces from being too sweet or too dry.
The crumb-topping method
Adding small pieces of dough over the filling creates a rustic finish. Some of the cherry filling remains visible, making the dessert attractive without requiring elaborate decoration.
The cooling method
Cooling allows the crust to firm up and the cherry filling to settle. Cutting too early may cause the filling to run and the bars to fall apart.
For the cleanest slices, refrigerate the cooled dessert for 30–60 minutes before cutting with a sharp knife.
History of Cherry Desserts
Cherries have been enjoyed in sweet dishes for centuries. As cherry cultivation spread throughout Europe and later North America, cooks began using fresh, dried, preserved, and canned cherries in pies, puddings, pastries, and cakes.
Fruit-filled pies became especially popular in American home baking, where seasonal fruit and pantry ingredients were transformed into affordable family desserts. Over time, home cooks developed simpler variations that offered the flavor of a traditional fruit pie without requiring a separate pastry crust.
Cherry bars and crumb-topped cherry desserts reflect that practical baking tradition. They combine a buttery base with fruit filling and a simple topping, making them easier to prepare, transport, portion, and share.
This particular recipe is a modern home-style variation inspired by those familiar traditions rather than a claim to one specific historical origin. Its appeal comes from the same qualities that have kept homemade fruit desserts popular: simple ingredients, comforting flavors, and the pleasure of sharing something delicious with the people we love.
Formation and Presentation
The beauty of this dessert comes from its three contrasting layers.
The bottom layer: A soft, buttery crust provides structure and a delicate sweetness. It should be firm enough to hold the filling while remaining tender when bitten.
The middle layer: The cherry filling brings bright fruit flavor, a glossy red color, and a juicy texture. A touch of lemon helps balance its sweetness, while optional almond extract adds depth.
The top layer: Small pieces of dough bake into a golden topping that contrasts beautifully with the red cherries. A light vanilla glaze adds a final touch of sweetness.
For a family-style presentation, arrange the bars on a white serving platter and leave a little space between each piece. The red filling and golden crust look especially inviting against a simple background.
For a more elegant dessert, serve each bar on a small plate with a spoonful of whipped cream or a scoop of vanilla ice cream.
Tips for the Best Results
- Use softened butter: This makes the dough easier to mix and produces a tender texture.
- Do not overmix: Stop mixing as soon as the flour is incorporated.
- Balance the sweetness: Lemon juice gives the cherry filling a brighter flavor.
- Watch the baking time: Every oven is different, so begin checking near the end of the suggested baking range.
- Cool before slicing: This is the key to bars that hold their shape.
- Customize the topping: Add a small handful of sliced almonds or finely chopped pecans if you enjoy a little crunch.
- Adjust the fruit: If using homemade cherry filling, cook it until thickened and allow it to cool before assembling the dessert.
Variations to Try

Cherry Almond Bars
Add almond extract to the filling and sprinkle sliced almonds over the topping before baking. The nutty aroma pairs beautifully with cherries.

Cherry Cream Cheese Bars
Beat 8 ounces of softened cream cheese with 1/4 cup sugar and one egg. Spread the mixture over the crust before adding the cherry filling, then add the remaining dough and bake until set.

Cherry Oat Crumble Bars
Replace about 1/2 cup of the flour in the reserved topping mixture with rolled oats. This gives the top a heartier texture and a pleasant crunch.
Storage and Make-Ahead Instructions
At room temperature: Keep the bars covered for up to one day in a cool kitchen.
In the refrigerator: Store in an airtight container for up to 4–5 days. Chilling helps the filling stay firm and makes the bars easier to serve.
In the freezer: Freeze fully cooled bars in a single layer until firm, then transfer them to a freezer-safe container with parchment between layers. For best quality, use within 2–3 months.
Thaw frozen bars in the refrigerator overnight. Add the glaze after thawing if you want the freshest appearance.
You can also bake the dessert the day before a gathering. Let it cool completely, cover, and refrigerate. Slice shortly before serving.
What to Serve with Cherry Dessert Bars
This dessert is versatile enough for almost any occasion.
- Coffee: A warm cup of coffee balances the sweetness and makes the bars perfect for after-supper conversations.
- Black tea: A lightly brewed tea provides a simple, comforting accompaniment.
- Vanilla ice cream: The cool, creamy texture contrasts with the buttery crust and fruity filling.
- Whipped cream: A spoonful of lightly sweetened whipped cream makes each serving feel special.
- Fresh cherries: When in season, a few fresh cherries on the serving platter add a lovely finishing touch.
Conclusion
There is something special about bringing a homemade dessert to the table after everyone has finished supper. The plates are cleared, the coffee is poured, and nobody is in a hurry to leave. A simple cherry dessert can turn those ordinary moments into memories worth keeping.
These old-fashioned cherry dessert bars combine a buttery crust, sweet cherry filling, and golden topping in a recipe that is easy enough for an ordinary evening and special enough for a family celebration.
Make a pan for your next Sunday supper, holiday gathering, or afternoon coffee with someone you love. Cut generous squares, set them on the table, and let everyone help themselves.
You may discover that the best part is not the recipe itself, but the conversations that continue long after the last crumb has disappeared.
For Cherry Dessert Lovers
If you love homemade fruit desserts, this recipe deserves a place in your collection. It is comforting, easy to share, and simple to adapt to your family’s tastes.
Try it once with the classic vanilla glaze, then experiment with almond flavoring, a crunchy oat topping, or a creamy cheesecake layer. Each variation brings something different while keeping the familiar cherry flavor at the heart of the dessert.
A little baking tip to remember: The secret to beautiful cherry bars is patience. Let the dessert cool before slicing, and give the filling time to settle. The result will be neat, tender squares that look just as good as they taste.
Some recipes fill a plate. The truly special ones bring everyone back to the table.