
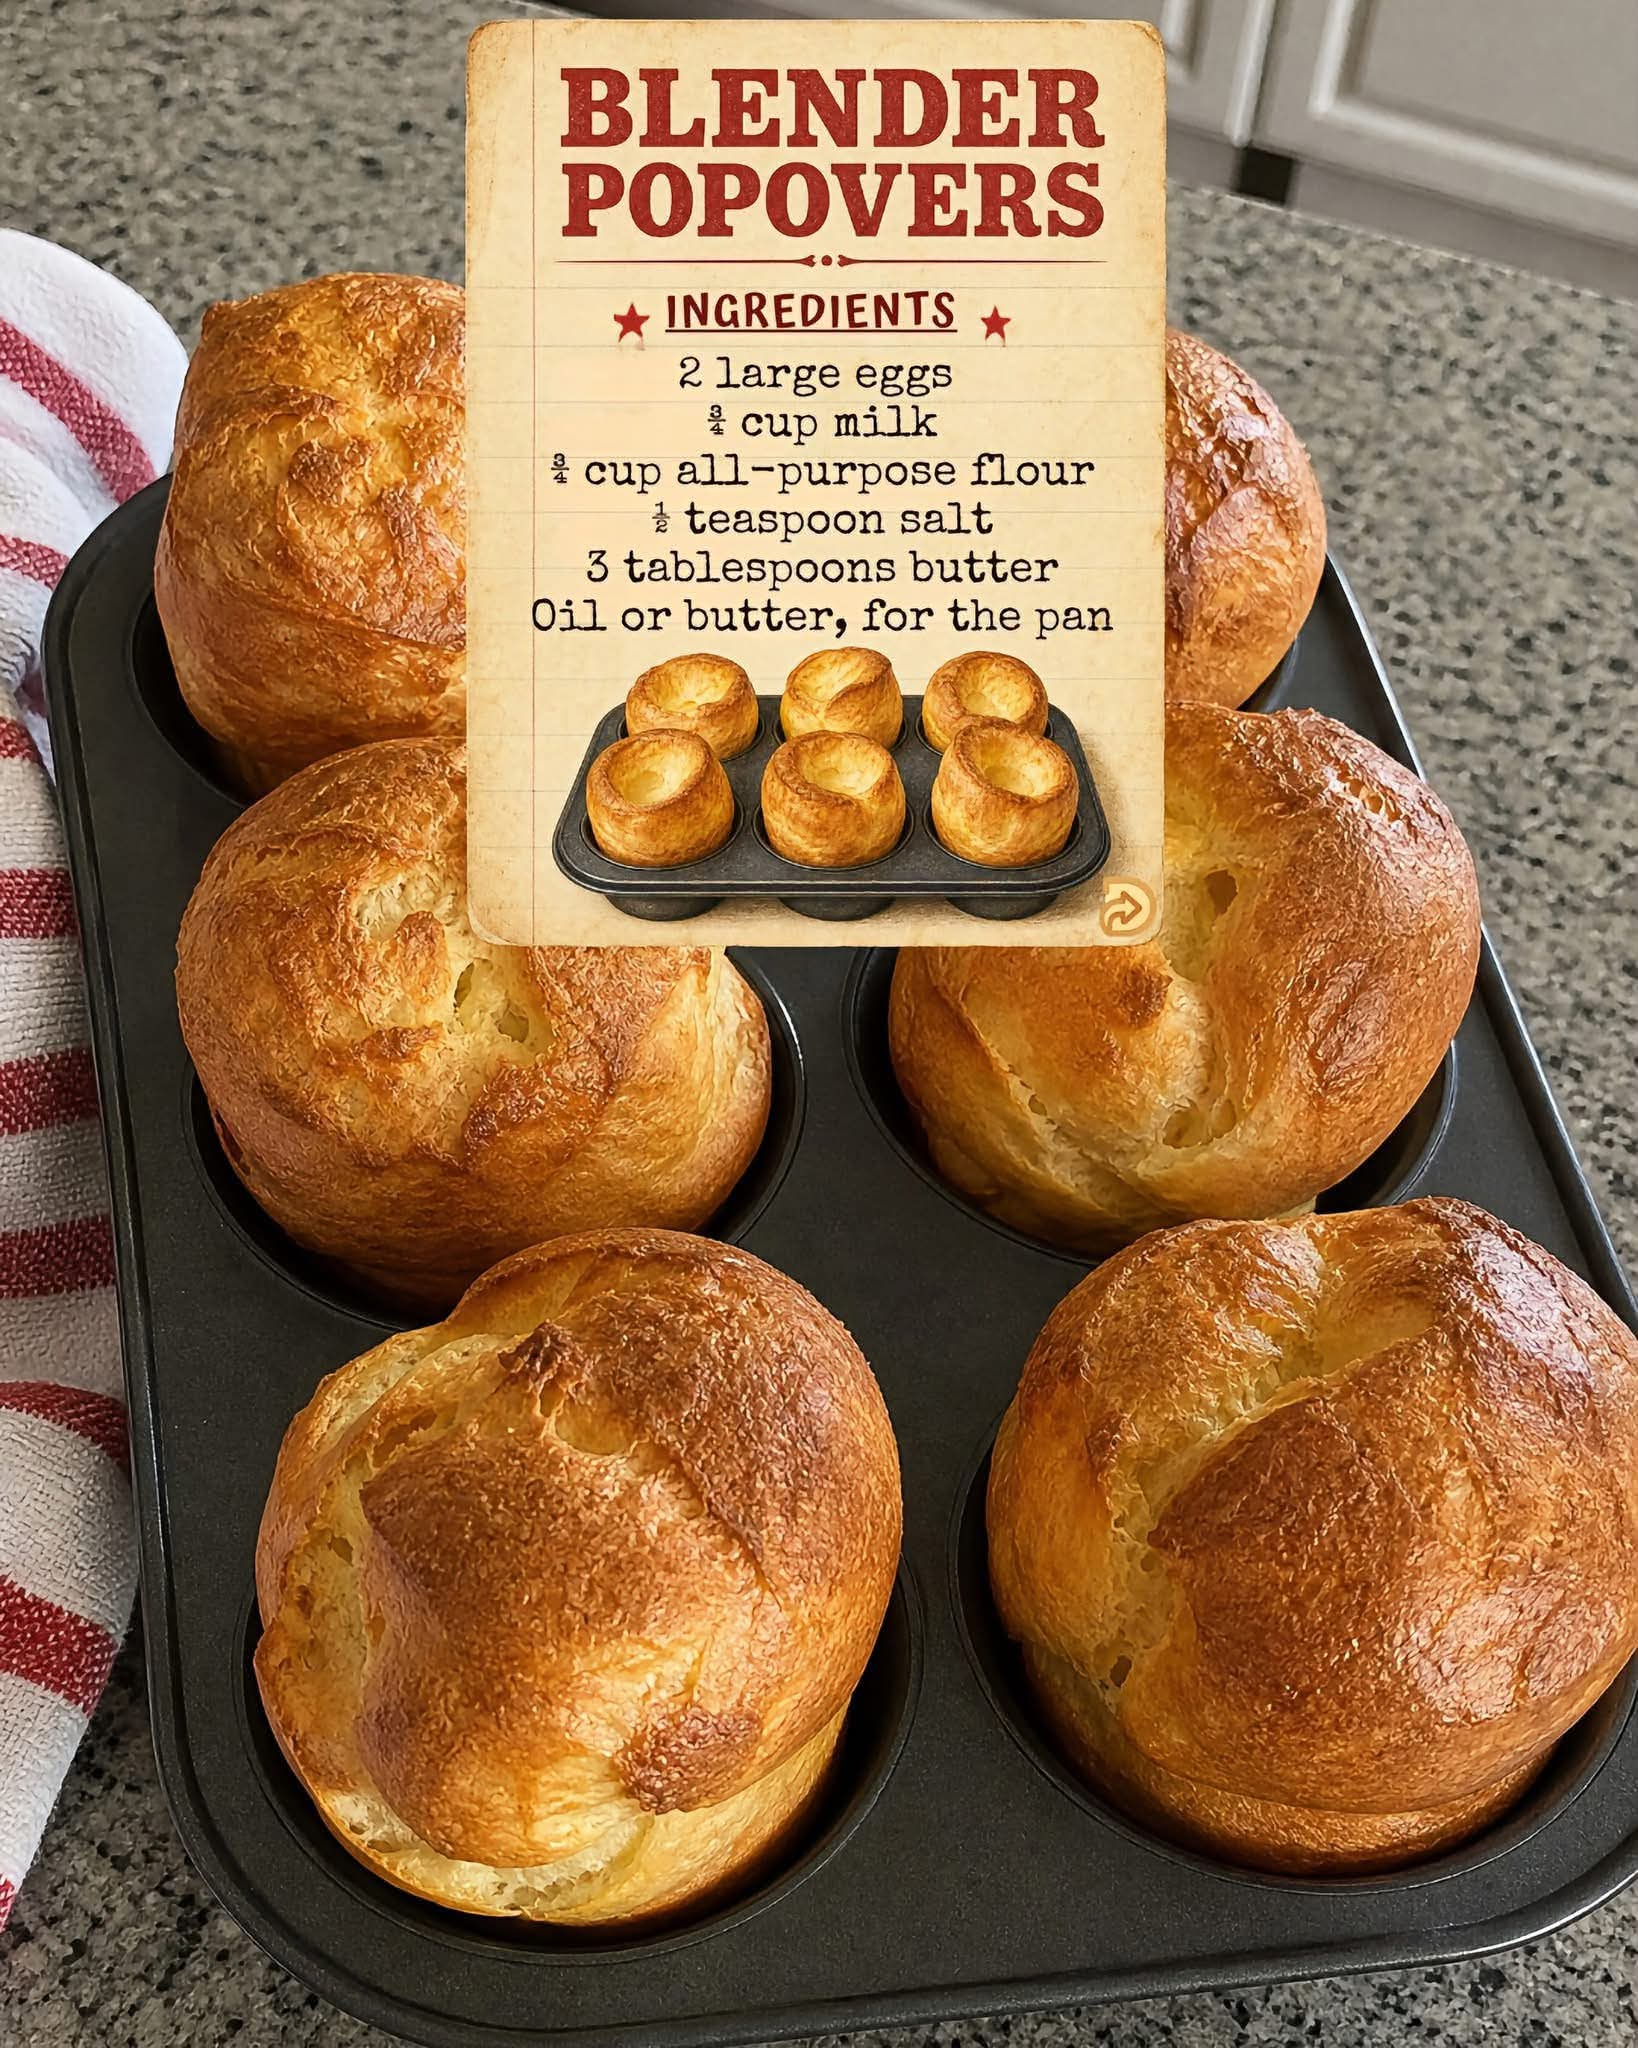
Blender Popovers: Light, Golden, and Beautifully Puffy Homemade Popovers

Introduction
There is something magical about watching a simple mixture of eggs, milk, flour, and butter transform into tall, golden popovers in the oven. They rise dramatically, develop crisp golden shells, and form wonderfully airy centers that are perfect for filling with butter, jam, honey, or your favorite savory toppings.
These Blender Popovers are one of those old-fashioned recipes that prove you do not need complicated ingredients or hours of preparation to make something special. The blender does most of the work, creating a smooth batter in just a few minutes. Once the batter is ready, the hot oven takes over and transforms it into beautiful, puffed pastries with a delicate exterior and a light, hollow interior.
The hardest part is leaving the oven door alone. It may be tempting to peek inside to admire those growing golden domes, but opening the door too early can release heat and interrupt the rising process before the structure has set.
Whether you serve them for breakfast, brunch, afternoon tea, or alongside a comforting dinner, these homemade popovers are sure to make an impression. Serve them straight from the oven while they are warm and crisp, and watch everyone reach for another.
Ingredients

This recipe makes approximately 6 popovers, depending on the size of your pan.
Main ingredients
- 2 large eggs, preferably at room temperature
- 3/4 cup milk (180 ml)
- 3/4 cup all-purpose flour (approximately 90–95 g)
- 1/2 teaspoon salt
- 3 tablespoons unsalted butter (approximately 42 g)
- Oil or additional melted butter, for greasing the pan
Optional ingredients for serving
- Softened butter
- Strawberry or raspberry jam
- Honey
- Powdered sugar
- Cream cheese
- Fresh berries
- Grated cheese and fresh herbs for a savory variation
Important note: Traditional popovers do not require baking powder or yeast. Their impressive height comes primarily from steam produced by the liquid in the batter and the expansion of air during baking.
Instructions
Step 1: Preheat the oven
Preheat your oven to 425°F (220°C).
Place a six-cup popover pan inside the oven while it heats. Warming the pan helps the batter begin cooking immediately when it is poured into the cups.
If you do not have a dedicated popover pan, a standard muffin pan can work, although the popovers may not rise as tall because the cups are generally shorter and wider.
Allow the pan to heat for approximately 10–15 minutes, or until the oven has reached the desired temperature.
Step 2: Melt the butter
Place the butter in a small microwave-safe bowl and heat it in short intervals until melted. You can also melt it gently in a small saucepan over low heat.
Set the butter aside briefly to cool. It should remain liquid but should not be so hot that it cooks the eggs when blended.
Step 3: Prepare the batter in the blender
Add the eggs, milk, flour, salt, and melted butter to your blender.
Blend for approximately 20–30 seconds, or until the mixture is completely smooth and free of visible flour lumps.
Scrape down the sides if necessary and blend briefly again.
The batter should be thin and pourable, similar to a thin pancake batter. Avoid blending for too long, as excessive mixing can develop the gluten in the flour and affect the delicate texture.
Let the batter rest for approximately 5–10 minutes while keeping the oven hot. This short rest helps the flour hydrate and allows some of the larger air bubbles to settle.
Step 4: Prepare the hot pan
Carefully remove the heated popover pan from the oven using oven mitts.
Lightly grease each cup with oil or melted butter, making sure to coat the bottoms and sides.
Work carefully because the pan will be very hot. Place it on a heat-resistant surface before adding the batter.
Step 5: Fill the cups
Pour the prepared batter into the greased cups, filling each approximately halfway.
Try to distribute the batter evenly so the popovers bake at a similar rate.
Return the pan to the oven immediately. Closing the oven door promptly helps maintain the high temperature needed for a strong initial rise.
Step 6: Bake without opening the oven door
Bake at 425°F (220°C) for 20 minutes.
During this stage, the heat causes moisture in the batter to turn into steam. The steam expands the batter, pushing it upward and creating the characteristic hollow interior.
Resist the temptation to open the oven door. A sudden drop in temperature can interrupt the expansion process before the popovers have developed enough structure to hold their shape.
Step 7: Lower the temperature
After the first 20 minutes, reduce the oven temperature to 350°F (175°C) without opening the door if your oven allows you to adjust it externally.
Continue baking for another 10–15 minutes, until the popovers are deeply golden, crisp, and firm.
The lower temperature allows the interiors to cook more thoroughly while the exterior dries and becomes crisp.
If your oven requires opening the door to adjust the controls, make the change as quickly as possible.
Step 8: Check for doneness
Once the popovers are well browned, remove the pan from the oven.
They should look tall and puffed, with crisp golden surfaces. Pale popovers are more likely to collapse because their internal structure may not be fully set.
If desired, make a small slit in the side of each popover immediately after baking to release excess steam. This can help prevent the interiors from becoming soggy as they cool.
Step 9: Serve immediately
Remove the popovers from the pan and place them in a serving basket or on a plate.
Serve while warm with butter, jam, honey, or your favorite topping.
For breakfast, pair them with eggs and fresh fruit. For dinner, serve them alongside roasted meat, soup, or a rich gravy.
Methods for Perfect Blender Popovers


1. The blender method
The blender method is quick and convenient. It combines all the ingredients evenly and eliminates the need to whisk the batter by hand.
Add the liquid ingredients before the flour if your blender struggles with thick mixtures. Blend only until smooth, and scrape down the sides if needed.
2. The hot-pan method
A preheated pan gives the batter an immediate burst of heat. This helps the outside begin setting while steam expands inside.
Make sure the pan is thoroughly hot before greasing and filling it.
3. The high-heat baking method
Starting at 425°F creates the strong initial heat needed to produce steam rapidly. Reducing the temperature afterward helps the popovers cook through without burning their exteriors.
The timing may vary slightly depending on your oven, the pan material, and the size of the cups.
4. The no-peeking method
Keeping the oven door closed during the initial rise is one of the most important rules of popover baking.
Cold air entering the oven can reduce the temperature at a critical moment. If the popovers have not developed enough structure, they may collapse before they finish baking.
5. The steam-release method
Popovers have delicate, hollow interiors. Releasing a little steam immediately after baking can help the shells remain crisp.
If you prefer very soft interiors, you can skip the slitting step, but serve the popovers promptly.
The History of Popovers
Popovers are a traditional American baked good closely related to the British Yorkshire pudding.
Yorkshire pudding has long been prepared using a simple batter of eggs, milk, and flour, traditionally baked in hot fat and served with roasted meats. As British culinary traditions traveled to North America, cooks adapted similar batters to their own kitchens and serving customs.
The name popover describes the way the batter expands and rises above the rim of the baking cup during cooking.
Unlike bread, which relies on yeast or other leavening agents, popovers depend primarily on steam and the structure provided by eggs and flour. This makes them a fascinating example of how ordinary ingredients can produce a dramatic result.
Over time, popovers became popular as both a savory accompaniment and a sweet breakfast or brunch treat. They can be served with butter and jam, filled with cream, or paired with soups, stews, and roasted dishes.
The blender version is a modern convenience rather than a separate historic tradition. It preserves the basic principles of classic popover baking while making preparation faster and easier for today’s home cooks.
Understanding the Formation of Popovers
The formation of a popover is one of the most interesting parts of the recipe.
The role of eggs
Eggs provide structure, moisture, and protein. As the popovers heat, egg proteins coagulate and help form the shell that supports the expanded pastry.
The role of milk
Milk contributes moisture, tenderness, and flavor. Its water content becomes an important source of steam during baking.
The role of flour
Flour provides the starch and gluten structure that allows the batter to expand while retaining its shape. Too much flour can produce a heavier result, so measuring carefully is important.
The role of butter
Butter adds flavor and richness while helping the finished popovers develop a delicate texture.
The role of steam
Steam is the primary force behind the dramatic rise. As the liquid in the batter heats, it produces vapor that expands inside the developing structure.
The combination of expanding steam, hot oven temperatures, and setting egg-and-flour proteins creates the familiar hollow center and crisp exterior.
Tips for Tall, Golden Popovers
- Use room-temperature eggs and milk when possible for more consistent results.
- Measure the flour accurately rather than packing it tightly into the measuring cup.
- Make sure the oven is fully preheated before baking.
- Heat the pan before adding the batter.
- Grease every cup thoroughly to help prevent sticking.
- Fill the cups only about halfway.
- Do not add baking powder unless you are intentionally changing the recipe.
- Avoid opening the oven during the first 20 minutes.
- Bake until the popovers are well browned, not merely puffed.
- Serve promptly for the best contrast between the crisp exterior and airy center.
Common Mistakes and How to Fix Them
Why didn’t my popovers rise?
The oven or pan may not have been hot enough, the batter may have been too thick, or the measurements may have been inaccurate. Check the oven temperature and make sure the batter is thin and pourable.
Why did my popovers collapse?
They may have been underbaked or removed from the oven before their structure had set. Bake until the shells are deeply golden and firm.
Why are the centers soggy?
The popovers may need more baking time, or trapped steam may have softened the shells after baking. Try extending the final baking stage by a few minutes and make a small slit to release steam after removing them from the oven.
Why did they stick to the pan?
The cups may not have been greased thoroughly, or the popovers may have cooled too long in the pan. Grease the cups carefully and remove the popovers shortly after baking.
Why are they uneven in size?
Uneven filling, differences in cup size, or hot spots in the oven can cause inconsistent rising. Divide the batter as evenly as possible and use a pan with cups of equal size.
Delicious Variations

Classic Butter and Jam Popovers
Serve warm popovers with softened butter and strawberry, raspberry, or apricot jam. This simple combination is ideal for breakfast or afternoon tea.

Cheddar and Herb Popovers
Fold a small amount of grated cheddar and finely chopped herbs into the prepared batter. Bake as directed for a savory version that pairs well with soup.

Sweet Breakfast Popovers
Add 1 teaspoon of vanilla extract and a little finely grated lemon zest to the batter. Dust the baked popovers lightly with powdered sugar and serve with honey or berries.

Cream-Filled Dessert Popovers
Once the popovers have cooled slightly, split them and fill with lightly sweetened whipped cream and fresh fruit. Serve immediately for a simple but elegant dessert.
Serving Suggestions
Blender popovers are wonderfully adaptable, so you can serve them throughout the day.
For breakfast, enjoy them with scrambled eggs, fresh fruit, yogurt, or a cup of coffee.
For brunch, arrange them in a basket alongside butter, honey, preserves, and cream cheese so everyone can choose a favorite topping.
For dinner, serve them warm beside roast chicken, beef, vegetable soup, or a hearty stew. Their hollow centers are particularly good for soaking up flavorful gravy.
For a sweet afternoon snack, pair them with jam and tea. Their crisp shells and delicate interiors make them satisfying without needing an elaborate filling.
Storage and Reheating
Popovers are best enjoyed fresh from the oven because their crisp shells gradually soften as they cool.
If you have leftovers, let them cool completely and store them in an airtight container at room temperature for up to one day.
To restore some of their crispness, place them in a preheated 350°F (175°C) oven for approximately 5–8 minutes. Avoid microwaving them if you want to maintain a crisp exterior, since the microwave can make them soft and chewy.
For the best results, prepare the batter shortly before baking rather than baking the popovers far in advance. Although leftovers can be reheated, freshly baked popovers generally have the lightest texture and most impressive rise.
Conclusion
Blender Popovers are proof that a handful of everyday ingredients can create something truly memorable. With eggs, milk, flour, butter, and salt, you can make golden pastries that rise dramatically in the oven and develop crisp shells with airy centers.
The preparation is simple, the ingredients are familiar, and the results are impressive enough for guests while remaining easy enough for an ordinary morning at home.
Remember the essential secrets: use a hot oven, warm the pan, blend the batter until smooth, and resist opening the oven door before the popovers have had time to set.
Serve them warm with butter and jam for breakfast, or alongside a comforting dinner for a delicious homemade touch.
For Popover Lovers
If you love simple recipes that transform basic pantry ingredients into something special, these popovers deserve a place in your kitchen.
They are ideal for anyone who enjoys fresh baking without the time and effort required for traditional bread dough. There is no kneading, no yeast, and no complicated shaping. Just blend, pour, bake, and enjoy.
Try the classic version first, then experiment with savory cheese, fresh herbs, sweet vanilla, or your favorite preserves.
And remember: the hardest part is not blending the batter or preparing the pan. It is waiting patiently while those beautiful domes rise behind the oven door.
When they finally emerge golden, crisp, and puffed, that first warm bite makes the wait worthwhile.