
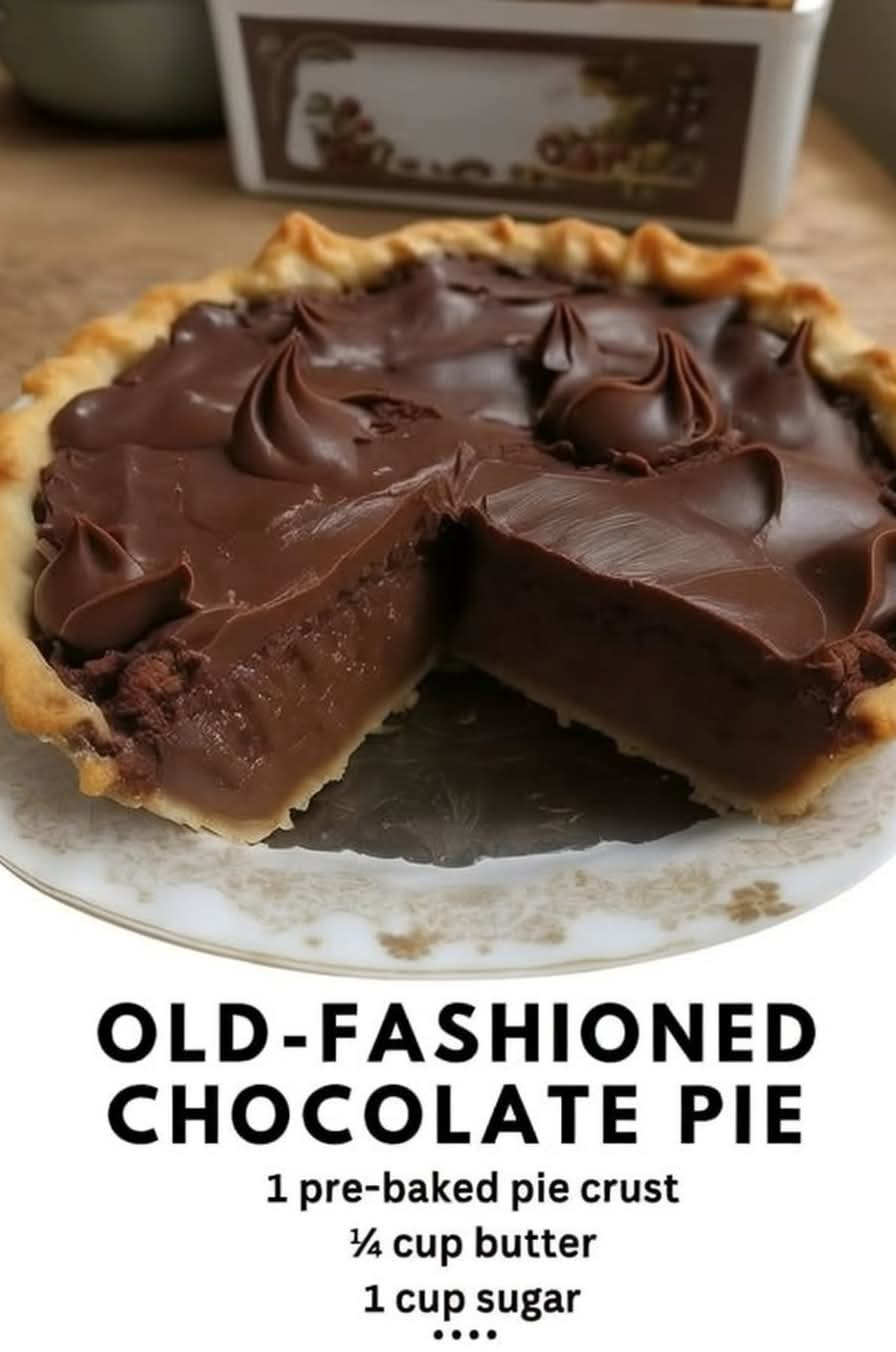
Old-Fashioned Chocolate Pie with Homemade Meringue
Introduction
There is something truly special about an old-fashioned chocolate pie made from scratch. It is the kind of dessert that brings back memories of Sunday dinners, family gatherings, warm kitchens, and grandmothers who always seemed to know how to make something wonderful from simple ingredients.
I remember hearing stories about chocolate pies cooling on kitchen counters after church, their golden meringue peaks gently toasted and their creamy chocolate filling waiting beneath a flaky homemade crust. The smell of cocoa, butter, and vanilla would fill the house, inviting everyone to gather around the table just a little sooner than usual.
This traditional chocolate pie is a beautiful example of how simple ingredients can create an unforgettable dessert. The filling is smooth, rich, and deeply chocolatey, with a texture that melts in your mouth. The buttery crust provides the perfect foundation, while the light, fluffy meringue adds a delicate sweetness that balances the richness of the chocolate.
Unlike instant pudding desserts, this homemade version develops its flavor through gently cooking cocoa, sugar, milk, egg yolks, and butter together until everything becomes a luxurious chocolate custard. A little vanilla brings all the flavors together, creating that familiar taste that so many people associate with their childhood.
Whether you are preparing dessert for Sunday dinner, Thanksgiving, Christmas, or an ordinary weekday when you need something comforting, this old-fashioned chocolate pie deserves a place on your table.
Ingredients
This recipe makes one 9-inch chocolate pie, serving approximately 8 people.
For the Homemade Pie Crust
- 1 1/4 cups all-purpose flour
- 1/2 teaspoon salt
- 1/2 cup cold unsalted butter, cut into small cubes
- 3 to 4 tablespoons ice water
Alternatively, you can use one prepared 9-inch pie crust to save time.
For the Chocolate Filling
- 1 1/2 cups granulated sugar
- 1/4 cup unsweetened cocoa powder
- 1/4 cup cornstarch
- 1/4 teaspoon salt
- 2 1/2 cups whole milk
- 4 large egg yolks, lightly beaten
- 2 tablespoons unsalted butter
- 2 teaspoons vanilla extract
For the Homemade Meringue
- 4 large egg whites, at room temperature
- 1/4 teaspoon cream of tartar
- 1/2 cup granulated sugar
- 1/2 teaspoon vanilla extract
Equipment Needed
- One 9-inch pie dish
- A rolling pin
- A medium saucepan
- A mixing bowl
- A whisk
- An electric mixer
- A rubber spatula
- Measuring cups and spoons
- A baking sheet, if needed to catch drips
Instructions
Step 1: Prepare the Pie Crust
Preheat your oven to 375°F (190°C).
In a medium bowl, combine the flour and salt. Add the cold butter and work it into the flour using a pastry cutter or your fingertips until the mixture resembles coarse crumbs. Small pieces of butter should remain throughout the mixture.
Add the ice water one tablespoon at a time, gently mixing until the dough begins to come together. Avoid adding too much water, as this can make the crust tough.
Gather the dough into a ball, flatten it into a disk, and wrap it. Refrigerate for approximately 30 minutes.
Once chilled, roll the dough on a lightly floured surface into a circle large enough to fit a 9-inch pie dish. Transfer it carefully into the dish, gently pressing it into the bottom and sides. Trim the excess dough and crimp the edges if desired.
Prick the bottom lightly with a fork. Line the crust with parchment paper and fill with pie weights or dried beans.
Bake for 15 minutes, remove the parchment and weights, then continue baking for another 8 to 12 minutes, or until the crust looks dry and lightly golden.
Allow the crust to cool while you prepare the filling.
If using a store-bought crust, follow the package instructions for blind baking.
Step 2: Mix the Chocolate Filling Ingredients
In a medium saucepan, whisk together the sugar, cocoa powder, cornstarch, and salt until evenly combined.
Gradually pour in the milk, whisking continuously to prevent lumps from forming. Continue mixing until the cocoa powder and dry ingredients are fully incorporated.
In a separate bowl, lightly beat the egg yolks.
Keep the egg yolks nearby because they will need to be incorporated carefully into the warm chocolate mixture.
Step 3: Cook the Chocolate Custard
Place the saucepan over medium heat. Cook the chocolate mixture, stirring constantly with a whisk, until it becomes hot and begins to thicken.
This usually takes approximately 6 to 10 minutes, depending on your saucepan and stove.
Once the mixture is hot, slowly whisk about one cup of the warm chocolate mixture into the beaten egg yolks. Add it gradually while whisking to warm the yolks without scrambling them.
Pour the tempered egg yolk mixture back into the saucepan.
Continue cooking over medium-low heat, whisking constantly, until the filling reaches a gentle bubble and becomes thick, smooth, and glossy. Let it bubble gently for about one minute while stirring to ensure the cornstarch is properly cooked.
Remove the saucepan from the heat.
Add the butter and vanilla extract. Whisk until the butter melts completely and the filling becomes silky.
The chocolate custard should be thick enough to coat the back of a spoon while remaining smooth and creamy.
Step 4: Fill the Pie Crust
Pour the warm chocolate filling into the prepared pie crust.
Use a spatula to spread it evenly, reaching all the way to the edges.
Set the pie aside while you prepare the meringue. Do not allow the filling to become completely cold before adding the topping, because the meringue adheres better to a warm filling.
Step 5: Prepare the Meringue
Place the egg whites in a clean, completely dry mixing bowl. Make sure there is no egg yolk mixed into the whites, as even a small amount of fat can prevent them from whipping properly.
Using an electric mixer, beat the egg whites on medium speed until they become foamy.
Add the cream of tartar and continue beating until soft peaks form.
Gradually add the sugar, approximately one tablespoon at a time, while beating continuously.
Once all the sugar has been incorporated, increase the mixer speed to medium-high and continue beating until the meringue is glossy and forms stiff peaks. Add the vanilla extract during the final moments of mixing.
When you lift the beaters, the meringue should hold its shape without collapsing.
Avoid overbeating, as excessively dry meringue can become difficult to spread evenly.
Step 6: Spread the Meringue Over the Pie
Spoon the meringue over the warm chocolate filling.
Spread it gently toward the edges of the crust, making sure the meringue touches the crust all the way around. This helps prevent the topping from shrinking away during baking.
Use the back of a spoon to create decorative peaks and swirls across the surface.
You can make small, delicate peaks or taller, dramatic ones, depending on the look you prefer.
Step 7: Bake Until Golden
Reduce the oven temperature to 350°F (175°C).
Place the pie in the oven and bake for approximately 12 to 18 minutes, or until the meringue develops a light golden-brown color.
Keep a close eye on it during the final minutes because meringue can brown quickly.
Remove the pie from the oven and place it on a wire rack.
Allow it to cool gradually at room temperature for about one hour before refrigerating.
Step 8: Chill and Serve
Refrigerate the pie for at least 3 to 4 hours before slicing so the chocolate filling can set properly.
For the cleanest slices, use a sharp knife dipped in warm water and wiped dry between cuts.
Serve each slice with its beautiful layers of flaky pastry, rich chocolate custard, and fluffy golden meringue.
For the most traditional presentation, serve the pie just as it is. Its simple, homemade flavor needs very little embellishment.
Cooking Methods
The Traditional Stovetop Custard Method
The heart of this recipe is the stovetop chocolate custard. Cooking the milk, cocoa, sugar, cornstarch, and egg yolks together creates a filling that is thicker and richer than ordinary chocolate pudding.
The key is patience. Keep the mixture moving with a whisk, especially around the corners and bottom of the saucepan. This prevents scorching and encourages an even, smooth texture.
Tempering the egg yolks is equally important. Adding a little warm custard to the yolks before returning them to the pan gently raises their temperature and helps prevent scrambled eggs from forming in the filling.
The Blind-Baking Method
Blind baking means baking the pie crust before adding the filling. Because the chocolate custard is already cooked on the stove, the crust needs to be baked separately to ensure it is crisp rather than soggy.
Pie weights help keep the crust from puffing up or collapsing while it bakes. Removing the weights for the final minutes allows the bottom to dry and develop a light golden color.
The Meringue Method
Meringue is made by whipping egg whites with sugar until they become thick, glossy, and stable.
Room-temperature egg whites generally whip more easily than cold ones. A clean bowl and gradual sugar addition also help create a stronger, smoother foam.
Spreading the meringue over warm filling and sealing it against the crust helps reduce shrinkage. Baking until the peaks turn golden adds a delicate toasted flavor.
Because this pie contains eggs, allow the meringue to cook thoroughly. For additional food safety, use pasteurized eggs or a suitable pasteurized egg-white product and follow its preparation guidance.
The History of Old-Fashioned Chocolate Pie
Chocolate pie belongs to a long tradition of homemade American custard pies. As cocoa powder, sugar, milk, and other baking ingredients became more accessible, home cooks developed affordable desserts that could be prepared with pantry staples.
Chocolate custard pies became especially familiar in Southern American cooking, where pies were often served after Sunday dinners, at church gatherings, during family reunions, and on holiday tables.
Many families passed their recipes from one generation to the next. Some cooks used cocoa powder and milk, while others added evaporated milk or extra egg yolks for a richer filling. Some preferred a plain chocolate top, while others crowned their pies with generous swirls of meringue.
There is no single recipe that represents every family’s tradition. Instead, old-fashioned chocolate pie has become a collection of beloved variations, each reflecting the tastes and memories of the people who make it.
For many families, the dessert represents more than chocolate. It recalls the warmth of a grandmother’s kitchen, the anticipation of a special meal, and the pleasure of sitting together long after the plates have been cleared.
That is part of what makes this pie so enduring. Its ingredients may be simple, but the memories attached to it can be extraordinary.
Formation and Texture: What Makes This Pie Special?
A successful old-fashioned chocolate pie depends on three distinct layers working together.
The Flaky Crust
The crust provides a buttery, slightly crisp contrast to the soft filling. Keeping the butter cold while preparing the dough helps create a tender pastry.
Blind baking gives the crust enough structure to hold the custard without becoming excessively soft.
The Silky Chocolate Layer
The chocolate filling should be rich, smooth, and firm enough to slice while remaining creamy on the tongue.
Cornstarch thickens the milk mixture, while the egg yolks contribute richness and a custard-like texture. Butter adds a smooth finish, and vanilla rounds out the cocoa flavor.
Cooking the filling sufficiently is important. If it is removed from the heat too early, it may remain loose after chilling. If it is cooked too aggressively without stirring, it can develop lumps or scorch.
The Fluffy Meringue
The meringue creates a light, airy topping that contrasts with the dense chocolate custard.
Its glossy peaks become lightly toasted in the oven, adding visual appeal and a subtle caramelized flavor.
The best result is a pie with a crisp crust, a smooth chocolate center, and a soft meringue topping that holds its shape.
Tips for the Best Old-Fashioned Chocolate Pie
Use good-quality cocoa powder. Since chocolate is the main flavor, choose unsweetened cocoa that you enjoy. Natural or Dutch-process cocoa can work, although the flavor and color will vary.
Whisk the dry ingredients first. Combining the cocoa powder, sugar, cornstarch, and salt before adding milk helps reduce lumps.
Temper the egg yolks carefully. Add the hot mixture slowly and whisk continuously for a smooth custard.
Do not rush the thickening process. The filling needs to reach a gentle boil and cook briefly for the cornstarch to work properly.
Prepare the meringue just before using it. Freshly whipped meringue is easier to spread and less likely to lose its structure while sitting.
Seal the meringue to the crust. This small step helps prevent the topping from pulling away as the pie cools.
Cool the pie gradually. Sudden temperature changes can encourage condensation and make the meringue weep.
Keep leftovers refrigerated. Because the pie contains milk and eggs, refrigerate it within two hours of preparation or serving. Store covered and enjoy within about three days for the best quality.
Variations to Try
Extra-Rich Chocolate Pie
Replace up to half a cup of the milk with heavy cream for a richer filling. The texture will be slightly more luxurious, so allow plenty of time for chilling.
Chocolate Pie Without Meringue
If you prefer a simpler dessert, omit the meringue and serve the chilled chocolate pie with a little whipped cream. Add the whipped cream shortly before serving.
Chocolate Pie with a Graham Cracker Crust
For a different texture, use a prepared graham cracker crust. Bake it according to its package directions before adding the filling.
Dark Chocolate Variation
For a deeper chocolate flavor, add 1 to 2 ounces of finely chopped semisweet chocolate to the hot custard after removing it from the heat. Stir until completely melted.
Holiday Chocolate Pie
For a festive variation, add a small pinch of cinnamon to the filling. The warm spice complements the chocolate without overpowering its traditional flavor.
What to Serve with Chocolate Pie
Old-fashioned chocolate pie is wonderful on its own, but it also pairs beautifully with simple accompaniments.
- Fresh strawberries or raspberries provide a bright, slightly tart contrast.
- A cup of black coffee balances the sweetness of the filling and meringue.
- Unsweetened tea makes a refreshing accompaniment after a large family meal.
- A small scoop of vanilla ice cream offers an extra-creamy dessert experience, although the pie is already rich enough to stand alone.
For holiday dinners, serve modest slices after the main meal. The chocolate custard is satisfying, and its delicate meringue makes every serving feel special.
Common Mistakes and How to Avoid Them
Lumpy chocolate filling: Whisk the dry ingredients thoroughly before adding milk, then stir continuously while cooking. If necessary, strain the finished custard before pouring it into the crust.
Runny filling: Make sure the custard reaches a gentle boil and cooks for approximately one minute while being stirred. Chill the finished pie for several hours before slicing.
Weeping meringue: Use clean equipment, add sugar gradually, seal the meringue against the crust, and avoid sudden temperature changes.
Meringue shrinking: Spread the meringue to the edges while the filling is still warm, and avoid overbeating the egg whites.
Soggy crust: Blind-bake the crust until it is dry and lightly golden before filling it.
Overly sweet dessert: Use a good-quality unsweetened cocoa powder and consider serving the pie with unsweetened coffee or tea rather than adding more sweet toppings.
Make-Ahead and Storage Instructions
You can prepare the pie crust a day in advance and keep it refrigerated before baking. The chocolate custard is best prepared shortly before assembling the pie so that the meringue can be added while the filling is warm.
For the best topping and texture, bake the completed pie on the day you plan to serve it.
Once cooled, refrigerate the pie in a covered container. The meringue may soften slightly during storage, but the chocolate filling will remain delicious.
Freezing is generally not recommended for a finished meringue-topped custard pie because thawing can change the texture of both the meringue and the filling.
Conclusion
Old-fashioned chocolate pie is a reminder that the most memorable desserts do not need elaborate decorations, expensive ingredients, or complicated techniques. Sometimes all you need is a homemade crust, a pot of rich chocolate custard, a few egg whites, and a little patience.
Every slice offers something comforting: the gentle crunch of pastry, the silky richness of chocolate, and the soft sweetness of golden meringue. It is a dessert that feels equally appropriate at a Sunday family dinner, a holiday celebration, or a quiet evening at home.
Perhaps the best part is the way it brings people together. Someone asks for a second slice, someone remembers how their grandmother used to make it, and suddenly the conversation turns toward old kitchens, family traditions, and meals that live in our memories long after the last bite.
Make this pie for the people you love, share it around your table, and do not be surprised if someone asks you to save the recipe.
For the Lovers of Old-Fashioned Desserts
If you love recipes that taste like childhood, this homemade chocolate pie deserves a place in your collection. It is perfect for anyone who appreciates traditional Southern-style desserts, homemade custards, flaky pastry, and fluffy meringue.
Chocolate lovers will appreciate the deep cocoa flavor, while those who enjoy nostalgic family recipes will love its simple, familiar character.
Serve it after Sunday dinner, bring it to a family gathering, or make it simply because you want to fill your kitchen with the smell of something wonderful.
Some recipes feed a family, and some recipes become part of a family’s story. This old-fashioned chocolate pie has all the makings of both.
Recipe at a Glance
- Preparation time: 35 minutes
- Chilling time for the dough: 30 minutes
- Baking time: Approximately 35 to 45 minutes, including the crust and meringue
- Additional chilling time: 3 to 4 hours
- Servings: 8 slices
- Difficulty: Intermediate
- Storage: Refrigerate covered and enjoy within approximately 3 days
The result is a timeless homemade dessert with a buttery crust, a smooth chocolate center, and a cloud of golden meringue—a little taste of tradition in every bite.