
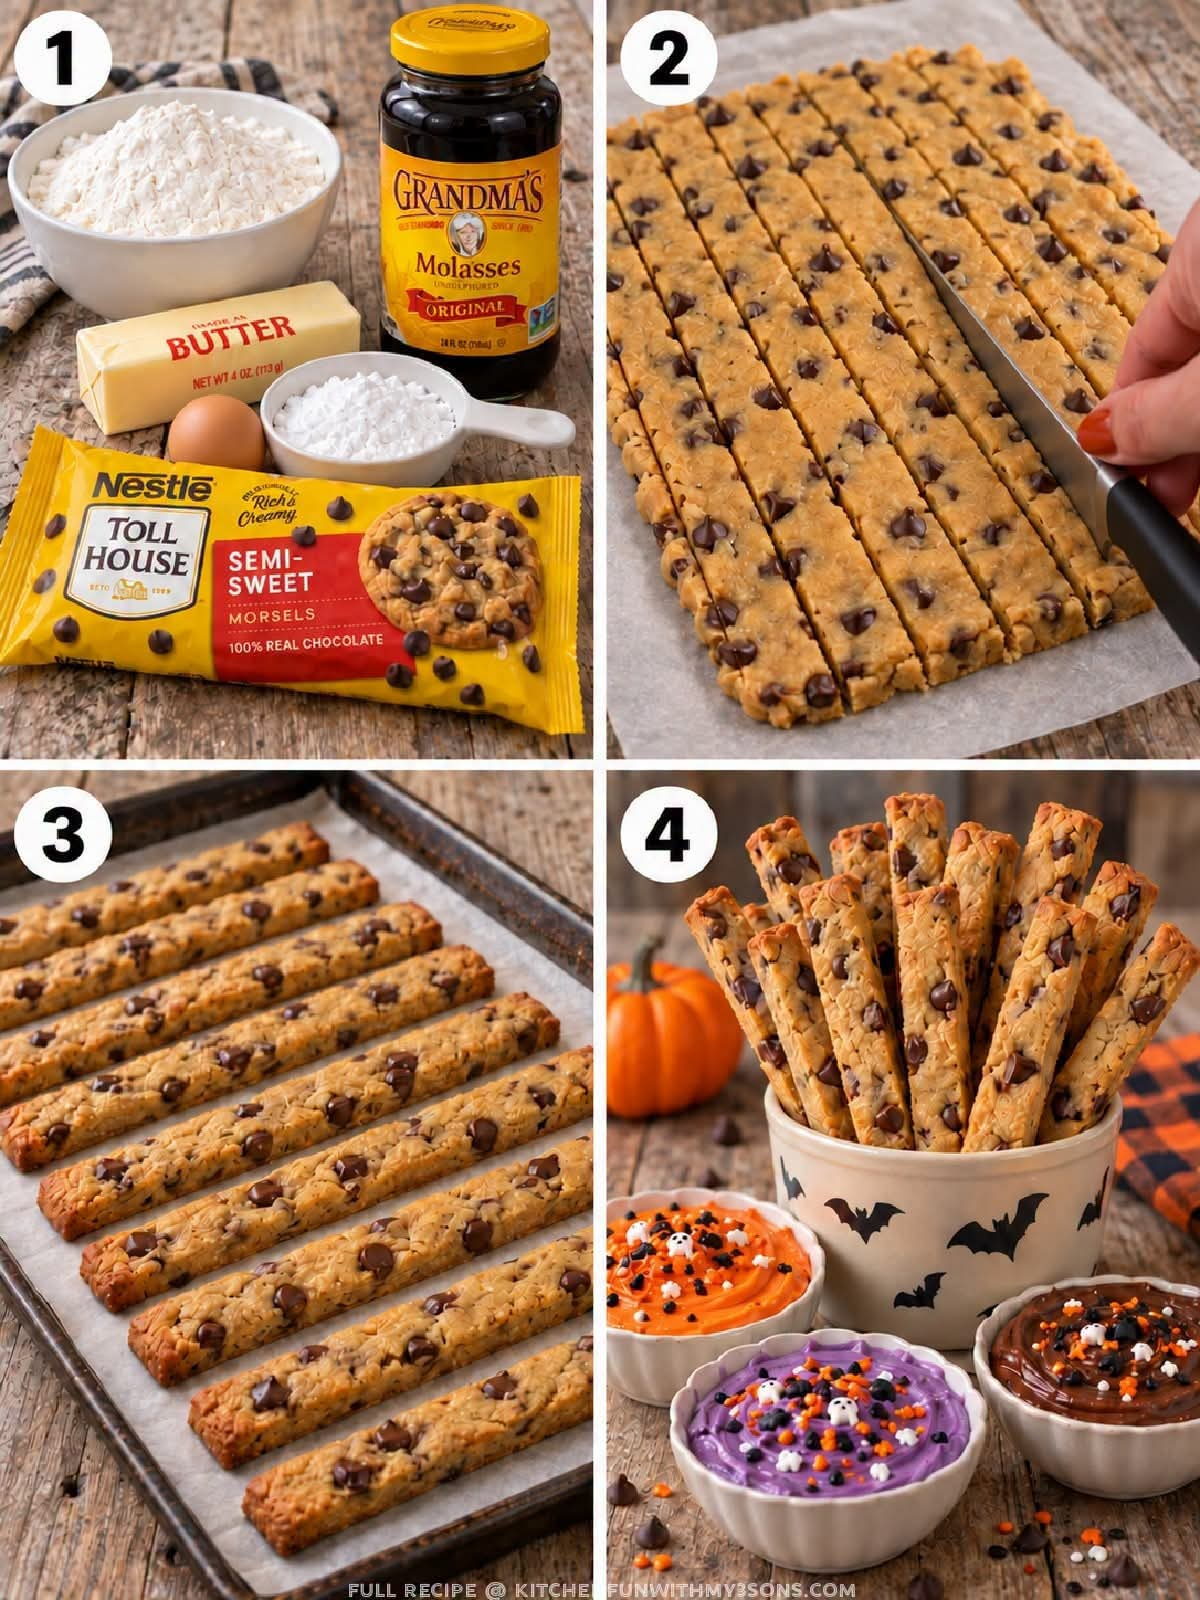
Halloween Cookie Fries with Spooky Frosting Dipping Sauce
Introduction
Halloween Cookie Fries are a fun, creative, and delicious treat that turns ordinary sugar cookie dough into crispy-edged, soft-centered cookie strips that look just like French fries. Served with colorful Halloween frosting for dipping, these sweet cookie fries are perfect for Halloween parties, family gatherings, school celebrations, and festive dessert tables.
This recipe combines the buttery sweetness of homemade sugar cookies with creamy, colorful frosting that makes every bite feel special. The cookie fries are easy to shape, simple to bake, and fun for children and adults to decorate together. You can serve them in small paper fry baskets with orange, purple, green, or black frosting on the side for a playful Halloween presentation.
Whether you are hosting a Halloween party or looking for a creative baking project to enjoy at home, these cookie fries are guaranteed to bring a little extra fun to your dessert table.
Ingredients
For the Cookie Fries
- 2 ½ cups all-purpose flour
- ½ teaspoon baking powder
- ¼ teaspoon salt
- ¾ cup unsalted butter, softened
- ¾ cup granulated sugar
- 1 large egg
- 2 teaspoons vanilla extract
- 1 tablespoon milk, if needed
- 1 tablespoon granulated sugar for sprinkling, optional
For the Halloween Frosting Dip
- 1 cup powdered sugar
- 2 tablespoons unsalted butter, softened
- 1–2 tablespoons milk or heavy cream
- ½ teaspoon vanilla extract
- Orange food coloring
- Purple food coloring
- Green food coloring, optional
- Halloween sprinkles, optional
You can also use ready-made vanilla frosting if you prefer a quicker preparation.
Instructions
Step 1: Prepare the Oven
Preheat your oven to 350°F (175°C). Line two baking sheets with parchment paper to prevent sticking and help the cookie fries bake evenly.
Step 2: Mix the Dry Ingredients
In a medium bowl, whisk together the flour, baking powder, and salt. Set aside while you prepare the cookie dough.
Mixing the dry ingredients separately helps distribute the baking powder and salt evenly throughout the dough.
Step 3: Cream the Butter and Sugar
In a large mixing bowl, beat the softened butter and granulated sugar for about 2–3 minutes until the mixture becomes light and creamy.
Add the egg and vanilla extract. Beat again until everything is well combined. Scrape down the sides of the bowl to ensure an even mixture.
Step 4: Make the Cookie Dough
Gradually add the dry ingredients to the butter mixture, mixing on low speed until a soft dough forms.
If the dough appears too crumbly, add milk one teaspoon at a time until it comes together. Avoid adding too much milk because the dough should remain firm enough to cut into strips.
Step 5: Chill the Dough
Shape the dough into a flat disc, wrap it, and refrigerate for approximately 30 minutes.
Chilling helps firm the butter, making the dough easier to roll and cut. It also helps the cookie fries hold their shape during baking.
Step 6: Shape the Cookie Fries
Lightly flour your work surface and roll the dough into a rectangle approximately ¼ inch thick.
Using a sharp knife or pizza cutter, cut the dough into long, narrow strips resembling French fries. Aim for strips about ½ inch wide and 3–4 inches long.
Transfer the strips carefully to the prepared baking sheets, leaving a little space between each one.
For a more realistic appearance, make some strips slightly shorter or narrower than others.
Step 7: Bake the Cookie Fries
Bake for 8–12 minutes, depending on their thickness, until the edges are lightly golden and the centers are set.
For softer cookie fries, remove them when the edges are just beginning to color. For slightly crispier fries, allow them to bake a little longer while watching carefully to prevent overbrowning.
Let the cookies rest on the baking sheet for about 5 minutes before transferring them to a wire rack to cool completely.
Step 8: Prepare the Halloween Frosting
In a bowl, beat the softened butter until smooth. Add the powdered sugar, vanilla extract, and one tablespoon of milk.
Mix until creamy. Add a little more milk if necessary to achieve a smooth, thick consistency suitable for dipping.
Divide the frosting into separate small bowls. Color one bowl orange, another purple, and a third green if desired.
Keep the frosting thick enough to cling to the cookie fries without becoming runny.
Step 9: Arrange the Dipping Sauces
Transfer each frosting color into a small serving bowl. Add Halloween sprinkles to the tops if desired.
Arrange the cooled cookie fries in small baskets, paper cups, or on a large serving platter. Place the colorful frosting bowls beside them for dipping.
Step 10: Serve and Enjoy
Serve the cookie fries at room temperature with the Halloween frosting on the side. Guests can dip each cookie into their favorite color and decorate it with sprinkles.
For the best texture, allow the cookies to cool completely before serving. Warm cookies may cause the frosting to soften too much.
Methods for Perfect Cookie Fries
1. The classic sugar cookie method
This method creates buttery, tender cookie fries with a slightly crisp exterior. Chilling the dough before cutting helps the strips keep their shape.
2. The extra-crispy method
Roll the dough slightly thinner and bake the strips until the edges become lightly golden. Keep a close eye on them because thin cookies can brown quickly.
3. The soft-centered method
Keep the strips approximately ¼ inch thick and remove them from the oven as soon as the centers are set. They will continue to firm up as they cool.
4. The easy party method
Use refrigerated sugar cookie dough to save preparation time. Roll it out, cut it into strips, bake according to the dough package directions, and prepare the Halloween frosting separately.
5. The colorful decorating method
Offer orange, purple, green, and white frosting in separate bowls. Add themed sprinkles, candy eyes, or small Halloween decorations around the serving platter for a festive presentation.
A Brief History of Cookie Fries
Cookie fries are a modern dessert idea inspired by the familiar appearance of French fries. Instead of potatoes, these playful treats use sweet cookie dough cut into long strips and baked until tender or lightly crisp.
The concept belongs to the broader tradition of transforming familiar foods into whimsical desserts. Bakers and dessert shops have long experimented with unexpected shapes, colorful toppings, and interactive ways to serve sweets.
Halloween is especially suited to this style of baking because the holiday encourages imaginative decorations, themed colors, and treats that are as entertaining to look at as they are to eat.
Although cookie fries are not a traditional historic Halloween dessert, they have become a creative option for themed parties, dessert platters, and family baking activities.
Formation and Presentation
The way you shape and serve your cookie fries can make this dessert even more appealing.
- French fry basket presentation: Place the cookie strips in small food-safe paper baskets or cups to recreate the appearance of a classic serving of fries.
- Halloween color theme: Pair orange frosting with purple and green dips for a bright seasonal display.
- Monster cookie fries: Add candy eyes to a few cookies after baking, using a small amount of frosting to help them stick.
- Witch-inspired presentation: Serve the cookie fries beside green frosting and arrange them on a dark platter.
- Party platter: Group the cookie fries in the center of a large plate and surround them with bowls of different frosting colors.
For a neat presentation, let the cookies cool completely and use small bowls that are easy for guests to reach.
Tips for the Best Results
- Use softened butter rather than melted butter for a smooth, stable dough.
- Chill the dough if it becomes sticky or difficult to cut.
- Cut the strips into similar thicknesses so they bake evenly.
- Do not overbake if you prefer tender cookie fries.
- Allow the cookies to cool completely before adding decorations.
- Add milk to the frosting gradually to prevent it from becoming too thin.
- Store the frosting separately if you want to keep the cookies crisp.
- If preparing ahead, bake the cookie fries a day in advance and decorate or serve them just before the party.
Storage Instructions
At room temperature: Store plain cookie fries in an airtight container for up to 4–5 days, provided they are completely cool and kept in a cool, dry place.
Frosting: Store leftover buttercream-style frosting in an airtight container in the refrigerator for up to 5 days. Bring it toward room temperature and stir or beat until smooth before serving.
Freezing: Freeze the baked, undecorated cookie fries in a freezer-safe container for up to 2 months. Thaw at room temperature before serving.
For the best presentation, keep the cookies and frosting separate until serving time.
Variations for Every Halloween Party
Chocolate Cookie Fries
Replace ¼ cup of flour with ¼ cup unsweetened cocoa powder for chocolate-flavored cookie fries. Pair them with vanilla or orange frosting.
Cinnamon Sugar Cookie Fries
Add ½ teaspoon ground cinnamon to the dough. Sprinkle the strips with a little cinnamon sugar before baking for a warm, spiced flavor.
Almond Vanilla Cookie Fries
Replace half the vanilla extract with almond extract for a subtle almond flavor. Use a light hand because almond extract can be strong.
Chocolate-Dipped Cookie Fries
Dip one end of each cooled cookie strip into melted chocolate and let it set. Serve with orange or purple frosting for an extra-special Halloween treat.
Mini Cookie Fries
Cut the dough into shorter strips to make bite-sized cookies. These are perfect for children’s parties, dessert buffets, and sharing plates.
Conclusion
Halloween Cookie Fries with Frosting Dipping Sauce are an easy, playful, and delicious way to celebrate the spooky season. With their buttery sugar cookie flavor, fun French-fry shape, and colorful frosting dips, they turn simple ingredients into a memorable party dessert.
The best part is how customizable they are. You can experiment with different cookie flavors, frosting colors, sprinkles, and serving styles to create a dessert that matches your Halloween theme.
Serve them at a party, prepare them with your family, or package them in festive treat boxes for friends and neighbors. These cookie fries bring together creativity, sweetness, and the simple joy of homemade baking.
For the Lovers of Fun Halloween Desserts
If you love sugar cookies, colorful frosting, and desserts that make everyone smile, this recipe is worth adding to your Halloween baking collection. Children can help cut the dough with supervision, choose their favorite frosting colors, and decorate the serving platter.
For an especially fun dessert table, pair the cookie fries with Halloween cupcakes, chocolate-dipped pretzels, caramel apples, and themed sugar cookies.
These sweet little fries are proof that a simple cookie recipe can become something extraordinary with a little imagination.
Final serving idea: Arrange the cookie fries in a basket, place three bowls of orange, purple, and green frosting alongside them, and let everyone dip, decorate, and enjoy.