
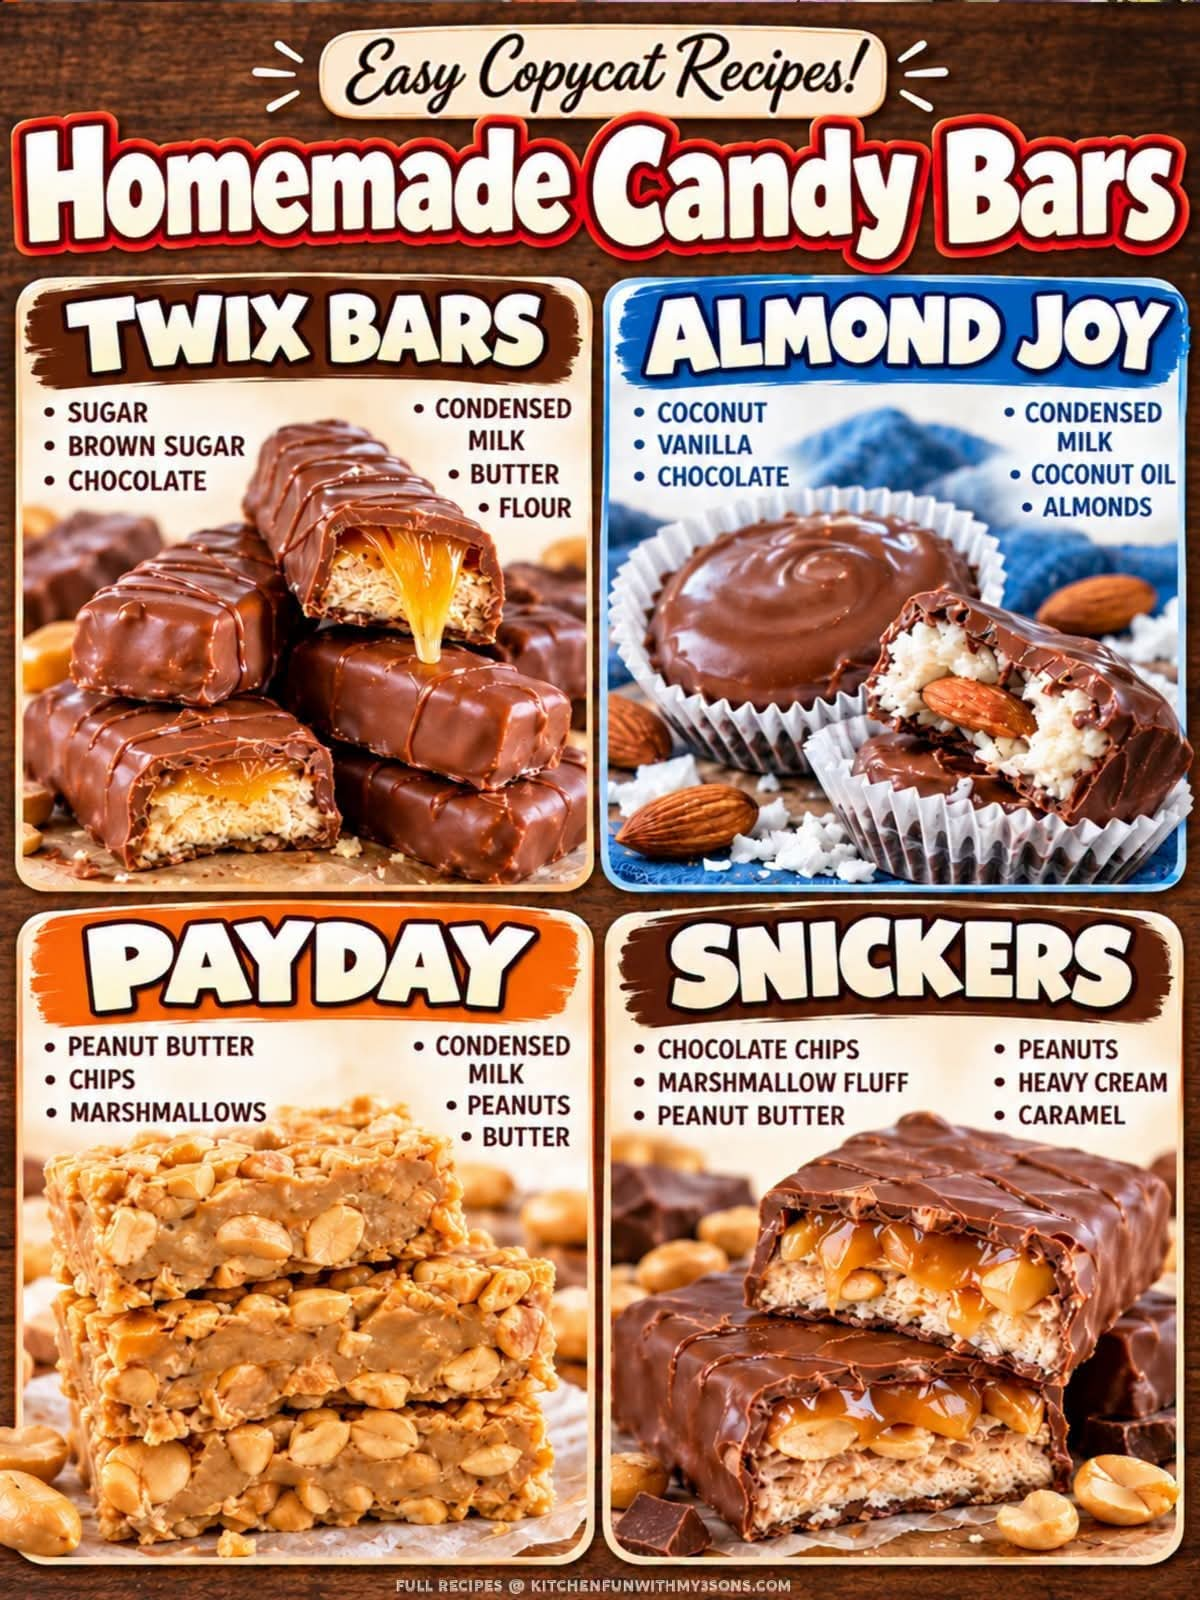
Homemade Candy Bars: Easy, Delicious, No-Bake Chocolate Treats
Introduction
There is something truly special about making your favorite candy bars right in your own kitchen. Homemade candy bars are rich, sweet, creamy, crunchy, and covered in a delicious layer of chocolate. The best part is that you do not need expensive equipment, complicated techniques, or a long list of ingredients to create a treat that tastes like it came straight from a candy shop.
Whether you love chocolate-covered peanut butter bars, caramel-filled chocolate treats, crunchy wafer bars, or coconut-filled candy, making candy at home allows you to experiment with your favorite flavors and textures. You can prepare them for holidays, birthdays, family gatherings, bake sales, or simply keep a batch in the refrigerator whenever you want something sweet.
This homemade candy bar recipe is inspired by popular chocolate bars and uses simple ingredients to create a delicious combination of creamy peanut butter, crunchy graham crackers, and smooth melted chocolate. It is an easy, no-bake recipe that both beginners and experienced home cooks can enjoy.
Ingredients
For the creamy candy filling
- 1 cup creamy peanut butter
- 1/2 cup unsalted butter, softened
- 2 cups powdered sugar
- 1 cup finely crushed graham crackers
- 1 teaspoon vanilla extract
- A small pinch of salt, optional
For the chocolate coating
- 2 cups milk chocolate chips
- 1 tablespoon coconut oil or vegetable shortening, optional
- 1/2 cup caramel candies, optional, for a caramel variation
Optional additions
- 1/2 cup chopped roasted peanuts
- 1/2 cup shredded coconut
- 1/2 cup crushed crispy rice cereal
- A little flaky sea salt for finishing
Note: This recipe makes peanut butter-style candy bars. You can adapt the filling and coating to create several different homemade candy bar variations.
Equipment Needed
- A medium mixing bowl
- An electric hand mixer or sturdy wooden spoon
- A square baking pan, approximately 8 × 8 inches
- Parchment paper
- A microwave-safe bowl or double boiler
- A spatula
- A sharp knife
- A refrigerator
Instructions
Step 1: Prepare the baking pan
Line an 8 × 8-inch square baking pan with parchment paper, leaving some paper hanging over the sides. This makes it much easier to remove the candy filling once it has chilled.
Lightly grease the parchment paper if necessary to prevent sticking.
Step 2: Make the peanut butter filling
Place the softened butter and creamy peanut butter in a mixing bowl. Beat them together until the mixture becomes smooth, creamy, and well combined.
Add the vanilla extract and a small pinch of salt, if desired. Mix again to distribute the flavors evenly.
Gradually add the powdered sugar, stirring after each addition. Add the finely crushed graham crackers and mix until the ingredients form a thick, slightly crumbly dough that holds together when pressed.
If the mixture feels too dry, add a small spoonful of peanut butter. If it is too soft, add a little more powdered sugar or crushed graham crackers.
Step 3: Shape the candy base
Transfer the peanut butter mixture into the prepared baking pan.
Press it firmly and evenly into the bottom of the pan using a spatula or the back of a spoon. Pay attention to the corners so that the filling has a uniform thickness.
For a more authentic candy bar appearance, smooth the top carefully.
Place the pan in the refrigerator for approximately 30–45 minutes, or until the filling becomes firm enough to cut.
Step 4: Cut into candy bars
Lift the chilled filling out of the pan using the parchment paper.
Place it on a cutting board and cut it into rectangular bars. You can make them small for bite-sized treats or larger for traditional candy bar portions.
Arrange the bars on a parchment-lined tray and return them to the refrigerator for another 15–20 minutes. Chilled bars are easier to dip into melted chocolate without falling apart.
Step 5: Melt the chocolate
Place the chocolate chips in a microwave-safe bowl.
Microwave in 20–30-second intervals, stirring thoroughly between each interval until the chocolate is smooth and completely melted.
If desired, stir in the coconut oil or vegetable shortening. This helps create a smoother coating that is easier to dip.
Alternatively, melt the chocolate in a heatproof bowl set over a saucepan of gently simmering water. Make sure no water enters the chocolate, as this can cause it to seize.
Step 6: Coat the candy bars
Remove the chilled bars from the refrigerator.
Using a fork, carefully dip each bar into the melted chocolate, turning it to cover all sides. Lift it out and allow the excess chocolate to drip back into the bowl.
Place each coated bar on the parchment-lined tray.
For a thicker chocolate shell, allow the first coating to set briefly and dip the bars a second time.
Step 7: Decorate the bars
Before the chocolate hardens, sprinkle the bars with chopped roasted peanuts, shredded coconut, or a little flaky sea salt.
You can also drizzle additional melted chocolate over the top to create a decorative finish.
For a caramel version, add a thin layer of prepared caramel to the filling or drizzle caramel over the finished chocolate coating. Allow the caramel to cool and set before serving.
Step 8: Chill until set
Place the finished candy bars in the refrigerator for approximately 30–45 minutes, or until the chocolate coating has completely hardened.
Once set, transfer the candy bars to an airtight container.
Allow them to sit at room temperature for a few minutes before serving if you prefer a softer filling.
Cooking Methods and Preparation Techniques
1. The no-bake method
This is the easiest way to prepare homemade candy bars. The filling is mixed, shaped, chilled, and coated in chocolate without using an oven.
The refrigerator does most of the work by firming the filling and setting the chocolate. It is an excellent method for beginners and anyone who wants homemade sweets without complicated baking steps.
2. The double-boiler chocolate method
A double boiler melts chocolate gently using indirect heat. This method is useful when working with larger quantities of chocolate because it helps prevent scorching.
Keep the water at a gentle simmer and ensure the bottom of the bowl does not touch the water.
3. The microwave method
Microwaving is quick and convenient. However, chocolate can burn easily if heated for too long.
Use short intervals and stir frequently. The remaining heat will help melt small pieces of chocolate as you stir.
4. The layered candy method
For candy bars with several layers, prepare the base first, add a layer of caramel or another filling, chill until firm, and then finish with chocolate.
This technique creates a more elaborate candy bar with contrasting textures and flavors.
Homemade Candy Bar Variations
1. Peanut Butter Chocolate Bars
Use the main recipe as written. The peanut butter filling creates a creamy, rich center, while the chocolate coating provides a satisfying snap. Add chopped peanuts for extra crunch.

2. Chocolate Caramel Bars
Add a layer of thick caramel between the filling and chocolate coating. Chill the caramel until firm enough to handle before dipping. A sprinkle of sea salt creates a delicious sweet-and-salty flavor.

3. Chocolate Coconut Bars
Replace the graham cracker filling with a mixture of shredded coconut and sweetened condensed milk. Shape into bars, chill thoroughly, and dip in melted chocolate for a coconut-centered treat.

4. Crispy Chocolate Bars
Fold crispy rice cereal into a chocolate or peanut butter mixture before shaping. The cereal adds a light crunch that contrasts beautifully with the smooth chocolate shell.
The History of Homemade Candy Bars
Chocolate and confectionery traditions have developed over centuries. Early chocolate beverages were consumed in Mesoamerica long before solid chocolate bars became popular. During the nineteenth century, improvements in chocolate processing helped make chocolate more accessible and encouraged the development of solid chocolate confections.
As candy manufacturing grew, chocolatiers began combining chocolate with ingredients such as peanuts, caramel, nougat, wafers, coconut, and fruit. These combinations created many of the familiar candy bar styles enjoyed today.
Homemade candy making developed alongside commercial confectionery. Families prepared fudge, toffee, chocolate clusters, peanut butter sweets, and other treats in their own kitchens, especially for holidays and celebrations.
Today, homemade candy bars offer a way to recreate familiar flavors while choosing the ingredients, sweetness, fillings, and sizes. Although this particular peanut butter recipe is a modern home-kitchen version rather than a historical formula, it follows the same tradition of combining simple ingredients into something special.
Formation: How Homemade Candy Bars Come Together
The secret to a successful candy bar is understanding how each layer contributes to the finished texture.
The filling: Peanut butter and butter create a rich base, while powdered sugar gives the mixture structure and sweetness. Crushed graham crackers add body and a subtle crunch.
The chilling stage: Cooling the filling allows the butter to firm up, making the mixture easier to cut and dip.
The chocolate shell: Melted chocolate forms the outside coating. Once chilled, it creates a firm layer around the soft filling.
The finishing touches: Nuts, coconut, caramel, and sea salt can add extra flavor and texture, allowing you to customize every batch.
For the best results, keep the bars cold before dipping and avoid introducing water into the melted chocolate. If the chocolate begins to thicken during dipping, warm it gently and stir until smooth again.
Tips for Perfect Homemade Candy Bars
- Use creamy peanut butter for the smoothest filling. Natural peanut butter that separates heavily may make the mixture softer or oilier.
- Sift the powdered sugar if it contains lumps.
- Crush the graham crackers finely so the filling holds together evenly.
- Chill the bars thoroughly before dipping them into chocolate.
- Use a fork or dipping tool to allow excess chocolate to drain away.
- Work in small batches so the remaining bars stay cold.
- Let the chocolate set completely before stacking the bars.
- For neat cuts, use a sharp knife and wipe the blade between slices when preparing layered candy.
- If you have peanut allergies in your household, use an appropriate alternative such as sunflower seed butter and check all ingredient labels for cross-contact warnings.
Storage and Shelf Life
Store the finished candy bars in an airtight container in the refrigerator for approximately 1–2 weeks for the best quality.
Separate layers with parchment paper to prevent sticking.
For longer storage, freeze the bars in a freezer-safe container for up to 2–3 months. Thaw them in the refrigerator before serving to reduce condensation on the chocolate coating.
Because homemade candy bars do not contain the same preservatives as many commercial products, keep them refrigerated, especially in warm weather. Discard any bars that show signs of spoilage.
Serving Suggestions
Homemade candy bars are perfect for dessert platters, holiday cookie boxes, birthday celebrations, potlucks, and edible gifts.
Serve them alongside coffee, tea, cold milk, or hot chocolate. You can also chop them into small pieces and use them as toppings for ice cream, brownies, or other desserts.
For a beautiful gift, arrange the fully set bars in paper candy cups inside a decorative box. Keep them cool during storage and transport.
Frequently Asked Questions
Can I make homemade candy bars without baking?
Yes. This peanut butter version requires no oven. The filling is mixed, chilled, cut, and dipped in chocolate.
Can I use dark chocolate instead of milk chocolate?
Absolutely. Dark chocolate gives the bars a richer, less sweet flavor. White chocolate can also be used, although it requires careful melting.
Why is my filling too soft?
The butter may be too warm, or the mixture may need additional powdered sugar or graham cracker crumbs. Refrigerate it before shaping and dipping.
Why is my chocolate coating too thick?
The chocolate may have cooled too much. Warm it gently and stir. A small amount of coconut oil or vegetable shortening can help thin the coating.
Can I make these bars ahead of time?
Yes. They are ideal for preparing ahead because they need time to chill and set. Make them a day or two before a celebration and store them in the refrigerator.
Can I make smaller candy bites instead?
Yes. Roll the filling into small balls or cut it into bite-sized squares before dipping. Adjust the chilling time as needed.
Conclusion
Homemade candy bars prove that delicious treats do not need to be complicated. With a handful of everyday ingredients, a little preparation, and some melted chocolate, you can create candy that looks beautiful and tastes wonderful.
The creamy peanut butter center, the sweet graham cracker texture, and the smooth chocolate coating make this recipe a fantastic starting point for experimenting with homemade confectionery. Once you master the basic method, you can create caramel-filled bars, coconut treats, crispy chocolate bites, and many other variations.
Prepare a batch for your family, share a few with friends, or package them as thoughtful homemade gifts. These simple candy bars may quickly become one of your favorite no-bake treats.
For Candy Bar Lovers
If you love chocolate, caramel, peanut butter, coconut, and crunchy candy fillings, this recipe is for you. The best thing about making candy at home is being able to create your favorite combinations and adjust every batch to your taste.
Try the peanut butter version first, then experiment with caramel, roasted nuts, crispy cereal, or coconut. You may discover a homemade candy bar that becomes a regular request at every family gathering.
Recipe tip: For the best combination of flavor and texture, use good-quality chocolate, chill the filling until firm, and let the finished bars set completely before taking your first bite.