
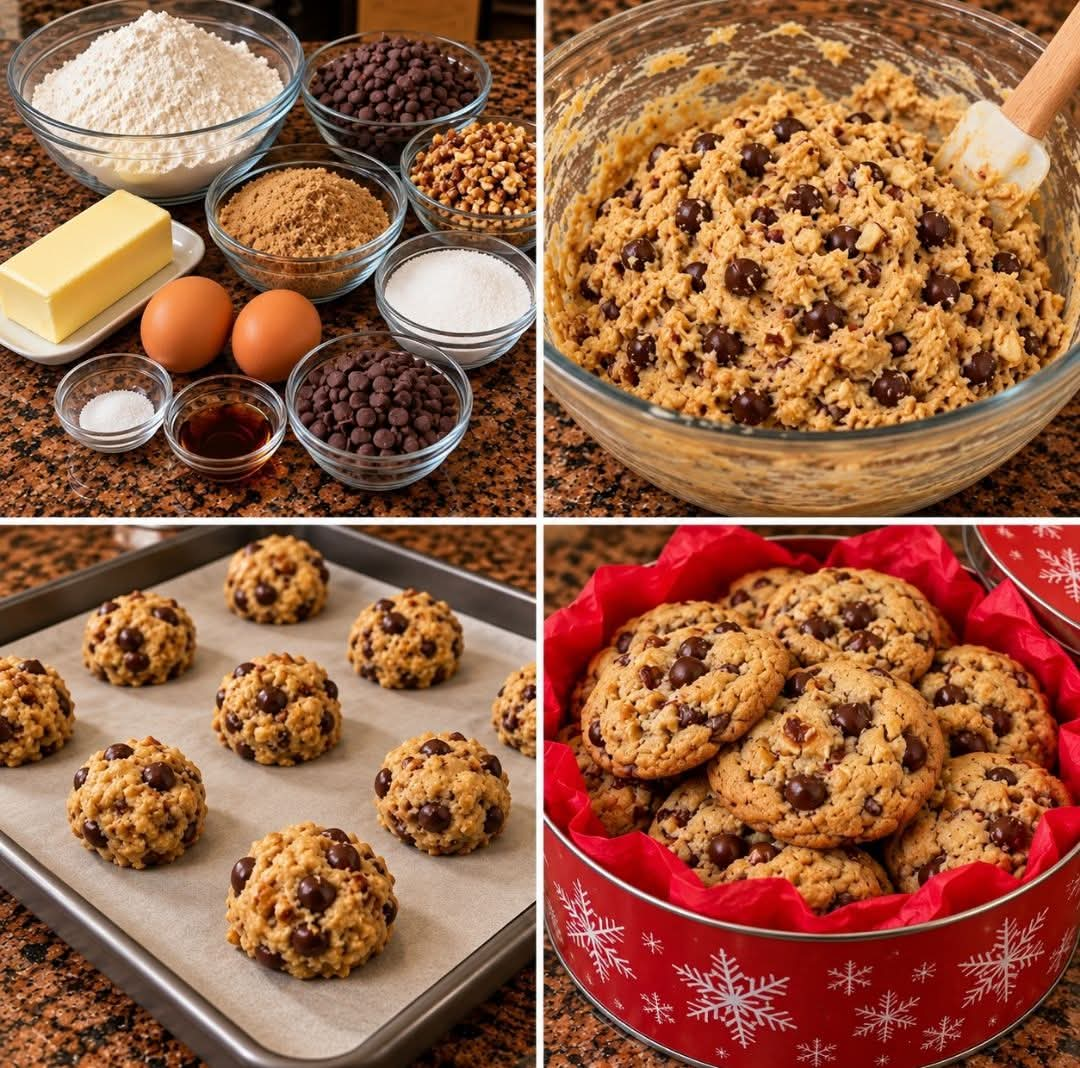
Holiday Favorite Cookie Bars: A Delicious Treat Everyone Will Love


Introduction
Some holiday desserts are so delicious that they become a family tradition year after year. These homemade cookie bars are exactly that kind of treat. With their buttery flavor, soft and chewy centers, lightly golden edges, and irresistible sweetness, they are perfect for holiday gatherings, cookie exchanges, potlucks, bake sales, and homemade gifts.
When you need to bake a large quantity of treats for family and friends, cookie bars are an excellent choice. Instead of shaping individual cookies one at a time, you simply prepare the dough, spread it into a baking pan, bake, and cut it into squares once cooled.
These cookie bars are especially convenient during the busy holiday season because they can be made ahead and frozen. When you’re ready to serve them, simply thaw them for about 10 minutes before enjoying. Whether you prepare one pan or several dozen batches, these bars are sure to become a favorite among everyone who tastes them.
Ingredients
Preparation time: 15 minutes · Baking time: 25–32 minutes · Cooling time: 1 hour · Yield: 24 bars
This is a classic buttery cookie-bar version inspired by the holiday baking story.

For the cookie dough
- 1 cup (225 g) unsalted butter, softened
- 1 cup packed brown sugar
- ½ cup granulated sugar
- 2 large eggs
- 2 teaspoons vanilla extract
- 2¾ cups all-purpose flour
- 1 teaspoon baking soda
- ½ teaspoon baking powder
- ½ teaspoon salt

Optional additions
- 1½ cups chocolate chips
- ½ cup chopped pecans or walnuts
- 2 tablespoons extra chocolate chips for the top
- A small pinch of flaky salt, if desired
Equipment needed
- One 9 × 13-inch baking pan
- Parchment paper
- Two mixing bowls
- Electric mixer or sturdy wooden spoon
- Rubber spatula
- Measuring cups and spoons
- Sharp knife for cutting the cooled bars
Instructions
Step 1: Prepare the oven and pan
Preheat your oven to 350°F (175°C). Line a 9 × 13-inch baking pan with parchment paper, leaving a little overhang on the sides. This makes it much easier to lift the baked cookie slab out of the pan after cooling.
Lightly grease the parchment paper if necessary.
Step 2: Cream the butter and sugars
Place the softened butter, brown sugar, and granulated sugar in a large mixing bowl.
Beat for about 2–3 minutes until the mixture looks creamy and smooth. Scrape down the sides of the bowl to ensure everything is evenly combined.
The brown sugar gives the bars a deeper caramel flavor and helps keep their centers soft, while the granulated sugar contributes to their lightly crisp edges.
Step 3: Add the eggs and vanilla
Add the eggs one at a time, mixing after each addition. Stir in the vanilla extract until the mixture is smooth.
Avoid using cold butter straight from the refrigerator because it will be difficult to cream properly. Room-temperature ingredients help produce a more uniform dough.
Step 4: Combine the dry ingredients
In a separate bowl, whisk together the flour, baking soda, baking powder, and salt.
Gradually add the dry ingredients to the butter mixture. Mix on low speed or stir by hand until no large pockets of flour remain.
Do not overmix the dough. Excessive mixing can make the finished bars tougher than desired.
Step 5: Add the chocolate chips and nuts
Fold in the chocolate chips and chopped nuts, if using.
Make sure the additions are distributed throughout the dough so that every square receives plenty of delicious chocolate and crunchy texture.
For an attractive finish, reserve a small handful of chocolate chips to scatter over the top.
Step 6: Spread the dough into the pan
Transfer the dough to the prepared baking pan. Use a spatula or clean hands to press it into an even layer, reaching all four corners.
Sprinkle the reserved chocolate chips over the surface and press them gently into the dough.
Try to keep the thickness consistent throughout the pan. An even layer helps the bars bake uniformly.
Step 7: Bake until golden
Place the pan in the preheated oven and bake for approximately 25–32 minutes.
The edges should be lightly golden, and the center should look set but remain slightly soft. A toothpick inserted into the middle should come out without wet raw dough, although a few moist crumbs are perfectly fine.
Avoid overbaking. Cookie bars continue to firm up as they cool, and removing them at the right moment helps preserve their chewy texture.
Step 8: Cool completely
Remove the pan from the oven and place it on a wire rack.
Allow the cookie slab to cool in the pan for at least 45–60 minutes before cutting. If you cut the bars while they are still hot, they may crumble or lose their shape.
Once cooled, lift the slab out using the parchment paper and transfer it to a cutting board.
Step 9: Cut and serve
Use a sharp knife to cut the slab into 24 squares or rectangles. For cleaner edges, wipe the knife between cuts.
Arrange the bars on a serving platter, package them in holiday gift boxes, or store them for later.
These bars are delicious at room temperature and pair wonderfully with coffee, tea, hot chocolate, or a cold glass of milk.
Methods for Perfect Cookie Bars

1. The one-pan baking method
Spreading the dough into one pan saves time and eliminates the need to shape dozens of individual cookies. It is especially useful when preparing large quantities for holiday celebrations.

2. The chewy-center method
Watch the center closely during the final minutes of baking. Remove the bars when the edges are golden and the middle is just set. Allowing them to cool fully gives them the ideal sliceable texture.

3. The make-ahead freezing method
Cool the bars completely before freezing. Separate layers with parchment paper and store them in an airtight, freezer-safe container. Thaw individual portions for about 10 minutes, adjusting the time if the bars are especially thick or your room is cool.
The History of Cookie Bars
Cookie bars are a practical variation of traditional drop cookies. Home bakers have long looked for ways to prepare familiar desserts more efficiently, especially when baking for large families, school events, community gatherings, and festive celebrations.
Traditional cookies require individual portions to be scooped, spaced, and baked in batches. Bar cookies simplify this process by allowing the dough to bake together in a single pan before being cut into portions.
Over time, countless versions have become popular, including chocolate chip bars, blondies, oatmeal bars, peanut butter bars, and layered dessert bars.
Their popularity comes from their convenience, adaptable ingredients, and ability to feed a crowd without complicated preparation. Although this particular recipe is a modern classic-style version, its simple method reflects the practical spirit of home baking that has made cookie bars a favorite for generations.
Formation and Texture: What Makes These Bars Special?
The secret to excellent cookie bars lies in the balance between the ingredients and the baking time.
- Butter creates richness and contributes to a tender crumb.
- Brown sugar adds caramel notes and helps retain moisture.
- Granulated sugar encourages browning and gives the edges a pleasant bite.
- Eggs bind the ingredients and provide structure.
- Flour creates the body of the bars.
- Baking soda and baking powder help produce a lighter texture.
- Vanilla extract enhances the buttery, sweet flavor.
- Chocolate chips and nuts provide contrasting flavors and textures.
When baked correctly, the outside develops a light golden color while the center remains tender and chewy. Cooling is equally important because the butter and sugars firm up as the bars reach room temperature.
The result is a dessert that can be sliced neatly, stacked for serving, and stored for future occasions.
Variations to Try

Classic Chocolate Chip Bars
Use semisweet chocolate chips for a familiar, crowd-pleasing version. A mixture of milk and dark chocolate creates a more complex flavor.

Chocolate Pecan Bars
Add chopped pecans for a nutty crunch that works beautifully with the buttery dough.

Festive Holiday Bars
Replace some of the chocolate chips with red and green candy-coated chocolates for a colorful holiday dessert.

Salted Caramel Bars
Swirl a modest amount of thick caramel into the dough before baking and finish with a light sprinkle of flaky salt.
How to Freeze and Store Cookie Bars
One of the best features of this recipe is that the bars can be prepared ahead of time.
To store at room temperature: Place completely cooled bars in an airtight container. For the best quality, enjoy them within 3–4 days.
To refrigerate: Store them in an airtight container for up to about one week. Bring them to room temperature before serving for a softer texture.
To freeze: Wrap individual bars or separate layers with parchment paper, then place them in a freezer-safe airtight container or bag. Freeze for up to 2–3 months for best quality.
To serve from frozen: Remove the number of bars you need and let them thaw for about 10 minutes, checking that the centers have softened sufficiently. Thick bars may need longer.
For holiday gifting, freeze the bars before placing them in decorative packaging. Add the ribbons, labels, and gift decorations after thawing so everything stays neat and dry.
Tips for Baking a Large Holiday Batch
If you are preparing several pans for a holiday celebration, a little organization makes the process much easier.
- Measure all the dry ingredients before beginning.
- Use the same pan size for each batch so the bars bake consistently.
- Line every pan with parchment paper for easy removal.
- Keep a written record of baking times for your particular oven.
- Cool each batch completely before stacking or wrapping.
- Label frozen containers with the recipe name and date.
- Cut the bars into uniform pieces for attractive serving platters and gift boxes.
If you want to prepare many batches, bake them in manageable quantities rather than mixing an enormous amount of dough at once. This helps maintain consistent mixing, texture, and baking results.
Serving Ideas
These cookie bars are versatile enough for almost any occasion.
- Serve them on a dessert platter alongside brownies and holiday cookies.
- Package a few bars in small gift boxes for neighbors and coworkers.
- Add them to a holiday dessert buffet.
- Serve slightly warmed bars with vanilla ice cream.
- Pair them with coffee or hot chocolate during a cozy winter evening.
- Cut them into smaller squares for bake sales and large gatherings.
For a more elegant presentation, stack the bars on a white serving plate and add a few extra chocolate chips on top before baking.
Conclusion
These holiday cookie bars are the kind of simple, satisfying dessert that makes baking for a crowd enjoyable. They combine buttery sweetness, a tender center, golden edges, and plenty of opportunities to customize the flavor.
Their greatest advantage is convenience: one pan produces multiple servings, the recipe is easy to adapt, and the finished bars can be frozen ahead of time. When the holidays become busy, having a homemade dessert ready to thaw and serve can make entertaining much easier.
Whether you bake them for your family, bring them to a party, or prepare several batches for holiday gifts, these cookie bars deserve a place in your favorite baking collection.
For Cookie Lovers
If you love easy homemade desserts, these bars are worth adding to your holiday baking list. They are simple enough for beginner bakers, versatile enough for experienced cooks, and practical for anyone who needs to prepare treats in advance.
The best part is that you do not have to wait for a special occasion to enjoy them. Make a batch for the holidays, freeze a few for later, and keep some ready for unexpected guests.
A little baking tip for your next batch: Let the bars cool completely before slicing, and freeze them in individual portions so you can enjoy a homemade treat whenever the craving strikes.
Recipe note: Your original post does not identify the exact type of cookie bar. This recipe uses a classic chocolate-chip cookie-bar base, so the ingredients may differ from the original recipe mentioned in your post.