
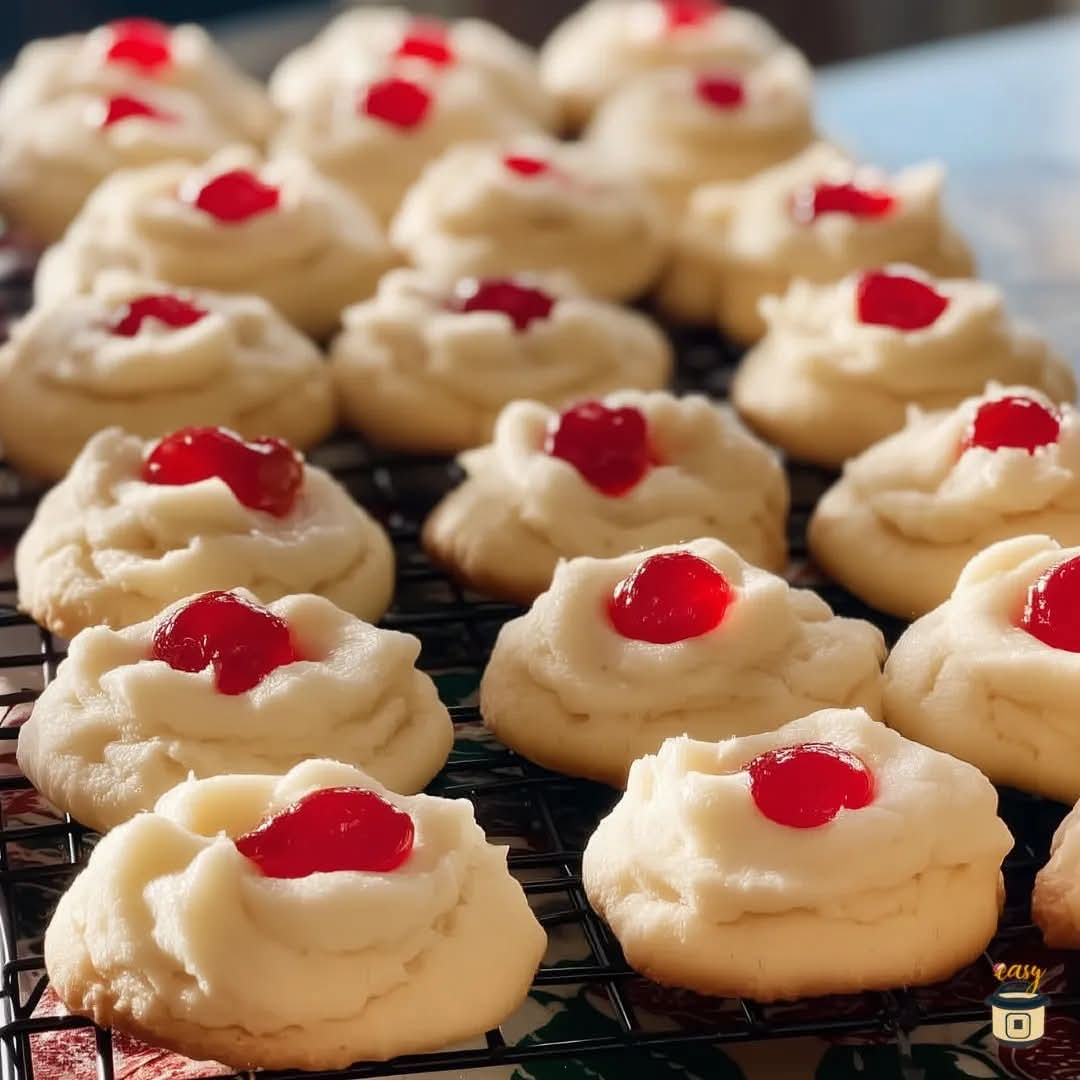
Old-Fashioned Cherry-Topped Butter Cookies: A Sweet Taste of Auntie’s Kitchen
Introduction
Some recipes are more than a list of ingredients and instructions. They are little pieces of family history, carrying the warmth of a familiar kitchen, the sweetness of childhood memories, and the love of someone who made ordinary moments feel special. These old-fashioned cherry-topped butter cookies are exactly that kind of recipe.
I still remember the way my aunt carefully arranged her homemade cookies inside a metal tin, placing a sheet of wax paper between each layer to keep them beautiful and fresh. Every cookie had a delicate golden edge, a soft buttery center, and a bright red cherry nestled right in the middle. Opening that tin felt like discovering a little treasure, and the sweet aroma of butter, sugar, and cherries seemed to fill the entire kitchen.
These cookies are wonderfully simple, made with everyday baking ingredients and a little patience. Their tender texture, rich buttery flavor, and cheerful cherry centers make them perfect for Christmas cookie trays, afternoon tea, family gatherings, bake sales, and homemade gifts.
The best part is that you do not need complicated decorating skills to make them beautiful. Each cookie gets its charm from a single maraschino cherry placed in the center before baking. The cherries add a pop of color and a fruity sweetness that pairs perfectly with the delicate butter cookie.
Whether you are recreating a cherished family tradition or making these cookies for the very first time, this recipe is an invitation to slow down, enjoy the process, and create memories worth passing along.
Ingredients
Preparation time: 20 minutes · Chilling time: 30 minutes · Baking time: 10–13 minutes · Makes approximately 30–36 cookies


For the butter cookies
- 1 cup (226 g) unsalted butter, softened to room temperature
- ¾ cup (150 g) granulated sugar
- 1 large egg yolk
- 2 teaspoons pure vanilla extract
- 2¼ cups (280 g) all-purpose flour
- ¼ teaspoon salt
- 1–2 tablespoons milk, if needed to soften the dough
For the cherry centers
- 30–36 maraschino cherries, drained thoroughly
- 1 tablespoon granulated sugar, optional, for sprinkling
- 1–2 teaspoons cherry juice, optional, for a light cherry glaze
Optional finishing touches
- ½ teaspoon almond extract for a traditional almond-butter flavor
- ¼ cup finely chopped nuts for rolling the cookie edges
- A little powdered sugar for dusting after baking
Important tip: Drain the cherries and pat them dry with paper towels before using them. Excess moisture can make the cookies wet around the centers and affect their appearance.
Instructions
Step 1: Prepare the oven and baking sheets
Preheat your oven to 350°F (175°C). Line two baking sheets with parchment paper.
Parchment paper helps prevent sticking and encourages the cookies to bake evenly without developing overly dark bottoms.
Remove the butter from the refrigerator ahead of time so it becomes soft enough to mix easily. It should yield gently when pressed but should not be melted or greasy.
Step 2: Cream the butter and sugar
Place the softened butter in a large mixing bowl. Add the granulated sugar and beat with an electric mixer for approximately 2–3 minutes, until the mixture looks pale, creamy, and fluffy.
This step is essential because it incorporates air into the dough and helps create cookies with a tender texture.
Scrape down the sides of the bowl with a spatula to ensure everything mixes evenly.
Step 3: Add the egg yolk and vanilla
Add the egg yolk and vanilla extract to the creamed butter mixture. Beat until thoroughly combined.
If you enjoy the classic flavor of bakery-style butter cookies, add the almond extract at this stage. Almond extract complements maraschino cherries beautifully, giving the finished cookies a nostalgic flavor reminiscent of traditional holiday baking.
Avoid adding too much extract, as its flavor can quickly overpower the butter and vanilla.
Step 4: Incorporate the dry ingredients
In a separate bowl, whisk together the flour and salt.
Add the dry ingredients to the butter mixture gradually, mixing on low speed until a soft dough forms.
The dough should hold together when pressed between your fingers without being excessively sticky. If it seems too dry or crumbly, add milk one teaspoon at a time until it comes together.
Do not overmix the dough. Excessive mixing can develop the gluten in the flour and make the finished cookies firmer than desired.
Step 5: Chill the dough
Cover the bowl and refrigerate the dough for approximately 30 minutes.
Chilling helps firm up the butter, making the dough easier to shape and reducing the chance that the cookies will spread too much in the oven.
This short resting period also makes the dough more manageable when forming neat, uniform cookies.
Step 6: Shape the cookies
Scoop out approximately one tablespoon of dough for each cookie. Roll each portion gently between your palms to form a smooth ball.
Arrange the balls on the prepared baking sheets, leaving approximately 2 inches between them.
Use your thumb or the rounded end of a small measuring spoon to create a shallow indentation in the center of each ball.
Press gently rather than forcing the dough downward. You want a small well for the cherry without making the cookie too thin at the bottom.
Step 7: Add the cherries
Place one thoroughly dried maraschino cherry in the center of each indentation.
Press each cherry gently into the dough so it sits securely without sinking completely beneath the surface.
For an attractive presentation, keep the cherries centered and use approximately the same amount of dough for every cookie.
If the cherries are unusually large, cut them in half and place one half, cut side down, in each cookie.
Step 8: Bake until lightly golden
Place the baking sheets in the preheated oven and bake for 10–13 minutes.
The cookies should look set, with pale tops and lightly golden edges. They should not become deeply browned, because the goal is a delicate butter cookie rather than a crisp, dark biscuit.
Check the cookies toward the end of the baking time. Ovens vary, and smaller cookies may finish sooner.
If the dough spreads slightly around the cherries, do not worry. These small imperfections are part of the charm of homemade cookies.
Step 9: Cool the cookies properly
Remove the baking sheets from the oven and allow the cookies to rest for approximately 5 minutes.
They will be delicate while hot, so avoid moving them immediately. Once they have firmed up, transfer them carefully to a wire rack to cool completely.
Do not place warm cookies directly into a storage tin. Trapped steam can soften them and create condensation.
Step 10: Add an optional finishing glaze
For a slightly glossy cherry center, stir a teaspoon of cherry juice into a small amount of powdered sugar until you obtain a thin glaze.
Use a small spoon or pastry brush to apply a little glaze to the cherries once the cookies have cooled.
This step is optional. The cookies are equally lovely without it, especially if you prefer the simple, old-fashioned appearance of a bright red cherry surrounded by golden butter dough.
Methods for Perfect Cherry-Topped Cookies


Method 1: The classic thumbprint method
This is the most traditional and straightforward approach.
Roll the dough into balls, create a small indentation, and place a cherry in each center before baking.
This method gives the cookies their familiar rounded shape and makes them easy for beginners to prepare. It is also ideal when you want every cookie to have a generous, visible cherry center.
Method 2: The soft bakery-style method
For especially tender cookies, cream the butter and sugar thoroughly, avoid overworking the flour, and chill the dough before shaping.
Use a light touch when forming the indentations. The cookies should remain thick enough to hold their shape and develop a soft center.
The finished texture should be delicate and buttery, with a gentle bite rather than a hard crunch.
Method 3: The almond-cherry method
Add ½ teaspoon almond extract to the dough along with the vanilla.
Almond and cherry are a classic flavor pairing. The almond gives the butter cookie a slightly nutty aroma that complements the fruity cherry center.
This version is especially lovely for Christmas cookie assortments, wedding showers, tea parties, and homemade gift boxes.
Method 4: The festive gift-tin method
Bake and cool the cookies completely before arranging them in a clean metal tin.
Place a layer of parchment or food-safe wax paper between each layer of cookies. Arrange them carefully so the cherry centers are not crushed by the cookies above them.
If you are stacking several layers, use a piece of parchment that lies flat over the cookies rather than pressing it down onto the cherries.
The result is a beautiful homemade gift that feels personal and traditional.
The History and Tradition of Cherry-Topped Cookies
Butter cookies have a long history in European home baking, where simple combinations of butter, sugar, flour, and eggs became beloved staples for celebrations and everyday treats.
As baking traditions spread and ingredients became more widely available, home cooks developed countless variations, including thumbprint cookies, shortbread-style cookies, jam-filled biscuits, and cookies decorated with candied fruit.
Maraschino cherries became a popular decorative ingredient in the United States during the late nineteenth and early twentieth centuries. Their brilliant red color and sweet flavor made them particularly appealing for cakes, desserts, and festive cookies.
Cherry-topped butter cookies fit naturally into the tradition of holiday baking and homemade gifts. Their attractive appearance makes them look special, even though their ingredients are simple and familiar.
Many families developed their own versions. Some used a little almond extract, others rolled the dough edges in chopped pecans, and some added a light sugar glaze to the cherries.
The tradition of storing cookies in metal tins also has a practical side. A well-sealed tin helps protect baked goods from air and keeps them from being crushed during storage or transport. Separating the layers with paper helps prevent the cookies from sticking together and protects their decorations.
Although every family’s recipe may differ, the heart of the tradition remains the same: preparing something by hand, sharing it with loved ones, and keeping familiar flavors alive through the years.
Formation: How to Create Beautiful Cookies Every Time
The formation of these cookies is simple, but a few details make a noticeable difference.
1. Keep the cookie sizes consistent. Use a tablespoon or small cookie scoop to portion the dough evenly. Cookies of similar size bake at the same rate and look more attractive when arranged in a tin.
2. Make shallow, even indentations. If the indentation is too deep, the cookie may crack or become thin around the center. If it is too shallow, the cherry may not stay in place.
3. Dry the cherries well. Moisture is one of the biggest challenges when using maraschino cherries. Patting them dry helps the dough bake evenly and prevents a wet ring from forming around each cherry.
4. Chill when necessary. If the dough becomes sticky or the butter begins to soften too much while shaping, refrigerate it for another 10–15 minutes.
5. Watch the edges, not just the tops. Butter cookies often remain pale on top even when fully baked. Lightly golden edges are a more useful indication that they are ready.
6. Allow complete cooling. Freshly baked cookies are fragile. Cooling helps their structure set and makes them easier to transfer and stack.
7. Protect the cherry centers. When arranging the cookies for serving or gifting, avoid pressing the layers tightly together. Their delicate appearance is part of what makes them special.
Tips, Variations, and Troubleshooting
Why did my cookies spread too much?
The butter may have been too soft, the dough may not have chilled long enough, or the baking sheet may have been warm before the cookies were placed on it.
Chill the dough before baking and always use a cool baking sheet for the next batch.
Why are my cookies dry or crumbly?
Too much flour or overbaking can cause dry cookies. Measure flour carefully by spooning it into the measuring cup and leveling the top, rather than packing it down.
Mix only until the dough comes together, and remove the cookies when their edges are lightly golden.
Why are my cherries sinking?
The indentations may be too deep, or the cherries may be too heavy for the dough.
Use a shallow indentation and press the cherry into place gently. If necessary, cut large cherries into smaller pieces.
Can I use fresh cherries?
Fresh cherries are not the best direct substitute for maraschino cherries in this recipe because they contain more moisture and may release juice during baking. For the most reliable results, use drained, dried maraschino cherries or another well-drained preserved cherry.
Can I prepare the dough in advance?
Yes. Prepare the dough, cover it tightly, and refrigerate it for up to 2 days. Let it soften slightly if it becomes too firm to shape.
You can also freeze the unbaked dough balls. For the best appearance, add the cherries shortly before baking and check the baking time as needed.
How should I store the cookies?
Once completely cool, store the cookies in an airtight container at room temperature for approximately 4–5 days, provided the kitchen is cool and dry.
For longer storage, freeze the baked cookies in a freezer-safe container for up to 2 months. Separate layers with parchment paper and thaw them while still covered to help prevent condensation from forming directly on the cookies.
Serving Ideas
These cherry-topped butter cookies are versatile enough for almost any occasion.
- Christmas cookie platters: Combine them with gingerbread, sugar cookies, shortbread, and chocolate chip cookies for a colorful holiday assortment.
- Afternoon tea: Serve them with tea, coffee, or hot chocolate.
- Family gatherings: Arrange them on a pretty plate alongside slices of pound cake or other homemade desserts.
- Homemade gifts: Pack them in decorative tins with parchment or food-safe wax paper between the layers.
- Bake sales: Their bright red centers make them easy to recognize and attractive when displayed.
- Celebrations: Serve them at birthdays, bridal showers, holiday parties, or neighborhood gatherings.
For a particularly nostalgic presentation, use an old-fashioned metal tin, tie a ribbon around it, and include a handwritten recipe card.
Variations to Try
Cherry-Almond Butter Cookies
Add ½ teaspoon almond extract to the dough. The almond aroma brings out the fruity flavor of the cherries and gives the cookies a traditional bakery-style character.
Cherry-Pecan Cookies
Roll the sides of each dough ball in finely chopped pecans before adding the indentation and cherry. The nuts provide a pleasant crunch that contrasts with the tender cookie.
Cherry-Vanilla Shortbread Cookies
Replace the egg yolk with 1–2 teaspoons of milk if needed to help the dough come together, and use a shortbread-inspired mixing method. The texture will be more crumbly and delicate, so handle the dough gently and chill it well before shaping.
Chocolate-Dipped Cherry Cookies
Once the cookies are completely cool, dip part of each cookie into melted semisweet chocolate. Allow the chocolate to set before packing them.
Keep the cherry visible so the cookies retain their classic appearance.
Holiday Sprinkle Cookies
Before baking, add a small amount of red or green sanding sugar around the edges. This gives the cookies a festive appearance without covering up the cherry centers.
Why Everyone Loves These Cherry-Topped Cookies
There is something comforting about a cookie that does not need elaborate icing, complicated techniques, or expensive ingredients to feel special.
The butter provides richness, the vanilla adds warmth, and the cherry offers a sweet, fruity contrast. The texture is tender, the shape is simple, and the finished cookies look as though they belong on a family holiday table.
Children often enjoy helping roll the dough and place the cherries in the centers. Adults appreciate how easily the cookies can be prepared ahead of a gathering. And anyone receiving a tin of them as a gift can appreciate the thoughtfulness behind a homemade treat.
Most of all, these cookies remind us that the recipes we cherish are often the ones associated with people we love.
A familiar smell, a particular flavor, or the sight of a red cherry in the middle of a golden cookie can bring back memories that have stayed with us for years.
Conclusion
Old-fashioned cherry-topped butter cookies are a beautiful reminder that some of the best desserts are also the simplest.
With butter, sugar, flour, vanilla, and a bright maraschino cherry, you can create a cookie that looks festive, tastes delicious, and feels connected to generations of home bakers.
The dough comes together easily, the cookies bake in just a few minutes, and the finished treats are perfect for sharing. Store them in a metal tin with paper between the layers, just as generations of home cooks have done with their favorite homemade sweets.
Perhaps the most meaningful part of this recipe is not the first bite, but the moment you open the tin and see those little red centers waiting inside. It is a reminder of family kitchens, handwritten recipes, and the people who showed their love by baking something special.
Make a batch for the holidays, share a few with a neighbor, or keep a tin on the counter for afternoon coffee. However you enjoy them, these cookies are a lovely way to turn an everyday baking session into a lasting tradition.
For the Lovers of Old-Fashioned Homemade Cookies
If you love recipes that bring back memories of childhood kitchens and family celebrations, these cherry-topped butter cookies deserve a place in your collection.
They are simple enough for an ordinary afternoon but beautiful enough for a special occasion. They are easy to share, easy to customize, and wonderful to make with children or loved ones.
And if you have ever opened a cookie tin expecting to find a favorite treat tucked beneath a layer of wax paper, you understand the special feeling these cookies can bring.
Bake them with love, store them with care, and pass the recipe along. Sometimes the smallest red cherry in the center of a homemade cookie holds the sweetest memories of all.