
.
Soft and Fluffy Amish Dinner Rolls Recipe
Introduction
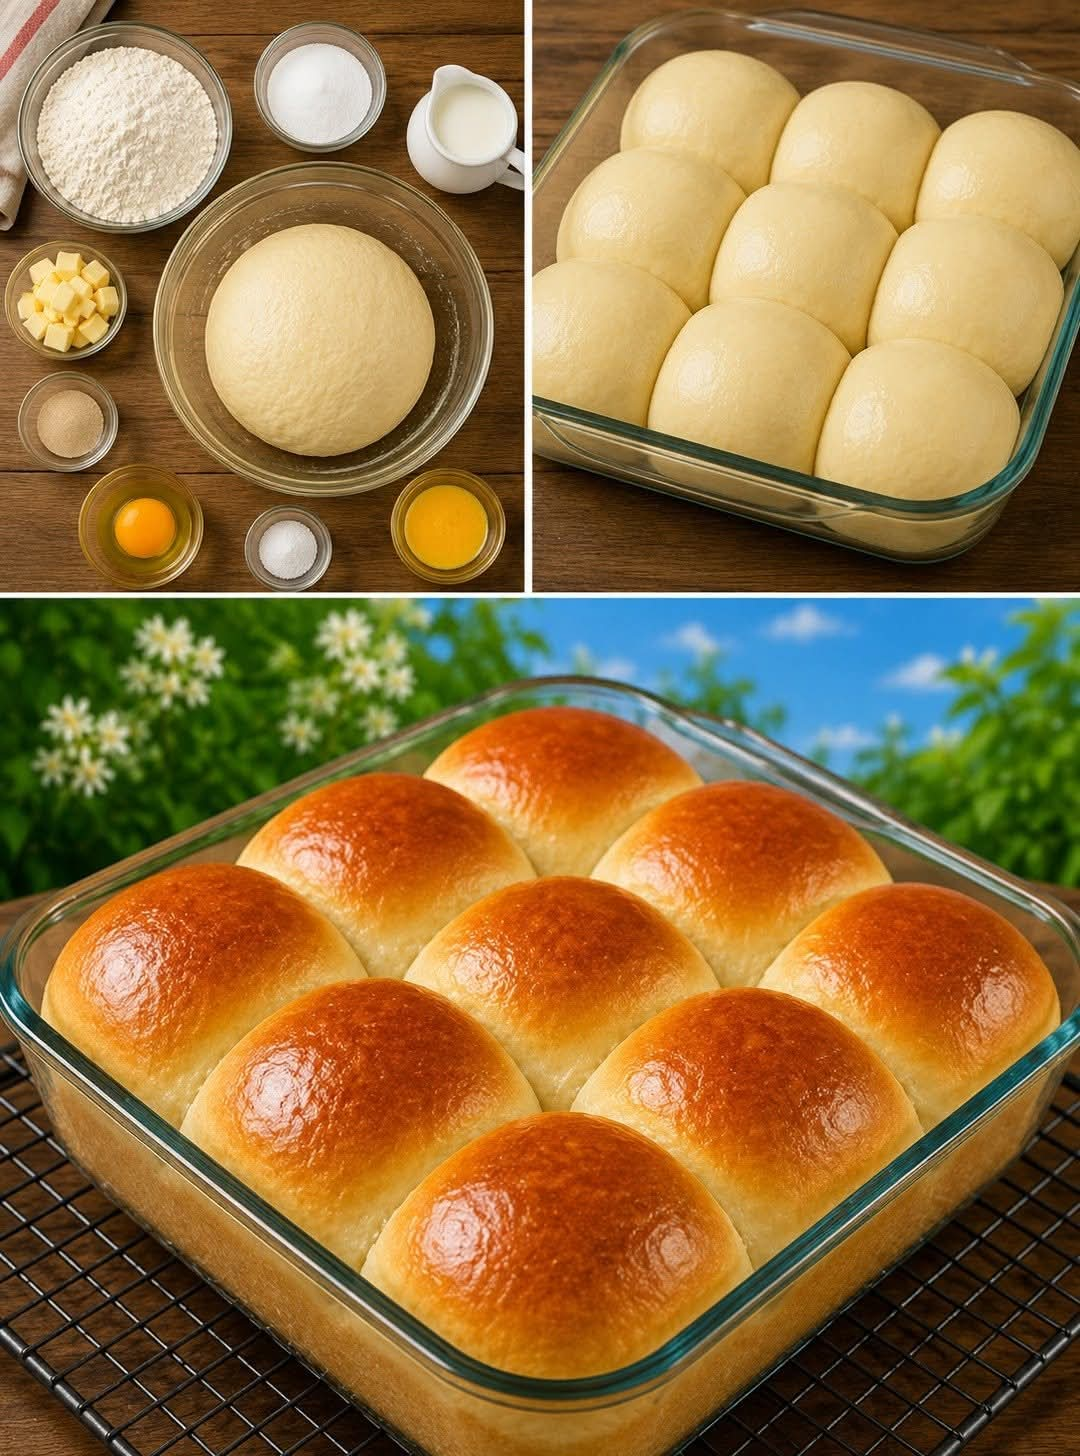
There is nothing quite like the smell of freshly baked homemade dinner rolls filling the kitchen. These Soft and Fluffy Amish Dinner Rolls are wonderfully tender, golden on the outside, and light and pillowy on the inside. Made with simple pantry ingredients, this traditional-style bread recipe brings warmth, comfort, and homemade goodness to any meal.
These rolls are perfect for Sunday family dinners, holiday celebrations, Thanksgiving gatherings, Christmas feasts, potlucks, or an ordinary weeknight when you want to serve something special. Their slightly sweet flavor and soft texture make them delicious with butter, honey, homemade jam, or your favorite savory dishes.
The best part is that you do not need expensive ingredients or complicated baking techniques to make them. With a little patience, careful kneading, and enough time for the dough to rise, you can prepare a batch of beautiful homemade rolls that taste as though they came straight from a traditional country kitchen.
Ingredients
Preparation Time: 25 minutes
Rising Time: 1 hour 30 minutes to 2 hours
Baking Time: 18–22 minutes
Total Time: Approximately 2 hours 30 minutes
Yield: 12–15 dinner rolls
For the Dinner Rolls
- 4 cups all-purpose flour, approximately 480 g, plus extra if needed
- 1 cup warm milk, approximately 240 ml
- 2 ¼ teaspoons active dry yeast, equivalent to one standard packet
- ¼ cup granulated sugar
- 1 large egg, at room temperature
- ¼ cup unsalted butter, melted and slightly cooled
- 1 teaspoon salt
For the Topping
- 2 tablespoons melted butter for brushing
- Extra softened butter for serving, optional
- Honey or homemade jam for serving, optional
Instructions
Step 1: Activate the Yeast
Pour the warm milk into a large mixing bowl. The milk should feel comfortably warm, not hot. Ideally, it should be around 100–110°F (38–43°C).
Add the sugar and active dry yeast. Stir gently and allow the mixture to stand for 5–10 minutes, until it becomes foamy.
This step helps activate the yeast, which gives the rolls their wonderful rise and fluffy texture. If the yeast does not foam, check that it is fresh and that the milk was not too hot or too cold.
Step 2: Prepare the Dough
Add the egg, melted butter, and salt to the yeast mixture. Whisk until everything is combined.
Gradually add the flour, one cup at a time, stirring with a wooden spoon or dough spatula. Continue mixing until a soft, slightly sticky dough begins to form.
Avoid adding too much flour at once. A dough that is too dry can produce dense rolls, while a soft dough helps create a tender interior.
Step 3: Knead the Dough
Transfer the dough to a lightly floured work surface. Knead for approximately 8–10 minutes by hand, stretching and folding the dough until it becomes smooth and elastic.
Alternatively, use a stand mixer fitted with a dough hook and knead on low to medium-low speed for about 5–7 minutes.
The dough should feel soft, supple, and slightly tacky without sticking excessively to your hands. Add a small amount of flour only if the dough is too sticky to handle.
Proper kneading develops the gluten structure that allows the rolls to rise and hold their soft, fluffy shape.
Step 4: Let the Dough Rise
Lightly grease a large bowl with butter or oil. Place the dough inside and turn it once to coat the surface.
Cover the bowl with a clean kitchen towel or plastic wrap. Leave it in a warm, draft-free place for approximately 60–90 minutes, or until the dough has doubled in size.
The exact rising time depends on the temperature of your kitchen. In a cooler room, the dough may need additional time.
Step 5: Shape the Rolls
Once the dough has doubled in size, gently press it down to release excess air.
Transfer it to a clean work surface and divide it into 12–15 equal portions. For evenly sized rolls, weigh the portions if you have a kitchen scale.
Shape each portion into a smooth ball by pulling the edges underneath and rolling it gently against the work surface.
Arrange the dough balls in a lightly greased 9-by-13-inch baking dish or on a baking tray, leaving a little space between them.
Step 6: Allow the Rolls to Rise Again
Cover the shaped rolls loosely with a clean towel. Let them rise for another 30–45 minutes, or until they look noticeably puffy and are touching or nearly touching one another.
This second rise is essential for achieving the signature light and airy texture of soft dinner rolls.
Avoid rushing this step. Properly proofed dough produces rolls that are tender rather than heavy.
Step 7: Preheat the Oven
Preheat your oven to 350°F (175°C).
Position a rack in the center of the oven so the rolls bake evenly. If you are using a glass baking dish, make sure it is suitable for the oven temperature.
Step 8: Bake Until Golden
Place the risen rolls in the preheated oven and bake for 18–22 minutes, depending on their size and your oven.
The tops should become lightly golden, and the rolls should look set and fluffy. If the tops brown too quickly, loosely cover them with aluminum foil during the final few minutes.
Avoid overbaking, as this can make the rolls dry instead of soft.
Step 9: Brush with Butter
Remove the rolls from the oven and immediately brush their tops generously with melted butter.
The butter adds a delicate shine, a rich aroma, and a tender finish to the crust.
Allow the rolls to rest for about 5–10 minutes before serving. They are especially delicious while still warm.
Detailed Baking Methods
Traditional Hand-Kneading Method
Hand-kneading is an excellent way to prepare these rolls without special equipment. Begin with a soft dough and use a gentle push, fold, and turn motion. Continue until the dough becomes elastic and smooth.
Do not worry if the dough feels slightly sticky at first. Kneading helps it become more manageable, and adding excessive flour can make the finished rolls heavy.
Stand Mixer Method
For a convenient alternative, combine the ingredients in a stand mixer and knead with the dough hook. Keep the mixer at a low or medium-low setting and watch the dough carefully.
Stop once the dough is smooth and elastic. Overmixing or overheating the dough can affect the final texture.
Warm-Kitchen Rising Method
Yeast dough rises best in a comfortably warm environment. Place the covered bowl in a draft-free area and allow the dough to rise naturally.
If your kitchen is cool, place the bowl near a warm location, but never expose the dough to excessive heat. The dough is ready when it has approximately doubled in volume, not simply when a certain amount of time has passed.
Make-Ahead Method
You can prepare the dough in advance for a special dinner. After kneading, place it in a covered, lightly greased bowl and refrigerate it overnight.
The next day, allow the dough to warm slightly if necessary, shape the rolls, and let them complete their second rise until puffy before baking.
Because refrigeration slows yeast activity, the timing may vary. Always judge the dough by its appearance and texture rather than relying only on the clock.
The History of Amish Dinner Rolls
Amish cooking is widely associated with home baking, family meals, simple ingredients, and traditional recipes passed from one generation to another. Many Amish communities have preserved food traditions that emphasize preparing nourishing meals at home and sharing them with family, neighbors, and guests.
Homemade bread has long held an important place in many rural American kitchens. Yeast rolls, loaves of bread, biscuits, pies, and other baked goods were practical ways to turn basic ingredients into satisfying food for everyday meals and special occasions.
The term “Amish dinner rolls” is commonly used today for soft, slightly sweet homemade rolls inspired by traditional country-style baking. However, recipes vary between households, and this particular version should be understood as a modern interpretation rather than one definitive historical Amish recipe.
Their enduring popularity comes from their simplicity. Flour, milk, yeast, butter, sugar, and eggs combine to create a comforting bread that can be served with almost any meal.
Formation: How These Rolls Become Soft and Fluffy
The secret to beautifully fluffy dinner rolls lies in the way the ingredients work together.
1. Yeast Creates Airy Dough
Yeast feeds on available sugars and produces carbon dioxide. The gas becomes trapped within the developing dough structure, allowing it to expand and rise.
This process creates the small air pockets responsible for the rolls’ light texture.
2. Milk Adds Tenderness
Milk contributes moisture, flavor, and natural sugars. It also helps produce a softer crumb and encourages a beautifully colored crust during baking.
3. Butter Improves the Texture
Butter adds richness and tenderness. It helps give the rolls their delicate mouthfeel and makes them especially enjoyable when served warm.
4. Eggs Provide Structure
The egg contributes moisture, richness, and structure. It also helps create a soft, cohesive crumb.
5. Kneading Develops Gluten
Kneading develops a network of gluten proteins that stretches around the gases produced by the yeast. This allows the dough to expand without collapsing easily.
6. The Second Rise Improves the Texture
After shaping, the rolls need time to become puffy again. This second rise helps create a lighter interior and a more delicate final texture.
7. Butter Finishes the Crust
Brushing the hot rolls with melted butter adds flavor and helps keep the surface tender. It gives the finished rolls an appealing sheen and makes them smell irresistible.
Tips for Perfect Amish-Style Dinner Rolls
- Measure the flour carefully. Too much flour is one of the most common reasons homemade rolls turn out dense.
- Check the milk temperature. Very hot milk can damage the yeast and prevent the dough from rising properly.
- Use fresh yeast. Yeast that has lost its activity may produce disappointing results.
- Allow enough rising time. The dough should double during the first rise and become visibly puffy during the second.
- Avoid overbaking. Remove the rolls once they are lightly golden and fully baked.
- Brush with butter immediately. Applying butter while the rolls are hot gives the surface a delicious finish.
- Keep them covered after baking. Once they have cooled slightly, cover them with a clean towel to help retain moisture.
Serving Suggestions
These soft and fluffy rolls are wonderfully versatile and can accompany many different meals.
For Family Dinners
Serve them alongside roasted chicken, beef stew, meatloaf, mashed potatoes, or creamy vegetable soup. Their tender texture makes them perfect for soaking up flavorful sauces and gravies.
For Holiday Meals
Add them to your Thanksgiving or Christmas table beside roast turkey, baked ham, stuffing, roasted vegetables, and other traditional favorites.
For Breakfast
Split a warm roll and spread it with butter, honey, fruit preserves, or your favorite jam. They are also delicious alongside scrambled eggs.
For Sweet Treats
Serve the rolls with cinnamon honey butter or a little homemade fruit jam for a simple, comforting snack.
For Sandwiches
Allow the rolls to cool and use them to make small sandwiches with sliced turkey, ham, cheese, chicken, or vegetables.
Storage and Reheating
At Room Temperature
Allow the rolls to cool completely, then store them in an airtight container or sealed food-safe bag. They are best enjoyed within 2–3 days.
In the Refrigerator
Refrigeration can make bread stale more quickly, so room-temperature storage is generally preferable for short periods. If your kitchen is very hot or humid, refrigerate them in a well-sealed container and reheat before serving.
In the Freezer
For longer storage, freeze the cooled rolls in a freezer-safe bag or airtight container for up to 2–3 months for best quality.
Thaw at room temperature and warm in a 300°F (150°C) oven for approximately 5–10 minutes, depending on their size. Cover loosely with foil if needed to prevent excessive browning.
Individual rolls can also be reheated briefly in the microwave, covered with a slightly damp paper towel to help retain moisture.
Common Mistakes to Avoid
Adding too much flour: This creates a stiff dough and dense rolls. Start with the recommended quantity and add only a little more when necessary.
Skipping the second rise: Shaping the rolls and baking them immediately often produces a heavier texture.
Using excessively hot milk: High temperatures can damage the yeast, preventing the dough from rising properly.
Cutting into the rolls too soon: A brief resting period allows the interior to settle and makes the rolls easier to handle.
Overbaking: Baking for too long can dry out the crumb. Watch for a light golden color and check that the rolls are cooked through.
Frequently Asked Questions
Can I make these rolls without a stand mixer?
Yes. A mixing bowl, wooden spoon, and your hands are all you need. Knead the dough by hand until smooth and elastic.
Can I use instant yeast?
Yes. Instant yeast can generally be mixed directly with the dry ingredients. Follow the package instructions and allow the dough to rise until it has doubled in size.
Why are my rolls dense?
Common causes include too much flour, inactive yeast, insufficient kneading, inadequate rising time, or overbaking. A soft dough and proper proofing are essential.
Can I make the rolls smaller?
Yes. Divide the dough into 18 smaller portions instead of 12–15. Begin checking them a few minutes earlier because smaller rolls may bake more quickly.
Can I make them sweeter?
You can increase the sugar slightly if you prefer sweeter rolls. Keep in mind that additional sugar can affect yeast activity and browning, so avoid making large changes without adjusting the recipe.
Can I prepare the rolls the night before?
Yes. Refrigerating the dough overnight is a convenient option. Allow enough time the next day for shaping, proofing, and baking.
Conclusion
These Soft and Fluffy Amish Dinner Rolls are a wonderful example of how simple ingredients can create something truly special. With their tender centers, lightly golden tops, rich buttery flavor, and delicate sweetness, they are the kind of homemade bread that makes every meal feel more welcoming.
Although the dough needs time to rise, the process is straightforward and rewarding. Once you master the basic techniques of mixing, kneading, proofing, and baking, you can make these rolls again and again for family dinners, celebrations, and everyday meals.
Serve them warm from the oven with butter, pair them with your favorite comfort foods, or save a few for breakfast the next morning. One batch is often enough to make everyone at the table ask for another.
For the Lovers of Homemade Bread
If you love the comforting aroma of freshly baked bread, these dinner rolls deserve a place in your recipe collection. They are ideal for anyone who appreciates traditional home cooking, soft bread, and recipes made with simple ingredients.
Bread lovers will especially enjoy pulling apart a warm roll, watching the fluffy interior separate, and spreading a little butter over the soft surface as it melts.
These rolls are also a lovely recipe to make with family. Measuring ingredients, kneading dough, shaping the rolls, and watching them rise can turn an ordinary afternoon into a memorable kitchen experience.
Whether you are preparing a holiday feast, hosting friends, or simply making dinner for the people you love, these soft and fluffy rolls bring a little extra comfort to the table.
Final Recipe Summary
- Preparation: 25 minutes
- First rise: 60–90 minutes
- Second rise: 30–45 minutes
- Baking: 18–22 minutes
- Oven temperature: 350°F (175°C)
- Yield: 12–15 rolls
The secret to success: Use a soft dough, knead until elastic, allow both rises to finish properly, avoid overbaking, and brush the warm rolls with melted butter.
Bake a batch, serve them warm, and enjoy the simple pleasure of homemade Amish-style dinner rolls with your favorite meals.