
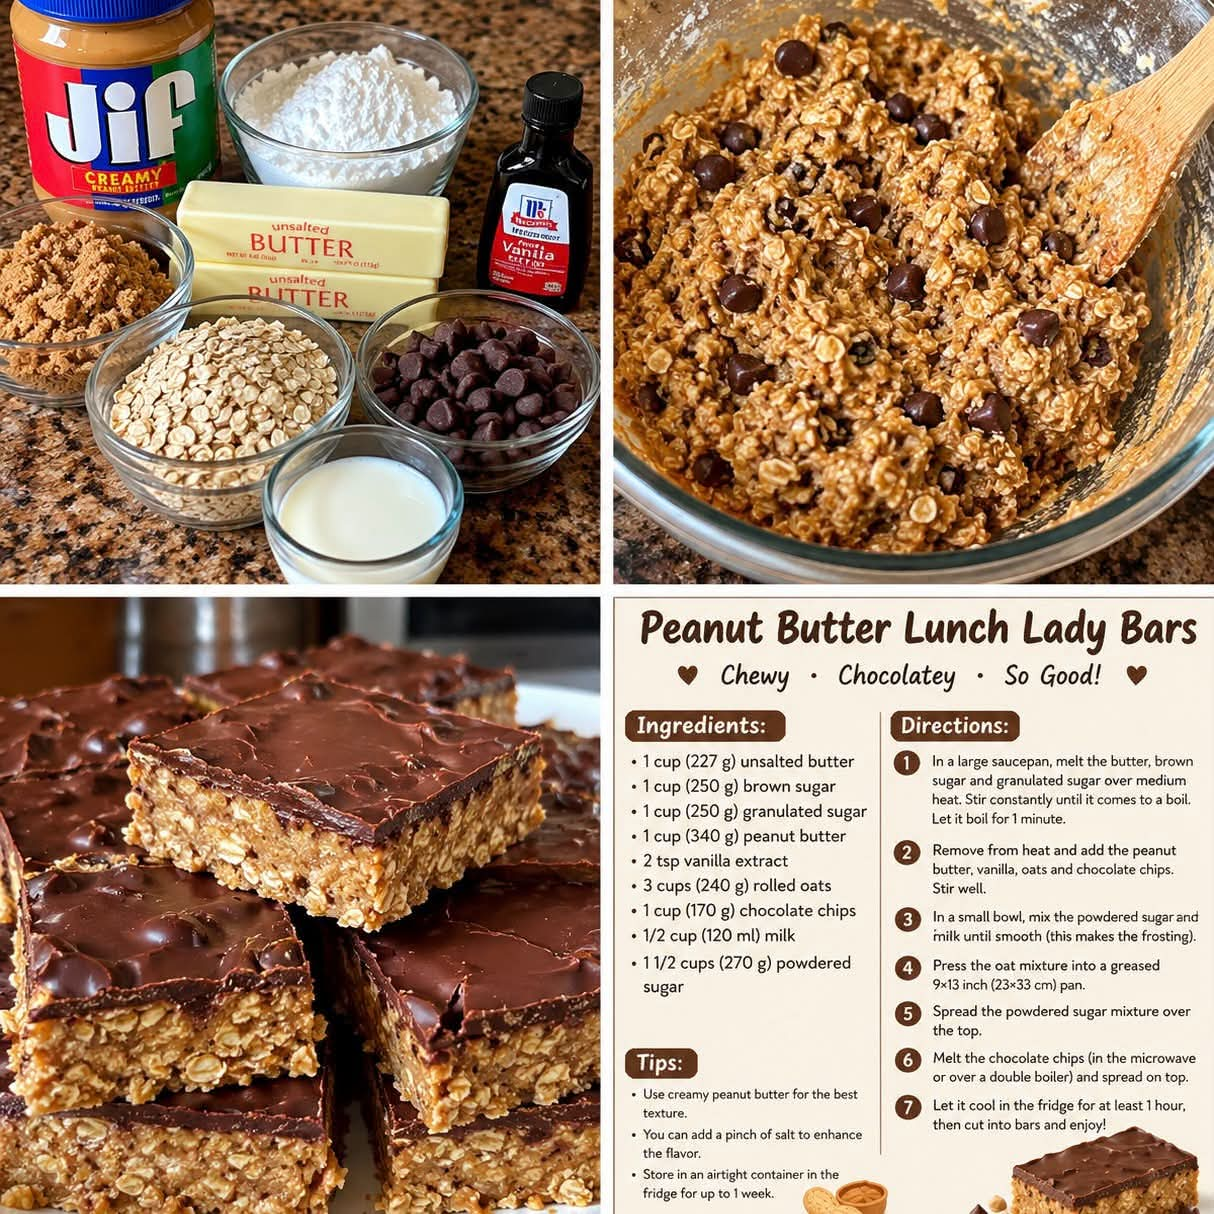
Old-Fashioned Lunch Lady Peanut Butter Bars
Introduction
There is something truly special about the recipes we remember from childhood. For many of us, school lunches were more than just a meal. They were filled with familiar flavors, warm memories, and delicious homemade treats that made an ordinary school day feel special.
These Old-Fashioned Lunch Lady Peanut Butter Bars bring back that nostalgic feeling. With a soft, buttery peanut butter base, a rich peanut butter topping, and a wonderfully sweet flavor, these bars are the kind of dessert that disappears quickly from the serving tray.
They are easy to prepare, use simple pantry ingredients, and are perfect for family gatherings, bake sales, potlucks, lunchboxes, and afternoon snacks. One bite is enough to remind you of the good old days when the lunch ladies seemed to know exactly how to make everyone smile.
Ingredients
For the peanut butter bars
- 1 cup unsalted butter, softened
- 1 cup creamy peanut butter
- 1 cup granulated sugar
- 1 cup packed brown sugar
- 2 large eggs
- 2 teaspoons vanilla extract
- 2 cups all-purpose flour
- 1 teaspoon baking soda
- 1/2 teaspoon salt
- 2 cups quick-cooking or old-fashioned rolled oats
For the peanut butter frosting
- 1/2 cup unsalted butter, softened
- 1/2 cup creamy peanut butter
- 2 cups powdered sugar
- 3–4 tablespoons milk
- 1 teaspoon vanilla extract
Instructions
Step 1: Prepare the baking pan
Preheat your oven to 350°F (175°C). Grease a 9-by-13-inch baking pan lightly with butter or cooking spray. You may also line it with parchment paper to make removing and cutting the bars easier.
Step 2: Cream the butter and sugars
In a large mixing bowl, beat the softened butter, peanut butter, granulated sugar, and brown sugar until the mixture becomes smooth and creamy.
This step helps create a tender, flavorful base with a rich peanut butter taste.
Step 3: Add the eggs and vanilla
Beat in the eggs one at a time, mixing well after each addition. Add the vanilla extract and continue mixing until everything is evenly combined.
Scrape down the sides of the bowl as needed to ensure all the ingredients are incorporated.
Step 4: Combine the dry ingredients
In a separate bowl, whisk together the flour, baking soda, and salt.
Gradually add the dry ingredients to the peanut butter mixture, mixing on low speed until just combined. Fold in the oats until they are evenly distributed throughout the dough.
Avoid overmixing, as this can make the bars tougher than desired.
Step 5: Spread the dough
Transfer the dough to the prepared baking pan. Spread it evenly into the corners using a spatula or the back of a spoon.
Press the dough gently into an even layer so the bars bake consistently.
Step 6: Bake until golden
Bake for approximately 18–25 minutes, or until the edges are lightly golden and the center is set.
Do not overbake. The bars should remain soft and slightly tender in the middle because they will continue to firm up as they cool.
Remove the pan from the oven and let the bars cool completely before frosting.
Step 7: Prepare the peanut butter frosting
In a mixing bowl, beat the softened butter and peanut butter until smooth.
Gradually add the powdered sugar, followed by the vanilla extract. Add the milk one tablespoon at a time until the frosting reaches a smooth, spreadable consistency.
If the frosting is too thick, add a little more milk. If it becomes too thin, mix in a small amount of additional powdered sugar.
Step 8: Frost the cooled bars
Spread the peanut butter frosting evenly over the completely cooled bars.
For an extra nostalgic presentation, use a spatula to create gentle swirls across the frosting.
Allow the frosting to set for 15–30 minutes before cutting the dessert into squares.
Step 9: Slice and serve
Cut the bars into squares or rectangles, depending on your preferred serving size.
Serve them with a glass of cold milk, a cup of coffee, or a warm cup of tea. These bars are delicious at room temperature and make a wonderful addition to any dessert table.
Methods of Preparation
The creaming method
The butter, peanut butter, and sugars are beaten together to create a smooth, evenly mixed base. The eggs and vanilla are then added to help bind the ingredients and develop flavor.
The dry-and-wet mixing method
The flour mixture is incorporated gradually into the wet ingredients. The oats are folded in last to provide texture and a satisfying bite.
The sheet-pan baking method
Instead of shaping individual cookies, the dough is spread into one rectangular pan. Baking everything together saves time and creates evenly sized portions once sliced.
The frosting method
The peanut butter frosting is prepared separately and spread over the cooled baked layer. Cooling first is important because warm bars can melt the frosting and make it difficult to spread evenly.
A Little History of School Cafeteria Desserts
School cafeteria desserts became treasured parts of American food culture throughout the twentieth century. Cafeterias often prepared familiar, economical dishes in large batches to serve many students at once.
Sheet cakes, oatmeal cookies, brownies, peanut butter treats, and fruit cobblers were practical choices because they could be baked in large pans and divided into individual servings.
Lunch ladies became associated with these comforting desserts because they helped prepare and serve the food that students enjoyed every school day. Many former students still remember their favorite cafeteria treats decades later.
Although recipes varied from school to school, the combination of simple ingredients, generous portions, and homemade flavor helped make these desserts memorable. These peanut butter bars capture that same spirit of uncomplicated, nostalgic baking.
Formation and Texture
The finished dessert has three appealing qualities.
The base: Soft, buttery, and slightly chewy, with oats that provide a pleasant texture.
The peanut butter flavor: Creamy and rich, balancing the sweetness of the sugars and frosting.
The topping: Smooth, fluffy, and sweet, creating a delicious contrast with the tender baked layer.
For clean slices, let the bars cool completely and allow the frosting to set before cutting. Use a sharp knife and wipe it between cuts for neat, bakery-style squares.
Helpful Tips for Perfect Results
- Use room-temperature butter and eggs for easier mixing.
- Measure the flour carefully to avoid dry, dense bars.
- Use creamy peanut butter for a smooth frosting and consistent texture.
- Do not overbake; a slightly soft center keeps the bars tender.
- Let the baked layer cool completely before adding the frosting.
- For extra texture, sprinkle a small handful of chopped roasted peanuts over the frosting.
- Store the bars in an airtight container at room temperature for up to three days, or refrigerate them for up to one week.
- For longer storage, freeze individual portions in a well-sealed container for up to three months.
Delicious Variations
Chocolate peanut butter bars
Add 1/2 cup of chocolate chips to the dough or drizzle melted chocolate over the finished frosting.
Extra-oatmeal bars
Use old-fashioned rolled oats for a heartier texture. The bars may be slightly chewier than those made with quick-cooking oats.
Honey-roasted peanut version
Replace a small portion of the creamy peanut butter with finely chopped honey-roasted peanuts for additional crunch and flavor.
Chocolate frosting variation
Replace the peanut butter frosting with a simple chocolate buttercream for a different cafeteria-inspired dessert.
Serving Suggestions
These bars are perfect for school-themed parties, family reunions, potlucks, bake sales, picnics, and holiday dessert trays.
For a nostalgic presentation, arrange them in neat rows on a large serving platter. Pair them with fresh fruit, cold milk, or a scoop of vanilla ice cream for a more indulgent dessert.
They also make a thoughtful homemade treat to share with friends, neighbors, coworkers, or anyone who enjoys old-fashioned American baking.
Conclusion
Old-Fashioned Lunch Lady Peanut Butter Bars are a wonderful reminder that the simplest recipes can create the most lasting memories.
Their soft oat-filled base, rich peanut butter flavor, and creamy frosting make them an irresistible homemade treat. They are easy enough for beginner bakers, practical enough for sharing, and delicious enough to become a family favorite.
Whether you remember eating similar desserts in your school cafeteria or are discovering them for the first time, these bars bring a little taste of nostalgia to every bite.
Sometimes, the best recipes are not the fanciest ones. They are the recipes that remind us of where we came from, the people who cared for us, and the little moments that made childhood special.
For the Lovers of Old-Fashioned Recipes
If you love vintage school cafeteria desserts, soft peanut butter treats, and simple homemade sweets, this recipe deserves a place in your collection.
Make a pan for your family, share a few squares with a friend, and enjoy the comforting flavor of a classic dessert made with love.
Some recipes are more than food. They are memories we can bake, share, and pass on to the next generation.
Final Recipe Notes
- Preparation time: 20 minutes
- Baking time: 18–25 minutes
- Cooling and frosting time: 45–60 minutes
- Total time: Approximately 1 hour 25 minutes to 1 hour 45 minutes
- Yield: 24 bars, depending on how they are cut
- Oven temperature: 350°F (175°C)
- Difficulty: Easy
A nostalgic homemade dessert that brings the comfort of the school cafeteria straight to your kitchen.