
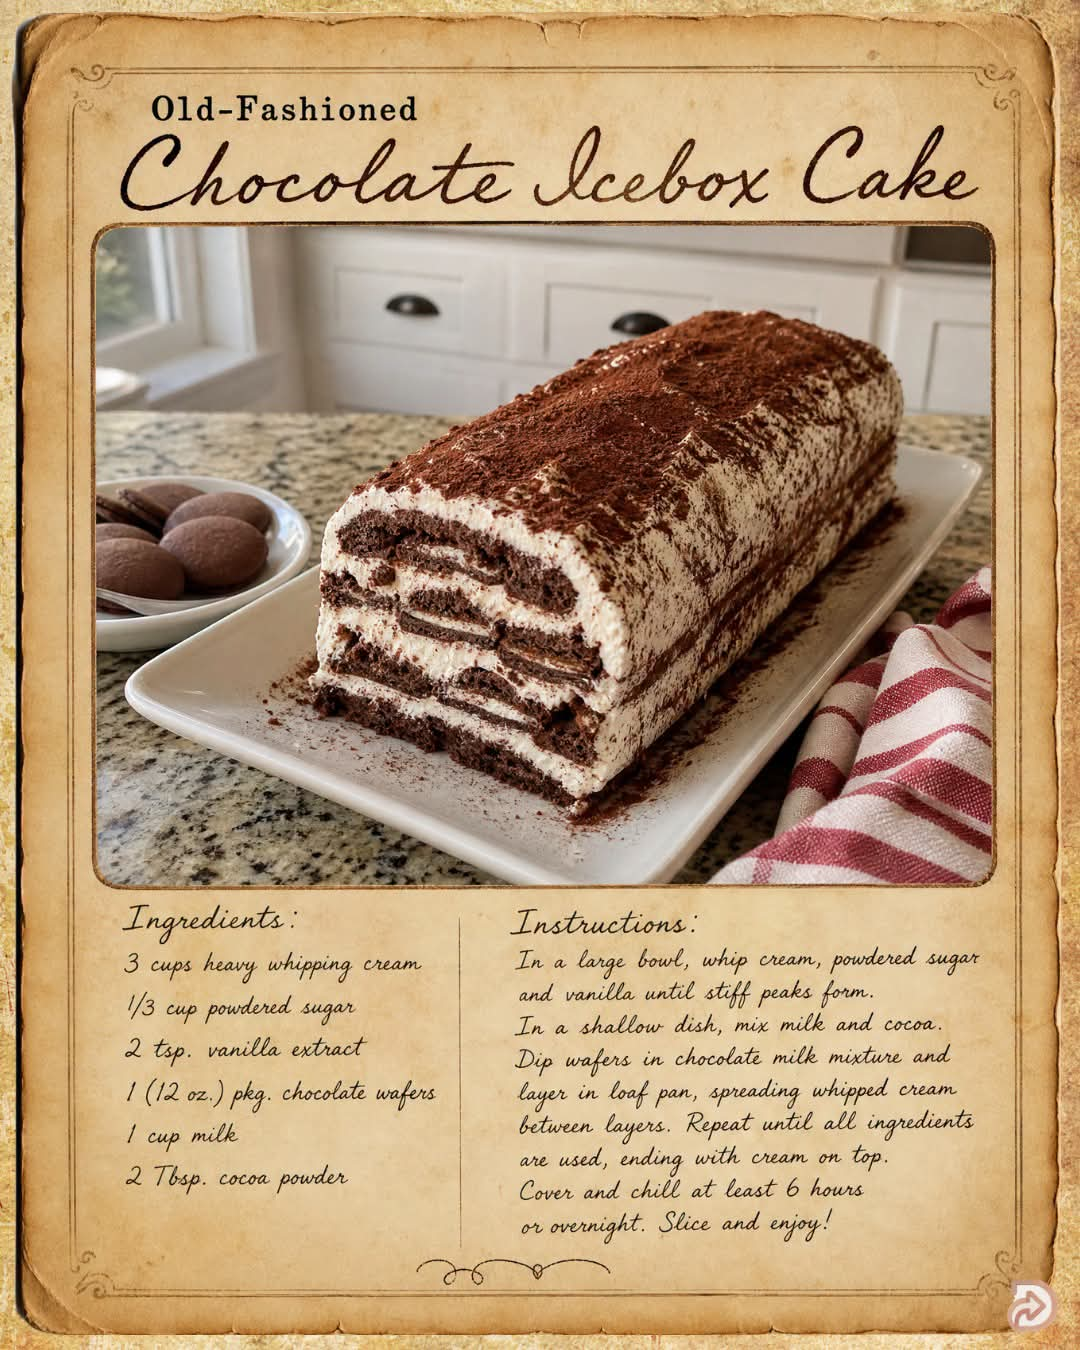
Here’s a detailed, blog-style recipe for your Chocolate Icebox Cake:
Chocolate Icebox Cake – A No-Bake Classic That Gets Better Overnight
Introduction
If you’re looking for a rich, creamy, and incredibly easy dessert that doesn’t require turning on the oven, Chocolate Icebox Cake is the perfect choice. This timeless no-bake dessert combines crisp chocolate wafers with fluffy whipped cream, transforming them into soft, cake-like layers after chilling overnight. Every bite is smooth, chocolaty, and wonderfully refreshing, making it a favorite for birthdays, holidays, family gatherings, or whenever you crave an effortless homemade dessert.
Ingredients
For the Cake
- 2 cups (480 ml) heavy whipping cream, chilled
- 1/4 cup powdered sugar
- 1 teaspoon pure vanilla extract
- 1 package (about 9 ounces/255 g) chocolate wafer cookies
- 1 cup whole milk
- 2 tablespoons unsweetened cocoa powder
Optional Garnishes
- Cocoa powder for dusting
- Chocolate curls
- Mini chocolate chips
- Fresh strawberries or raspberries
- Chocolate syrup drizzle
- Whipped cream rosettes
Equipment Needed
- 9×5-inch loaf pan
- Mixing bowls
- Electric hand mixer or stand mixer
- Rubber spatula
- Small bowl for chocolate milk
- Plastic wrap
Instructions
Step 1: Prepare the Whipped Cream
Pour the cold heavy cream into a large mixing bowl. Add the powdered sugar and vanilla extract. Beat on medium-high speed until stiff peaks form. The whipped cream should be thick enough to hold its shape.
Step 2: Make the Chocolate Milk
Whisk together the milk and cocoa powder until the cocoa dissolves completely. This mixture will soften the cookies and enhance the chocolate flavor.
Step 3: Dip the Chocolate Wafers
Working one cookie at a time, quickly dip each chocolate wafer into the chocolate milk. Do not soak them too long, or they may become too soft.
Step 4: Assemble the Cake
Spread a thin layer of whipped cream on the bottom of the loaf pan.
Arrange a layer of dipped chocolate wafers.
Cover with a generous layer of whipped cream.
Repeat the layers until all ingredients are used, finishing with a thick layer of whipped cream on top.
Step 5: Chill
Cover the loaf pan tightly with plastic wrap.
Refrigerate for at least 6 hours, but overnight is highly recommended. During this time, the cookies absorb moisture from the cream and become soft like cake.
Step 6: Serve
Remove from the refrigerator.
Dust generously with cocoa powder.
Decorate with chocolate curls or fresh berries if desired.
Slice with a sharp knife and serve chilled.
Preparation Method
The beauty of this dessert lies in its simplicity. Instead of baking, the refrigerator does all the work. As the cake chills, the whipped cream slowly softens the chocolate wafers, creating delicate, cake-like layers with almost no effort.
Tips for Success
- Use very cold heavy cream for the fluffiest whipped topping.
- Chill your mixing bowl before whipping the cream.
- Dip cookies quickly to avoid them falling apart.
- Let the cake rest overnight for the best texture.
- Slice with a warm knife for clean, beautiful layers.
Delicious Variations
Double Chocolate Icebox Cake
Add grated dark chocolate between each layer.
Mocha Icebox Cake
Mix 1 teaspoon instant espresso powder into the cocoa milk.
Peanut Butter Chocolate
Spread a thin layer of peanut butter between layers.
Mint Chocolate
Add peppermint extract to the whipped cream.
Cookies and Cream
Mix crushed chocolate sandwich cookies into the whipped cream.
History of Chocolate Icebox Cake
Icebox cakes became popular in the United States during the 1920s and 1930s when refrigerators, commonly called “iceboxes,” became household staples. Home bakers discovered that layering cookies with whipped cream and chilling them overnight created a cake-like dessert without baking. Chocolate Icebox Cake quickly became one of the most beloved versions because of its rich flavor and elegant appearance.
Presentation
For an elegant finish:
- Dust the top with cocoa powder.
- Add chocolate curls or shaved chocolate.
- Pipe whipped cream around the edges.
- Garnish with fresh strawberries or raspberries.
- Serve on chilled dessert plates with coffee or hot chocolate.
Why Everyone Loves This Recipe
Chocolate lovers adore this dessert because it is:
- Rich and creamy
- Easy to prepare
- Perfect for beginners
- No oven required
- Great for parties
- Ideal for making ahead
- Beautiful enough for special occasions
- Even better the next day
Storage
- Refrigerate for up to 4 days.
- Keep tightly covered.
- Freeze for up to 1 month and thaw in the refrigerator before serving.
Conclusion
Chocolate Icebox Cake proves that extraordinary desserts don’t have to be complicated. With just a handful of simple ingredients and a little patience while it chills, you’ll create a luscious, creamy dessert that tastes like it came from a professional bakery. Whether you’re making it for a celebration or simply satisfying a chocolate craving, this classic no-bake treat is guaranteed to impress family and friends.
One slice is never enough—once those crisp chocolate wafers transform into tender, cake-like layers wrapped in silky whipped cream, every bite becomes pure chocolate bliss! 🍫🍰