
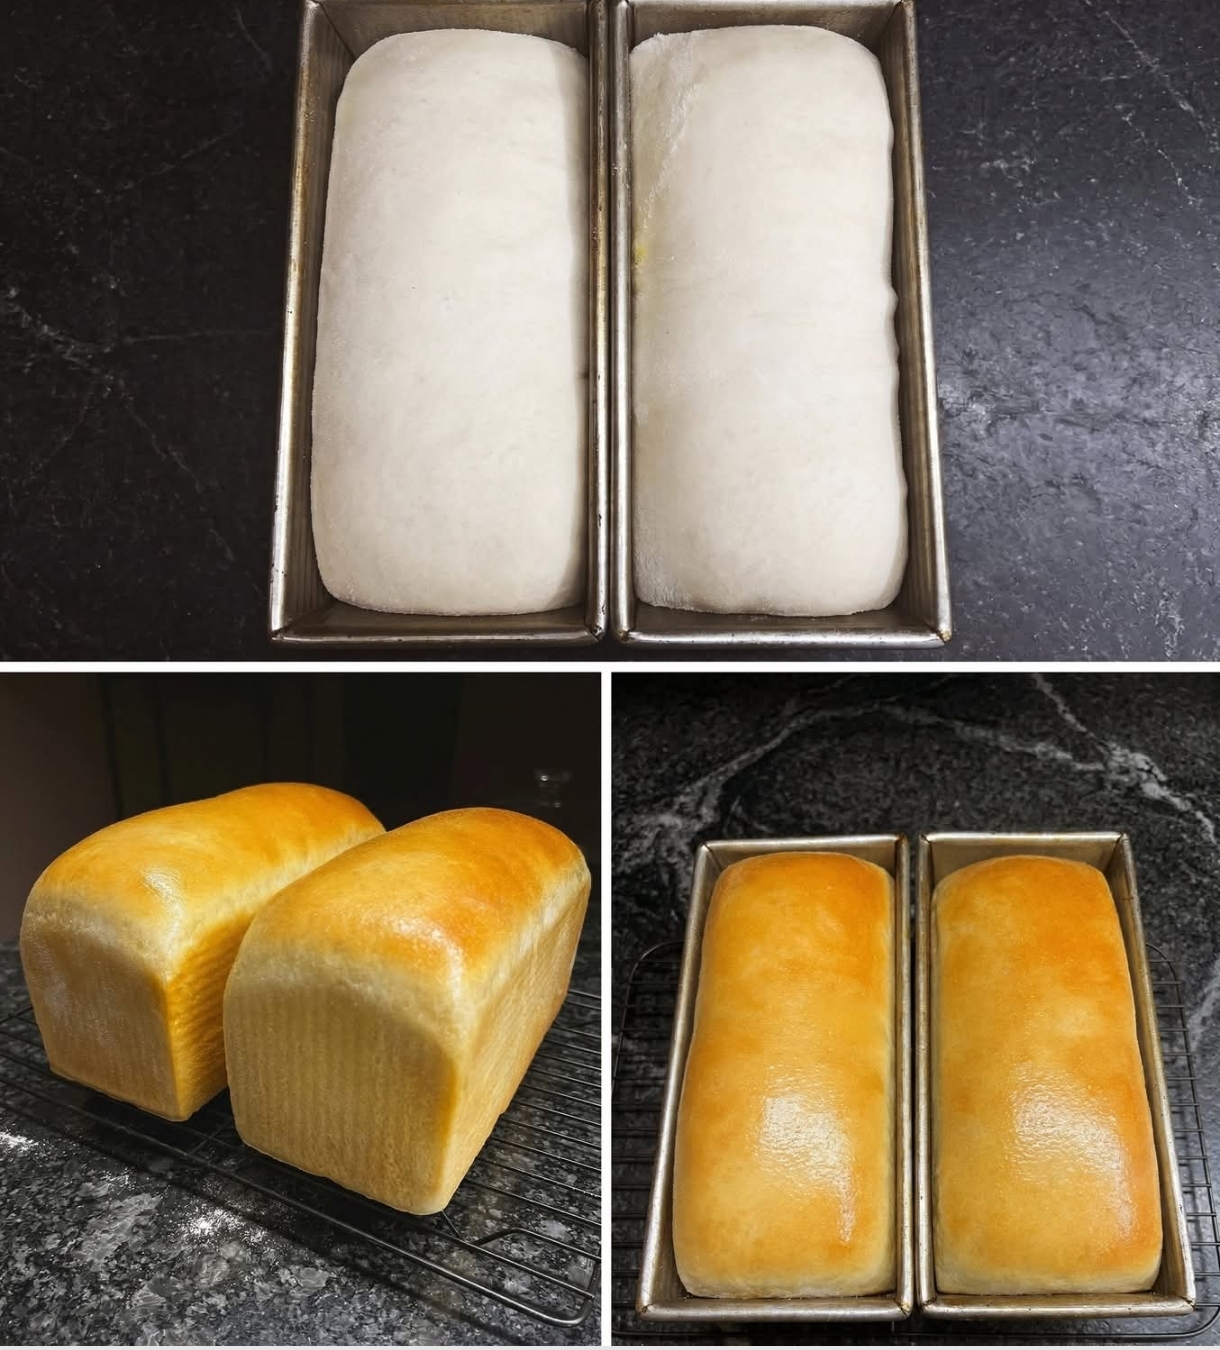
The Ultimate Soft Sourdough Sandwich Loaf
Introduction
There is something truly special about baking homemade sourdough bread. The aroma that fills the kitchen, the golden crust, and the soft, fluffy crumb make every moment of the process worthwhile. Unlike traditional artisan sourdough with its thick crust and large holes, this sandwich loaf is designed to be soft, tender, and perfect for everyday meals. It slices beautifully for sandwiches, toast, grilled cheese, French toast, and more.
This recipe combines the wonderful flavor of natural sourdough fermentation with the richness of butter, the sweetness of honey, and a careful mixing technique that produces consistently excellent results. Even if you’ve struggled with sourdough before, this forgiving recipe can help you achieve bakery-quality bread at home.
Ingredients
For the Dough
- 1 cup (240g) active sourdough starter
- 3½ cups (420g) unbleached all-purpose flour
- 1 cup (240ml) warm water
- ¼ cup (60ml) warm milk
- 3 tablespoons honey
- 4 tablespoons unsalted butter, softened
- 2 teaspoons fine sea salt
For Finishing
- 1 tablespoon melted butter for brushing the baked loaf
Equipment Needed
- Stand mixer with dough hook
- Large mixing bowl
- 9×5-inch loaf pan
- Kitchen scale (recommended)
- Plastic wrap or clean towel
- Cooling rack
- Bread knife
Instructions
Step 1: Feed the Starter
Feed your sourdough starter 4–8 hours before baking. It should be bubbly, active, and doubled in size before using.
Step 2: Mix the Dough
Combine the sourdough starter, warm water, warm milk, and honey in the mixer bowl.
Add the flour and salt, then mix until a shaggy dough forms.
Add the softened butter.
Step 3: Knead
Using the dough hook, knead for 8–12 minutes.
The dough should become smooth, elastic, and slightly tacky.
Perform the windowpane test by stretching a small piece of dough. If it stretches thin enough to let light pass through without tearing, it is ready.
Step 4: First Rise
Transfer the dough to a lightly greased bowl.
Cover and let rise for 4–8 hours, depending on room temperature, until doubled in size.
Step 5: Shape the Loaf
Gently deflate the dough.
Shape it into a tight rectangle by folding the sides inward and rolling it tightly into a loaf.
Place seam-side down in a greased loaf pan.
Step 6: Final Rise
Cover loosely.
Allow the dough to rise until it reaches about 1 inch above the rim of the loaf pan.
This usually takes 2–4 hours.
Step 7: Bake
Preheat oven to 375°F (190°C).
Bake for 35–40 minutes until the loaf is deep golden brown.
The internal temperature should reach about 200°F (93°C).
Step 8: Butter Finish
Immediately remove the bread from the pan.
Brush the hot loaf generously with melted butter.
This keeps the crust wonderfully soft and adds rich flavor.
Cool completely before slicing.
Baking Methods
Traditional Method
Allow the dough to ferment naturally at room temperature for the fullest sourdough flavor.
Overnight Method
After shaping, refrigerate overnight. The next morning, allow the loaf to warm slightly before baking.
Warm Kitchen Method
In warmer kitchens, fermentation will happen more quickly, so watch the dough rather than the clock.
Tips for Success
- Always use an active starter.
- Weigh ingredients for the most consistent results.
- Do not add too much flour; a slightly sticky dough creates a softer loaf.
- Perform the windowpane test before ending the kneading process.
- Let the bread cool completely before slicing to preserve its texture.
History of Sourdough Bread
Sourdough is one of the world’s oldest forms of leavened bread, dating back more than 5,000 years to ancient civilizations in Egypt. Before commercial yeast was invented, bakers relied on naturally occurring wild yeast and beneficial bacteria to ferment dough. This slow fermentation produced bread with remarkable flavor, improved keeping qualities, and excellent texture. Today, sourdough remains popular because of its traditional craftsmanship, rich taste, and wholesome appeal.
Nutritional Information (Approximate Per Slice)
- Calories: 170
- Protein: 5g
- Carbohydrates: 31g
- Fat: 3.5g
- Fiber: 1g
- Sugar: 3g
- Sodium: 220mg
Serving Suggestions
This bread is delicious served with:
- Butter and homemade jam
- Honey
- Peanut butter
- Avocado
- Scrambled eggs
- Grilled cheese
- Turkey or chicken sandwiches
- French toast
- Garlic butter
Why You’ll Love This Recipe
- Soft and fluffy texture
- Rich sourdough flavor
- Easy to slice
- Perfect for sandwiches
- Family-friendly
- Freezes beautifully
- Stays fresh for several days
- Beginner-friendly
Storage
Store at room temperature in a bread bag or airtight container for up to 4 days.
Freeze sliced bread for up to 3 months. Thaw individual slices as needed.
Conclusion
This sourdough sandwich loaf proves that homemade bread can be both beautiful and dependable. With an active starter, simple ingredients, and careful attention to technique, you’ll create a loaf with a tender crumb, soft buttery crust, and rich flavor that’s perfect for every meal. Once you’ve baked this loaf, it’s likely to become your go-to sourdough sandwich bread recipe for years to come.
For Bread Lovers
If you love homemade bread, this recipe is sure to become a favorite. Every slice showcases the magic of natural fermentation while remaining soft enough for everyday sandwiches. Whether you’re an experienced sourdough baker or making your first loaf, this recipe delivers delicious results that family and friends will enjoy. Nothing compares to the satisfaction of pulling a warm, freshly baked loaf from the oven and sharing it with the people you love.