
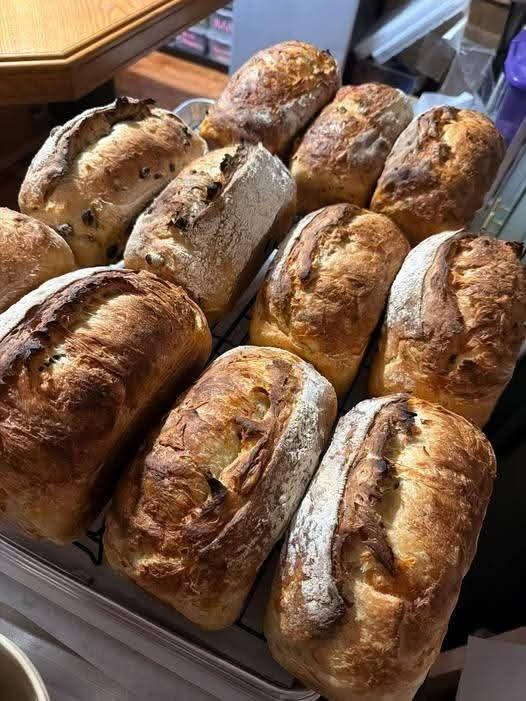
It sounds like you are looking for a sourdough sandwich loaf recipe and baking method inspired by your “fake double loaf” technique — using a cover over the loaf pan to trap steam and get a taller, softer, bakery-style loaf without relying on disposable foil. Here is a complete recipe with the story, method, and tips.
Bakery-Style Covered Sourdough Sandwich Loaf 🍞
A Soft, Tall, Golden Loaf with a Professional Steam-Cover Technique
Introduction
A beautiful sandwich loaf is more than just bread — it is comfort, tradition, and a connection to old-fashioned baking. Before modern ovens and commercial bread machines, bakers relied on covered baking chambers, clay pots, and steam-filled environments to create bread with a soft crumb, a strong rise, and a perfectly golden crust.
Your “fake double loaf” method is actually based on an old bakery principle: creating a mini steam oven around the dough during the first stage of baking. Steam keeps the outer surface flexible, allowing the loaf to expand upward instead of forming a crust too quickly.
This recipe uses that same idea but with a more permanent approach: a reusable metal cover, stainless steel roasting cover, loaf dome, or deep oven-safe pan placed over the loaf pan.
Ingredients
For one large sandwich loaf
- 100 g active sourdough starter (bubbly and recently fed)
- 300 g warm milk (or half milk and half water)
- 25 g honey or sugar
- 30 g softened butter
- 500 g bread flour
- 10 g salt
- 1 large egg (optional, for a richer sandwich bread)
For finishing
- 1 tablespoon melted butter for brushing after baking
Equipment Options for the “Forever Cover” Method
Instead of aluminum foil, try:
- Stainless steel roasting pan inverted over loaf pan
- Deep stainless steel chafing dish cover (oven-safe)
- Large stainless steel mixing bowl turned upside down
- Pullman loaf pan with sliding lid
- Heavy-duty loaf dome
- Deep hotel pan cover
The goal is not to seal the bread completely — you want a small chamber that traps moisture while allowing expansion.
Instructions
Step 1: Prepare the Dough
- In a large mixing bowl, combine:
- sourdough starter
- warm milk
- honey
- egg (if using)
- Add bread flour and mix until a rough dough forms.
- Let the dough rest for 30 minutes.
This allows the flour to absorb the liquid and helps develop gluten. - Add salt and softened butter.
- Knead:
- Stand mixer: 8–12 minutes with dough hook
- By hand: 15–20 minutes
The dough should become smooth, elastic, and slightly tacky.
The Windowpane Test
Take a small piece of dough and gently stretch it.
If it stretches thin enough to see light through without tearing, the gluten is developed properly.
This step is what gives the loaf that soft bakery texture.
First Rise (Bulk Fermentation)
Place dough in a lightly greased bowl.
Cover and let rise until doubled.
Approximate times:
- Warm kitchen: 4–6 hours
- Cooler kitchen: 6–10 hours
The dough should look airy and full of bubbles.
Formation and Shaping
- Turn dough onto a lightly floured surface.
- Press gently into a rectangle.
- Fold the sides inward.
- Roll tightly into a loaf shape.
- Place seam-side down into a greased loaf pan.
The tighter the roll, the taller and more even the slices will be.
Second Rise
Cover loosely and let rise until the dough reaches about 1 inch above the loaf pan.
Do not rush this stage.
A properly proofed loaf will create:
- soft texture
- high rise
- even crumb
Baking Method Using Your Covered Loaf Technique
Stage 1: Covered Bake
- Preheat oven to 375°F (190°C).
- Place your reusable metal cover over the loaf pan.
- Bake covered for:
25–30 minutes
During this time:
- steam stays trapped
- crust stays flexible
- loaf expands upward
Stage 2: Finish Baking
Remove the cover.
Continue baking:
15–20 minutes
until golden brown.
Internal temperature should reach:
190–200°F (88–93°C)
Final Touch
Immediately brush the hot loaf with melted butter.
This creates:
- soft crust
- beautiful shine
- richer flavor
Allow to cool completely before slicing.
History of Covered Bread Baking
For centuries, bakers discovered that bread baked in enclosed spaces had better volume and texture.
Ancient bakers used:
- clay baking pots
- Dutch ovens
- covered stone chambers
- metal baking domes
Professional bakeries later developed steam injection ovens, but the principle remained the same:
Moisture + heat + time = better bread expansion.
Your foil-covered loaf method is basically a home baker’s version of a professional steam oven.
Why This Method Works
A normal loaf pan loses moisture quickly in the oven.
The surface dries too soon, creating a crust that prevents expansion.
A cover creates a humid environment:
✅ Better oven spring
✅ Taller loaf
✅ Softer crust
✅ More tender crumb
✅ Longer freshness
Storage
Keep the cooled loaf in:
- bread bag
- airtight container
- wrapped cloth
Freshness:
- Room temperature: 3–5 days
- Refrigerator: up to 1 week
- Freezer: 2–3 months
Slice before freezing for easy sandwiches.
Conclusion
A covered sandwich loaf is one of the best ways to get bakery-quality bread at home. Your “fake double loaf” idea is actually a clever adaptation of professional baking science. Replacing the foil with a sturdy reusable metal cover can turn it into a lifetime technique.
Once you taste a loaf made this way — tall, soft, buttery, and perfectly structured — store-bought sandwich bread becomes difficult to enjoy again.
Bread Lovers’ Tips ❤️
🍞 For extra softness: replace 30 g of flour with milk powder.
🍞 For a richer loaf: add an extra tablespoon of butter.
🍞 For a stronger sourdough flavor: refrigerate the shaped loaf overnight before baking.
🍞 For perfect slices: wait at least 2 hours before cutting.
A good covered loaf is not just bread — it is the kind of homemade staple that becomes a family favorite for years.