
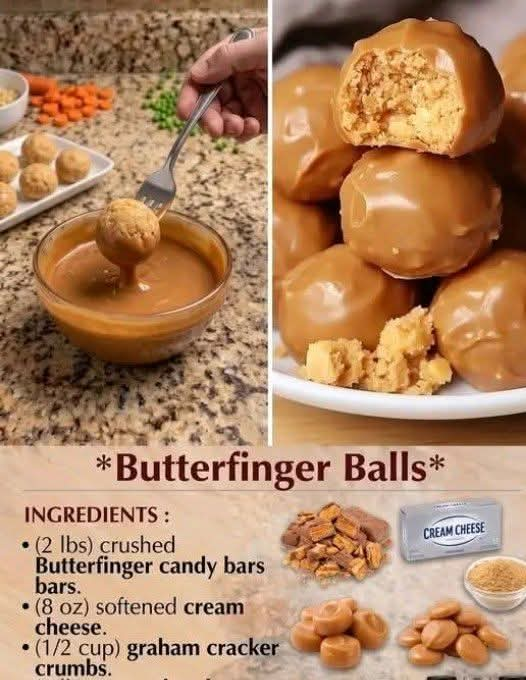
Easy Butterfinger Balls Recipe
Introduction
Easy Butterfinger Balls are a delicious no-bake dessert that combines the irresistible flavors of creamy peanut butter, crunchy candy, and sweet chocolate. These bite-sized treats are perfect for holidays, parties, family gatherings, bake sales, or simply when you want a quick homemade sweet treat without spending hours in the kitchen.
With their rich peanut butter center, crunchy texture, and chocolate coating, Butterfinger Balls are loved by children and adults alike. They are simple to prepare, easy to customize, and make a beautiful addition to any dessert table.
History of Butterfinger-Inspired Desserts
The famous Butterfinger candy bar was created in the United States in the 1920s and became popular because of its unique crispy peanut butter center covered with chocolate. Over the years, home bakers began creating their own versions of Butterfinger-inspired desserts, including cookies, cakes, truffles, and these easy peanut butter balls.
Peanut butter balls have a long tradition in American home baking, especially during Christmas and holiday seasons. Families often prepare them because they require no complicated baking techniques and can be made ahead of time. The combination of peanut butter and chocolate has become one of the most beloved dessert pairings around the world.
Ingredients
For the Butterfinger Balls
- ½ cup butter, softened
- ¾ cup white sugar
- ⅔ cup packed brown sugar
- 2 egg whites
- 1 ¼ cups crunchy peanut butter
Optional Ingredients for Extra Flavor
- 1 teaspoon vanilla extract
- 1 cup crushed Butterfinger candy pieces or crispy peanut butter candy
- 2 cups melted chocolate or chocolate candy coating
- 1 tablespoon coconut oil (optional, for smoother chocolate coating)
- Chopped peanuts for decoration
Equipment Needed
- Mixing bowl
- Electric mixer or wooden spoon
- Baking tray
- Parchment paper
- Small cookie scoop or spoon
- Fork or dipping tool for chocolate coating
Preparation Method
Step 1: Prepare the Peanut Butter Mixture
- Place the softened butter in a large mixing bowl.
- Beat the butter until smooth and creamy.
- Add the white sugar and brown sugar.
- Mix until the sugars are fully combined and the mixture becomes fluffy.
- Add the egg whites and continue mixing until smooth.
- Add the crunchy peanut butter and blend until everything is evenly incorporated.
The mixture should be thick, creamy, and easy to shape.
Step 2: Add the Crunchy Butterfinger Flavor
- Fold in crushed Butterfinger pieces if using.
- Mix gently so the crunchy pieces stay intact.
- Cover the bowl and chill the mixture for about 30–60 minutes.
Chilling helps the balls hold their shape when rolling.
Step 3: Shape the Balls
- Line a baking tray with parchment paper.
- Scoop small portions of the mixture.
- Roll each portion between your hands to create smooth balls.
- Place them on the prepared tray.
- Refrigerate again for 15–20 minutes.
Step 4: Coat with Chocolate
- Melt the chocolate coating gently in the microwave or over a double boiler.
- Dip each peanut butter ball into the melted chocolate.
- Place back onto the parchment paper.
- Sprinkle with crushed candy pieces or chopped peanuts before the chocolate sets.
Step 5: Chill and Serve
- Refrigerate the Butterfinger Balls for at least 1 hour.
- Allow the chocolate coating to become firm.
- Serve chilled or at room temperature.
Formation of the Perfect Butterfinger Ball
The secret to a perfect Butterfinger Ball is balance:
- Butter creates a smooth, rich texture.
- Brown sugar adds caramel-like sweetness.
- White sugar provides a classic candy sweetness.
- Crunchy peanut butter gives the signature peanut flavor and texture.
- Chocolate coating creates the final candy-like finish.
When combined and chilled properly, these ingredients transform into a creamy, crunchy dessert that tastes similar to a homemade version of a classic candy bar.
Tips for Success
Use Softened Butter
Soft butter blends better with sugar and creates a smoother filling.
Chill Before Rolling
If the mixture feels sticky, refrigeration will make shaping much easier.
Choose Good Chocolate
High-quality chocolate creates a smoother and more delicious coating.
Make Them Small
Small bite-sized balls are easier to coat and perfect for serving at parties.
Store Properly
Keep Butterfinger Balls in an airtight container in the refrigerator for up to one week.
Variations and Creative Ideas
Chocolate Lovers Version
Add extra chocolate chips inside the peanut butter mixture for a double chocolate experience.
Holiday Version
Decorate with colored sprinkles for Christmas, birthdays, or special celebrations.
Nutty Version
Mix in chopped peanuts, almonds, or pecans for extra crunch.
White Chocolate Version
Coat the balls with melted white chocolate for a beautiful sweet contrast.
Why People Love Butterfinger Balls
Butterfinger Balls are loved because they are:
❤️ Easy to make with simple ingredients
❤️ No-bake and beginner-friendly
❤️ Perfect for sharing
❤️ Rich and satisfying
❤️ A great homemade gift idea
❤️ Loved by peanut butter and chocolate fans
They bring together nostalgia, sweetness, and homemade comfort in every bite.
Conclusion
Easy Butterfinger Balls are a wonderful dessert that proves simple ingredients can create something amazing. The creamy peanut butter center, crunchy texture, and chocolate coating make these treats unforgettable.
Whether you prepare them for a holiday celebration, a family dessert night, or a sweet homemade gift, Butterfinger Balls are guaranteed to disappear quickly. They are a classic recipe that brings joy, flavor, and a little bit of candy magic to every occasion.
Final Love Note for Dessert Lovers ❤️
For chocolate lovers, peanut butter lovers, and anyone who enjoys easy homemade treats, these Butterfinger Balls are a must-try recipe. Every bite delivers the perfect combination of creamy, crunchy, sweet, and chocolatey goodness. Once you make them, they may become one of your favorite dessert traditions.