
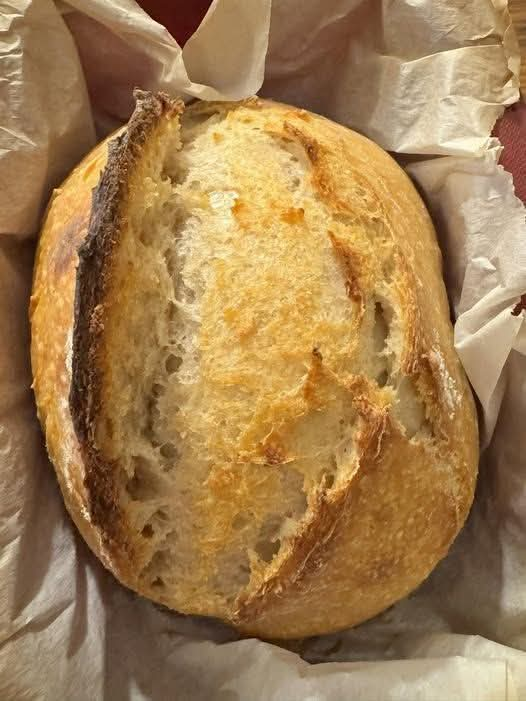
Classic Homemade Artisan Sourdough
Classic Homemade Artisan Sourdough Bread
Introduction
There’s nothing quite like baking your first loaf of sourdough bread. Watching a simple mixture of flour, water, salt, and an active sourdough starter transform into a beautifully risen loaf is one of the most rewarding experiences in home baking. While sourdough has a reputation for being difficult, the truth is that it requires more patience than skill. With time, practice, and a healthy starter, anyone can create bakery-quality bread with a crisp, crackly crust and a soft, chewy interior.
This recipe is designed for beginners while still producing an artisan-style loaf that is flavorful, rustic, and delicious. Whether you’re baking for your family, sharing with friends, or simply enjoying the process, homemade sourdough is a timeless tradition worth learning.
History of Sourdough
Sourdough is believed to be the oldest leavened bread in history, dating back more than 5,000 years to ancient Egypt. Before commercial yeast existed, bakers relied on naturally occurring wild yeast and beneficial bacteria found in flour and the environment. These microorganisms created the natural fermentation that gave sourdough its rise and distinctive tangy flavor.
Over the centuries, sourdough spread throughout Europe and became especially famous during the California Gold Rush, when miners carried their sourdough starters everywhere they traveled. Today, sourdough remains popular around the world because of its incredible flavor, rustic appearance, and traditional baking methods.
Ingredients
For the Dough
- 500 g bread flour
- 350 g filtered water, room temperature
- 100 g active sourdough starter (fed and bubbly)
- 10 g fine sea salt
Optional
- Rice flour for dusting the proofing basket
- Extra bread flour for shaping
- Sesame seeds, oats, or seeds for topping (optional)
Equipment
- Digital kitchen scale
- Large mixing bowl
- Dough scraper
- Banneton or proofing basket
- Dutch oven with lid
- Sharp bread lame or razor blade
- Cooling rack
Instructions
Step 1: Prepare the Starter
Feed your sourdough starter 4–8 hours before mixing the dough. It should double in size, become bubbly, and have a pleasant, slightly tangy aroma.
Step 2: Mix the Dough
In a large bowl, combine the bread flour and water until no dry flour remains. Cover and let rest for 45–60 minutes. This process, called autolyse, helps develop gluten naturally.
Step 3: Add Starter and Salt
Add the active sourdough starter and salt to the dough. Mix thoroughly until fully incorporated.
Step 4: Bulk Fermentation
Cover the bowl and let the dough ferment at room temperature for about 4–6 hours.
During the first 2 hours, perform a series of stretch-and-folds every 30 minutes to strengthen the dough.
Step 5: Pre-Shape
Lightly flour your work surface and gently shape the dough into a loose round. Let it rest for 20–30 minutes.
Step 6: Final Shape
Shape the dough tightly into a round or oval loaf and place it seam-side up in a floured banneton.
Step 7: Final Proof
Choose one of the following:
- Proof at room temperature for 2–3 hours, or
- Refrigerate overnight (8–16 hours) for enhanced flavor.
Step 8: Preheat the Oven
Preheat the oven to 475°F (245°C) with the Dutch oven inside for at least 45 minutes.
Step 9: Score the Dough
Turn the dough onto parchment paper and use a lame or razor blade to score the top.
Step 10: Bake
Bake covered for 20 minutes.
Remove the lid and bake another 20–25 minutes until the crust is deep golden brown and crisp.
Step 11: Cool
Transfer the loaf to a cooling rack and allow it to cool for at least one hour before slicing.
Methods
Traditional Artisan Method
Uses long fermentation at room temperature followed by baking in a Dutch oven for a rustic loaf with excellent oven spring.
Overnight Cold Fermentation
Refrigerating the shaped dough overnight develops deeper flavor, improves texture, and makes the dough easier to score.
Stretch-and-Fold Method
Instead of kneading, gently stretching and folding the dough strengthens the gluten while preserving air bubbles for an open crumb.
Formation
A properly baked sourdough loaf should have:
- A deeply golden, crisp crust
- Beautiful ear formation from scoring
- An airy, open crumb with irregular holes
- A chewy yet tender texture
- A rich, slightly tangy flavor
- A moist interior that stays fresh for several days
Tips for Success
- Always use a strong, active starter.
- Measure ingredients by weight for the best results.
- Avoid adding too much flour during shaping.
- Handle the dough gently to keep the trapped air.
- Allow the bread to cool completely before slicing.
- Practice regularly—every loaf teaches something new.
Serving Suggestions
Enjoy homemade sourdough with:
- Butter and flaky sea salt
- Homemade fruit preserves
- Avocado and poached eggs
- Soup or stew
- Cheese and charcuterie
- Sandwiches
- Olive oil with balsamic vinegar
- Toast topped with honey or nut butter
Why People Love Sourdough
Sourdough enthusiasts love it because:
- It has a rich, complex flavor.
- The crisp crust and chewy crumb are irresistible.
- Natural fermentation creates a unique texture.
- Each loaf is handcrafted and unique.
- Baking sourdough is relaxing and rewarding.
- It connects modern bakers with centuries of bread-making tradition.
- Sharing a homemade loaf with family and friends brings joy and creates lasting memories.
Conclusion
Baking sourdough bread is more than making food—it’s learning a timeless craft. Every loaf tells a story of patience, care, and creativity. While your first loaf may not be perfect, every bake builds confidence and skill. With a healthy starter, quality ingredients, and a little practice, you’ll soon be creating beautiful artisan loaves that are every bit as delicious as those from a professional bakery. Enjoy the journey, celebrate every success, and savor every slice.