
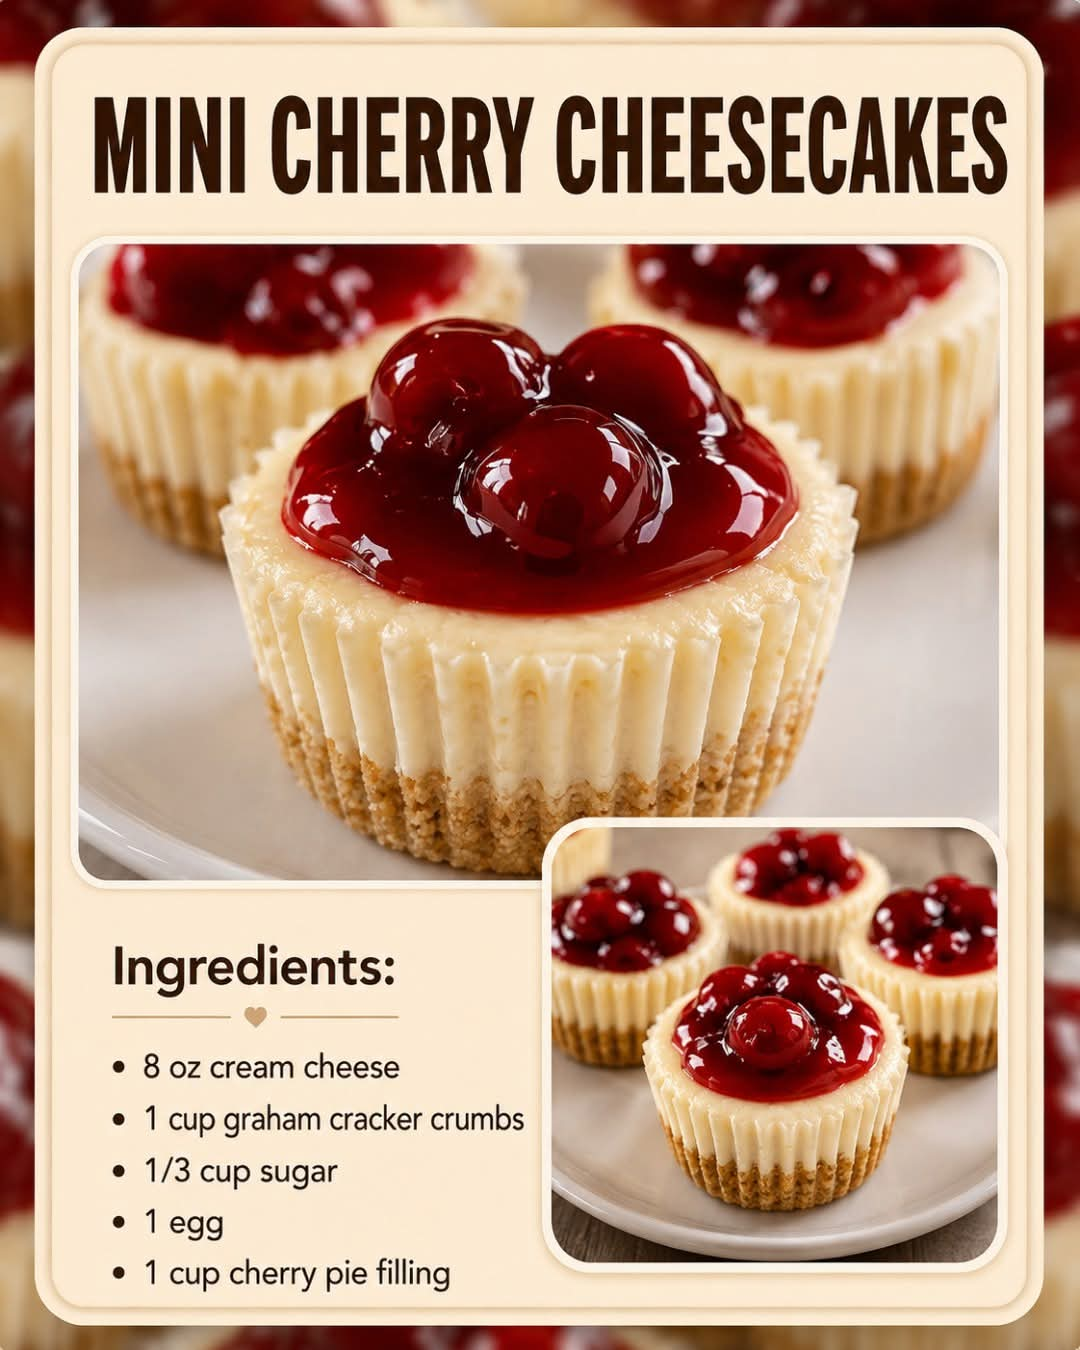
🍒 Mini Cherry Cheesecakes 🍰
Creamy, Delicious, Bite-Sized Cheesecakes with a Cherry Topping
🌟 Introduction
Mini Cherry Cheesecakes are the perfect little dessert when you want something creamy, fruity, and wonderfully indulgent without making a full-sized cheesecake. Each individual cheesecake has a buttery graham-cracker crust, a smooth and creamy cheesecake filling, and a glossy cherry topping.
They are especially wonderful for holidays, birthdays, family gatherings, potlucks, afternoon tea, bake sales, or simply when you want a special homemade treat. Because they are made in individual portions, they are also easy to serve and beautiful on a dessert table.
The combination of tangy cream cheese, sweet vanilla, buttery crust, and juicy cherries makes these little cheesecakes incredibly difficult to resist!
🛒 Ingredients
For the Crust
- 1 ½ cups graham cracker crumbs
- ¼ cup granulated sugar
- 6 tablespoons unsalted butter, melted
- ¼ teaspoon salt
For the Cheesecake Filling
- 16 ounces (450 g) cream cheese, softened
- ½ cup granulated sugar
- 2 large eggs
- 1 teaspoon vanilla extract
- ½ cup sour cream
- 2 tablespoons all-purpose flour
- 1 tablespoon lemon juice
- ¼ teaspoon salt
For the Cherry Topping
- 1 can (about 21 ounces / 595 g) cherry pie filling
Or use homemade cherry topping:
- 2 cups pitted cherries, fresh or frozen
- ⅓ cup granulated sugar
- 1 tablespoon cornstarch
- 1 tablespoon lemon juice
- 2 tablespoons water
- ½ teaspoon vanilla extract
Optional Decoration
- Whipped cream
- Fresh cherries
- Shaved white chocolate
- Powdered sugar
- Small mint leaves
🍒 Equipment
- 12-cup muffin tin
- Paper cupcake liners
- Mixing bowls
- Electric hand mixer or stand mixer
- Measuring cups and spoons
- Small spoon or cookie scoop
- Rubber spatula
- Cooling rack
👩🍳 Instructions
Step 1: Prepare the Oven
Preheat your oven to 325°F (165°C).
Line a 12-cup muffin tin with paper cupcake liners.
Preparing the liners first makes removing the mini cheesecakes much easier after baking.
Step 2: Make the Graham Cracker Crust
Place the graham cracker crumbs in a mixing bowl.
Add the sugar and salt and stir well.
Pour in the melted butter and mix until the crumbs are evenly coated and resemble wet sand.
Divide the mixture evenly among the 12 cupcake liners.
Use the back of a small spoon, measuring cup, or the bottom of a small glass to firmly press the crumbs down.
Bake the crusts for approximately 5–7 minutes.
Remove them from the oven and allow them to cool slightly.
🧀 Step 3: Prepare the Cheesecake Filling
Place the softened cream cheese in a large mixing bowl.
Beat it on medium speed until smooth and creamy.
Add the sugar and continue mixing until combined.
Add the eggs one at a time, mixing gently after each addition.
Add the vanilla extract, sour cream, lemon juice, flour, and salt.
Mix just until everything is combined and smooth.
Important Tip
Do not overmix the batter after adding the eggs.
Too much air can cause cheesecakes to puff dramatically during baking and then sink as they cool.
The finished batter should be thick, creamy, and completely smooth.
🧁 Step 4: Fill the Cheesecake Cups
Spoon the cheesecake mixture evenly over the prepared crusts.
Fill each cup approximately ¾ full.
Gently tap the muffin tin against the counter once or twice to remove large air bubbles.
🔥 Step 5: Bake
Place the muffin tin in the preheated oven.
Bake for approximately 18–22 minutes.
The edges should look set while the centers should still have a very slight jiggle.
Do not wait for the centers to become completely firm in the oven.
They will continue to set while cooling.
❄️ Step 6: Cool the Cheesecakes
Remove the pan from the oven.
Allow the cheesecakes to cool in the muffin tin for about 20–30 minutes.
Then transfer them to the refrigerator.
Chill for at least 2–4 hours.
For the best texture, refrigerate them overnight.
🍒 Step 7: Add the Cherry Topping
Once the cheesecakes are completely chilled, spoon a small amount of cherry pie filling over each cheesecake.
Try to place one or two beautiful cherries in the center of each one.
If you’re making homemade cherry topping, combine the cherries, sugar, cornstarch, lemon juice, and water in a saucepan.
Cook over medium heat, stirring gently, until the cherries release their juices and the mixture thickens.
Remove from the heat and stir in the vanilla.
Allow the topping to cool completely before spooning it onto the cheesecakes.
🍰 Step 8: Decorate
For an extra-special presentation, add a small swirl of whipped cream to each cheesecake.
Top with a cherry.
You can also add a little grated white chocolate or a tiny mint leaf.
Now your mini cherry cheesecakes are ready to serve!
❤️ The Method at a Glance
Crust
Mix graham cracker crumbs + sugar + melted butter → press into liners → bake briefly.
Filling
Beat cream cheese → add sugar → add eggs → add vanilla, sour cream, lemon juice, flour, and salt → mix until smooth.
Formation
Divide the filling over the crusts → bake until the edges are set and centers slightly jiggle.
Cooling
Cool at room temperature → refrigerate until completely chilled.
Topping
Add cherry pie filling or homemade cherry sauce → decorate → serve.
📜 A Little History of Cheesecake
Cheesecake has a long culinary history. Ancient versions of cheese-based cakes existed thousands of years ago, although they were quite different from the rich cream-cheese cheesecakes enjoyed today.
Over time, cheesecake traditions developed throughout Europe. The modern style became particularly associated with the United States after cream cheese became widely available.
Cherry and cheesecake became a particularly beloved combination because the bright acidity of cherries balances the richness and sweetness of the creamy filling.
Turning cheesecake into individual portions is a modern and practical way to enjoy this classic dessert. Mini cheesecakes are easier to portion, serve, decorate, and transport than a traditional large cheesecake.
💕 Why Cheesecake Lovers Love These
These little desserts have everything a cheesecake lover could want:
🍒 Sweet and slightly tangy cherries
🧀 Rich, creamy cheesecake
🍪 Buttery graham-cracker crust
🍦 Smooth vanilla flavor
🍋 A subtle brightness from lemon
✨ Beautiful individual presentation
They’re small enough to enjoy as a treat but impressive enough for a celebration.
⭐ Tips for Perfect Mini Cheesecakes
1. Use room-temperature cream cheese
Cold cream cheese can leave lumps in your filling.
2. Don’t overmix
Mix until smooth, but avoid whipping excessive air into the batter.
3. Don’t overbake
A slight jiggle in the center is exactly what you want.
4. Chill completely
The refrigerator is essential for achieving that classic cheesecake texture.
5. Add the topping after chilling
This keeps the cherry topping attractive and prevents it from sinking into the cheesecake.
6. Use full-fat cream cheese
For the richest and creamiest result, full-fat block-style cream cheese works especially well.
🍽️ Serving Suggestions
Serve these mini cheesecakes cold.
They are delicious with:
- A cup of coffee ☕
- Hot tea 🍵
- Fresh berries 🍓
- Extra cherry sauce 🍒
- Whipped cream
- Chocolate curls
- Vanilla ice cream
For a beautiful dessert platter, arrange the cheesecakes on a large serving tray and garnish each one with a cherry.
🎉 Perfect Occasions
These Mini Cherry Cheesecakes are wonderful for:
- Birthday parties
- Christmas celebrations
- Thanksgiving
- Valentine’s Day
- Mother’s Day
- Baby showers
- Bridal showers
- Potlucks
- Family dinners
- Afternoon tea
- Bake sales
- Holiday dessert tables
They’re also an excellent make-ahead dessert because they need time to chill before serving.
🧊 Storage
Store the cheesecakes covered in the refrigerator for approximately 3–4 days.
For best quality, keep them refrigerated until you’re ready to serve.
You can also freeze the baked cheesecakes without the cherry topping. Once completely chilled, wrap them well and freeze. Thaw them overnight in the refrigerator, then add the cherry topping before serving.
🍒 Final Formation
Imagine taking your first bite:
First comes the buttery graham-cracker crust.
Then comes the smooth, creamy vanilla cheesecake.
Finally, the sweet-tart cherry topping adds a burst of fruity flavor.
That combination is what makes these tiny cheesecakes so special.
They may be small, but they deliver all the satisfaction of a classic cheesecake in one beautiful little dessert.
❤️ Conclusion
Mini Cherry Cheesecakes are proof that sometimes the smallest desserts can make the biggest impression.
They’re creamy, fruity, buttery, elegant, and incredibly satisfying. The individual size makes them easy to serve, while the cherry topping gives them a beautiful homemade finish.
Whether you’re preparing them for your family, bringing them to a party, selling them at a bake sale, or simply treating yourself after a long day, these little cheesecakes are sure to become a favorite.
And the best part?
You don’t need to wait for a special occasion.
Make a batch, chill them, add those beautiful cherries, and enjoy a little bite of cheesecake happiness! 🍒🧀🍰❤️
🍒 A Little Love for Cheesecake Lovers
If you love creamy cheesecake, buttery crusts, and sweet cherries, these Mini Cherry Cheesecakes deserve a place in your recipe collection. One bite is rarely enough!