
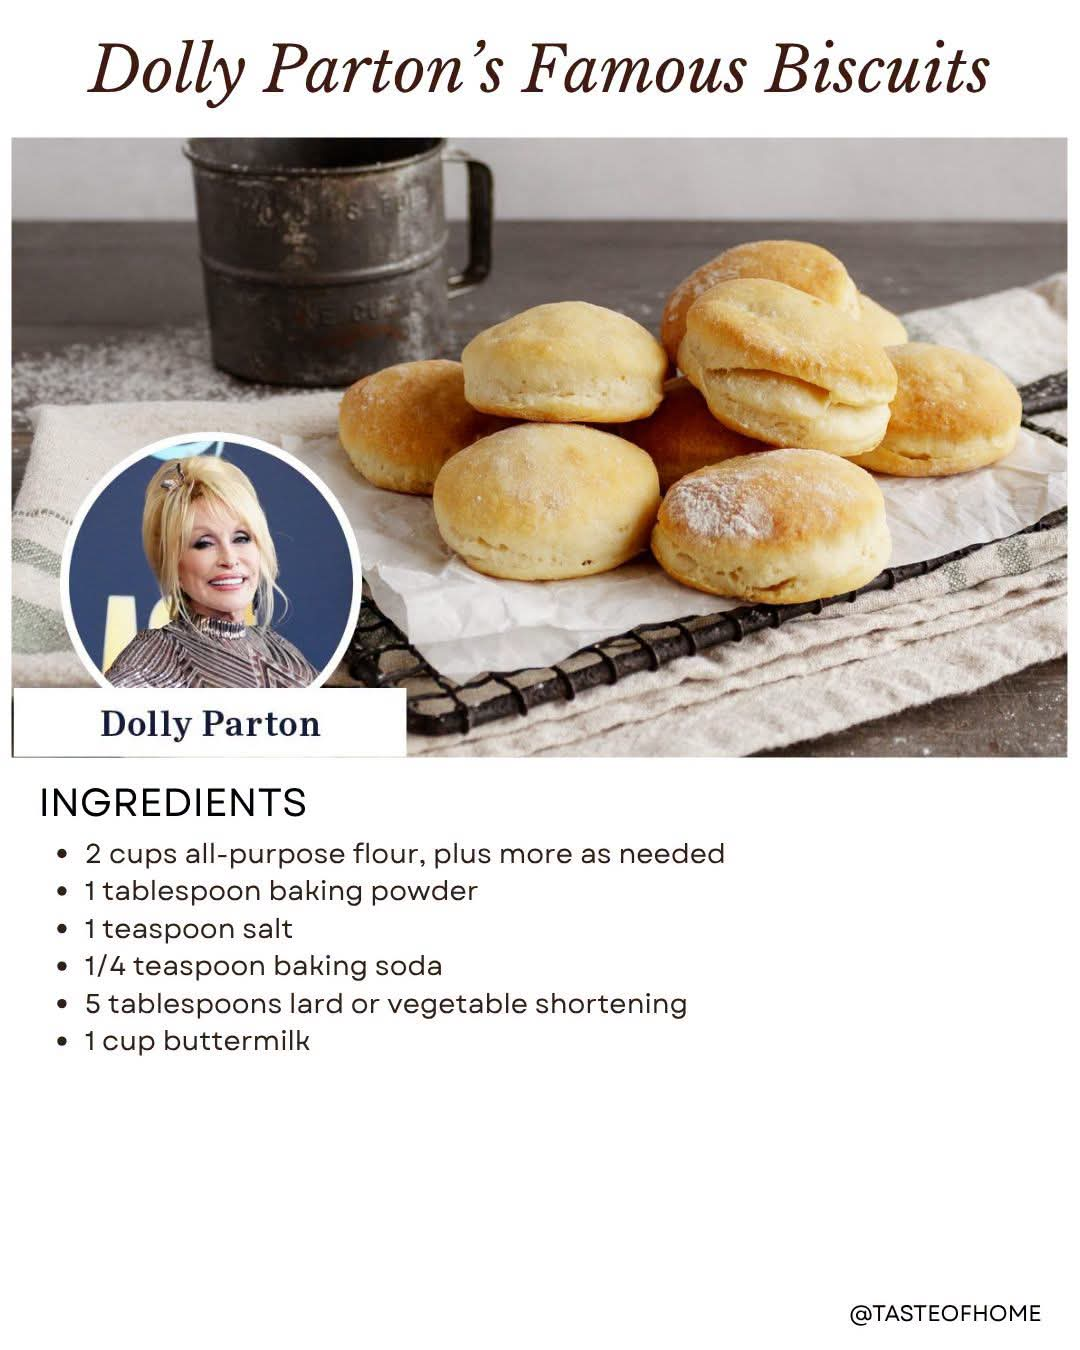
Dolly Parton–Inspired Southern Biscuits
Introduction
Few things are as comforting as a basket of freshly baked biscuits. Golden on the outside, tender and fluffy in the center, and delicious with butter, honey, jam, or homemade gravy, Southern biscuits have a special place in American home cooking.
This simple biscuit recipe is inspired by the traditional Southern baking style associated with Dolly Parton. It uses everyday ingredients and a straightforward technique, making it an excellent recipe for beginners as well as experienced bakers.
The secret is not complicated. Keep the dough cold, handle it gently, and avoid adding more flour than necessary. These small details help create biscuits that rise beautifully while remaining soft and tender inside.
Ingredients
Makes approximately 10 to 12 biscuits.
Dry Ingredients
3 cups all-purpose flour
1 tablespoon baking powder
1 teaspoon baking soda
1 teaspoon salt
1 tablespoon granulated sugar
Cold Ingredients
6 tablespoons cold unsalted butter
1 1/4 cups cold buttermilk
For the Top
2 tablespoons melted butter
Optional: honey or additional butter for serving
Equipment
Large mixing bowl
Pastry cutter or fork
Rolling pin
Round biscuit cutter, approximately 2 1/2 inches in diameter
Baking sheet or cast-iron skillet
Pastry brush
Wire cooling rack
History and Southern Tradition
Biscuits have been an important part of Southern American cooking for generations. Unlike yeast breads, biscuits can be prepared relatively quickly because chemical leaveners such as baking powder and baking soda provide the lift.
Buttermilk became particularly important in Southern kitchens because it was readily available as a byproduct of traditional butter making. Its natural acidity also works with baking soda to contribute to the biscuits’ tenderness and rise.
Dolly Parton is strongly associated with Southern food traditions and home-style cooking, and recipes connected with her name often celebrate the uncomplicated, comforting character of Appalachian and Southern cuisine.
This recipe follows that spirit rather than relying on complicated ingredients or elaborate techniques.
Preparing the Ingredients
Before beginning, make sure the butter and buttermilk are cold.
Cold butter is one of the most important ingredients in tender biscuits. When small pieces of butter remain inside the dough, they melt during baking and create pockets of steam. Those pockets help produce a flaky texture.
Measure the flour carefully. Too much flour can make the biscuits heavy and dry.
Preheat the oven to 425°F (220°C).
Method
Step 1: Combine the Dry Ingredients
Add the flour, baking powder, baking soda, salt, and sugar to a large mixing bowl.
Whisk everything together until evenly distributed.
This step is important because it prevents concentrated pockets of baking powder, baking soda, or salt in the finished biscuits.
Step 2: Cut in the Butter
Cut the cold butter into small cubes.
Add the butter to the flour mixture.
Using a pastry cutter, fork, or your fingertips, work the butter into the flour until the mixture resembles coarse crumbs.
Do not completely blend the butter into the flour.
Small pieces of butter should remain visible. Pieces about the size of small peas are ideal.
Step 3: Add the Buttermilk
Make a well in the center of the flour mixture.
Pour in the cold buttermilk.
Using a wooden spoon or your hands, gently mix until a rough, slightly sticky dough forms.
Do not overmix.
The dough does not need to look perfectly smooth at this stage.
If the dough appears extremely dry, add another tablespoon of buttermilk at a time until it comes together.
If it is slightly sticky, that is usually preferable to making it too dry with additional flour.
Forming the Dough
Lightly flour your work surface.
Turn the dough onto the surface.
Gently bring the dough together with your hands.
Instead of aggressively kneading it like bread dough, fold it over itself several times.
Flatten the dough gently, then fold it in half.
Turn it and repeat the process approximately 4 to 6 times.
This folding technique creates layers without developing too much gluten.
Shaping the Biscuits
Gently pat or roll the dough to approximately 3/4 inch to 1 inch thick.
Dip a round biscuit cutter lightly into flour.
Press the cutter straight down into the dough.
Do not twist the cutter.
Twisting can seal the edges of the dough and prevent the biscuits from rising properly.
Place the biscuits close together on a baking sheet or in a lightly greased cast-iron skillet.
For softer sides, place the biscuits close together.
For slightly crispier sides, leave a little space between them.
Gather the remaining dough gently and cut additional biscuits.
Try not to repeatedly knead the scraps, because excessive handling can make the final biscuits tougher.
The Final Formation
Once all the biscuits have been shaped, place them on the prepared baking surface.
For an especially good rise, make sure the dough remains cool.
If your kitchen is warm or the butter has softened significantly, place the shaped biscuits in the refrigerator for about 10 minutes before baking.
Brush the tops lightly with melted butter.
Baking
Place the biscuits in the preheated 425°F (220°C) oven.
Bake for approximately 12 to 16 minutes, depending on their size and your oven.
The tops should become golden brown and the biscuits should look fully risen.
Do not rely solely on the color of the tops. The centers should be cooked through.
Remove them from the oven and immediately brush the tops with a little more melted butter.
Allow them to rest for several minutes before serving.
How to Get Extra-Fluffy Biscuits
The most important rule is to keep the butter and buttermilk cold.
Use a light touch when mixing.
Do not overwork the dough.
Avoid adding excessive flour.
Fold the dough rather than kneading it aggressively.
Cut the biscuits straight down without twisting the cutter.
Bake in a fully preheated oven.
These simple techniques make a noticeable difference.
How to Serve Them
Fresh biscuits are wonderful served warm with butter.
For a sweet breakfast, serve them with:
Honey
Strawberry jam
Raspberry preserves
Peach preserves
Apple butter
Cinnamon butter
For a savory meal, try them with:
Country gravy
Sausage gravy
Fried chicken
Scrambled eggs
Bacon
Breakfast sausage
Ham and cheese
They can also be split and used to make breakfast sandwiches.
A Simple Honey Butter
For a special finishing touch, combine:
4 tablespoons softened butter
1 tablespoon honey
Mix until smooth and creamy.
Spread it over warm biscuits immediately before serving.
The combination of warm biscuit, melted butter, and honey is simple but incredibly satisfying.
Common Mistakes to Avoid
Using Warm Butter
Warm butter disappears into the flour instead of creating distinct pockets.
Always begin with cold butter.
Overmixing
Biscuits are not bread. They do not require extensive kneading.
Overworking the dough develops gluten and can produce tough biscuits.
Adding Too Much Flour
A dry dough usually produces dry biscuits.
The dough should be soft and slightly sticky before shaping.
Twisting the Biscuit Cutter
Press the cutter straight down and lift it straight up.
This helps preserve the edges and encourages better rising.
Baking at the Wrong Temperature
Biscuits benefit from a properly heated oven.
Make sure the oven has reached 425°F (220°C) before placing the biscuits inside.
Storage
Fresh biscuits are best served warm on the day they are baked.
Store completely cooled biscuits in an airtight container at room temperature for up to 2 days.
For longer storage, wrap them carefully and freeze them for up to approximately 3 months.
To reheat, place them in a 350°F (175°C) oven until warmed through.
Make-Ahead Method
You can prepare the biscuits ahead of time.
Shape the biscuits and place them on a baking sheet.
Freeze them until solid, then transfer them to a freezer-safe container or bag.
When ready to bake, place the frozen biscuits directly on a baking sheet.
Bake at 425°F (220°C), adding several extra minutes to the normal baking time.
This is particularly useful when preparing breakfast for a family or guests.
Why People Love These Biscuits
There is something special about a recipe that does not require complicated equipment or unusual ingredients.
These biscuits are inexpensive, quick to prepare, and versatile enough for breakfast, lunch, dinner, or a comforting afternoon snack.
They have crisp, buttery edges and a soft, tender center, while the buttermilk provides a subtle tang that balances the richness of the butter.
Most importantly, they have that homemade quality that makes people want to reach for just one more.
Conclusion
A good biscuit does not need to be complicated.
With flour, butter, buttermilk, a little leavening, and the right technique, you can create warm, tender Southern-style biscuits in your own kitchen.
The real secret is in the method: cold ingredients, gentle handling, proper folding, and a hot oven.
Serve them fresh from the oven with butter and honey, alongside eggs and bacon for breakfast, or with savory gravy for a comforting Southern meal.
Once you master this basic recipe, you may find yourself making biscuits regularly. They are simple enough for an ordinary morning but special enough to bring everyone to the table.
Final Serving Suggestion
For the ultimate homemade experience, serve the biscuits while they are still warm. Split one open, add a generous pat of butter, and let it melt into the soft center.
Add a spoonful of honey or your favorite fruit preserves, and enjoy the simple comfort of a freshly baked Southern biscuit.
Yummy Pumpkin Bread
Introduction
Yummy Pumpkin Bread is a wonderfully soft, moist, and aromatic quick bread that captures the comforting flavors of autumn in every slice. Made with pumpkin puree, melted butter, cinnamon, nutmeg, cloves, and ginger, this bread has a tender crumb and a rich combination of warm spices.
It is simple enough for a beginner baker yet delicious enough to serve to family and guests. The pumpkin gives the loaf its beautiful golden-orange color and helps keep it moist, while the spices provide the familiar cozy flavor associated with pumpkin desserts.
This pumpkin bread is delicious for breakfast, an afternoon snack, or dessert. It can be enjoyed plain, spread with butter, or served warm with cream cheese, whipped cream, or a drizzle of maple glaze.
Ingredients
Dry Ingredients
- 1 ¾ cups (220 g) all-purpose flour
- 1 teaspoon baking soda
- 2 teaspoons ground cinnamon
- ½ teaspoon ground nutmeg
- ½ teaspoon ground cloves
- ½ teaspoon ground ginger
- ½ teaspoon salt
Wet Ingredients
- ½ cup (113 g) unsalted butter, melted and slightly cooled
- 1 cup (225 g) canned pumpkin puree
- ¾ cup granulated sugar
- ½ cup packed light brown sugar
- 2 large eggs
- 1 teaspoon pure vanilla extract
Optional Additions
For additional texture and flavor, you can add:
- ½ cup chopped pecans or walnuts
- ½ cup chocolate chips
- ¼ cup raisins or dried cranberries
- 1 tablespoon maple syrup
- 1 tablespoon pumpkin seeds for the top
Equipment
- 9 x 5-inch loaf pan
- Large mixing bowl
- Medium mixing bowl
- Whisk
- Rubber spatula
- Measuring cups and spoons
- Parchment paper
- Wire cooling rack
Preparation
Begin by preheating the oven to 350°F (175°C). Allow the oven to fully preheat before placing the bread inside so that the loaf rises evenly.
Grease a 9 x 5-inch loaf pan with butter or nonstick cooking spray. For easier removal, line the bottom and two long sides with parchment paper, leaving a little overhang.
Melt the butter and allow it to cool for several minutes. The butter should remain liquid but should not be extremely hot.
Method
Step 1: Combine the Dry Ingredients
In a medium bowl, whisk together the flour, baking soda, cinnamon, nutmeg, cloves, ginger, and salt.
Mixing the spices evenly into the flour helps distribute their flavor throughout the finished loaf.
Set the bowl aside.
Step 2: Prepare the Wet Mixture
In a large mixing bowl, whisk together the melted butter, granulated sugar, and brown sugar.
Add the pumpkin puree and whisk until the mixture is smooth.
Add the eggs one at a time, mixing well after each addition. Stir in the vanilla extract.
The mixture should be smooth, creamy, and evenly combined.
Step 3: Combine Wet and Dry Ingredients
Gradually add the dry ingredients to the pumpkin mixture.
Using a rubber spatula or wooden spoon, gently fold the ingredients together until no large streaks of flour remain.
Do not overmix the batter. A few small lumps are perfectly acceptable. Overmixing can develop too much gluten and make the finished pumpkin bread dense or tough.
If using nuts, chocolate chips, raisins, or dried cranberries, gently fold them into the batter at this stage.
Step 4: Fill the Loaf Pan
Transfer the batter to the prepared loaf pan.
Use a spatula to spread the batter evenly from corner to corner.
If desired, sprinkle chopped nuts or pumpkin seeds over the top before baking.
Step 5: Bake
Place the loaf pan on the center rack of the preheated oven.
Bake for approximately 50 to 65 minutes.
The exact baking time will depend on your oven and the depth of your loaf pan.
Begin checking the bread around the 50-minute mark. Insert a toothpick or thin wooden skewer into the center. If it comes out with a few moist crumbs attached but no wet batter, the bread is ready.
If the top becomes dark before the center is fully baked, loosely cover the loaf with aluminum foil and continue baking.
Step 6: Cool
Remove the pumpkin bread from the oven and allow it to cool in the pan for approximately 10 to 15 minutes.
Carefully lift the loaf out using the parchment-paper overhang and transfer it to a wire rack.
Allow it to cool completely before slicing.
Although it can be eaten warm, allowing the bread to cool helps the crumb set and makes it easier to cut clean slices.
The Best Baking Method
The key to excellent pumpkin bread is avoiding overmixing.
Once the flour is added, mix only until the ingredients are incorporated. The pumpkin puree provides plenty of moisture, while the melted butter contributes richness and tenderness.
Using both granulated sugar and brown sugar gives the bread a balanced sweetness. Brown sugar also contributes additional moisture and a deeper caramel-like flavor.
The combination of cinnamon, nutmeg, cloves, and ginger creates a classic pumpkin-spice profile without overpowering the pumpkin itself.
How to Make It Extra Moist
For exceptionally moist pumpkin bread, keep the following tips in mind:
- Measure the flour accurately. Too much flour can make the loaf dry.
- Use pumpkin puree rather than pumpkin pie filling.
- Do not overbake the bread.
- Avoid overmixing after adding the flour.
- Allow the melted butter to cool slightly before mixing it with the eggs.
- Let the finished loaf cool properly before slicing.
If you prefer an even richer loaf, you can add a tablespoon of maple syrup to the wet ingredients.
History of Pumpkin Bread
Pumpkin has been used in North American cooking for centuries. Indigenous peoples cultivated pumpkins and other varieties of squash long before European settlers arrived, using them as an important food source.
As pumpkin became incorporated into European-American cooking, it appeared in pies, puddings, soups, cakes, and breads.
Modern pumpkin bread became especially popular as a seasonal quick bread because it does not require yeast or a long rising period. Baking soda provides the leavening, allowing the batter to be mixed and baked relatively quickly.
The popularity of pumpkin bread grew alongside the broader popularity of pumpkin-spiced foods. Today, it is commonly associated with autumn gatherings, Thanksgiving celebrations, holiday breakfasts, and cozy homemade baking.
Flavor and Formation
The finished pumpkin bread should have a beautifully rounded loaf with a slightly domed top and a golden-brown crust.
Inside, the crumb should be soft, moist, tender, and evenly textured. The pumpkin provides a subtle earthy sweetness, while cinnamon contributes warmth. Nutmeg adds a gentle aromatic quality, cloves bring depth, and ginger provides a mild spicy finish.
When properly baked, the loaf should hold together easily when sliced without becoming crumbly or dry.
Serving Suggestions
Pumpkin bread can be served in many different ways.
For a simple breakfast, slice it and serve it at room temperature with butter.
For a cozy dessert, warm a slice slightly and serve it with whipped cream.
Cream cheese is another excellent pairing because its mild tang balances the sweetness of the pumpkin bread.
For an especially indulgent presentation, drizzle the cooled loaf with a simple maple glaze made from powdered sugar and maple syrup.
You can also toast individual slices and serve them with butter, cream cheese, or nut butter.
Optional Cream Cheese Spread
Ingredients
- 4 ounces cream cheese, softened
- 2 tablespoons powdered sugar
- ½ teaspoon vanilla extract
- 1 tablespoon milk or heavy cream
Method
Place the softened cream cheese in a small bowl.
Beat until smooth. Add the powdered sugar and vanilla and mix until combined.
Add the milk or cream gradually until the spread reaches your desired consistency.
Spread over slices of pumpkin bread just before serving.
Optional Maple Glaze
Ingredients
- 1 cup powdered sugar
- 2 tablespoons pure maple syrup
- 1 to 2 tablespoons milk
- ½ teaspoon vanilla extract
Method
Whisk the powdered sugar and maple syrup together.
Add milk a little at a time until the glaze becomes smooth and pourable.
Stir in the vanilla.
Drizzle over the completely cooled pumpkin bread and allow the glaze to set for several minutes before slicing.
Storage
Store completely cooled pumpkin bread in an airtight container at room temperature for up to 3 days.
For longer storage, refrigerate the wrapped loaf for approximately 5 to 7 days.
The bread can also be frozen. Wrap individual slices or the entire loaf tightly in plastic wrap and place it inside a freezer-safe bag or container.
Frozen pumpkin bread can generally be stored for up to 3 months.
To serve, allow frozen slices to thaw at room temperature or warm them gently in the microwave.
Make-Ahead Method
Pumpkin bread is an excellent make-ahead recipe.
Bake the loaf one day before serving, allow it to cool completely, and wrap it tightly.
The flavors often become even more developed after resting overnight.
If serving it for breakfast or a holiday gathering, prepare the bread the evening before and slice it shortly before serving.
Variations
Chocolate Chip Pumpkin Bread
Fold ½ to 1 cup of chocolate chips into the batter before baking. Semi-sweet chocolate works particularly well with the warm spices.
Pumpkin Pecan Bread
Add ½ cup of roughly chopped pecans. You can also sprinkle additional pecans over the top before baking.
Cranberry Pumpkin Bread
Add ½ cup dried cranberries for a sweet-tart contrast to the pumpkin and spices.
Maple Pumpkin Bread
Add 1 tablespoon of pure maple syrup to the wet ingredients and drizzle the finished loaf with maple glaze.
Spiced Pumpkin Bread
For an even more intense spice flavor, add a small pinch of allspice along with the cinnamon, nutmeg, cloves, and ginger.
Common Mistakes to Avoid
Using Pumpkin Pie Filling
Do not substitute pumpkin pie filling for pumpkin puree. Pumpkin pie filling already contains sugar and spices, which can significantly change the recipe.
Overmixing
Overmixing the batter can produce a heavy and chewy loaf. Fold the flour into the wet ingredients gently and stop mixing as soon as the batter comes together.
Overbaking
Pumpkin bread continues to firm up as it cools. Remove it from the oven when a toothpick inserted into the center comes out with a few moist crumbs.
Cutting Too Soon
Cutting the bread immediately after baking can cause it to crumble. Give it time to cool and finish setting.
Conclusion
Yummy Pumpkin Bread is the kind of homemade recipe that fills the kitchen with the warm fragrance of cinnamon, ginger, cloves, and pumpkin. It is simple, comforting, and versatile enough for breakfast, snacking, dessert, or holiday entertaining.
The combination of pumpkin puree, melted butter, brown sugar, and warm spices creates a tender loaf with plenty of moisture and rich seasonal flavor.
Whether served plain, spread with cream cheese, topped with maple glaze, or filled with chocolate chips and nuts, this pumpkin bread is a delicious way to enjoy the comforting flavors of homemade baking.
For Pumpkin Bread Lovers
For anyone who loves pumpkin desserts, this recipe is a wonderful starting point. It can be prepared as a traditional loaf, transformed with chocolate chips or pecans, or finished with a sweet maple glaze.
A warm slice with a little butter is particularly comforting on a cool morning, while a cream-cheese-topped slice makes an excellent afternoon treat.
Once you make this recipe, it is easy to see why pumpkin bread remains such a beloved seasonal favorite: it is uncomplicated to prepare, wonderfully fragrant, moist, and full of the classic flavors that make autumn baking so special.
Quick No-Rise Homemade Dinner Rolls
Introduction
When you want warm, homemade bread but do not have time to wait for yeast dough to rise, these quick no-rise dinner rolls are an excellent choice. They are made with simple pantry ingredients and come together in just a few minutes. Instead of yeast, baking powder provides the lift, while milk gives the rolls a soft texture and mayonnaise adds richness and moisture.
These rolls are especially convenient for busy weeknight dinners, holiday meals, soups, stews, breakfasts, or whenever you want something warm and comforting straight from the oven. They have a tender, slightly rich interior and a lightly golden top, making them wonderful served warm with butter.
Ingredients
For the Rolls
- 1 cup all-purpose flour
- 1 teaspoon baking powder
- 1 teaspoon salt
- 1/2 cup milk
- 2 tablespoons mayonnaise
For Serving
- Softened butter, as desired
- Honey or jam, optional
- Additional butter for brushing, optional
Preparation
Before beginning, preheat your oven to 400°F (200°C). Lightly grease a standard muffin pan with butter, cooking spray, or a little vegetable oil.
Measure the flour carefully and place it in a medium mixing bowl. Add the baking powder and salt. Whisk or stir the dry ingredients together until they are evenly distributed.
In a separate measuring cup or small bowl, measure the milk and mayonnaise. The mayonnaise does not need to be completely smooth at this stage because it will blend into the mixture when everything is combined.
Method
Step 1: Prepare the Dry Ingredients
Add the flour, baking powder, and salt to a bowl. Mix thoroughly.
The baking powder is the leavening ingredient in this recipe. Unlike traditional yeast rolls, these rolls do not require fermentation or proofing, which is what makes them so quick.
Step 2: Add the Milk and Mayonnaise
Pour the milk into the dry ingredients and add the mayonnaise.
Using a wooden spoon, spatula, or fork, gently stir everything together until a thick, soft batter forms.
Do not overmix. Once the flour has been incorporated and there are no large pockets of dry flour remaining, stop stirring. Overmixing can make quick rolls tougher and less tender.
Step 3: Fill the Muffin Pan
Spoon the batter evenly into the prepared muffin cups.
Depending on the size of your muffin pan, you can divide the mixture among approximately 6 to 8 cups. Fill each cup roughly halfway to two-thirds full, allowing room for the rolls to expand as they bake.
For more evenly shaped rolls, use a spoon or small cookie scoop to divide the batter.
Step 4: Bake
Place the muffin pan in the preheated oven.
Bake for approximately 15 minutes, or until the tops are lightly golden and the rolls are cooked through.
Because ovens vary, begin checking them around the 13-minute mark. A toothpick inserted into the center should come out without wet batter attached.
Step 5: Finish the Rolls
Remove the pan from the oven and allow the rolls to cool for a few minutes.
For an especially delicious finish, brush the warm tops with melted butter. Serve immediately while they are still warm.
The Method Behind These Quick Rolls
Traditional dinner rolls usually depend on yeast to create carbon dioxide, which causes the dough to rise. Yeast dough generally needs time to rest and ferment before baking.
This recipe takes a different approach. Baking powder provides the leavening, allowing the rolls to rise during baking without a lengthy resting period.
The milk supplies moisture and helps create a tender crumb. The mayonnaise contributes fat and richness while also helping keep the interior moist. Because the mixture is prepared as a batter rather than a traditional kneaded dough, there is no need for kneading, shaping, or proofing.
The result is a simple bread-like roll that can go from mixing bowl to oven very quickly.
A Little History
Quick breads became especially useful in home kitchens because they offered an alternative to traditional yeast breads. Before modern conveniences made baking ingredients readily available, cooks relied on a variety of chemical and natural leavening methods.
Baking powder became particularly valuable because it allowed home cooks to produce light baked goods without waiting for yeast fermentation. This led to a wide range of biscuits, muffins, quick breads, and other no-yeast recipes.
Recipes using mayonnaise in baking also became popular as home cooks discovered that mayonnaise could contribute both fat and moisture to cakes, breads, and rolls. Since mayonnaise is primarily made from eggs and oil, it can add richness without requiring several separate ingredients.
These quick rolls fit comfortably into that tradition of practical home cooking: inexpensive ingredients, minimal preparation, and a warm homemade result.
Formation and Texture
The formation of these rolls is quite different from traditional bread dough.
You are not trying to develop a strong gluten network through kneading. Instead, the goal is to combine the ingredients gently and create a soft batter.
When the rolls enter the hot oven, the moisture and heat activate the baking powder. This produces bubbles that expand within the batter, helping the rolls become lighter and slightly higher.
The exterior develops a delicate golden crust while the inside remains soft and tender.
For the best texture, avoid adding extra flour simply because the batter looks soft. A soft batter is exactly what helps produce tender rolls.
Tips for Perfect Results
Measure the Flour Correctly
Too much flour can make the rolls dense and dry. For the most consistent results, spoon flour into a measuring cup and level the top rather than packing flour into the cup.
Do Not Overmix
Stir only until the ingredients are combined. A few small lumps are preferable to heavily mixed batter.
Use Fresh Baking Powder
Baking powder loses strength over time. If yours is old, the rolls may not rise as well.
Do Not Overbake
Bake just until the tops are golden and the centers are cooked. Leaving them in the oven too long can make them dry.
Serve Them Warm
These rolls are at their best shortly after baking. A little butter melted over the warm surface makes them especially satisfying.
Serving Ideas
These quick rolls can accompany almost any meal.
Serve them alongside:
- Roast chicken
- Beef stew
- Vegetable soup
- Tomato soup
- Chili
- Mashed potatoes and gravy
- Roast beef
- Baked ham
- Fried chicken
- Thanksgiving or holiday dinners
- Scrambled eggs and breakfast potatoes
For a sweeter variation, serve warm rolls with butter and honey, fruit preserves, or jam.
Optional Variations
Garlic Butter Rolls
Brush the baked rolls with melted butter mixed with a little garlic powder and dried parsley.
Herb Rolls
Add a small amount of dried oregano, thyme, rosemary, or Italian seasoning to the dry ingredients.
Cheddar Rolls
Fold a little shredded cheddar cheese into the batter before dividing it among the muffin cups.
Honey Butter
Mix softened butter with a little honey and serve it alongside the warm rolls.
Pepper and Herb Rolls
Add freshly ground black pepper and a pinch of dried herbs for a savory version that pairs beautifully with soups and stews.
Storage
These rolls are best enjoyed fresh and warm, but leftovers can be stored in an airtight container at room temperature for about a day.
To refresh them, warm them briefly in the oven or microwave. A small amount of butter can be added before reheating to restore some moisture and richness.
For longer storage, allow the rolls to cool completely, place them in a freezer-safe container or bag, and freeze them. Thaw and gently reheat before serving.
Common Mistakes to Avoid
The most common mistake is overmixing the batter. Quick breads become tougher when they are mixed excessively.
Another mistake is using too much flour. The mixture should be soft enough to spoon into the muffin cups.
Do not skip preheating the oven. Baking powder reacts during the baking process, and the properly heated oven helps the rolls rise and develop their golden exterior.
Finally, avoid overbaking. The rolls should be golden on top and cooked through but still tender inside.
Conclusion
These quick no-rise homemade rolls are proof that you do not need yeast, complicated equipment, or hours of preparation to enjoy warm bread at home. With just flour, baking powder, salt, milk, and mayonnaise, you can create tender little rolls that are ready for the table in roughly 15 minutes of baking time.
They are simple enough for an ordinary weeknight but comforting enough for a special family dinner. Serve them warm with butter, pair them with a hearty soup or stew, or enjoy them with honey or jam.
For anyone who loves homemade bread but does not always have time for traditional yeast dough, these easy rolls are a practical and delicious recipe to keep close at hand.