
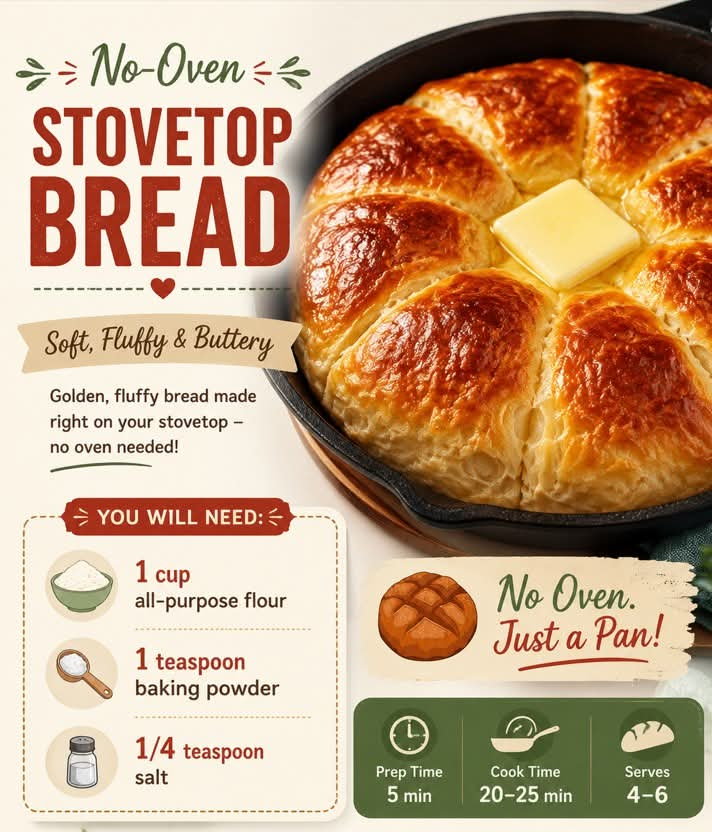
Homemade Stovetop Bread Without an Oven
Introduction
Fresh homemade bread does not require an oven. With a heavy skillet or covered pot, you can make a soft, tender loaf right on the stovetop. This method is especially useful when you do not have access to an oven or simply want a simple way to make bread using basic kitchen equipment.
The result is a beautifully golden bread with a soft interior and a lightly crisp crust. It is wonderful served warm with butter, honey, jam, cheese, eggs, soup, or simply a drizzle of olive oil.
Ingredients
For the Bread
- 3 cups all-purpose flour
- 1 tablespoon granulated sugar
- 2 teaspoons instant yeast
- 1 teaspoon salt
- 1 cup warm water, approximately
- 2 tablespoons vegetable oil or olive oil
- 2 tablespoons plain yogurt, optional, for extra softness
For the Pan
- 1 teaspoon vegetable oil or butter
Optional Toppings
- Melted butter
- Olive oil
- Honey
- Jam
- Cream cheese
- Soft cheese
- Garlic butter
- Sesame seeds
- Dried herbs
- Cinnamon and sugar for a sweeter version
History
Stovetop breads have been made in many parts of the world for centuries. Long before modern kitchens had reliable ovens, people cooked flatbreads and simple yeast breads on hot stones, griddles, clay surfaces, and heavy pans placed over a fire.
Different cultures developed their own versions of pan-cooked bread. The basic principle remained the same: mix flour with liquid and a leavening agent, allow the dough to develop, shape it, and cook it over controlled heat.
This modern stovetop loaf combines that traditional idea with familiar homemade bread ingredients. It is an excellent example of how simple cooking equipment can still produce satisfying homemade bread.
Preparation
Step 1: Activate the Yeast
Place the warm water in a large bowl. The water should feel warm but not hot.
Add the sugar and yeast. Stir gently and allow the mixture to stand for about 5 to 10 minutes.
If using active dry yeast, the mixture should become slightly foamy. If using instant yeast, you can also mix it directly with the flour.
Step 2: Make the Dough
Add the flour and salt to the yeast mixture.
Add the oil and optional yogurt.
Mix everything together with a wooden spoon or your hands until a rough dough forms.
If the dough seems extremely dry, add a little more warm water, one tablespoon at a time.
If it is excessively sticky, add a small amount of flour.
The goal is a soft dough that is slightly tacky but manageable.
Step 3: Knead the Dough
Transfer the dough to a lightly floured work surface.
Knead for approximately 8 to 10 minutes.
Push the dough forward with the heel of your hand, fold it back toward you, turn it, and repeat.
As you knead, the dough should become smoother, softer, and more elastic.
You can also use a stand mixer with a dough hook and knead until the dough becomes smooth and elastic.
Step 4: First Rise
Place the dough in a lightly oiled bowl.
Cover it with a clean kitchen towel or plastic wrap.
Allow it to rise in a warm, draft-free place for approximately 1 to 1 1/2 hours, or until it has roughly doubled in size.
The exact rising time will depend on the temperature of your kitchen.
Step 5: Shape the Bread
Once the dough has risen, gently press it down to release excess air.
Shape it into a round or slightly flattened loaf.
Do not make the loaf too thick. A moderately sized loaf cooks more evenly on the stovetop.
Let the shaped dough rest for another 15 to 20 minutes.
Stovetop Cooking Method
Step 6: Prepare the Pan
Use a heavy-bottomed skillet or Dutch oven that has a tight-fitting lid.
Lightly grease the pan with oil or butter.
Place the pan over very low heat for a few minutes.
It is important that the pan does not become extremely hot before the bread is added.
Step 7: Cook the Bread
Carefully place the shaped dough into the pan.
Cover the pan tightly with its lid.
Cook over very low heat for approximately 20 to 30 minutes.
Do not use high heat. The bottom of the bread can burn before the center has finished cooking.
After about 20 minutes, carefully check the bottom.
If it has become golden brown too quickly, reduce the heat even further.
Step 8: Turn the Bread
When the bottom is golden and the bread has become firm enough to handle, carefully flip it using a large spatula or plate.
Cover the pan again.
Continue cooking for another 10 to 15 minutes, or until the second side is golden brown and the center is fully cooked.
Cooking times vary according to the thickness of the loaf, the pan, and the strength of your stovetop.
Step 9: Check for Doneness
The bread should feel firm but springy when gently pressed.
If you have an instant-read thermometer, the center should generally reach around 190 to 200°F, or 88 to 93°C.
If the outside is browning but the center still seems doughy, lower the heat and continue cooking with the lid on.
Step 10: Cool the Bread
Transfer the finished bread to a wire rack.
Allow it to cool for at least 15 to 20 minutes before slicing.
Although it can be tempting to cut into it immediately, allowing the bread to rest helps the interior finish setting and prevents it from becoming gummy.
Alternative Covered-Pot Method
For an even softer loaf, you can use a heavy pot with a tight-fitting lid.
Lightly grease the bottom of the pot and place the shaped dough inside.
Cover and cook over the lowest possible heat.
The enclosed environment helps retain moisture and creates a softer interior.
Turn the loaf carefully halfway through cooking if necessary to brown both sides evenly.
Method for Extra-Soft Bread
For especially tender bread, use the optional yogurt and do not add too much flour during kneading.
The dough should remain soft.
You can also brush the finished bread with melted butter immediately after cooking. Cover it loosely with a clean towel for several minutes to help maintain a soft crust.
Serving Ideas
A warm slice of stovetop bread is delicious with many toppings.
Classic Butter
Spread softened butter over a warm slice and allow it to melt into the bread.
Honey
Drizzle honey over warm bread for a simple sweet breakfast.
Jam
Strawberry, raspberry, apricot, or blueberry jam pairs beautifully with homemade bread.
Cheese
Serve with cream cheese, soft cheese, cheddar, mozzarella, or another favorite cheese.
Garlic Butter
Mix softened butter with minced garlic and a little dried parsley. Spread it over warm bread.
Olive Oil
Dip fresh bread into extra-virgin olive oil. Add a little salt and dried herbs if desired.
Breakfast Style
Top a warm slice with scrambled eggs, fried eggs, avocado, or cheese.
Sweet Cinnamon Bread
For a dessert-style serving, spread the bread with butter and sprinkle it with cinnamon and sugar.
Important Tips for Success
- Keep the heat low. Stovetop bread needs gentle cooking so the outside does not burn before the center is done.
- Use a heavy pan. A thick-bottomed skillet distributes heat more evenly.
- Keep the lid closed. Removing the lid repeatedly allows heat and moisture to escape.
- Do not add excessive flour. Too much flour can produce a dense and dry loaf.
- Give the dough enough time to rise. Proper fermentation helps create a lighter texture.
- Let the bread cool before slicing. This gives the crumb time to set properly.
- Adjust cooking time according to thickness. A thicker loaf will require more time than a thinner one.
Formation and Texture
The bread should have a lightly browned exterior and a soft, tender interior.
When sliced, the crumb should be flexible and slightly springy rather than wet or dense.
The combination of yeast, kneading, resting, and gentle stovetop cooking creates the characteristic bread texture. The yogurt, if used, adds additional tenderness and moisture.
Storage
Allow the bread to cool completely before storing.
Keep it in an airtight container or wrapped in a clean kitchen towel for up to 2 days at room temperature.
For longer storage, slice the bread and freeze it in a sealed freezer-safe bag.
Individual slices can be thawed and warmed in a skillet or toaster.
Conclusion
This stovetop bread proves that you do not need an oven to enjoy homemade bread. With flour, yeast, water, a little oil, and a heavy pan, you can create a warm loaf with a tender center and beautifully browned crust.
It is simple enough for everyday baking and versatile enough for breakfast, lunch, dinner, or an afternoon snack.
For Bread Lovers
For bread lovers, the best part is serving the loaf while it is still slightly warm. A fresh slice with butter is simple and comforting, while honey, jam, cheese, garlic butter, or olive oil can turn the same bread into something completely different.
The recipe is also easy to customize. Add herbs for a savory loaf, seeds for texture, or cinnamon and sugar for a sweeter version.
Once you master the basic stovetop method, you can experiment with different flours, seasonings, toppings, and shapes while keeping the same simple cooking technique.
Final Serving Suggestion
Slice the bread while it is warm but not steaming hot. Spread generously with butter and serve immediately.
For a savory option, try warm bread with butter, cheese, and a sprinkle of herbs.
For a sweet option, try butter with honey or homemade jam.
There is something especially satisfying about tearing into a loaf of bread that was cooked entirely on the stovetop and made from simple ingredients.