
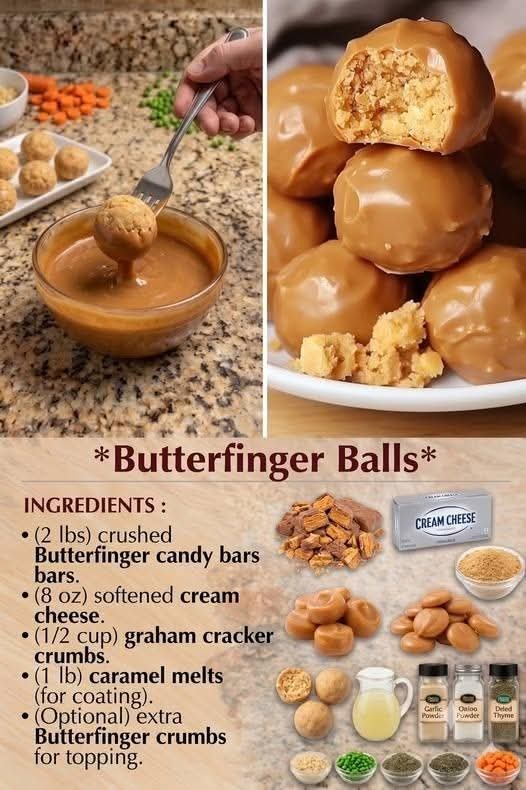
Easy Butterfinger Balls
Introduction
Easy Butterfinger Balls are a rich, peanut-butter-filled treat with a wonderful combination of creamy, crunchy, buttery, and sweet flavors. They are inspired by the beloved combination of peanut butter and crispy candy associated with Butterfinger-style desserts, but this homemade version turns those familiar flavors into bite-sized treats that are easy to prepare.
The recipe begins with a soft, buttery peanut-butter mixture combined with brown sugar and white sugar. A small amount of flour and baking soda helps create the base, while crunchy peanut butter provides texture and a satisfying roasted peanut flavor. Once prepared, the mixture can be shaped into small balls and finished according to your preference.
These treats are excellent for holiday dessert trays, bake sales, parties, family gatherings, cookie exchanges, or simply keeping a container of something sweet in the kitchen. They are especially appealing to peanut-butter lovers because every bite has a rich peanut flavor balanced by the sweetness of the sugars.
Ingredients
Main Mixture
- ½ cup butter, softened
- ¾ cup granulated white sugar
- ⅔ cup packed brown sugar
- 2 egg whites
- 1¼ cups crunchy peanut butter
- 1½ teaspoons vanilla extract
- 1 cup all-purpose flour
- ½ teaspoon baking soda
Optional Chocolate Coating
For a more candy-like Butterfinger-inspired finish, you can also use:
- 2 cups chocolate chips or melting chocolate
- 1 tablespoon shortening or coconut oil, optional
- ½ cup finely crushed crispy peanut-butter candy or peanut-butter cookies, optional
Optional Decorations
- Finely chopped roasted peanuts
- Peanut-butter candy pieces
- Melted white chocolate for drizzling
- Crushed chocolate cookies
- A small pinch of flaky salt
Preparation
Before beginning, allow the butter to soften at room temperature. Soft butter should be easy to press with a finger but should not be melted.
Line a large baking sheet or tray with parchment paper or wax paper. This will make shaping and handling the finished balls much easier.
Measure all ingredients carefully. Pack the brown sugar firmly into the measuring cup so that it holds its proper amount.
If you plan to coat the balls in chocolate, prepare a second tray lined with parchment paper.
Instructions
Step 1: Cream the Butter and Sugars
Place the softened butter in a large mixing bowl.
Add the granulated sugar and packed brown sugar. Using an electric mixer, beat the butter and sugars together for approximately 2 to 3 minutes.
The mixture should become lighter, smoother, and slightly fluffy.
Properly creaming the butter and sugars helps distribute the sugar throughout the mixture and creates a pleasant texture.
Step 2: Add the Egg Whites
Add the egg whites to the butter mixture.
Beat until they are fully incorporated.
Do not worry if the mixture looks slightly different after adding the egg whites. Continue mixing until it becomes smooth.
Add the vanilla extract and mix briefly.
Step 3: Add the Peanut Butter
Add the crunchy peanut butter.
Mix until the peanut butter is evenly distributed throughout the batter.
The crunchy peanut butter is especially important because it gives the finished treats small pieces of roasted peanuts throughout every bite.
For an especially rich peanut-butter flavor, use a good-quality commercial peanut butter that has a smooth consistency with crunchy peanut pieces.
Step 4: Combine the Dry Ingredients
In a separate bowl, whisk together:
- 1 cup all-purpose flour
- ½ teaspoon baking soda
Mixing these ingredients separately helps distribute the baking soda evenly through the flour.
Step 5: Combine Wet and Dry Ingredients
Gradually add the flour mixture to the peanut-butter mixture.
Mix on low speed just until the flour disappears.
Do not overmix the dough. Overmixing can make the finished mixture unnecessarily dense or tough.
The dough should be thick enough to hold its shape.
Step 6: Chill the Mixture
Cover the bowl and refrigerate the mixture for approximately 30 to 45 minutes.
Chilling makes the mixture easier to handle and prevents it from becoming too sticky while you shape the balls.
If your kitchen is particularly warm, you may want to chill it for closer to an hour.
Step 7: Form the Balls
Use a small cookie scoop or tablespoon to portion the mixture.
Roll each portion gently between your palms until it forms a smooth ball.
Place the balls on the prepared parchment-lined baking sheet.
Try to keep them approximately the same size so they look uniform and are easy to serve.
For bite-sized treats, approximately 1 tablespoon of mixture per ball works very well.
Step 8: Chill Again
Once all of the balls have been shaped, place the tray in the refrigerator for another 20 to 30 minutes.
This additional chilling helps the balls firm up before coating or serving.
Chocolate Coating Method
If you want to turn these into a more traditional candy-style treat, chocolate coating is an excellent finishing touch.
Place the chocolate chips or melting chocolate in a microwave-safe bowl.
Heat in short intervals of approximately 20 to 30 seconds, stirring well between each interval.
Continue until the chocolate is almost completely melted. Stir until smooth.
If desired, add a tablespoon of shortening or coconut oil to help create a thinner, smoother coating.
Do not overheat the chocolate because it can become thick or grainy.
Coating the Balls
Using two forks or a dipping tool, place one chilled peanut-butter ball into the melted chocolate.
Turn it gently until completely coated.
Lift the ball from the chocolate and allow the excess coating to drip back into the bowl.
Place the coated ball on parchment paper.
Continue with the remaining balls.
If desired, sprinkle the tops with finely chopped peanuts or crushed peanut-butter candy before the chocolate sets.
Allow the chocolate to harden completely at room temperature or place the tray in the refrigerator for approximately 15 to 20 minutes.
Butterfinger-Inspired Crunch Method
For an even stronger Butterfinger-style character, crush crispy peanut-butter candy into very small pieces.
After dipping each ball in chocolate, immediately sprinkle some of the crushed candy over the top.
The combination of chocolate, peanut butter, and crunchy candy creates a texture that is especially satisfying.
You can also gently press a few larger pieces into the chocolate before it hardens.
Formation of the Recipe
The character of these treats comes from several simple ingredients working together.
Butter provides richness and helps create a smooth base. White sugar contributes sweetness, while brown sugar adds a deeper caramel-like flavor.
Crunchy peanut butter is the main flavor ingredient. It gives the recipe its characteristic roasted peanut taste while also adding small pieces of peanut throughout the mixture.
Egg whites help bind the ingredients together without adding the additional richness of egg yolks.
Flour provides structure, while baking soda helps create a lighter texture.
Vanilla brings all of the flavors together and gives the finished treats a familiar bakery-style aroma.
When chocolate is added, it provides a bittersweet contrast to the sweet peanut-butter center.
History
The idea behind Butterfinger-style desserts comes from the long-standing popularity of combining peanuts, peanut butter, sugar, and chocolate.
Butterfinger candy itself became famous for its crisp, flaky peanut-butter center covered in chocolate. Over time, the distinctive combination inspired countless homemade desserts, including cookies, cakes, cheesecakes, bars, pies, and bite-sized candies.
Homemade peanut-butter balls have their own long tradition as well. They became popular because they could be prepared with simple pantry ingredients and shaped without complicated equipment.
This recipe brings those two traditions together. Instead of trying to reproduce a commercial candy exactly, it uses familiar homemade ingredients to create a convenient peanut-butter treat with a Butterfinger-inspired flavor profile.
Important Tips for Success
Use Softened Butter
Softened butter blends much more easily with the sugars. Avoid using melted butter unless the recipe has specifically been designed for it.
Use Crunchy Peanut Butter
Crunchy peanut butter provides the texture that makes these treats particularly enjoyable.
Do Not Overmix
Once the flour has been added, mix only until everything is combined.
Chill the Mixture
Chilling is one of the easiest ways to make the balls easier to shape.
Keep the Balls Consistent
Using a cookie scoop helps produce evenly sized treats that look attractive on a dessert platter.
Do Not Overheat Chocolate
Chocolate should be melted gently. Stir frequently and use short heating intervals when using a microwave.
Serving Suggestions
Serve the Butterfinger Balls chilled or slightly cool.
They make an excellent addition to:
- Holiday cookie trays
- Dessert buffets
- Birthday parties
- Potluck gatherings
- Bake sales
- Cookie exchanges
- Family celebrations
- Afternoon coffee tables
- Homemade gift boxes
For an attractive presentation, place the balls in small paper candy cups and arrange them on a serving platter.
Storage
Store the finished treats in an airtight container.
If they are chocolate-coated, refrigeration is recommended, particularly in a warm kitchen.
They can generally be kept refrigerated for several days when properly covered.
For longer storage, place the balls in a freezer-safe container, separating layers with parchment paper. Allow them to thaw in the refrigerator before serving.
Variations
Chocolate Peanut Butter Balls
Use milk chocolate for a sweeter, classic candy flavor.
Dark Chocolate Version
Use dark chocolate for a richer and less sweet contrast.
Extra Peanut Version
Add finely chopped roasted peanuts to the mixture for additional crunch.
White Chocolate Drizzle
After the chocolate coating has set, drizzle melted white chocolate over the tops.
Salted Peanut Version
Add a tiny amount of flaky salt to the chocolate coating. The salt can beautifully balance the sweetness.
Double Peanut Butter Version
Use peanut-butter chips along with the crunchy peanut butter for an even more intense peanut-butter flavor.
Troubleshooting
The Mixture Is Too Sticky
Place it in the refrigerator for another 20 to 30 minutes. Chilling should make shaping much easier.
The Mixture Is Too Dry
If the mixture seems unusually dry and refuses to hold together, check that the ingredients were measured correctly. A small amount of additional peanut butter can help bring the mixture together.
The Balls Do Not Hold Their Shape
The mixture may need additional chilling. Shape the balls and refrigerate them before coating.
The Chocolate Is Too Thick
Add a very small amount of shortening or coconut oil and stir thoroughly.
The Chocolate Does Not Set
Place the coated balls in the refrigerator for approximately 15 to 20 minutes.
Why Peanut Butter Lovers Will Enjoy This Recipe
Peanut-butter lovers will appreciate this recipe because peanut butter is not simply an accent ingredient. It forms the heart of the dessert.
The crunchy peanuts provide texture, the brown sugar adds a caramel-like depth, the butter creates richness, and the chocolate coating brings everything together.
Each bite has a combination of sweet, nutty, buttery, and chocolate flavors that makes it difficult to stop at just one.
Conclusion
Easy Butterfinger Balls are a simple homemade treat that transforms everyday ingredients into something special. The combination of butter, brown sugar, white sugar, crunchy peanut butter, vanilla, and a little flour creates a rich and satisfying base that can be enjoyed on its own or finished with a layer of chocolate.
Their small size makes them perfect for sharing, while their peanut-butter and chocolate flavor makes them especially popular with dessert lovers.
Whether you prepare them for a holiday gathering, a bake sale, a family celebration, or simply as a homemade treat for the weekend, these Butterfinger-inspired balls are an easy recipe worth keeping in your collection.
The best recipes are often the ones that are simple enough to make again and again, and this is exactly that kind of recipe: uncomplicated, comforting, rich in peanut-butter flavor, and made for sharing with the people you love.