
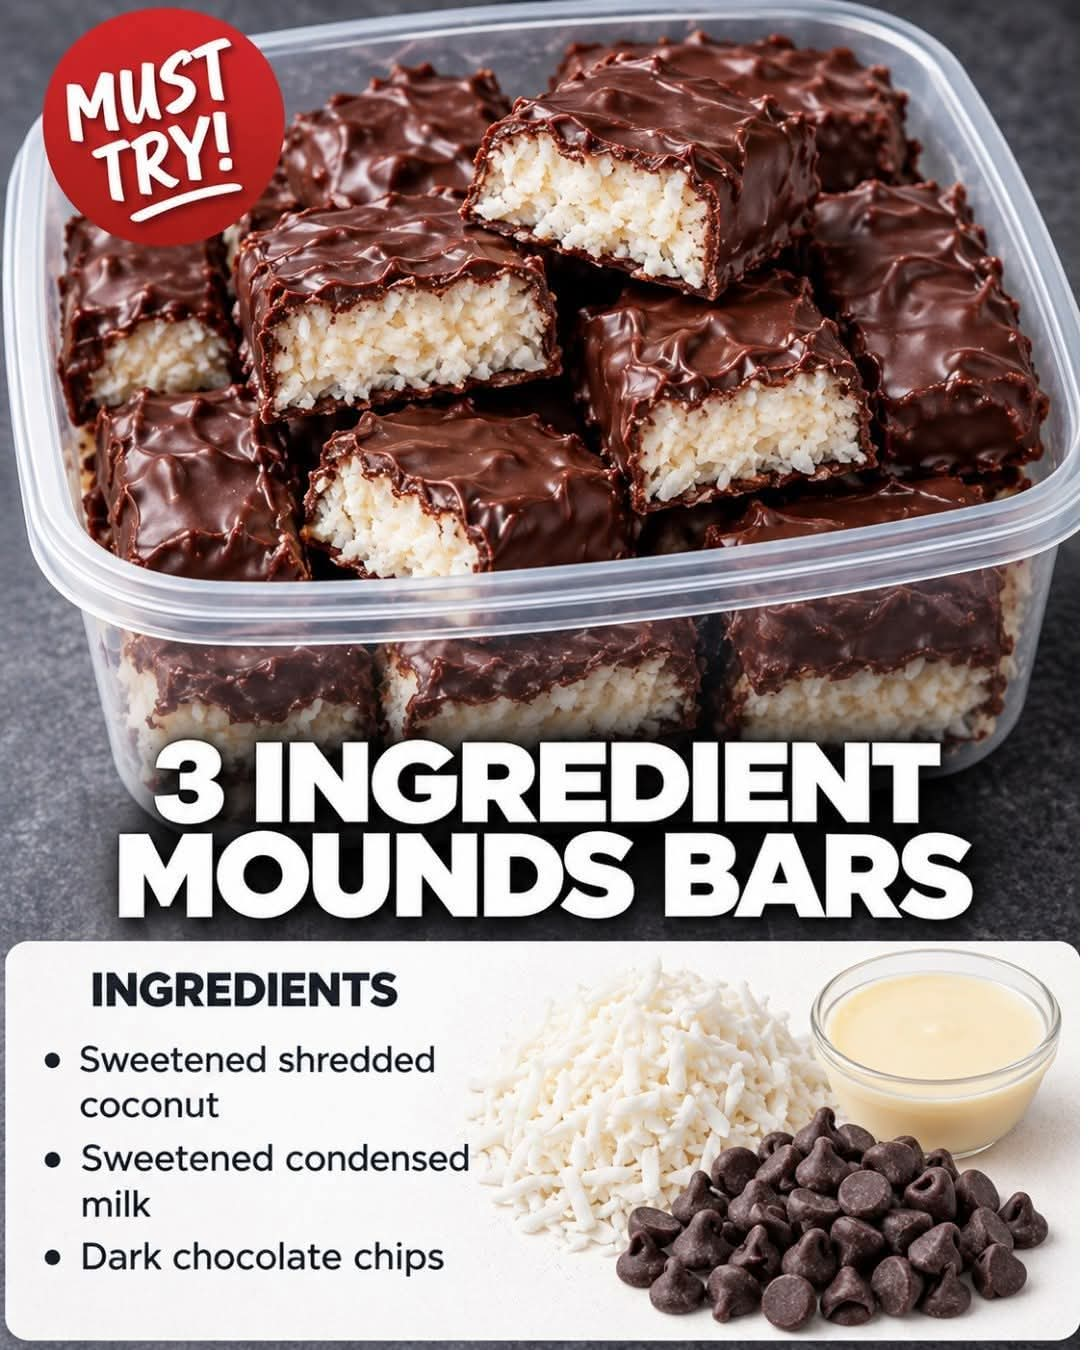
3-Ingredient Mounds Bars
Introduction
If you love the classic combination of sweet coconut and rich dark chocolate, these homemade 3-Ingredient Mounds Bars are a wonderfully simple treat to make at home. They require only three basic ingredients and do not require complicated baking techniques. The result is a chewy, creamy coconut center surrounded by a smooth chocolate coating.
These homemade bars are inspired by the classic MOUNDS candy bar, which traditionally combines sweetened shredded coconut with a dark chocolate coating. The original candy was first produced in the United States in the 1920s and became especially well known for its coconut-and-dark-chocolate combination.
This homemade version is especially appealing because the coconut mixture can be shaped into bars, chilled until firm, and then dipped in melted chocolate. It is an excellent recipe for holidays, parties, homemade gifts, bake sales, or simply satisfying a chocolate craving.
Recipe Overview
Recipe: 3-Ingredient Mounds Bars
Preparation Time: 20 minutes
Chilling Time: 1–2 hours
Total Time: About 1 hour 30 minutes
Yield: 12–16 bars
Difficulty: Easy
Method: No-bake
Ingredients
For the Coconut Center
- 3 cups sweetened shredded coconut
- 1 can, approximately 14 ounces, sweetened condensed milk
- 2 cups dark chocolate chips or dark chocolate melting wafers
These three ingredients form the entire recipe. The shredded coconut provides the chewy texture, the sweetened condensed milk binds the coconut together and gives it a rich sweetness, and the dark chocolate creates the smooth outer coating.
Optional Additions
The recipe is designed around three ingredients, but you can make small variations if desired:
- 1 teaspoon vanilla extract for additional flavor
- A small pinch of salt to balance the sweetness
- 1 tablespoon coconut oil to make the chocolate thinner and easier to dip
- Unsweetened coconut instead of sweetened coconut if you prefer a less-sweet filling
If you add anything beyond the three main ingredients, the recipe is technically no longer a three-ingredient recipe, but these additions can be useful for customizing the flavor and texture.
Instructions
Step 1: Prepare the Coconut Mixture
Place the shredded coconut in a large mixing bowl.
Pour the sweetened condensed milk over the coconut. Using a sturdy spoon or spatula, mix thoroughly until every strand of coconut is coated.
The mixture should be thick, sticky, and moist enough to hold its shape when pressed together. If it seems unusually loose, allow it to sit for several minutes so the coconut can absorb some of the condensed milk.
Step 2: Prepare the Pan
Line an 8-by-8-inch or 9-by-9-inch square baking pan with parchment paper.
Leave some parchment hanging over the sides. This will make it much easier to remove the chilled coconut mixture later.
Transfer the coconut mixture into the prepared pan.
Step 3: Form the Coconut Layer
Press the coconut mixture firmly and evenly into the pan.
Use the back of a spoon, a flat spatula, or your clean hands to compress it. Pressing firmly is important because it prevents the coconut center from crumbling when you cut it into bars.
Try to create an even layer approximately 1/2 to 3/4 inch thick.
Step 4: Chill the Coconut
Place the pan in the refrigerator for approximately 1 hour, or until the coconut mixture is firm.
For an even firmer center, you can place it in the freezer for about 30–40 minutes.
Do not freeze it until completely solid. You want the coconut mixture firm enough to cut but still easy to handle.
Step 5: Cut the Bars
Remove the coconut slab from the pan using the parchment paper.
Place it on a cutting board.
Using a sharp knife, cut the slab into approximately 12–16 rectangular bars.
For smaller candy-sized pieces, cut them into 16 bars. For larger dessert bars, cut them into 12 pieces.
If the coconut mixture begins sticking to the knife, lightly wipe the knife between cuts.
Step 6: Melt the Chocolate
Place the dark chocolate chips or melting wafers in a microwave-safe bowl.
Heat for approximately 20–30 seconds at a time, stirring thoroughly after each interval.
Continue until the chocolate is mostly melted, then stir until completely smooth.
Do not overheat the chocolate. Chocolate can become thick or scorched if heated for too long.
Alternatively, melt the chocolate gently over a double boiler, stirring constantly until smooth.
Step 7: Coat the Coconut Bars
Using two forks, dipping tools, or a chocolate fork, carefully place one coconut bar into the melted chocolate.
Turn it gently until all sides are coated.
Lift the bar out and allow excess chocolate to drip back into the bowl.
Place the coated bar on a parchment-lined tray.
Repeat with the remaining coconut bars.
Step 8: Create a Classic Finish
For a simple homemade appearance, leave the chocolate smooth.
For a more decorative finish, use a fork to gently make thin lines across the top while the chocolate is still soft.
You can also sprinkle a tiny amount of shredded coconut over the top before the chocolate sets.
Step 9: Chill Until Firm
Place the finished bars in the refrigerator for approximately 20–30 minutes, or until the chocolate has completely set.
Once firm, the bars are ready to serve.
Detailed Method
The key to successful Mounds Bars is controlling the texture of the coconut center.
The coconut and condensed milk should be mixed thoroughly but not excessively. You want the coconut to remain pleasantly chewy rather than becoming an overly dense paste.
Firm pressing is equally important. When the coconut mixture is compressed into the pan, the finished bars hold together much better after cutting.
Chilling is the next important stage. A cold coconut center is considerably easier to cut and dip into chocolate than a warm or soft one.
Finally, the chocolate should be melted gently. A smooth chocolate coating gives the bars their characteristic candy-bar appearance and provides a pleasant contrast to the soft coconut interior.
Formation of the Bars
The bars are formed in three simple layers of preparation.
First comes the coconut foundation. Sweetened shredded coconut is combined with condensed milk until a cohesive mixture forms.
Second comes shaping. The mixture is compressed into a uniform slab and chilled. Once firm, it is divided into individual rectangular pieces.
Third comes the chocolate coating. Each coconut piece is completely surrounded by melted dark chocolate and then chilled again until the coating becomes firm.
This simple formation creates the characteristic contrast of a soft, chewy coconut center and a firm chocolate exterior.
The History Behind Mounds Bars
The MOUNDS candy bar has a history dating back to the early 20th century. The Hershey Company states that MOUNDS was first produced in 1920 and later became part of The Hershey Company in 1988.
Historical accounts of its exact creation differ. Some sources credit West Haven candy maker Vincent Nitido with creating the original candy in 1920, while historical accounts connected with Peter Paul describe the formula as being developed by members of the Peter Paul company around 1920–1921.
The defining combination has remained remarkably simple: sweet coconut covered in dark chocolate. The Hershey Company describes the modern MOUNDS center as shredded, sweetened coconut surrounded by dark chocolate.
During World War II, MOUNDS became particularly popular with American soldiers. Hershey’s historical timeline notes that the U.S. military accounted for a very large share of MOUNDS purchases during the war.
The related Almond Joy appeared later, in 1946, using a coconut center with almonds and a different chocolate coating. MOUNDS, in contrast, remained the nut-free coconut-and-dark-chocolate version.
Why These Homemade Bars Are So Popular
The appeal of this recipe comes from its simplicity.
There is no cake batter to prepare, no oven to preheat, and no complicated candy-making equipment required. The coconut mixture can be prepared in minutes, chilled, cut, dipped in chocolate, and refrigerated until ready.
The texture is also highly satisfying. The coconut center is soft and chewy, while the chocolate shell becomes firm when chilled.
The combination of coconut and dark chocolate creates a rich flavor that is sweet without requiring a long ingredient list.
Tips for Perfect Mounds Bars
Use the Right Coconut
Sweetened shredded coconut works particularly well because it provides both moisture and sweetness.
If using unsweetened coconut, you may find that the finished bars are less sweet and slightly different in texture.
Press the Mixture Firmly
Do not simply spread the coconut mixture loosely into the pan. Compress it firmly so the bars hold together.
Chill Before Cutting
A well-chilled coconut layer is much easier to cut cleanly.
Use Good Chocolate
Since chocolate makes up the entire outer coating, its flavor has a significant effect on the finished dessert.
Dark chocolate provides the closest flavor profile to traditional MOUNDS candy.
Avoid Overheating Chocolate
Melt the chocolate slowly and stir frequently. Gentle heating produces a smoother coating.
Work Quickly
Once the coconut bars are cut, keep them chilled until you are ready to dip them. A firm center is much easier to coat.
Storage
Store the finished Mounds Bars in an airtight container.
They can be refrigerated for approximately 1–2 weeks, although they are often enjoyed much sooner.
For the best texture, allow refrigerated bars to sit at room temperature for several minutes before serving.
You can also freeze the finished bars in a freezer-safe container. Separate layers with parchment paper to prevent them from sticking together.
Serving Ideas
These homemade bars are excellent served as an afternoon treat with coffee or tea.
They also work beautifully as:
- Holiday candy
- Homemade gifts
- Party desserts
- Bake-sale treats
- Dessert-table additions
- Chocolate-and-coconut snack bars
- Homemade Christmas candy
- Valentine’s Day treats
- No-bake desserts
For gifting, place individual bars into small candy cups and arrange them in a decorative box or tin.
Variations for Coconut Lovers
Extra Coconut Mounds Bars
For an even stronger coconut flavor, sprinkle additional shredded coconut over the chocolate before it sets.
Dark Chocolate Version
Use a high-cocoa dark chocolate for a deeper, less-sweet flavor.
Milk Chocolate Version
Although traditional MOUNDS is associated with dark chocolate, milk chocolate can be used if you prefer a sweeter and creamier coating.
Mini Mounds Bars
Cut the coconut slab into small bite-sized pieces before dipping them. These make excellent party candies.
Coconut Truffles
Instead of forming rectangular bars, roll the coconut mixture into small balls and coat them completely in chocolate.
Chocolate Drizzle
Rather than completely dipping each piece, place the chilled coconut bars on parchment and drizzle melted chocolate over the top.
Common Problems and Solutions
The Coconut Mixture Is Too Soft
Add a little more shredded coconut and refrigerate it again. The mixture should be moist but firm enough to hold its shape.
The Bars Fall Apart
The coconut mixture probably needs to be pressed more firmly or chilled longer.
The Chocolate Is Too Thick
A small amount of coconut oil can help make melted chocolate more fluid and easier to coat with.
The Chocolate Does Not Set
Place the coated bars in the refrigerator until the chocolate becomes firm.
The Coconut Is Too Sweet
Use unsweetened coconut next time, or choose a darker chocolate with a higher cocoa percentage to balance the sweetness.
For Mounds Lovers
If you are a true coconut-and-chocolate lover, this recipe is particularly satisfying because every bite gives you the combination that made the original candy famous: chewy coconut surrounded by chocolate.
The recipe is also easy enough to make with children under appropriate supervision, especially during the shaping and decorating stages. It can become a fun family activity during holidays or weekends.
For coconut lovers, these bars can also be made slightly thicker, giving you a generous coconut center beneath the chocolate shell.
Conclusion
These 3-Ingredient Mounds Bars prove that an impressive homemade candy does not need a complicated recipe. With shredded coconut, sweetened condensed milk, and dark chocolate, you can create a rich, chewy, chocolate-covered coconut treat with very little preparation.
The recipe combines an uncomplicated method with a classic flavor combination that has been enjoyed for more than a century. The original MOUNDS candy was introduced in the 1920s, and its signature coconut-and-dark-chocolate combination remains its defining characteristic today.
Whether you make them for your family, prepare them as a holiday gift, serve them at a party, or simply keep a batch in the refrigerator for a sweet treat, these homemade bars are an easy and delicious way to enjoy the timeless pairing of coconut and chocolate.