
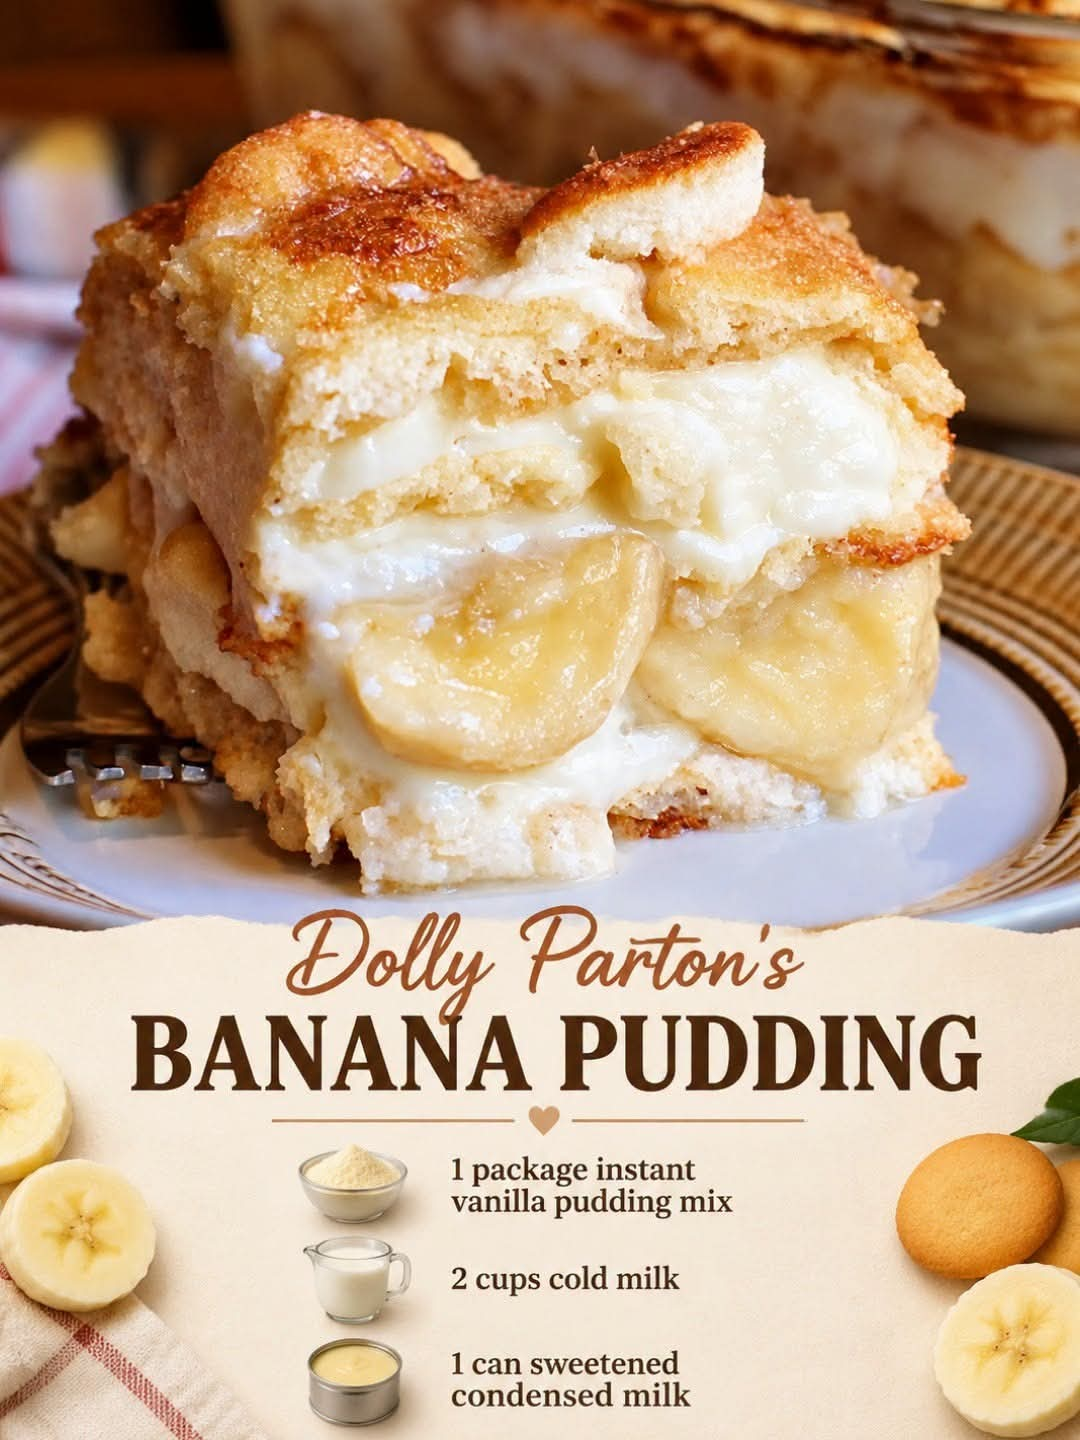
Dolly Parton’s Banana Pudding
Introduction
Dolly Parton’s Banana Pudding is a classic Southern-style dessert built around everything people love about homemade banana pudding: creamy vanilla pudding, sweet bananas, soft vanilla wafers, and a rich, cheesecake-like filling.
This version takes traditional banana pudding and makes it especially indulgent by combining instant vanilla pudding with sweetened condensed milk and softened cream cheese. The result is a smooth, luxurious dessert with layers of bananas and cookies that become wonderfully tender as the pudding rests.
It is an excellent make-ahead dessert for family dinners, potlucks, holidays, church gatherings, birthdays, and Sunday meals. It is simple enough for a beginner but impressive enough to serve to guests.
Ingredients
For the Creamy Pudding Mixture
- 1 package instant vanilla pudding mix, approximately 3.4 ounces
- 2 cups cold whole milk
- 1 can sweetened condensed milk, approximately 14 ounces
- 1 package cream cheese, 8 ounces, softened
For the Layers
- 4–6 ripe but firm bananas
- 1 package vanilla wafers, approximately 11 ounces
- 1 teaspoon vanilla extract, optional
- Whipped cream, optional, for topping
Preparation
Before beginning, make sure the cream cheese has softened to room temperature. This is important because softened cream cheese blends much more easily and helps prevent lumps.
Choose bananas that are ripe and naturally sweet but still firm enough to hold their shape. Very soft or heavily spotted bananas can become mushy after sitting in the pudding.
Have a large glass serving bowl, trifle dish, or deep 9-by-13-inch baking dish ready for assembling the dessert.
Instructions
Step 1: Prepare the Vanilla Pudding
Pour the cold milk into a large mixing bowl.
Add the instant vanilla pudding mix and whisk vigorously for about 2 minutes, or until the mixture begins to thicken.
Let the pudding stand for several minutes so it can reach a thicker consistency.
Step 2: Prepare the Cream Cheese
Place the softened cream cheese in a separate bowl.
Beat the cream cheese until completely smooth and creamy.
Gradually add the sweetened condensed milk while continuing to mix. Beat until the mixture is smooth and well incorporated.
If using vanilla extract, add it at this stage.
Step 3: Combine the Mixtures
Gradually add the cream cheese mixture to the prepared vanilla pudding.
Mix until everything is completely combined and the filling is thick, creamy, and smooth.
Avoid overmixing once the ingredients are incorporated.
Taste the mixture before assembling. The sweetened condensed milk provides plenty of sweetness, while the cream cheese adds a mild tang that balances the dessert.
Step 4: Prepare the Bananas
Peel the bananas and slice them into approximately 1/4-inch-thick rounds.
Try to slice the bananas shortly before assembling the pudding so they remain fresh.
For the best texture, use bananas that are yellow with a little firmness rather than extremely ripe bananas.
Step 5: Begin the First Layer
Place a layer of vanilla wafers across the bottom of your serving dish.
Arrange banana slices over the cookies.
Spread approximately one-third of the creamy pudding mixture over the bananas.
Use the back of a spoon or an offset spatula to spread the pudding evenly.
Step 6: Continue Layering
Repeat the layers:
- Vanilla wafers
- Sliced bananas
- Creamy pudding mixture
Continue until all of the ingredients have been used.
Finish with a generous layer of the pudding mixture.
Step 7: Decorate the Top
Arrange several vanilla wafers around the top of the pudding.
You can also add additional banana slices just before serving.
For an extra-special presentation, pipe or spoon whipped cream over the top.
For the best appearance, wait until shortly before serving to add fresh banana slices to the top.
Step 8: Refrigerate
Cover the banana pudding tightly with plastic wrap or a lid.
Refrigerate for at least 4 hours.
For an especially soft, flavorful dessert, refrigerate it overnight.
The resting time allows the vanilla wafers to absorb some of the creamy pudding while still retaining enough structure to create a wonderful soft-cookie texture.
Method
The key method behind this banana pudding is layering.
Instead of mixing the bananas and cookies directly into the pudding, they are arranged in separate layers. This creates different textures throughout the dessert: creamy pudding, tender bananas, and softened vanilla wafers.
The cream cheese and sweetened condensed milk transform the ordinary pudding mixture into a richer filling. The cream cheese provides body and a slight tang, while the condensed milk contributes sweetness and a silky texture.
The History and Southern Tradition of Banana Pudding
Banana pudding has become one of the most recognizable desserts associated with Southern American cooking.
The dessert combines ingredients that became increasingly accessible in American kitchens during the late 19th and early 20th centuries, including packaged vanilla wafers, commercial pudding mixes, and bananas that could be transported into areas where they were not locally grown.
Over time, banana pudding became a favorite at family gatherings, church suppers, picnics, holidays, and community celebrations.
Traditional versions are often made with homemade vanilla custard and meringue, while easier modern versions frequently use instant pudding and whipped topping.
The recipe has continued to evolve, with families adding their own touches. Cream cheese, condensed milk, whipped cream, and different types of cookies are now common variations.
Dolly Parton is strongly associated with Southern food traditions and home-style cooking, making this style of rich banana pudding especially fitting for a recipe inspired by Southern comfort food.
Formation and Layering Guide
For a beautiful presentation, think of the dessert as a series of alternating layers.
Start with cookies on the bottom. They create a sturdy base and absorb some of the pudding as the dessert rests.
Next comes the banana layer. The fresh fruit provides natural sweetness and a soft, fruity contrast to the cookies.
The pudding mixture follows, covering the bananas and filling the spaces between the cookies.
Repeat the process until the dish is full.
The final pudding layer should be smooth and creamy, with vanilla wafers arranged decoratively on top.
If you are serving the pudding in a clear trifle bowl, the alternating layers become part of the presentation.
Tips for the Best Banana Pudding
Use Cold Milk
The milk should be cold when preparing the instant pudding. Cold milk helps the pudding thicken properly.
Soften the Cream Cheese
Do not use cream cheese directly from the refrigerator. Allow it to soften first so it blends smoothly with the condensed milk.
Choose Firm Bananas
Bananas that are ripe but firm will hold their shape better during refrigeration.
Do Not Assemble Too Early
Although banana pudding benefits from several hours of chilling, leaving fresh banana slices exposed for an excessively long period can cause them to darken.
For the freshest appearance, decorate the top with banana slices shortly before serving.
Allow Time for the Cookies to Soften
One of the best parts of banana pudding is the texture of the vanilla wafers after they have absorbed some of the pudding.
A minimum of 4 hours in the refrigerator gives the flavors time to come together.
Make It Ahead
Banana pudding is an excellent make-ahead dessert. Preparing it several hours before dinner gives the pudding time to chill and allows the layers to develop their signature texture.
Optional Variations
Chocolate Banana Pudding
Add a thin layer of chocolate pudding between some of the vanilla pudding layers, or sprinkle chocolate shavings over the finished dessert.
Strawberry Banana Pudding
Add thinly sliced strawberries alongside the bananas for a fruity variation.
Peanut Butter Banana Pudding
Add small spoonfuls of creamy peanut butter between the layers or drizzle melted peanut butter over the finished pudding.
Homemade Whipped Cream
For a more traditional homemade finish, whip cold heavy cream with a little powdered sugar and vanilla until soft peaks form. Spoon it over the chilled pudding immediately before serving.
Extra-Cookie Version
If you love vanilla wafers, crush some of them and sprinkle the crumbs over the top while placing whole wafers around the edge of the dish.
Serving Suggestions
Serve the banana pudding cold, preferably in individual dessert glasses or generous spoonfuls from a large serving dish.
For a special occasion, garnish each serving with a vanilla wafer and a few fresh banana slices.
The dessert pairs beautifully with coffee, tea, or a glass of cold milk.
Storage
Keep the banana pudding covered and refrigerated.
For the best texture and appearance, enjoy it within 1–2 days. The vanilla wafers will continue to soften as the pudding sits, and the bananas may gradually become darker and softer.
Always keep the dessert refrigerated because it contains milk and cream cheese.
Why People Love This Dessert
There is something particularly comforting about banana pudding.
It is creamy without being complicated, sweet without requiring elaborate decoration, and nostalgic without needing expensive ingredients.
The combination of bananas, vanilla wafers, and creamy pudding creates a familiar flavor that reminds many people of family dinners and Southern gatherings.
The addition of cream cheese and sweetened condensed milk makes this version particularly rich and satisfying.
Conclusion
Dolly Parton’s Banana Pudding is the kind of dessert that turns simple pantry ingredients into something special.
Creamy vanilla pudding is combined with rich cream cheese and sweetened condensed milk, then layered with ripe bananas and vanilla wafers. After several hours in the refrigerator, the flavors blend together and the cookies become perfectly tender.
Whether served at a family dinner, holiday gathering, potluck, or casual weekend meal, this banana pudding is a comforting dessert that is easy to prepare and even easier to enjoy.
For the best results, give the pudding plenty of time to chill, use ripe but firm bananas, and allow the layers to rest before serving. The result is a rich, creamy, nostalgic banana pudding with a wonderfully soft texture and classic Southern character.
Creamy Frozen Milk Cubes Dessert
Introduction
This creamy frozen milk cube dessert is a simple, refreshing treat made by freezing a creamy mixture into small cubes and then blending those cubes with a little milk until smooth. The result is thick, silky, cold, and spoonable, with a texture somewhere between soft ice cream and a frozen milkshake.
It is an excellent recipe when you want a homemade frozen dessert without complicated equipment. The frozen cubes make the mixture easy to portion, freeze, and blend whenever you are ready to enjoy it.
Ingredients
For the Frozen Cubes:
- 2 cups whole milk
- 1 cup heavy cream
- 1/3 cup granulated sugar
- 1 teaspoon vanilla extract
- 2 tablespoons powdered milk, optional
- Pinch of salt
For Blending:
- 1 to 2 tablespoons cold milk to begin
- Additional milk, only if needed
- 1 tablespoon honey or maple syrup, optional, for extra sweetness
For Serving:
- Fresh berries
- Sliced banana
- Chopped nuts
- Chocolate shavings
- Caramel or chocolate sauce
- Crushed cookies
- Toasted coconut
Instructions
1. Prepare the Milk Mixture
Place the milk, heavy cream, sugar, powdered milk if using, vanilla extract, and salt in a saucepan.
Warm the mixture over low heat, stirring frequently, just until the sugar has completely dissolved. Do not allow it to boil.
Remove the saucepan from the heat and allow the mixture to cool completely.
2. Freeze the Mixture
Pour the cooled mixture into clean ice cube trays.
Place the trays in the freezer and freeze for at least 5 to 6 hours, preferably overnight, until the cubes are completely solid.
For easier blending, use smaller ice cube trays if available.
3. Blend the Frozen Cubes
Remove the frozen cubes from the trays and place them in a high-powered blender or food processor.
Add 1 to 2 tablespoons of milk and begin blending.
Stop the blender occasionally and scrape down the sides if necessary.
Continue blending until the frozen cubes become smooth, thick, and creamy.
If the mixture is too firm to blend, add another tablespoon of milk at a time. Avoid adding too much liquid because the finished dessert should remain thick and creamy.
4. Adjust the Flavor
Taste the mixture after blending.
If you prefer it sweeter, add a small amount of honey, maple syrup, or powdered sugar and blend again.
For a chocolate version, add 1 to 2 tablespoons of unsweetened cocoa powder.
For a strawberry version, blend in several frozen strawberries.
For a banana version, add half of a ripe banana.
Method
The key to this recipe is controlling the amount of liquid used during blending.
The frozen milk mixture provides the cold, creamy foundation, while a very small amount of milk helps the blender break everything down. Starting with only 1 to 2 tablespoons prevents the dessert from becoming watery.
Blend gradually rather than adding a large amount of milk at once. The mixture will initially look crumbly or icy, but as the frozen cubes break down, they will become smooth and creamy.
If your blender struggles, stop it, stir the mixture, and continue blending. A food processor can also work particularly well for this method.
Formation and Texture
The texture depends on how finely the frozen cubes are blended.
For a thick, soft-serve-like dessert, use very little milk and blend until completely smooth.
For a thinner, milkshake-like consistency, gradually add more milk until you reach the desired texture.
For an especially creamy result, allow the frozen cubes to sit at room temperature for approximately 3 to 5 minutes before blending. They should remain frozen but become slightly easier for the blender to process.
History and Inspiration
Frozen milk desserts have existed in many forms across different cultures. Before modern ice-cream machines became common, people used combinations of milk, cream, sugar, and natural flavorings and relied on freezing temperatures to create chilled desserts.
The frozen-cube method is a modern, convenient adaptation of that basic idea. Instead of freezing one large container and repeatedly stirring or scraping it, the mixture is frozen in small portions. Those portions can then be blended directly into a creamy dessert whenever desired.
This approach is particularly useful for homemade treats because it allows the dessert to be prepared ahead of time and blended fresh.
Variations
Chocolate Frozen Milk Dessert
Add 2 tablespoons cocoa powder to the milk mixture before freezing. For a richer chocolate flavor, add a handful of chocolate chips after blending.
Strawberry Cream
Add 1 cup of chopped strawberries to the blender with the frozen cubes. Blend until creamy and pink.
Vanilla Bean
Use vanilla bean paste or the seeds from one vanilla bean instead of vanilla extract for a stronger vanilla flavor.
Peanut Butter
Blend in 2 tablespoons creamy peanut butter for a rich peanut butter version.
Coconut
Replace part of the milk with canned coconut milk and add shredded coconut before serving.
Coffee
Add 1 to 2 teaspoons instant coffee or espresso powder during blending for a coffee-flavored frozen dessert.
Tips for the Best Results
Use whole milk and heavy cream when possible because the higher fat content creates a smoother texture.
Make sure the frozen cubes are completely solid before blending.
Always start with only 1 to 2 tablespoons of milk.
Do not add all the milk at once. Add it gradually until the blender can process the mixture.
Use a powerful blender or food processor for the smoothest result.
If the dessert becomes too soft, place it back in the freezer for 20 to 30 minutes before serving.
For individual portions, freeze the mixture in small trays so you can blend only the amount you need.
Serving
Serve immediately after blending for the softest and creamiest consistency.
Spoon the dessert into chilled bowls or glasses and top with berries, nuts, chocolate shavings, crushed cookies, coconut, or your favorite sauce.
For a more elegant presentation, place two or three scoops in a dessert glass and garnish with fresh fruit.
Conclusion
This frozen milk cube dessert is an easy homemade way to create a creamy frozen treat with minimal preparation. The most important technique is simple: freeze the mixture completely, blend the frozen cubes with a small amount of milk, and add more liquid only when necessary.
The basic vanilla version is delicious on its own, but the recipe is also easy to customize with chocolate, fruit, coffee, peanut butter, coconut, or other favorite flavors.
For Dessert Lovers
Anyone who enjoys homemade ice cream, milkshakes, frozen yogurt, or creamy chilled desserts will appreciate this recipe. It is especially appealing because the frozen cubes can be prepared ahead of time, allowing you to make a fresh batch whenever you want a cold and creamy treat.