
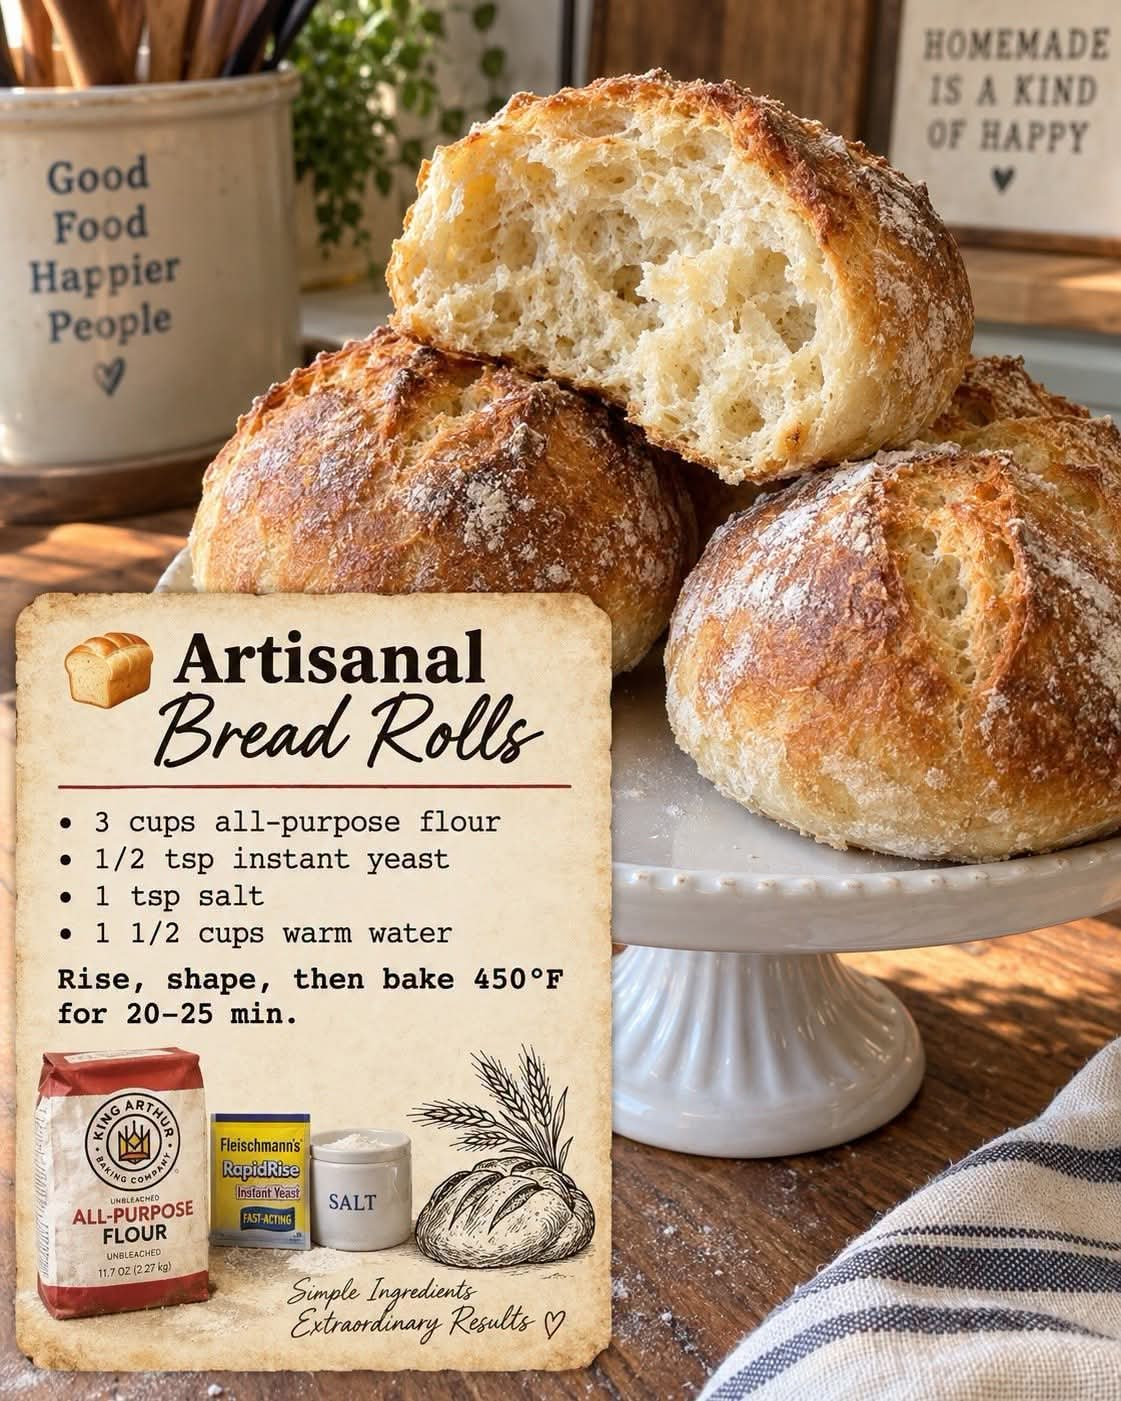
Artisanal Bread Rolls
Introduction
These Artisanal Bread Rolls are wonderfully rustic, crusty on the outside, and soft and airy inside. The recipe is especially appealing because it requires very little hands-on work. Instead of kneading the dough for a long time, the mixture is simply stirred together and allowed to rest for several hours.
The long fermentation gives the dough time to develop flavor and creates the light, irregular texture associated with artisan-style bread. With only a handful of basic ingredients, you can make beautiful homemade rolls that are perfect for breakfast, sandwiches, soups, stews, or serving alongside a family dinner.
Ingredients
- 3 cups all-purpose flour
- 1/2 teaspoon instant yeast
- 1 teaspoon salt
- 1 1/2 cups warm water
- Additional flour, for shaping
- Parchment paper, for baking
Instructions
1. Prepare the Dough
In a large mixing bowl, combine the all-purpose flour, instant yeast, and salt. Stir the dry ingredients together until they are evenly distributed.
Pour in the warm water gradually. Using a wooden spoon, sturdy spatula, or your hands, mix until all the flour has been moistened and a sticky, shaggy dough forms.
The dough should look rough and wet rather than smooth. There is no need to knead it at this stage.
2. Allow the Dough to Rise
Cover the bowl tightly with plastic wrap, a lid, or a clean kitchen towel.
Leave the dough at room temperature for approximately 8 to 12 hours, or overnight. During this long resting period, the yeast will slowly ferment the dough.
When ready, the dough should be noticeably expanded, bubbly, and soft. The surface may have several visible air pockets, which are a good indication that fermentation has taken place.
3. Shape the Rolls
Lightly flour a clean work surface. Gently turn the dough out of the bowl.
Because this is a high-hydration dough, it will be sticky. Avoid adding excessive flour, as too much flour can make the finished rolls dense.
Divide the dough into several portions, depending on the size of rolls you want. Gently shape each portion into a loose round. Try not to press out all the air bubbles that developed during fermentation.
Place the shaped rolls on a parchment-lined baking sheet, leaving enough space between them for expansion.
4. Rest the Shaped Rolls
Allow the rolls to rest while the oven heats. This short rest gives the dough another opportunity to relax and become slightly more airy.
Meanwhile, preheat the oven to 450°F (230°C).
5. Bake
Once the oven is fully heated, place the rolls inside.
Bake for approximately 20 to 25 minutes, or until the rolls are beautifully golden brown and have a firm, crisp crust.
For an especially crisp exterior, avoid opening the oven repeatedly during baking. The high heat helps the rolls develop their characteristic rustic crust.
6. Cool
Remove the rolls from the oven and transfer them to a wire rack.
Allow them to cool for several minutes before serving. The interior continues to set as the bread cools, so cutting into the rolls immediately can make the crumb appear slightly gummy.
Method
The key method behind these bread rolls is long, slow fermentation rather than intensive kneading. A small amount of instant yeast is combined with flour, salt, and water, and the dough is left undisturbed for several hours.
During fermentation, the yeast gradually produces carbon dioxide and other flavor compounds. The gas becomes trapped within the developing dough structure, producing the bubbles and airy texture that make artisan bread so appealing.
After fermentation, the dough is handled gently. This preserves many of the air pockets created during the long rise. The rolls are then baked at a high temperature, allowing the exterior to become crisp and deeply golden while the inside remains tender.
The History of Artisan-Style Bread
Artisan bread is associated with traditional bread-making methods in which simple ingredients are transformed through fermentation, careful handling, and baking rather than relying on complicated additives or highly processed techniques.
Traditional European breads have long demonstrated how flour, water, salt, and yeast can produce remarkably flavorful loaves. Different regions developed their own styles according to local grains, climate, ovens, and baking traditions.
The modern popularity of no-knead and long-fermented bread grew from renewed interest in these traditional techniques. The approach became particularly attractive to home bakers because it demonstrated that excellent bread does not necessarily require extensive kneading or professional equipment.
These rolls follow that same philosophy: simple ingredients, plenty of fermentation time, gentle shaping, and a hot oven.
Formation of the Bread Rolls
The formation of these rolls happens in several important stages.
First, flour absorbs the water and begins forming the structure of the dough. The yeast then becomes active and starts fermenting the available sugars.
As the dough rests for many hours, fermentation produces carbon dioxide. These gases become trapped within the dough, creating a network of small and large air pockets.
When the dough is divided and shaped, gentle handling is important. Excessive pressing or kneading at this stage can remove too much of the accumulated gas.
Finally, the intense heat of the oven causes the remaining gases and moisture inside the dough to expand rapidly. The exterior sets and browns, producing the crisp crust, while the interior develops its soft and airy crumb.
Tips for the Best Results
Use warm rather than hot water. Water that is excessively hot can interfere with yeast activity.
Do not worry if the dough looks unusually sticky. This is normal for a wet, no-knead-style dough.
Give the dough enough fermentation time. The 8-to-12-hour resting period is an important part of the recipe and contributes significantly to flavor and texture.
Handle the dough gently after fermentation. Preserving the bubbles helps create lighter rolls.
Make sure the oven is completely preheated before baking. A properly heated oven is essential for developing a crisp crust.
For more evenly sized rolls, divide the dough using a kitchen scale.
If your kitchen is particularly warm, begin checking the dough earlier, as fermentation may happen faster.
Serving Suggestions
These rustic rolls are delicious served warm with butter. They also work beautifully alongside creamy soups, stews, roasted meats, pasta dishes, salads, and hearty vegetable meals.
They can be sliced horizontally and used for sandwiches, breakfast rolls, mini burgers, or leftover roast beef sandwiches.
For breakfast, serve them with butter, jam, honey, or cheese. For dinner, place a basket of warm rolls in the center of the table and let everyone tear off a fresh piece.
Storage
Store completely cooled rolls in an airtight container or bread bag at room temperature for up to a few days.
For longer storage, allow the rolls to cool completely, place them in a freezer-safe bag, and freeze them. Thaw at room temperature and warm briefly in the oven before serving to help restore their crisp exterior.
Conclusion
Artisanal Bread Rolls prove that homemade bread can be simple, affordable, and incredibly satisfying. With just flour, yeast, salt, and water, you can create rolls with a rustic golden crust and a soft, flavorful interior.
The secret is patience. Instead of spending a long time kneading, you allow fermentation to do much of the work. Once the dough has developed, gentle shaping and a hot oven finish the process.
These rolls are ideal for anyone who loves the taste and texture of freshly baked bread without complicated techniques. They are simple enough for a beginner and rewarding enough to become a regular part of your baking routine.
For Bread Lovers
If you love bread with a crisp crust, airy center, and homemade character, these Artisanal Bread Rolls are worth making. They are especially enjoyable when served warm from the oven with butter, but their versatility makes them useful for almost any meal.
There is something special about placing freshly baked bread on the table. The aroma fills the kitchen, the crust crackles as the rolls cool, and every bite has that unmistakable homemade quality.
This is the kind of simple recipe that can become a family favorite and a dependable addition to your homemade baking collection.