
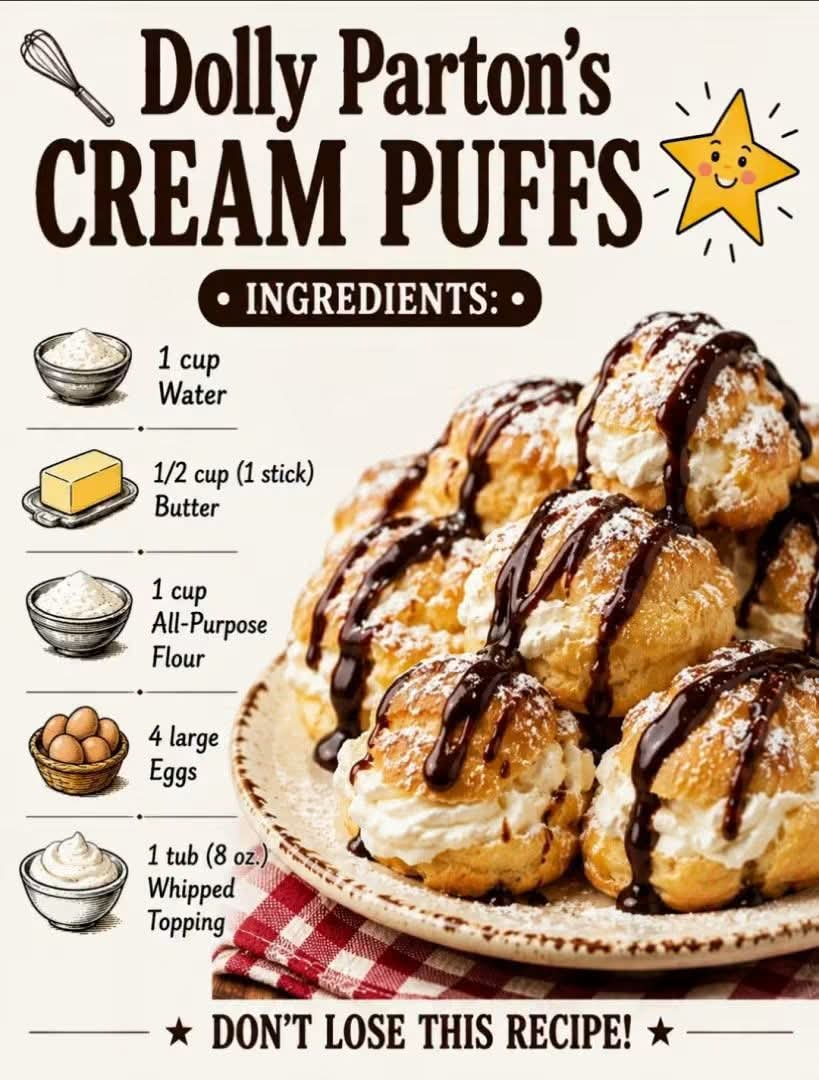
Dolly Parton-Inspired Cream Puffs
Introduction
There is something wonderfully old-fashioned about a homemade cream puff. Light, golden pastry surrounds a cloud of sweet, silky whipped cream, creating a dessert that feels both elegant and comforting. These Dolly Parton-inspired cream puffs are simple enough for a family kitchen but beautiful enough to serve at a holiday gathering, afternoon tea, birthday celebration, or Sunday dinner.
The pastry begins with a classic choux dough made from water, butter, flour, and eggs. Once baked, the dough rises into hollow, golden shells with a delicate crisp exterior and soft interior. After cooling, each shell is filled with freshly whipped cream sweetened with powdered sugar.
The beauty of this recipe is its simplicity. There are no complicated cake layers or elaborate decorations. Just a few basic ingredients are transformed into a beautiful dessert that looks special and tastes even better.
Ingredients
For the Cream Puff Pastry
- 1 cup water
- 1/2 cup unsalted butter
- 1 cup all-purpose flour
- 4 large eggs
- 1/4 teaspoon salt, optional
- 1 teaspoon granulated sugar, optional
- 1 teaspoon vanilla extract, optional
For the Whipped Cream Filling
- 1 cup heavy whipping cream, very cold
- 1/2 cup powdered sugar
- 1 teaspoon vanilla extract
- 1/2 teaspoon vanilla bean paste, optional
For Finishing
- Powdered sugar, for dusting
- Fresh berries, optional
- Chocolate or caramel sauce, optional
Instructions
Step 1: Prepare the Oven
Preheat the oven to 425°F (220°C). Line a large baking sheet with parchment paper.
Make sure the oven is fully preheated before the cream puffs go inside. The initial high temperature helps create the steam that makes the pastry rise.
Step 2: Make the Butter Mixture
Place the water and butter in a medium saucepan over medium heat.
Add the optional salt and sugar. Stir occasionally while the butter melts.
Bring the mixture to a full boil. Once the butter has completely melted and the liquid is bubbling, remove the saucepan from the heat.
Step 3: Add the Flour
Add all of the flour to the hot butter-and-water mixture at once.
Using a sturdy wooden spoon or spatula, stir vigorously until the flour is completely incorporated.
Return the saucepan to medium-low heat and continue stirring for approximately 1 to 2 minutes.
The dough will become thick and smooth and should pull away from the sides of the pan. A thin film may form on the bottom of the saucepan. This is a good indication that the dough has been cooked properly.
Step 4: Cool the Dough Slightly
Remove the saucepan from the heat and allow the dough to cool for approximately 5 minutes.
It should still be warm, but it should not be extremely hot. This prevents the eggs from cooking when they are added.
Step 5: Add the Eggs
Add the eggs one at a time.
After adding each egg, beat vigorously until it is completely absorbed before adding the next one.
At first, the dough may look separated or slippery. Keep mixing. It will eventually become smooth, glossy, and thick.
Add the vanilla if using.
The finished dough should be thick enough to hold its shape but soft enough to pipe.
Step 6: Shape the Cream Puffs
Transfer the dough to a piping bag fitted with a large round tip.
Pipe small mounds onto the prepared baking sheet, leaving several centimeters of space between each one.
For evenly sized cream puffs, pipe each mound approximately 1 1/2 to 2 inches wide.
If the tops have a small peak, lightly moisten your fingertip with water and gently smooth the peak.
Step 7: Bake the Pastry
Place the baking sheet in the preheated oven.
Bake at 425°F (220°C) for approximately 10 minutes.
Then reduce the temperature to 375°F (190°C) and continue baking for another 18 to 25 minutes, or until the cream puffs are deeply golden, puffed, and firm.
Do not open the oven door during the first part of baking. A sudden loss of heat can cause the pastries to collapse.
Step 8: Release the Steam
Once the cream puffs are golden brown and fully baked, turn off the oven.
Crack the oven door slightly and allow the pastries to sit inside for approximately 5 to 10 minutes.
Remove them from the oven and transfer them to a wire rack.
For especially crisp shells, make a small hole in the bottom or side of each cream puff with a skewer or the tip of a small knife. This allows excess steam to escape.
Let them cool completely before filling.
Method for the Whipped Cream
Place the cold heavy cream in a large chilled mixing bowl.
Begin beating on medium speed.
Gradually add the powdered sugar while continuing to beat.
Add the vanilla extract.
Increase the mixer speed and continue beating until the cream becomes thick and forms medium-to-stiff peaks.
Be careful not to overbeat the cream, because it can eventually become grainy and turn into butter.
Filling the Cream Puffs
Once the pastry shells are completely cool, use a small serrated knife to cut them horizontally.
Alternatively, make a small opening in the bottom of each shell and pipe the filling inside.
Fill each pastry generously with the sweet whipped cream.
Replace the top of the pastry shell.
Finish each cream puff with a light dusting of powdered sugar.
For a special presentation, add fresh strawberries, raspberries, blueberries, or a small drizzle of chocolate or caramel sauce.
The Classic Choux Pastry Method
The pastry used for cream puffs is called pâte à choux, or choux pastry.
Unlike many cakes and breads, choux pastry does not depend on yeast or a traditional chemical leavening agent to rise.
Instead, water contained in the dough turns into steam during baking. The steam expands inside the pastry and pushes the dough outward, creating the characteristic hollow center.
This hollow space is what makes cream puffs perfect for filling with whipped cream, pastry cream, custard, ice cream, or other fillings.
History of Cream Puffs
Cream puffs belong to the long tradition of European choux pastry. The technique became especially associated with French pastry-making, where pâte à choux developed into many beloved desserts.
The same basic pastry technique is used for éclairs, profiteroles, gougères, and other classic preparations.
The name “choux” refers to the small cabbage-like appearance of the baked pastries. When piped and baked, the dough expands dramatically, producing a crisp outside and hollow interior.
Cream puffs eventually became popular far beyond France and found their way into American home kitchens, where they became a favorite dessert for family gatherings, church suppers, holidays, showers, and special celebrations.
Their appeal is easy to understand: the pastry requires only a handful of everyday ingredients, yet the finished dessert looks wonderfully impressive.
Formation of the Cream Puffs
The formation of these pastries happens in several important stages.
First, the water and butter are heated together. When the flour is added, the mixture is stirred into a thick dough.
The dough is then cooked briefly on the stovetop. This step helps remove excess moisture and develops the structure needed for the pastry to rise.
Eggs are incorporated gradually. They provide richness, moisture, structure, and elasticity.
When the dough enters the hot oven, the water inside the dough produces steam. That steam expands rapidly, pushing the pastry outward and creating a hollow center.
As baking continues, the outer shell becomes golden and firm. The result is a pastry that is crisp enough to hold its shape while remaining light and delicate.
Once cooled, the hollow center becomes the perfect place for sweet whipped cream.
Important Baking Tips
Use Room-Temperature Eggs
Room-temperature eggs generally incorporate into the warm dough more easily.
Add the Eggs Gradually
Do not add all four eggs at once. Adding them one at a time allows you to control the consistency of the dough.
Cook the Flour Properly
The dough should be cooked briefly after the flour is added. It should pull away from the sides of the saucepan and form a cohesive ball.
Do Not Underbake
Cream puffs that are removed too early may collapse because their internal structure has not had enough time to set.
Look for a rich golden-brown color rather than a pale appearance.
Avoid Opening the Oven Too Early
Keeping the oven door closed helps maintain the temperature and allows the pastry to develop properly.
Cool Completely Before Filling
Warm cream puff shells can melt the whipped cream and make the dessert soggy.
Fill Shortly Before Serving
For the best texture, fill the shells relatively close to serving time.
Make-Ahead Method
The pastry shells can be prepared ahead of time.
Bake and cool them completely, then store them in an airtight container for approximately 1 to 2 days.
If the shells become slightly soft, place them in a 300°F (150°C) oven for several minutes to refresh them. Allow them to cool completely before filling.
The whipped cream is best prepared close to serving time.
Storage
Filled cream puffs are best enjoyed the same day because the moisture from the filling gradually softens the pastry.
Unfilled shells can be stored at room temperature in an airtight container.
Filled cream puffs should be refrigerated because of the whipped cream.
For the best flavor and texture, serve them chilled but not ice-cold.
Serving Suggestions
These cream puffs are beautiful served on a large dessert platter.
For an elegant presentation, arrange them in a pyramid and dust lightly with powdered sugar.
For a holiday table, serve them with fresh berries and a little chocolate sauce.
For a Southern-inspired dessert table, pair them with coffee, tea, hot chocolate, or a scoop of vanilla ice cream.
You can also replace the whipped cream with pastry cream, vanilla custard, chocolate pastry cream, lemon cream, or sweetened mascarpone.
Why People Love These Cream Puffs
There is something especially satisfying about biting through the delicate golden shell and discovering a generous center of sweet, creamy filling.
The pastry is light rather than heavy, while the whipped cream adds richness without overwhelming the dessert.
They are also wonderfully versatile. The same pastry can be filled and decorated in countless ways, making it suitable for birthdays, Christmas, Thanksgiving, bridal showers, afternoon gatherings, Sunday dinners, or simply a homemade treat when you want something special.
The ingredients are simple, but the finished result feels like something from a beautiful bakery.
Conclusion
These Dolly Parton-inspired cream puffs are a wonderful example of how simple ingredients can create an impressive homemade dessert.
With buttery choux pastry, lightly sweetened whipped cream, and a delicate dusting of powdered sugar, every bite combines crisp, golden pastry with soft, creamy sweetness.
The most important part of the recipe is patience. Cook the dough properly, add the eggs gradually, bake the shells until deeply golden, and allow them to cool before filling.
Once you master the basic technique, you can make cream puffs again and again, changing the filling and toppings to create a completely different dessert each time.
For Cream Puff Lovers
If you love classic homemade desserts, these cream puffs are the kind of recipe worth keeping in your recipe collection.
They are elegant enough for company, easy enough for a weekend baking project, and nostalgic enough to remind you of old-fashioned family desserts.
A platter of freshly filled cream puffs, lightly dusted with powdered sugar, has a way of disappearing quickly. Make plenty, because once family and guests taste that buttery pastry and sweet whipped cream together, there is a very good chance they will ask for another one.