
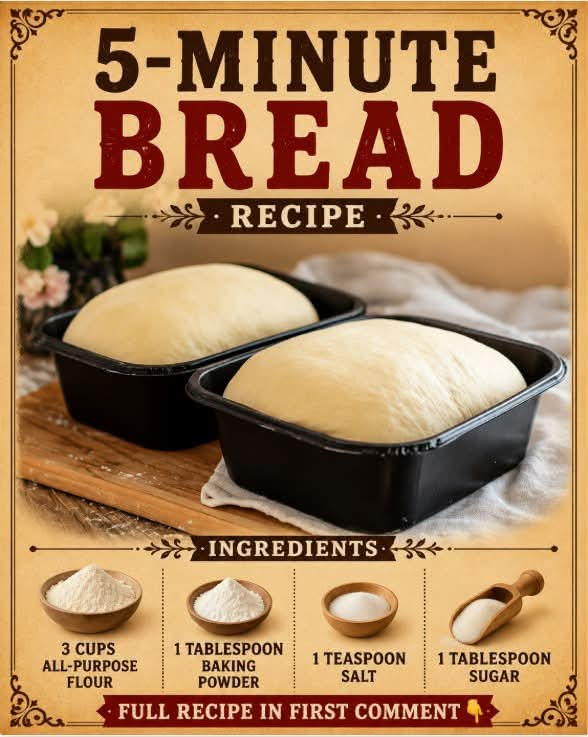
5-Minute Bread Recipe
Introduction
When you need fresh homemade bread but do not have time to wait for yeast to rise, this simple 5-Minute Bread Recipe is an excellent solution. Made with just a handful of basic pantry ingredients, this bread comes together quickly and can be prepared without yeast or a long rising period.
The combination of all-purpose flour, baking powder, salt, and sugar creates a simple quick bread with a lightly crisp exterior and a soft, tender interior. It is especially useful for breakfast, sandwiches, soups, stews, or as a warm side dish for dinner.
Although the actual preparation can take only a few minutes, the bread still needs time to cook properly. The name “5-minute bread” refers to the quick mixing and preparation rather than the total baking time.
Ingredients
- 3 cups all-purpose flour
- 1 tablespoon baking powder
- 1 teaspoon salt
- 1 tablespoon granulated sugar
- Approximately 1 to 1 1/4 cups milk or water, added gradually
- 2 tablespoons melted butter or vegetable oil, optional
- Extra flour for shaping
Instructions
1. Prepare the Dry Ingredients
Place the flour in a large mixing bowl. Add the baking powder, salt, and sugar.
Whisk or stir everything together thoroughly so the baking powder and salt are evenly distributed throughout the flour.
This step is important because baking powder is responsible for helping the bread rise. Even distribution ensures that the loaf develops a more consistent texture.
2. Add the Liquid
Begin adding the milk or water gradually while stirring with a wooden spoon or spatula.
Do not add all of the liquid at once. The exact amount required can vary depending on the flour and humidity.
Continue mixing until a soft dough forms. If desired, add melted butter or vegetable oil for a slightly richer and softer bread.
3. Form the Dough
Transfer the dough onto a lightly floured work surface.
Gently knead it for about 30 seconds to 1 minute, just until it comes together.
Avoid extensive kneading. Unlike yeast bread, this quick bread does not require lengthy kneading, and overworking the dough can make the finished bread tougher.
Shape the dough into a round loaf or divide it into smaller portions for individual breads.
4. Prepare for Cooking
For an oven-baked loaf, place the shaped dough on a lightly greased baking sheet or in a small greased baking pan.
Make a shallow cross on top with a sharp knife. This allows the bread to expand more easily during baking.
5. Bake
Preheat the oven to 400°F (200°C).
Bake the bread for approximately 25 to 35 minutes, depending on its size and thickness.
The bread should become lightly golden on the outside. When tapped gently on the bottom, it should sound hollow.
If you make smaller individual breads, begin checking them after approximately 15 to 20 minutes.
6. Cool
Remove the bread from the oven and place it on a wire rack.
Allow it to cool for at least 10 minutes before slicing. Cooling gives the interior time to finish setting and makes the bread easier to cut.
Serve warm with butter, cheese, jam, honey, soup, or your favorite spread.
Method
The basic method behind this bread is that of a quick bread rather than a traditional yeast loaf.
First, the flour provides the structure. Baking powder acts as the leavening agent, producing gas when it reacts with moisture and heat. This gas expands during cooking and gives the bread some lift.
The sugar adds a subtle sweetness and can also encourage browning. Salt balances the flavor and prevents the finished bread from tasting flat.
The liquid brings the dry ingredients together into a workable dough. Because there is no yeast, there is no need for a long fermentation or proofing period.
The key to achieving tender bread is gentle handling. Once the dough has formed, avoid kneading it excessively.
History of Quick Bread
Quick breads have a long history in home cooking because they provide an alternative to traditional yeast breads.
Before modern commercial yeast became widely available, cooks used several natural methods to make bread rise. With the development and popularization of chemical leaveners such as baking soda and baking powder, it became much easier to prepare breads without waiting for fermentation.
Quick breads became particularly useful in busy households because they could be mixed and baked immediately.
Recipes using baking powder eventually became common in household cookbooks, especially for biscuits, soda breads, muffins, pancakes, and simple loaves.
This recipe follows that same practical tradition: simple ingredients, minimal preparation, and no yeast-rising period.
Formation and Texture
The dough should be soft but manageable.
If the dough feels extremely sticky, add a small amount of flour, one tablespoon at a time. If it feels dry or crumbly, add a little more liquid.
The finished bread should have a lightly browned exterior with a soft and somewhat dense interior.
For a softer loaf, adding a small amount of melted butter or oil can make a noticeable difference.
For a more rustic texture, use slightly less liquid and shape the dough into a thicker round loaf.
Important Tips for Success
Use fresh baking powder. Old baking powder may not provide enough lifting power.
Measure the flour carefully. Too much flour can produce a dry, heavy loaf.
Add liquid gradually. You may not need the entire amount.
Do not over-knead the dough. A few gentle movements are enough to bring the ingredients together.
Preheat the oven completely before baking.
Allow the bread to cool slightly before slicing so the interior does not become gummy.
For extra flavor, you can add dried herbs, garlic powder, grated cheese, seeds, or finely chopped herbs to the dough.
Serving Ideas
This bread is versatile enough to serve with almost any meal.
For breakfast, slice it while warm and serve it with butter, honey, jam, or eggs.
For lunch, use thicker slices for sandwiches filled with cheese, vegetables, chicken, tuna, or other favorite fillings.
At dinner, serve warm slices alongside soups, stews, roasted vegetables, or grilled meats.
You can also toast leftover slices and serve them with butter, cheese, avocado, or eggs.
Variations
Herb Bread
Add 1 to 2 teaspoons of dried herbs such as oregano, thyme, rosemary, or Italian seasoning to the dry ingredients.
Garlic Bread
Add 1 teaspoon of garlic powder and, if desired, a little dried parsley. After baking, brush the warm loaf with melted butter mixed with garlic.
Cheese Bread
Add approximately 1 cup of shredded cheddar or another flavorful cheese to the dough. Mix gently to distribute it evenly.
Sweet Breakfast Bread
Increase the sugar slightly and add a teaspoon of cinnamon. Serve warm with butter or honey.
Seeded Bread
Add sunflower seeds, sesame seeds, flaxseeds, or pumpkin seeds to the dough for additional texture.
Storage
Allow the bread to cool completely before storing it.
Keep it in an airtight container or tightly wrapped at room temperature for up to two days.
For longer storage, slice the bread and freeze the slices in a sealed freezer-safe bag. Individual slices can then be warmed as needed.
Conclusion
This 5-Minute Bread Recipe is a practical choice when you want homemade bread without yeast, fermentation, or complicated preparation.
With only a few basic ingredients, you can create a warm loaf that works beautifully for breakfast, lunch, dinner, or snacks. The recipe is simple enough for beginners while also providing plenty of opportunities for customization.
The most important things to remember are to add the liquid gradually, avoid overworking the dough, and bake until the loaf is properly golden and cooked through.
For Bread Lovers
For anyone who loves homemade bread, this recipe is especially appealing because it removes much of the waiting associated with traditional bread making.
There is something comforting about mixing a few simple ingredients, shaping the dough, and soon having a warm loaf ready for the table.
Serve it fresh with butter, pair it with a bowl of soup, turn it into sandwiches, or simply tear off a warm piece and enjoy it as it is. The simplicity is part of what makes this quick bread so useful and satisfying.
Final Method at a Glance
- Combine flour, baking powder, salt, and sugar.
- Gradually add milk or water.
- Mix until a soft dough forms.
- Add optional melted butter or oil.
- Gently knead just until combined.
- Shape into a loaf or individual breads.
- Place on a greased baking sheet.
- Bake at 400°F (200°C) until golden and cooked through.
- Cool briefly.
- Slice and serve warm.
The result is a simple homemade quick bread that can be prepared with everyday ingredients and enjoyed in countless ways.