
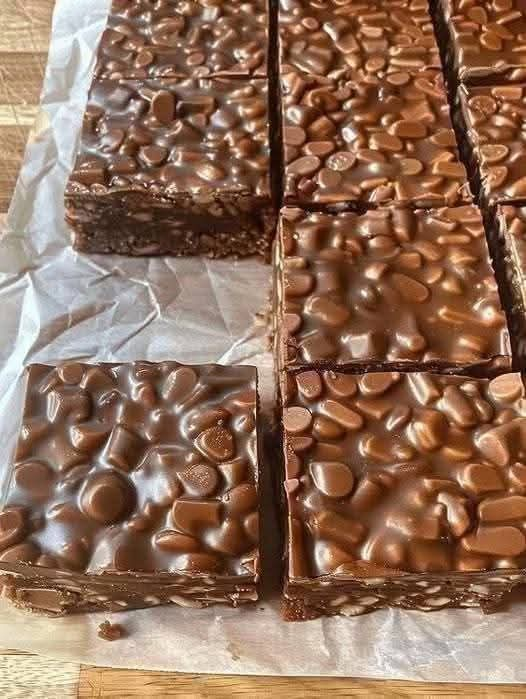
Classic Christmas Holiday Bars
Introduction
There are some Christmas recipes that become part of the holiday tradition simply because everyone loves them. These classic holiday bars are one of those recipes. They are simple enough to prepare without spending hours in the kitchen, yet they have the rich, buttery sweetness and festive homemade flavor that people look forward to every year.
If you are preparing cookies and desserts for a large Christmas gathering, these bars are especially useful because one pan produces many servings. They are easy to cut into small squares, arrange on cookie trays, package as gifts, or serve alongside coffee and hot chocolate.
The texture is soft and tender in the center, with lightly golden edges and a sweet, flavorful topping. Once cooled and cut, each little square becomes an easy bite-sized Christmas treat.
Ingredients
For the Bar Base
- 1 cup unsalted butter, softened
- 1 cup granulated sugar
- 1/2 cup packed brown sugar
- 2 large eggs
- 2 teaspoons vanilla extract
- 2 1/2 cups all-purpose flour
- 1 teaspoon baking powder
- 1/2 teaspoon salt
For the Topping
- 1 cup semi-sweet chocolate chips
- 1 cup white chocolate chips
- 1 cup chopped pecans or walnuts
- 1/2 cup shredded sweetened coconut, optional
- 1/2 cup festive sprinkles, optional
Optional Glaze
- 1 cup powdered sugar
- 2 tablespoons milk
- 1/2 teaspoon vanilla extract
Instructions
Step 1: Prepare the Pan
Preheat the oven to 350°F (175°C).
Grease a 9-by-13-inch baking pan and line it with parchment paper, leaving a little parchment hanging over the sides. This makes it much easier to lift the cooled bars from the pan before cutting.
Step 2: Make the Batter
Place the softened butter, granulated sugar, and brown sugar in a large mixing bowl.
Beat until the mixture becomes creamy and lighter in texture. Add the eggs one at a time, mixing well after each addition. Stir in the vanilla extract.
In a separate bowl, whisk together the flour, baking powder, and salt.
Gradually add the dry ingredients to the butter mixture. Mix just until the flour disappears. Avoid overmixing because excessive mixing can make the finished bars less tender.
Step 3: Form the Bars
Spread the batter evenly into the prepared baking pan.
Use the back of a spoon or an offset spatula to smooth the surface. Make sure the batter reaches the corners so the bars bake evenly.
Step 4: Add the Toppings
Sprinkle the chocolate chips, white chocolate chips, chopped nuts, and coconut over the top.
If you are making these specifically for Christmas, a small amount of festive sprinkles can be added for a colorful finish.
Press the toppings very gently into the batter so they remain in place while baking.
Step 5: Bake
Place the pan in the preheated oven and bake for approximately 25 to 32 minutes.
The edges should be lightly golden, while the center should look set but still slightly soft. Do not overbake. The bars will continue to firm as they cool.
Step 6: Cool Completely
Remove the pan from the oven and place it on a wire rack.
Allow the bars to cool completely in the pan before cutting. For especially clean squares, refrigerate them for 30 to 60 minutes after they have cooled.
Step 7: Add the Glaze
If desired, whisk together the powdered sugar, milk, and vanilla until smooth.
Drizzle the glaze over the cooled bars and allow it to set before cutting.
Step 8: Cut and Serve
Lift the entire slab from the pan using the parchment paper.
Place it on a cutting board and cut into squares or rectangles. For Christmas cookie trays, smaller pieces work particularly well because they allow guests to sample several different desserts.
Method
The secret to these bars is keeping the preparation simple. The butter and sugars are first creamed together to create a smooth base. Eggs provide structure and richness, while vanilla gives the batter its familiar bakery-style aroma.
The flour mixture is then incorporated gently. Once the batter is spread into the pan, the toppings are scattered across the surface before baking.
The result is a soft, buttery bar with slightly crisp edges, a tender center, and layers of chocolate, nuts, and sweetness throughout.
The History of Christmas Dessert Bars
Bar cookies became popular because they offered home bakers an easier alternative to individually shaped cookies. Instead of rolling, cutting, and baking several trays of separate pieces, a baker could spread one mixture into a single pan, bake it, and cut it into portions afterward.
This style of baking became particularly useful during holidays and celebrations, when families needed large quantities of desserts.
Christmas baking traditions often include recipes that are inexpensive, easy to multiply, and convenient to store. Holiday bars fit naturally into that tradition. A single large pan can produce several dozen small pieces, making them ideal for parties, cookie exchanges, school gatherings, family celebrations, and homemade gift boxes.
Formation and Texture
The formation of these bars begins with the creaming of butter and sugar. This creates a smooth, rich foundation.
The eggs help bind the ingredients together and contribute to the soft structure. Flour provides the framework that allows the bars to hold their shape after baking.
The toppings create another layer of texture. Chocolate becomes soft and slightly melted, while chopped nuts provide a pleasant crunch. Coconut, if used, adds chewiness and another layer of flavor.
For the best texture, the most important step is not overbaking. The center should be set but not dry. Once the bars cool, they become firm enough to cut while retaining a tender bite.
Tips for Making Large Batches
If you really want to prepare hundreds of these for a Christmas event, work in separate batches rather than trying to multiply the recipe into one enormous bowl.
Prepare each pan using the same measurements and baking time. Allow every pan to cool completely before cutting.
For a large holiday production, cut the bars into small uniform squares. A 9-by-13-inch pan can provide many small servings when cut appropriately.
Keep the finished bars in airtight containers and separate layers with parchment paper.
Storage
Store the completely cooled bars in an airtight container at room temperature for several days.
For longer storage, place them in a sealed freezer-safe container and freeze them for up to several weeks. Separate layers with parchment paper so they do not stick together.
Allow frozen bars to thaw at room temperature before serving.
Serving Ideas
These bars are wonderful on a Christmas dessert platter alongside cookies, fudge, brownies, and other homemade treats.
They can also be served with:
- Coffee
- Hot chocolate
- Tea
- Warm milk
- Vanilla ice cream
- Whipped cream
For gifts, arrange several pieces in a small holiday box lined with parchment paper.
Why Lovers of Homemade Christmas Baking Enjoy Them
People who love traditional holiday baking appreciate recipes like these because they do not require complicated decorating or specialized equipment.
They are especially appealing to anyone who needs to feed a crowd. The recipe is straightforward, the ingredients are familiar, and the finished bars can be made ahead of time.
Most importantly, they have that homemade quality that makes people reach for one more piece.
Conclusion
These Christmas Holiday Bars are the kind of dessert that earns a permanent place in a family recipe collection. They are simple, generous, flavorful, and easy to prepare in large quantities.
Whether you are making one pan for your family or preparing dozens of batches for a Christmas celebration, these bars are dependable and delicious.
Make them ahead, let them cool completely, cut them into neat little squares, and arrange them on your holiday table. They are exactly the kind of simple Christmas treat that disappears quickly once everyone gets a taste.