
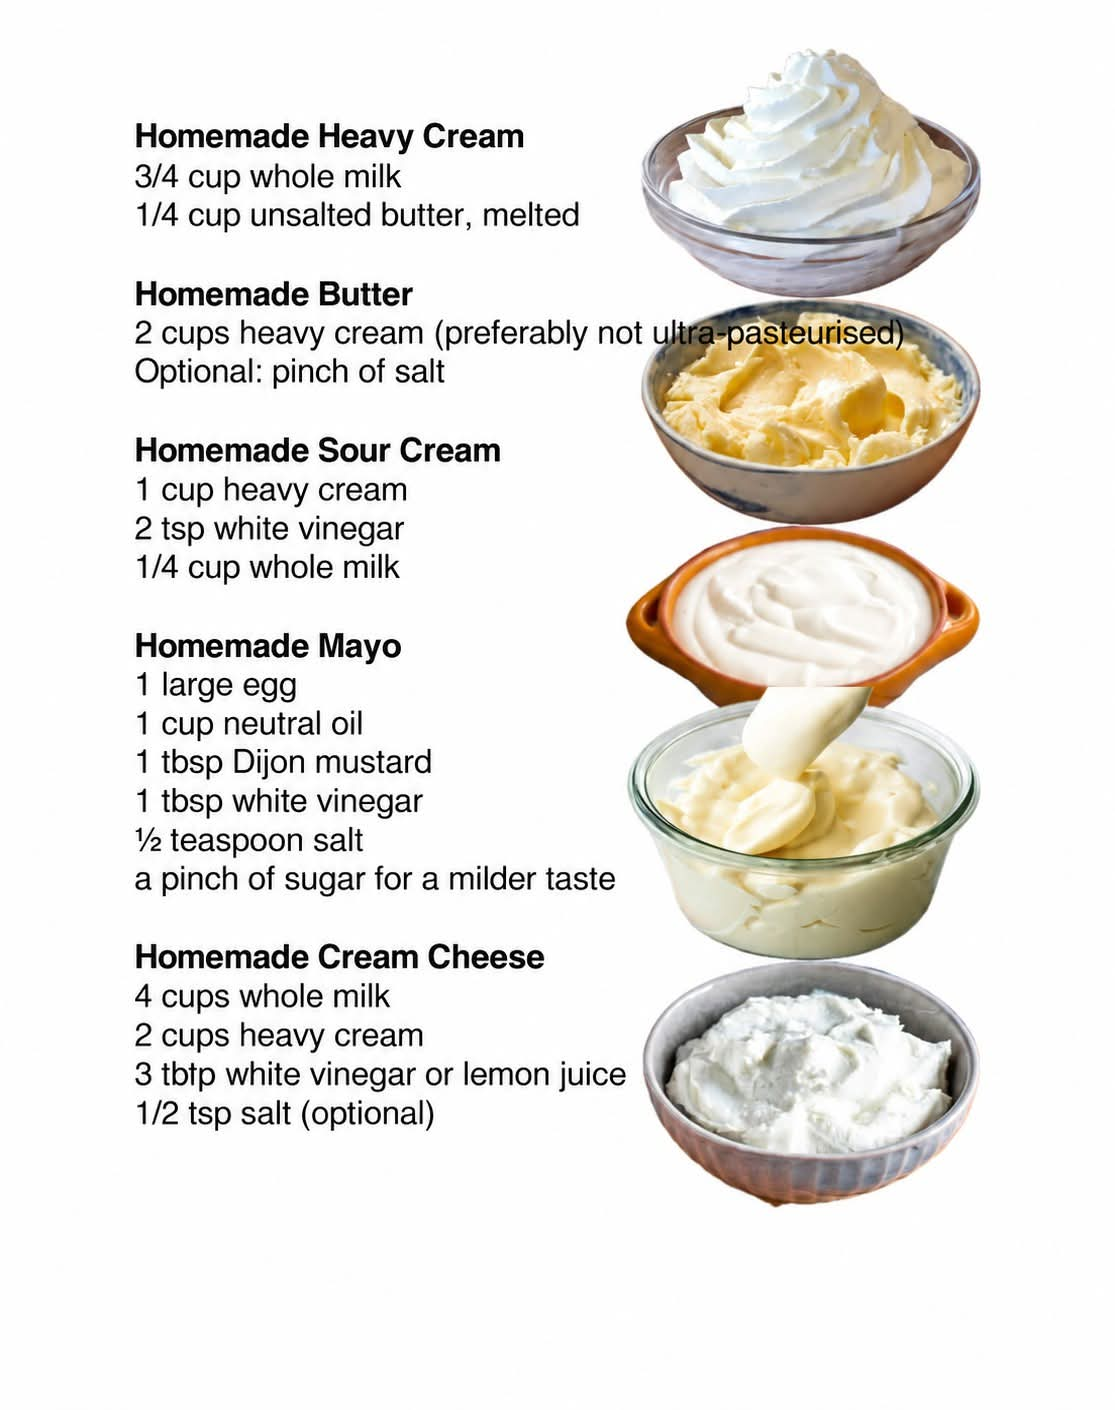
Homemade Products: A Complete Guide to Making Delicious Homemade Goods from Scratch
Introduction
There is something truly special about homemade products. Whether you are preparing fresh food for your family, making sweet treats for a celebration, or creating delicious pantry staples in your own kitchen, homemade products bring a sense of comfort, creativity, and satisfaction that store-bought alternatives often cannot match.
Homemade cooking allows you to choose your ingredients, adjust flavors to your preferences, reduce unnecessary additives, and prepare fresh products whenever you need them. From homemade bread and creamy butter to fruit jams, sauces, cookies, cakes, and traditional family recipes, the possibilities are almost endless.
One of the greatest advantages of making products at home is that you do not need expensive equipment or professional cooking experience. With simple ingredients, basic kitchen tools, and a little patience, you can create wonderful products that your family and friends will enjoy.
This guide focuses on a classic homemade product: traditional homemade butter, a simple and versatile recipe that demonstrates how everyday ingredients can become something delicious.
Recipe: Traditional Homemade Butter


Introduction to Homemade Butter
Homemade butter is rich, creamy, and wonderfully fresh. It can be spread on warm bread, melted over vegetables, added to sauces, or used in cakes, cookies, pastries, and other baked goods.
Making butter at home is also an excellent way to understand a traditional kitchen technique that has been practiced for generations. The process is surprisingly straightforward: cream is churned or whipped until the fat separates from the liquid, leaving behind butter that can be washed, shaped, and stored.
Ingredients
Preparation time: 10–20 minutes
Yield: Approximately 200–250 grams, depending on the cream.
- 500 ml heavy whipping cream, preferably with at least 35% milk fat
- Cold water, preferably very cold, for washing the butter
- A small pinch of salt, optional
Kitchen Equipment
- A large mixing bowl
- An electric hand mixer, stand mixer, or tightly sealed jar
- A fine-mesh strainer
- A wooden spoon or spatula
- A clean container with a lid for storage
Instructions
Step 1: Prepare the Cream
Pour the heavy cream into a large mixing bowl. If you are using an electric mixer, choose a bowl with enough room for the cream to expand as it whips.
Start mixing at medium speed. At first, the cream will become foamy. Continue mixing until it forms soft peaks and then stiff peaks.
Do not stop when the cream resembles whipped cream. Keep mixing until the texture changes and the fat begins to separate from the liquid.
Step 2: Separate the Butter
Continue beating the cream. After a few more minutes, you should see yellowish clumps forming in a thin, pale liquid.
The yellow clumps are the butter, while the liquid is buttermilk.
This transformation is the most important part of the process. The cream’s fat particles gather together, separating from much of the liquid.
Turn off the mixer once the separation is complete.
Step 3: Drain the Buttermilk
Place a fine-mesh strainer over a clean bowl and pour the mixture through it.
Collect the liquid separately if you wish to use it in pancakes, biscuits, quick breads, or marinades. Homemade buttermilk from this process is not identical to cultured buttermilk, but it can still be useful in many recipes.
Press the butter gently with a spatula to remove as much liquid as possible.
Step 4: Wash the Butter
Transfer the butter into a clean bowl and add very cold water.
Press and fold the butter gently with a wooden spoon or spatula. The water may become cloudy as remaining buttermilk washes away.
Drain the water and repeat with fresh cold water until it stays relatively clear.
This step helps remove residual buttermilk, which can shorten the butter’s storage life.
Step 5: Add Salt
If you prefer salted butter, add a small pinch of salt and mix thoroughly.
You can leave the butter unsalted if you intend to use it for baking or prefer a more neutral flavor.
Taste a small amount and adjust the salt according to your preference.
Step 6: Shape the Butter
Gather the butter into a compact ball or press it into a small container or butter mold.
Use a spatula to remove any remaining liquid before storing it.
For a traditional presentation, shape the butter into a small block and smooth the surface with the back of a spoon.
Step 7: Chill and Store
Place the finished butter in a clean, covered container and refrigerate promptly.
For the best quality, use homemade butter within several days, especially if you are uncertain how thoroughly it was washed. Keep it refrigerated at 4°C (40°F) or below, and discard it if it develops an unusual smell, color, or texture.
Homemade butter can also be frozen in a well-sealed container for longer storage.
Methods of Making Homemade Butter
There are several ways to make butter at home.

1. Electric Mixer Method
This is the quickest and most convenient approach. An electric mixer separates the butterfat from the liquid with relatively little physical effort.

2. Jar-Shaking Method
Pour cream into a clean jar, filling it no more than halfway. Seal it securely and shake vigorously until butter forms. This method takes more time and effort but requires very little equipment.

3. Traditional Churning Method
A butter churn uses repeated mechanical movement to separate the butterfat. This method reflects the traditional way many households prepared butter before electric appliances became common.
History of Homemade Butter
Butter has a long history in human food traditions. Before modern refrigeration and industrial food production, families in many regions made butter from the cream collected from cow’s milk and, in some places, from the milk of other animals.
Traditional butter-making often involved wooden churns, bowls, and simple hand-operated tools. The process required patience, but it allowed households to transform fresh dairy cream into a useful cooking ingredient.
Butter became an important part of everyday cooking in many European, African, Middle Eastern, and Asian food traditions. Different cultures developed their own methods for preparing, flavoring, storing, and using dairy fats.
Today, although commercial butter is widely available, homemade butter remains popular among home cooks who appreciate traditional food preparation, freshness, and the satisfaction of making something from scratch.
Formation: How Does Cream Become Butter?
Butter forms through a physical process called churning.
Cream contains tiny droplets of fat surrounded by protective membranes. When the cream is whipped or shaken repeatedly, these structures begin to break down, allowing the fat droplets to join together.
The process occurs in stages:
- Whipping: Air enters the cream, and the cream thickens.
- Fat aggregation: Continued movement causes the fat particles to gather together.
- Separation: Yellow butter clumps form, and the watery liquid separates.
- Washing: The butter is rinsed to remove residual buttermilk.
- Finishing: Salt may be added, and the butter is shaped and chilled.
The result is a smooth, rich dairy product that can be used in many sweet and savory recipes.
Other Homemade Products to Try
Once you become comfortable preparing homemade butter, you can explore a wide range of products made with everyday ingredients.

Homemade Bread
Flour, water, yeast, and salt can become a soft, fragrant loaf. Homemade bread is ideal for breakfast, sandwiches, and family meals.

Homemade Fruit Jam
Fruit, sugar, and lemon juice create a delicious spread for toast, pancakes, and desserts. Follow a tested preservation recipe if you plan to store jam at room temperature.

Homemade Tomato Sauce
Fresh or canned tomatoes, garlic, onions, and herbs make a versatile sauce for pasta, pizza, and casseroles.

Homemade Cookies
Simple baking ingredients can produce crisp edges, soft centers, and flavors that you can customize with chocolate, nuts, oats, or spices.
Tips for Successful Homemade Products
- Use fresh ingredients. Quality ingredients make a noticeable difference in taste and texture.
- Measure carefully. Accurate measurements are especially important when baking.
- Keep equipment clean. Wash hands, utensils, and containers before preparing food.
- Follow storage guidelines. Homemade products may lack the preservatives used in commercial versions.
- Experiment gradually. Change one ingredient or technique at a time so you can understand its effect.
- Label stored products. Include the preparation date and keep refrigerated or frozen foods at safe temperatures.
Conclusion
Homemade products are more than simple kitchen creations. They represent tradition, creativity, resourcefulness, and the pleasure of preparing food with your own hands.
Homemade butter is an excellent place to begin because it requires few ingredients and demonstrates how a basic kitchen technique can transform cream into something useful and delicious. Once you master the process, you can explore bread, sauces, jams, baked goods, and countless other homemade favorites.
With patience, good ingredients, and proper food handling, your kitchen can become a place where everyday ingredients turn into memorable creations.
For Homemade Food Lovers
If you love homemade products, start with one recipe, practice until you feel confident, and gradually build your own collection of family favorites. Keep notes about your ingredients, measurements, and results so you can repeat the recipes you enjoy most.
The greatest reward is sharing something you have made yourself with the people you care about.
Homemade food is made with care, enjoyed with family, and remembered for years.