
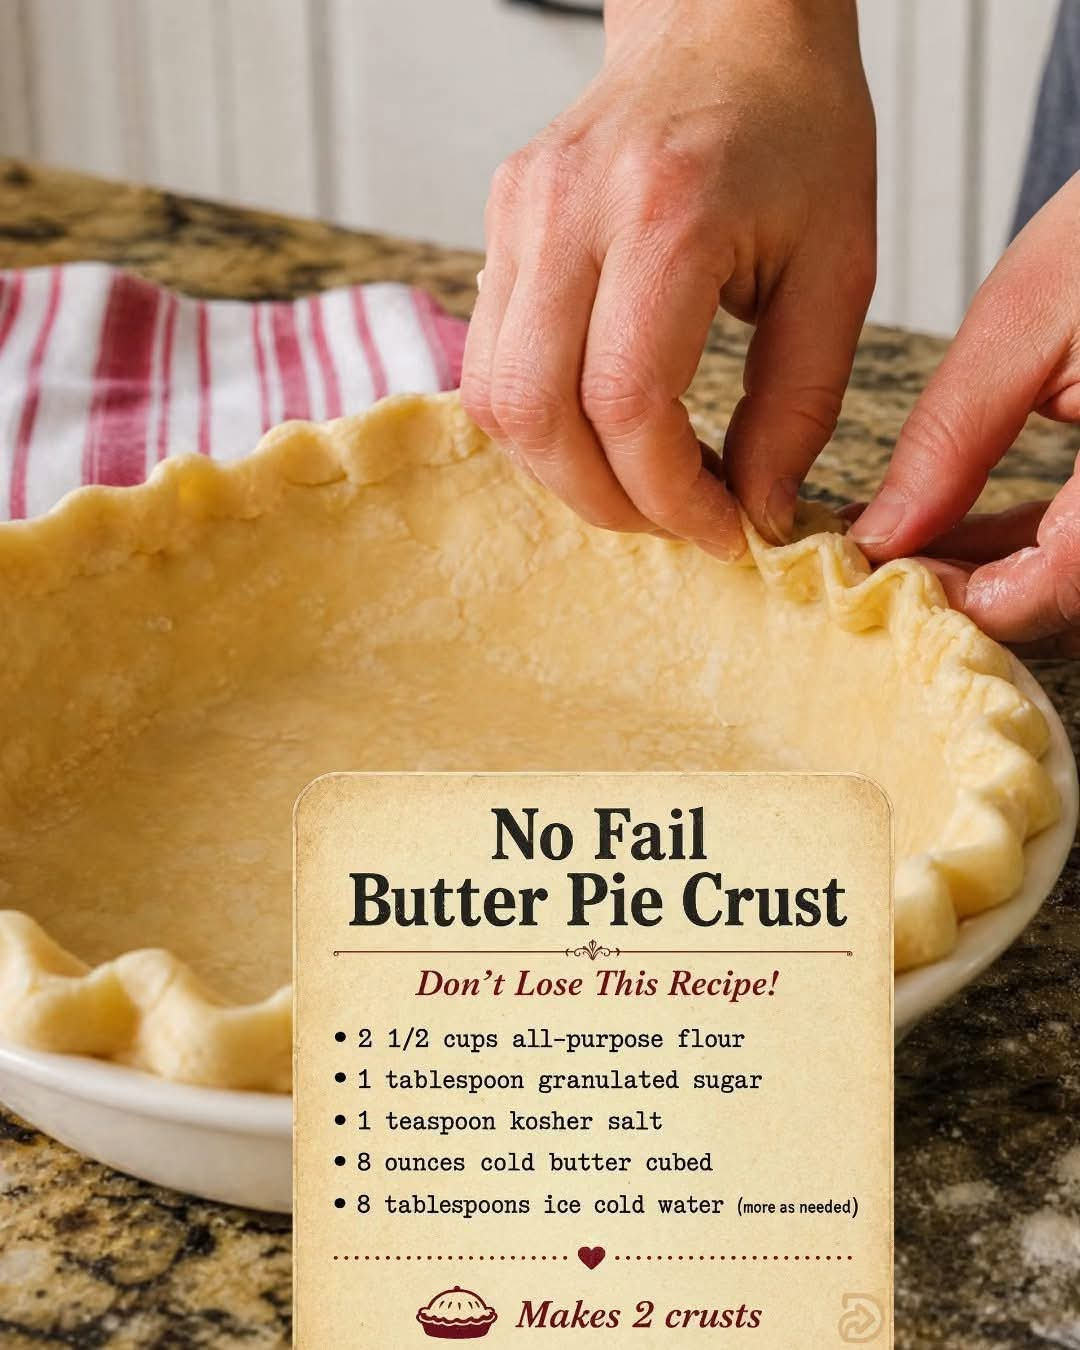
No-Fail Butter Pie Crust
Introduction
A great pie begins with a great crust. This No-Fail Butter Pie Crust is a classic homemade pastry designed to be tender, flaky, buttery, and sturdy enough to hold everything from fruit fillings to creamy custards and savory pies.
The secret is simple: keep the ingredients cold, avoid overworking the dough, and most importantly, do not completely blend the butter into the flour. Those small pieces of cold butter are exactly what create the beautiful flaky layers that make homemade pie crust so special.
As the pie bakes, the pieces of butter melt and release moisture. That moisture creates steam, which helps separate the layers of dough and produces a light, crisp, flaky texture.
This recipe makes two crusts, making it perfect for a double-crust pie or for preparing one crust now and saving the second for another pie.
Ingredients
For the Pie Crust
- 2½ cups all-purpose flour
- 1 tablespoon granulated sugar
- 1 teaspoon kosher salt
- 8 ounces cold unsalted butter, cut into small cubes
- 8 tablespoons ice-cold water, plus a little more if needed
Optional Ingredients for Finishing
Depending on the pie you are preparing, you may also use:
- 1 egg beaten with a tablespoon of water for an egg wash
- A small amount of granulated sugar for sprinkling
- Flour for lightly dusting the work surface
- Additional butter for greasing the pie plate if desired
Instructions
Step 1: Prepare the Ingredients
Before beginning, make sure the butter and water are very cold.
Cut the butter into cubes and place it in the refrigerator while you prepare the dry ingredients. You can also place the mixing bowl in the refrigerator for a few minutes if your kitchen is particularly warm.
The colder the butter remains, the better the final texture will be.
Step 2: Combine the Dry Ingredients
Place the all-purpose flour, granulated sugar, and kosher salt in a large mixing bowl.
Whisk everything together until the salt and sugar are evenly distributed throughout the flour.
This simple step helps ensure that every portion of the dough has a balanced flavor.
Step 3: Add the Cold Butter
Add the cold cubed butter to the flour mixture.
Using a pastry cutter, fork, or your fingertips, gently work the butter into the flour.
Do not mix until the butter disappears.
Instead, aim for a mixture containing plenty of small pieces of butter, approximately pea-sized, along with some slightly larger pieces.
This is one of the most important parts of the recipe.
Those visible pieces of butter will eventually become the flaky layers in the baked crust.
Step 4: Add the Ice-Cold Water
Begin adding the ice-cold water gradually.
Start with several tablespoons and gently mix the dough after each addition.
Continue adding water until the dough begins to come together.
You may not need all of the water, while some kitchens may require a little more depending on the flour, humidity, and temperature.
The dough should look somewhat rough and shaggy rather than perfectly smooth.
Do not knead it.
Step 5: Bring the Dough Together
Transfer the mixture onto a lightly floured work surface.
Gently press the dough together with your hands.
If there are a few dry crumbs remaining, sprinkle a small amount of additional ice water over them and gently press them into the dough.
The goal is simply to bring everything together.
Avoid squeezing, kneading, or repeatedly working the dough because excessive handling can develop gluten and make the crust tough.
Step 6: Divide the Dough
Divide the dough into two approximately equal portions.
Gently shape each portion into a disk.
Do not form the dough into a tight ball.
A flat disk will be much easier to roll later and will require less handling.
Step 7: Wrap and Refrigerate
Wrap each dough disk tightly in plastic wrap or place it in an airtight container.
Refrigerate the dough for at least 1 hour.
For even better flavor and texture, the dough can be refrigerated for several hours or overnight.
This resting period allows the butter to firm up again and gives the gluten time to relax.
Method
The method behind this pie crust is based on three simple principles: cold ingredients, visible pieces of butter, and gentle handling.
The Cold Butter Method
Cold butter is essential because it needs to remain solid while the dough is being prepared.
If the butter becomes warm and blends completely into the flour, the finished crust may lose some of its flakiness.
Keeping the butter cold allows it to remain in distinct pieces throughout the dough.
The Flaky-Layer Method
Do not work every bit of butter into the flour.
Instead, leave small pieces distributed throughout the dough.
When the crust enters the hot oven, the butter melts and produces steam. That steam pushes apart portions of the dough, creating thin, flaky layers.
This is why a slightly uneven dough mixture is actually desirable.
The Minimal-Handling Method
Pie dough should be handled just enough to bring it together.
Overmixing can develop too much gluten, resulting in a crust that is chewy rather than tender.
A rough-looking dough before refrigeration is completely normal.
The dough will become easier to roll once it has rested and chilled.
How to Roll the Dough
Once the dough has chilled, remove one disk from the refrigerator.
Let it sit for a few minutes if it is extremely firm.
Lightly flour your work surface and rolling pin.
Begin rolling from the center of the dough outward, rotating the dough occasionally as you work.
Continue until the dough is approximately 12 inches in diameter for a standard 9-inch pie plate.
Try to maintain an even thickness.
If the dough begins sticking, add a very small amount of flour to the work surface.
Avoid adding excessive flour because too much flour can make the finished crust dry.
How to Place the Crust in the Pie Plate
Carefully transfer the rolled dough to the pie plate.
Gently ease the dough into the corners rather than stretching it.
Allow the dough to naturally settle into the shape of the pan.
Trim any excess dough around the edge, leaving enough to create a decorative border.
For a single-crust pie, fold the edge underneath itself and crimp it with your fingers or a fork.
For a double-crust pie, place the filling into the bottom crust and cover it with the second rolled-out disk.
Seal and crimp the edges, then cut several small vents in the top crust to allow steam to escape.
Chilling Before Baking
For an especially flaky crust, chill the assembled pie before baking.
This gives the butter another opportunity to become firm.
When the cold crust enters a hot oven, the rapid melting of the butter helps create the characteristic flaky texture.
If your kitchen is warm or the dough has become soft while rolling, refrigeration is especially helpful.
Baking Method
The exact baking temperature and time will depend on the pie filling and the specific recipe you are using.
As a general approach, bake the assembled pie according to the filling’s instructions.
For a double-crust fruit pie, the crust is often started at a higher temperature to encourage browning and then finished at a slightly lower temperature so the filling can cook without excessively darkening the crust.
If the edges brown too quickly, cover them loosely with aluminum foil or use a pie shield.
The finished crust should be golden brown and crisp.
Tips for a Successful Crust
Keep Everything Cold
Cold butter is the foundation of flaky pastry.
If your butter starts becoming soft while preparing the dough, stop working and place the bowl in the refrigerator for several minutes.
Do Not Overwork the Butter
The butter should remain visible in small pieces.
Some pieces may be pea-sized while others can be slightly larger.
That uneven distribution is part of the process.
Do Not Add Too Much Water
Water helps the flour bind together, but excessive water can produce a tougher crust.
Add it gradually and stop as soon as the dough holds together when gently pressed.
Do Not Knead the Dough
Pie dough is not bread dough.
It does not need extensive kneading.
Gentle pressing is enough.
Rest the Dough
Refrigerating the dough for at least an hour makes it easier to roll and helps prevent excessive shrinkage during baking.
History of Butter Pie Crust
Butter-based pastry has a long history within European baking traditions, where cooks developed different methods for combining flour, fat, and liquid to create tender pastry.
Early pastry techniques were used for both sweet and savory dishes. Over time, different regions developed their own preferred fats and methods. Butter became particularly valued for its rich flavor and ability to produce delicate pastry.
The basic principle behind flaky pastry has remained remarkably consistent: incorporate fat into flour, add just enough liquid to bring the dough together, keep the fat cold, and expose the dough to high heat.
The modern American pie crust became closely associated with fruit pies, especially apple, cherry, peach, berry, and pumpkin pies. Homemade pie became an important part of family cooking, holiday meals, church gatherings, community events, and weekend baking.
Formation of the Dough
The formation of this crust can be understood as a balance between flour, butter, and water.
The flour provides structure.
The butter provides richness and creates the flaky layers.
The water brings the flour together into a workable dough.
When the butter is distributed in small pieces rather than completely incorporated, it creates pockets within the dough.
During baking, the water contained in the butter turns into steam. The steam pushes against the surrounding dough, helping separate the layers.
At the same time, the flour sets and the butter contributes a rich, crisp texture.
That is the reason this simple technique can produce such a beautiful crust.
Using the Two Crusts
This recipe produces two crusts, which gives you several options.
Use both crusts for a double-crust fruit pie.
Use one for a traditional single-crust pie and freeze the second for later.
You can also use the second crust for hand pies, galettes, pot pies, or other pastry recipes.
If freezing the dough, wrap it very well and place it in a freezer-safe bag or container.
Thaw it in the refrigerator before rolling.
Common Mistakes to Avoid
One of the biggest mistakes is allowing the butter to become warm.
Another is adding too much water.
Overworking the dough is also a common problem.
Finally, avoid rolling the dough repeatedly. Every time the dough is gathered and rerolled, additional gluten can develop and the crust may become less tender.
Work efficiently, keep everything cold, and handle the dough as little as possible.
Conclusion
This No-Fail Butter Pie Crust is a dependable recipe to keep in your kitchen because it uses simple ingredients and relies on a few important techniques rather than complicated steps.
The most important lesson is to respect the butter.
Do not completely blend it into the flour. Leave those small pieces throughout the dough. When they meet the heat of the oven, they melt and create steam, helping form the flaky little layers that make a homemade pie crust so delicious.
With cold butter, ice water, gentle handling, and enough resting time, you can create a golden, tender, beautifully flaky crust for almost any pie.
For Pie Lovers
For anyone who loves traditional homemade pies, learning to make a good butter crust is a valuable kitchen skill.
There is something especially satisfying about rolling out a piece of homemade pastry, filling it with fresh fruit or a creamy filling, crimping the edges by hand, and watching it become golden and flaky in the oven.
This crust is suitable for classic apple pie, cherry pie, peach pie, blueberry pie, pumpkin pie, pecan pie, chocolate cream pie, and many savory pies as well.
Once you become comfortable with the technique, you can make the dough part of your regular baking routine.
The recipe is simple, but the result can make an ordinary pie feel truly homemade.