
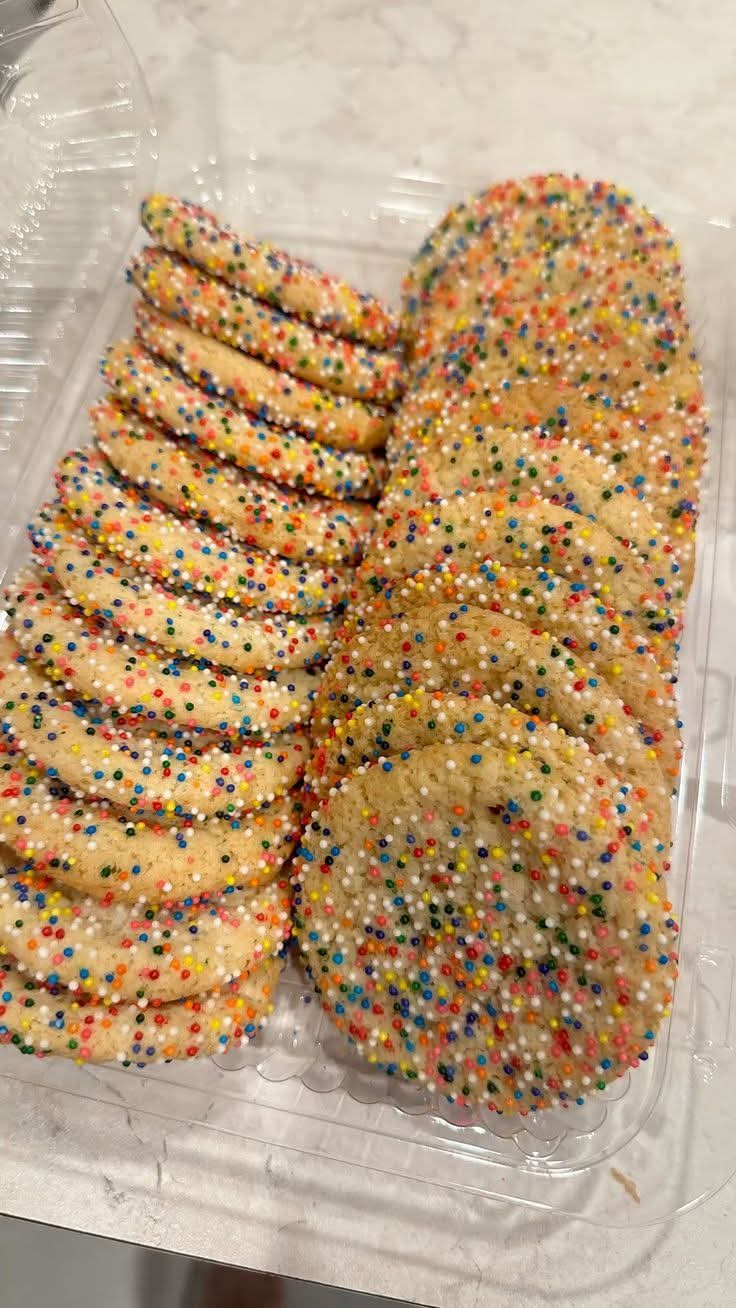
Grandma’s Old-Fashioned Homemade Heritage Cookies
A treasured family recipe brought back to life, filled with nostalgia, warmth, and the sweet memories of generations past.
Introduction: A Recipe That Was Never Truly Forgotten
Some recipes are more than just a list of ingredients. They are pieces of family history, little reminders of the people who came before us, and precious traditions that deserve to be passed down from one generation to the next.
My mom’s grandmother used to make these wonderful old-fashioned cookies, and the family talked about them for years. Unfortunately, when she passed away, the original recipe disappeared with her. Nobody seemed to know exactly how she made them, but the memories of their delicious taste remained.
Now, after all these years, the recipe has finally been rediscovered and recreated. I cannot wait to make them for my mom and see whether that first bite brings back the memories she has carried in her heart for so long.
These homemade heritage cookies are buttery, tender, lightly sweet, and wonderfully comforting. They are the kind of old-fashioned treat that belongs on a kitchen table beside a cup of coffee or tea, especially when family gathers to share stories about the past.
Ingredients
Preparation time: 20 minutes
Chilling time: 30 minutes
Baking time: 10–14 minutes
Yield: Approximately 24 cookies
The original family recipe was not included in the story, so the following is a traditional-style reconstruction rather than a verified copy of the grandmother’s exact recipe.
- 2 ½ cups all-purpose flour
- 1 cup unsalted butter, softened
- ¾ cup granulated sugar
- 1 large egg
- 1 teaspoon vanilla extract
- 1 teaspoon baking powder
- ¼ teaspoon salt
- 2 tablespoons milk, if needed
- 2 tablespoons granulated sugar for sprinkling, optional
Instructions
Step 1: Prepare the Dough
In a large mixing bowl, beat the softened butter and granulated sugar together for about 2–3 minutes until the mixture becomes light and creamy.
Add the egg and vanilla extract. Continue mixing until everything is thoroughly combined.
The butter should be soft enough to mix easily but not melted. This helps create cookies with a tender texture and a pleasant buttery flavor.
Step 2: Combine the Dry Ingredients
In a separate bowl, whisk together the flour, baking powder, and salt.
Gradually add the dry ingredients to the butter mixture, stirring gently until a soft dough forms.
If the dough seems too dry or crumbly, add milk one teaspoon at a time until it holds together. Avoid adding too much liquid, as the dough should remain firm enough to shape.
Step 3: Chill the Dough
Cover the bowl and refrigerate the dough for approximately 30 minutes.
Chilling helps the butter firm up, making the dough easier to handle and helping the cookies maintain their shape during baking.
While the dough chills, preheat the oven to 350°F (175°C). Line a baking sheet with parchment paper.
Step 4: Shape the Cookies
Remove the dough from the refrigerator and place it on a lightly floured surface.
Roll the dough to approximately ¼ inch thick. Use a round cookie cutter, a drinking glass, or your favorite cookie cutter to shape the cookies.
Alternatively, roll the dough into small balls and flatten them gently with your fingers or the bottom of a glass.
If desired, sprinkle a little granulated sugar over the tops for a delicate sweetness and a traditional homemade appearance.
Step 5: Bake Until Lightly Golden
Arrange the cookies on the prepared baking sheet, leaving approximately 1 inch between them.
Bake for 10–14 minutes, depending on their thickness and size. The edges should be lightly golden, while the centers may remain pale.
Do not wait for the entire cookie to become dark brown. Overbaking can make these simple butter cookies dry and hard.
Step 6: Cool and Serve
Allow the cookies to rest on the baking sheet for about 5 minutes before transferring them to a wire rack.
Let them cool completely before serving. Their texture will become more stable as they cool, and the buttery flavor will develop beautifully.
Serve them with coffee, tea, warm milk, or a glass of cold milk for a comforting old-fashioned treat.
Methods: The Secrets to Delicious Old-Fashioned Cookies
Creaming method: Beat the butter and sugar thoroughly to create a smooth, light mixture. This helps produce a tender cookie.
Gentle mixing method: Once the flour is added, mix only until the dough comes together. Excessive mixing can make the cookies tougher.
Chilling method: Refrigerating the dough makes it easier to roll and helps prevent excessive spreading in the oven.
Even-shaping method: Keep the cookies approximately the same thickness so they bake evenly.
Careful baking method: Remove the cookies when the edges are just beginning to turn golden. They will continue to firm up as they cool.
History: The Memories Behind Grandma’s Recipes
Before handwritten recipes became common in every household, many family recipes were passed down through observation and experience.
Grandmothers often taught their children and grandchildren how to cook by demonstrating each step. They measured flour with cups or handfuls, judged the consistency of dough by touch, and knew when something was ready simply by its smell, appearance, or sound.
Some recipes were written on old index cards, tucked inside cookbooks, or kept in kitchen drawers. Others existed only in the memories of the people who prepared them.
That is why losing a family recipe can feel like losing a small piece of family history. The dish itself may seem simple, but it carries memories of birthdays, holidays, afternoon visits, and loved ones gathered around a table.
Recreating an old family favorite is a wonderful way to keep those memories alive. Even when the original recipe cannot be recovered exactly, the process of trying, tasting, and sharing can bring generations closer together.
These heritage-style cookies celebrate that tradition: simple ingredients transformed into something meaningful through the love and care that go into making them.
Formation: How the Cookies Develop Their Texture
The texture of these cookies comes from the balance of butter, sugar, flour, and egg.
- Butter provides richness and helps create a tender bite.
- Sugar adds sweetness and contributes to the lightly crisp edges.
- Egg binds the ingredients and gives the dough structure.
- Flour provides the framework that allows the cookies to hold their shape.
- Baking powder gives the cookies a little lift.
- Vanilla adds a familiar, comforting aroma.
Chilling the dough before baking helps control spreading, while moderate oven heat allows the cookies to bake evenly without becoming overly dark.
The finished cookies should have lightly crisp edges and a tender, delicate center, making them perfect for enjoying fresh or saving for later.
Variations to Try
Old-Fashioned Cinnamon Cookies
Add ½ teaspoon ground cinnamon to the dry ingredients for a warm, nostalgic flavor.
Lemon Butter Cookies
Add 1 teaspoon finely grated lemon zest to the butter and sugar mixture for a fresh citrus aroma.
Vanilla Sugar Cookies
Roll the shaped cookies in a little vanilla sugar before baking for an extra-sweet finish.
Jam-Filled Heritage Cookies
Make a small indentation in each dough ball and add a little thick strawberry or raspberry jam before baking. Avoid overfilling, as the jam can spread.
Almond Butter Cookies
Replace the vanilla extract with ½ teaspoon almond extract for a delicate nutty aroma.
Storage and Serving Suggestions
Allow the cookies to cool completely before storing them in an airtight container.
- At room temperature: Store for approximately 5–7 days in a cool, dry place.
- In the freezer: Freeze baked cookies in a well-sealed container for up to 3 months.
- For serving: Pair with tea, coffee, milk, or a scoop of vanilla ice cream.
- For gifting: Arrange the cooled cookies in a decorative tin or a simple paper-lined box.
For the best texture, keep the cookies away from moisture and avoid storing them while they are still warm.
Conclusion: Some Memories Deserve to Be Baked Again
There is something truly special about bringing an old family recipe back into the kitchen.
Perhaps the first batch will taste exactly as Mom remembers. Perhaps it will need a little adjusting before it comes close to the cookies her grandmother once made. Either way, the experience is worth it.
Recipes connect us to people who may no longer be with us, allowing their traditions to continue through our own hands. Every time we prepare a familiar dish, we create another opportunity to share stories, preserve memories, and pass something meaningful to the next generation.
These old-fashioned cookies are a reminder that even the simplest homemade treats can hold a lifetime of love.
Make a batch, invite your family into the kitchen, and let the stories begin.
For the Lovers of Homemade Family Recipes
If you love traditional baking, vintage desserts, handwritten recipe cards, and the comforting flavors of Grandma’s kitchen, this recipe is for you.
Share it with someone who remembers a special dish from childhood, or make it with your mother, grandmother, children, or grandchildren. Sometimes the best part of a recipe is not the finished dessert but the memories created while preparing it together.
A little question for fellow recipe lovers: What is one recipe your mother or grandmother used to make that you wish you could taste again?
Tell us its name and the memories attached to it. Your forgotten family favorite might inspire someone else to bring a treasured tradition back to life.
Recipe note: This is a suggested old-fashioned butter-cookie recipe inspired by the family story. The exact original recipe cannot be confirmed without knowing which specific cookies the grandmother made.