
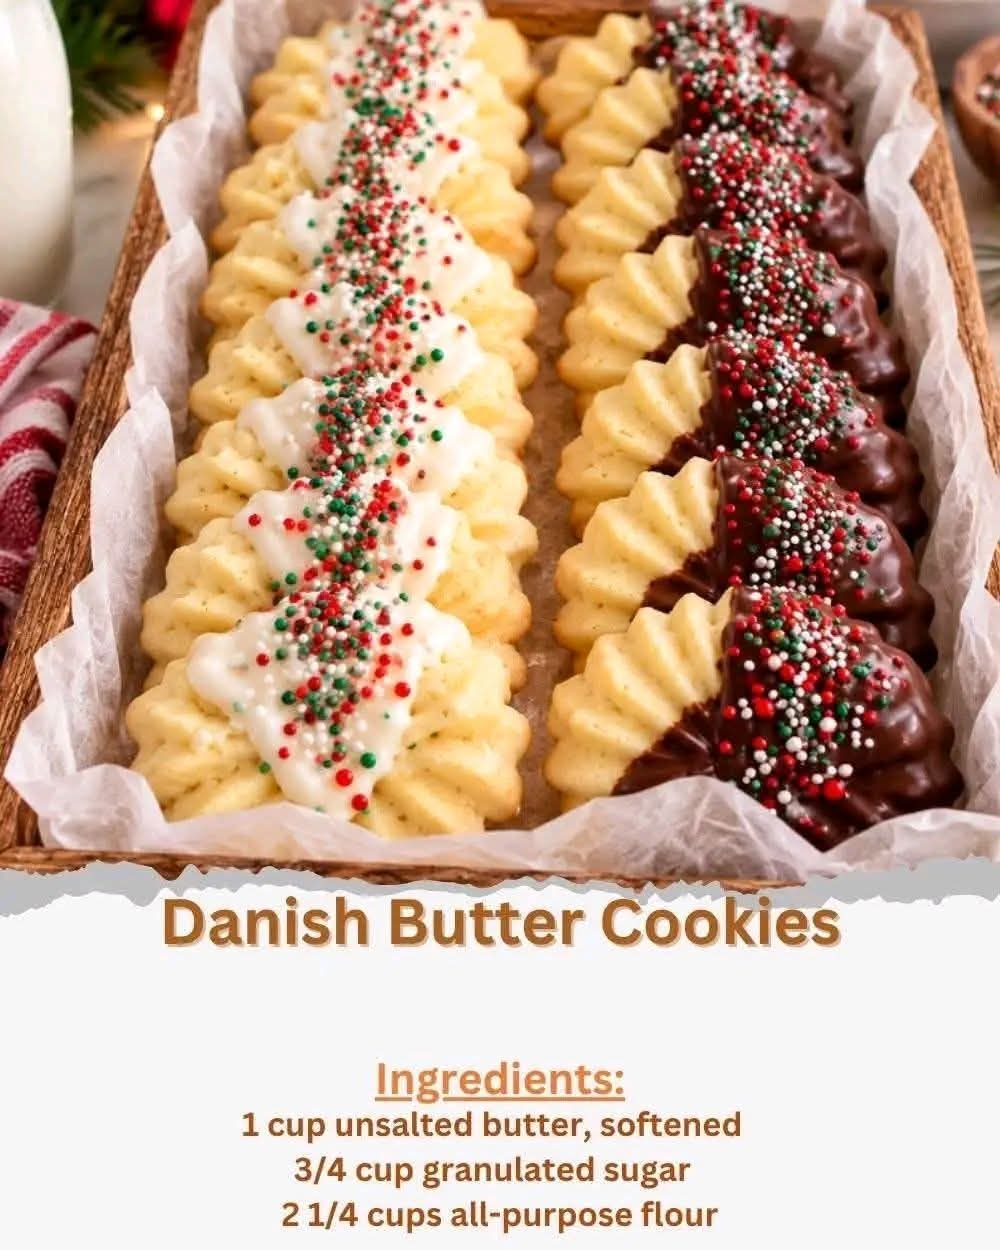
Danish Butter Cookies
Introduction
Danish Butter Cookies are a classic European treat known for their delicate texture, rich buttery flavor, and simple, elegant appearance. They are the kind of cookies that require only a handful of basic ingredients but deliver an incredibly satisfying result.
These cookies are crisp around the edges, tender in the center, and wonderfully fragrant with vanilla and butter. They are perfect with coffee, tea, hot chocolate, or a cold glass of milk. Because the dough is easy to shape, you can create traditional rings, swirls, or piped rounds for a beautiful homemade presentation.
Ingredients
For the Cookies
- 1 cup unsalted butter, softened
- 3/4 cup granulated sugar
- 1 large egg
- 2 teaspoons vanilla extract
- 2 1/4 cups all-purpose flour
Optional Finishing Ingredients
- 2 tablespoons granulated sugar, for sprinkling
- 1 teaspoon vanilla sugar, optional
- Melted chocolate, optional for dipping
- Toasted coconut, optional for decoration
Instructions
1. Prepare the Butter
Place the softened butter in a large mixing bowl. Beat it with an electric mixer for about 2 to 3 minutes until it becomes smooth, creamy, and slightly lighter in color.
Using properly softened butter is important. It should be soft enough to mix easily but should not be melted.
2. Add the Sugar
Gradually add the granulated sugar to the butter. Continue beating for another 2 to 3 minutes until the mixture is light and fluffy.
This creaming process helps create the delicate texture that makes butter cookies so enjoyable.
3. Add the Egg and Vanilla
Beat in the egg until completely incorporated. Add the vanilla extract and mix again until the mixture is smooth.
If the mixture looks slightly separated at this stage, do not worry. Once the flour is added, the dough will come together.
4. Add the Flour
Gradually add the flour to the wet ingredients. Mix on low speed just until the flour disappears and a soft cookie dough forms.
Do not overmix the dough. Excessive mixing can develop the gluten in the flour and make the cookies less tender.
5. Prepare the Dough for Shaping
Transfer the dough to a piping bag fitted with a large star-shaped tip if you want traditional Danish-style swirls or rings.
If the dough is too firm to pipe, let it sit at room temperature for several minutes. Avoid adding extra liquid because this can change the final texture.
You can also shape the dough by hand if you prefer simple round cookies.
6. Shape the Cookies
Preheat the oven to 350°F (175°C).
Line baking sheets with parchment paper.
Pipe the dough into small circles, swirls, or traditional ring shapes, leaving about 1 to 2 inches between each cookie.
For a classic appearance, keep the cookies relatively small and uniform in size so they bake evenly.
7. Chill the Cookies
Place the shaped cookies in the refrigerator for approximately 15 to 20 minutes before baking.
Chilling helps the cookies hold their shape and prevents them from spreading too much in the oven.
8. Bake
Bake for approximately 10 to 14 minutes, depending on their size and thickness.
The cookies should be lightly golden around the edges while remaining relatively pale in the center.
Do not overbake them. Their delicate buttery texture is one of their defining characteristics.
9. Cool
Allow the cookies to cool on the baking sheet for about 5 minutes.
Then carefully transfer them to a wire rack and allow them to cool completely.
The cookies will become crisper as they cool.
Method
The traditional method begins with creaming softened butter and sugar until light and smooth. The egg and vanilla are then incorporated before flour is gently mixed in to create a soft dough.
The dough can be piped into classic Danish shapes or rolled and cut into simple cookies. Chilling the shaped dough before baking helps preserve the design and produces cookies with neat edges.
The key to successful Danish Butter Cookies is controlling the temperature of the butter and avoiding overmixing once the flour has been added.
History of Danish Butter Cookies
Danish Butter Cookies have become internationally associated with Denmark and with the traditional blue tins commonly found in homes around the world.
Butter has long been an important ingredient in Danish baking, and Danish pastry traditions developed a strong reputation for rich, carefully prepared baked goods. Butter cookies became especially popular because they were simple enough to make from everyday pantry ingredients while still feeling special enough for guests and celebrations.
The familiar assortment of differently shaped cookies also became part of their identity. Rings, pretzel shapes, swirls, and small piped cookies are often included together, giving the classic Danish cookie assortment its distinctive appearance.
Over time, Danish Butter Cookies became popular far beyond Denmark and are now enjoyed during holidays, afternoon coffee breaks, family gatherings, and special occasions.
Formation and Shaping
One of the most enjoyable parts of making Danish Butter Cookies is shaping the dough.
Classic Rings
Pipe a circle of dough onto the baking sheet. Keep the thickness consistent so the entire cookie bakes evenly.
Swirls
Starting from the center, pipe the dough outward in a spiral. This produces a beautiful bakery-style cookie.
Round Cookies
Scoop small portions of dough and gently flatten them. These are especially easy for beginners.
Traditional Pretzel Shapes
Pipe the dough into small pretzel-like shapes for a more traditional Danish assortment.
For the best presentation, try to make all cookies approximately the same size.
Tips for Perfect Danish Butter Cookies
Use real unsalted butter for the richest flavor.
Make sure the butter is softened naturally rather than melted.
Measure the flour carefully. Too much flour can make the cookies dry and difficult to pipe.
Do not overmix after adding the flour.
Chill the shaped cookies before baking if you want them to maintain their decorative shape.
Bake until the edges are lightly golden. The centers should remain relatively pale.
Allow the cookies to cool completely before storing them.
Storage
Once completely cooled, store the cookies in an airtight container at room temperature.
They generally keep well for about 1 to 2 weeks when properly sealed. For the best texture, keep them away from moisture.
These cookies can also be frozen. Place completely cooled cookies in an airtight freezer-safe container with parchment paper between layers. Thaw them at room temperature before serving.
Serving Ideas
Danish Butter Cookies are wonderful served alongside:
- Coffee
- Black tea
- Green tea
- Hot chocolate
- Vanilla ice cream
- Fresh berries
- Whipped cream
- Fruit preserves
They also make a lovely homemade gift when arranged in a decorative tin or cookie box.
For Butter Cookie Lovers
If you love traditional bakery cookies, Danish Butter Cookies are an excellent recipe to keep in your collection. Their appeal comes from simplicity: rich butter, sweet sugar, vanilla, and flour combine to create a cookie that feels both nostalgic and elegant.
They are especially enjoyable during the holiday season, but there is no reason to wait for a special occasion. A batch can be prepared for an afternoon coffee, a family gathering, a dessert table, or simply when you want something homemade and buttery.
For anyone who loves crisp edges, delicate centers, and classic European-style baking, these cookies are difficult to resist.
Conclusion
Danish Butter Cookies prove that a great dessert does not need a long list of ingredients. With butter, sugar, egg, vanilla, and flour, you can create beautiful cookies with a rich flavor and delicate texture.
The secret is in the technique: cream the butter and sugar properly, avoid overworking the flour, shape the dough carefully, chill when necessary, and bake just until the edges become lightly golden.
The result is a classic homemade cookie that is simple, elegant, and perfect for sharing with family and friends.