
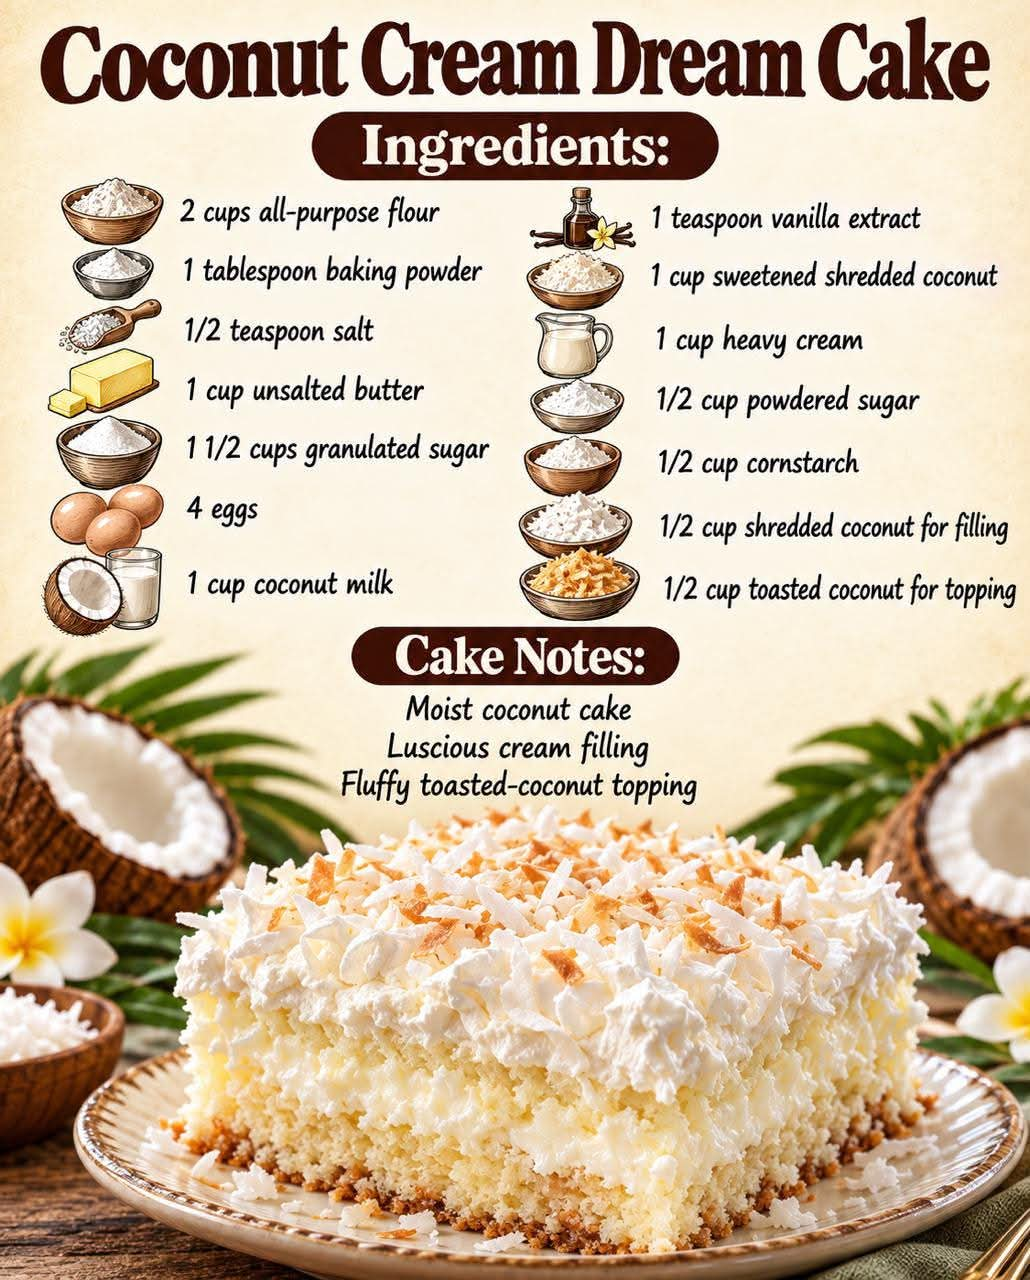
Coconut Cream Dream Cake
Introduction
Coconut Cream Dream Cake is a soft, moist, and wonderfully creamy dessert that brings the tropical flavor of coconut to every bite. Made with a tender white cake base, a rich coconut cream filling, and a fluffy whipped topping, this cake is the perfect treat for family gatherings, birthdays, holidays, potlucks, and Sunday dinners.
The beauty of this recipe is its simplicity. Using a convenient white cake mix makes preparation easy, while milk, coconut cream, and shredded coconut transform an ordinary cake into a delicious homemade-style dessert. Every slice offers a beautiful combination of delicate cake, creamy coconut flavor, and a light, cloud-like topping.
This cake is especially wonderful when prepared ahead of time because chilling allows the flavors to blend together and gives the cake its signature creamy texture. If you love coconut desserts that are sweet, refreshing, and easy to share, Coconut Cream Dream Cake deserves a place in your recipe collection.
Ingredients
For the Cake
- 1 box white cake mix, approximately 15.25 ounces (Duncan Hines recommended)
- 3 large eggs
- 1 cup milk
- 1/2 cup vegetable oil
- 1 teaspoon vanilla extract, optional
For the Coconut Cream Filling
- 1 can (14 ounces) sweetened condensed milk
- 1 can (13.5 ounces) coconut milk
- 1 teaspoon coconut extract, optional
- 1 cup sweetened shredded coconut
For the Creamy Topping
- 1 container (8 ounces) whipped topping, thawed
- 1 cup heavy whipping cream, cold
- 2 tablespoons powdered sugar
- 1/2 teaspoon vanilla extract
- 1/2 cup sweetened shredded coconut, for garnish
Optional Decorations
- Toasted coconut flakes
- White chocolate shavings
- A few fresh berries
- Additional whipped topping
Instructions
Step 1: Prepare the Oven and Baking Pan
Preheat your oven to 350°F (175°C). Grease a 9-by-13-inch baking pan with butter or nonstick cooking spray.
Prepare all your ingredients before beginning. Allow the eggs and milk to reach room temperature for a smoother cake batter.
Step 2: Make the Cake Batter
In a large mixing bowl, combine the white cake mix, eggs, milk, vegetable oil, and vanilla extract.
Beat with an electric mixer on medium speed for approximately 2 minutes, or until the batter is smooth and evenly combined. Scrape down the sides of the bowl as needed.
Avoid overmixing, as excessive mixing can affect the tenderness of the finished cake.
Step 3: Bake the Cake
Pour the batter into the prepared baking pan and spread it evenly.
Bake for approximately 25–35 minutes, or until the center is set and a toothpick inserted into the middle comes out clean or with a few moist crumbs.
Baking time may vary depending on your oven and cake mix. Allow the cake to rest for about 10 minutes after removing it from the oven.
Step 4: Prepare the Coconut Cream Mixture
While the cake is still slightly warm, combine the sweetened condensed milk and coconut milk in a medium bowl. Add the coconut extract if desired and stir until smooth.
Using the handle of a wooden spoon or a thick skewer, poke holes across the surface of the cake, spacing them about an inch apart.
Slowly pour the coconut mixture over the cake, allowing the liquid to seep into the holes. Spread it evenly so the entire cake absorbs the creamy mixture.
Sprinkle 1 cup of shredded coconut over the surface if you want extra coconut flavor throughout the cake.
Step 5: Allow the Cake to Cool
Let the cake cool at room temperature until it is no longer warm. Cover the pan and refrigerate for at least 2–4 hours.
For the best flavor and texture, refrigerate it overnight. This gives the coconut mixture time to soak into the cake, creating a moist and tender dessert.
Step 6: Prepare the Whipped Topping
In a chilled mixing bowl, beat the cold heavy whipping cream with the powdered sugar and vanilla extract until soft peaks form, then continue until medium-firm peaks develop.
Gently fold in the thawed whipped topping until the mixture is smooth and fluffy.
If you prefer a quicker preparation, you can simply use the thawed whipped topping without adding the heavy cream.
Step 7: Frost the Cake
Remove the chilled cake from the refrigerator. Spread the whipped topping evenly over the entire surface.
Use a spatula to create soft swirls or a smooth finish.
Sprinkle the remaining shredded coconut over the top. For extra flavor and a beautiful golden appearance, lightly toast some of the coconut in a dry skillet before using it as a garnish.
Step 8: Chill Before Serving
Return the cake to the refrigerator for at least another 30–60 minutes to allow the topping to set.
When ready to serve, cut the cake into squares with a clean knife. Wipe the knife between cuts for neat, attractive slices.
Serve cold for the best creamy texture and refreshing coconut flavor.
Methods of Preparation
The Easy Cake Mix Method
This method uses a boxed white cake mix as the foundation. Combining it with milk, eggs, and oil creates a tender cake that pairs beautifully with the coconut filling.
It is ideal for busy home cooks who want a delicious dessert without measuring every dry ingredient from scratch.
The Coconut Soaking Method
The secret to this cake is allowing the coconut milk and sweetened condensed milk mixture to soak into the baked cake.
The holes help distribute the liquid throughout the crumb, creating a soft, moist texture and giving every slice a rich coconut flavor.
Pour the mixture gradually rather than all at once to help it absorb evenly.
The Whipped Cream Method
A combination of whipped cream and whipped topping creates a light, airy frosting that balances the sweetness of the condensed milk.
Keep the cream cold while whipping, and avoid overbeating it. Fold the mixtures together gently to preserve their fluffy texture.
The Overnight Chilling Method
Refrigerating the cake overnight is highly recommended. The cake becomes more flavorful as the coconut mixture settles into the crumb, while the topping becomes easier to slice.
This method also makes the dessert convenient for parties because most of the preparation can be completed the day before serving.
The History of Coconut Cream Dream Cake
Coconut desserts have a long history in tropical regions where coconuts are widely available. Across the Caribbean, Southeast Asia, the Pacific Islands, and parts of Latin America, coconut milk, coconut cream, and grated coconut have been used in both everyday cooking and special-occasion sweets.
In American home baking, coconut cakes became popular through community cookbooks, family recipe collections, church suppers, and holiday celebrations. Traditional coconut cakes often featured layers of sponge cake, creamy frosting, and generous amounts of shredded coconut.
As boxed cake mixes became common in American kitchens during the twentieth century, home bakers began adapting traditional desserts into simpler recipes. Cakes made with prepared cake mixes, sweetened condensed milk, and whipped toppings became popular because they were convenient, affordable, and easy to prepare ahead of time.
Coconut Cream Dream Cake follows that spirit of practical home baking. Although the exact origin of this particular name is uncertain, the recipe combines familiar American cake-making techniques with the tropical richness of coconut.
Today, coconut poke cakes and chilled cream cakes remain popular choices for family celebrations because they are easy to prepare and deliver plenty of flavor in every serving.
Formation and Texture of the Cake
The delicious texture of Coconut Cream Dream Cake comes from the combination of several ingredients working together.
The white cake base: Eggs provide structure, while milk adds moisture. Vegetable oil helps keep the crumb tender even after refrigeration.
The coconut filling: Sweetened condensed milk contributes sweetness and a rich consistency. Coconut milk supplies the distinctive tropical flavor, while the holes allow the mixture to penetrate the cake.
The shredded coconut: Coconut adds a pleasant texture and reinforces the flavor of the filling. It can be mixed into the cake or reserved for the topping.
The whipped topping: Whipped cream creates an airy texture, while prepared whipped topping helps provide a stable finish.
The chilling process: Refrigeration allows the filling to distribute throughout the cake and gives the dessert time to develop its full flavor.
Together, these elements create a dessert that is soft, creamy, sweet, and delicately flavored with coconut.
Tips for the Best Coconut Cream Dream Cake
- Use room-temperature ingredients: Eggs and milk mix more evenly into the cake batter.
- Do not overbake: Remove the cake when the center is cooked and a toothpick comes out clean or with a few moist crumbs.
- Poke enough holes: Evenly spaced holes help the coconut filling reach more of the cake.
- Pour slowly: Allow the filling to absorb rather than collecting entirely in one spot.
- Chill thoroughly: A well-chilled cake is easier to cut and has a better-developed flavor.
- Toast the coconut: Toasting some of the garnish adds a nutty aroma and a little crunch.
- Keep it refrigerated: Because of the dairy-based filling and topping, the cake should be stored in the refrigerator.
Delicious Variations
Chocolate Coconut Dream Cake
Use a chocolate cake mix instead of white cake mix. The rich chocolate flavor pairs beautifully with the coconut filling and whipped topping.
Pineapple Coconut Dream Cake
Add a thin layer of well-drained crushed pineapple over the chilled cake before spreading on the topping. The pineapple brings a fruity sweetness that complements the coconut.
Almond Coconut Dream Cake
Add a small amount of almond extract to the cake batter or whipped topping. Almond and coconut create a delicious bakery-style flavor combination.
Toasted Coconut Dream Cake
Toast the shredded coconut in a dry skillet over medium-low heat, stirring frequently until lightly golden. Let it cool completely before sprinkling it over the frosting.
Extra Creamy Coconut Cake
Replace part of the coconut milk with coconut cream for a richer filling. Because coconut cream can be thicker and richer than coconut milk, stir the mixture thoroughly before pouring it over the cake.
Serving Suggestions
Coconut Cream Dream Cake is best served cold, cut into generous squares.
It pairs wonderfully with freshly brewed coffee, tea, or a glass of cold milk. For a special occasion, serve each slice with a spoonful of whipped cream and a sprinkle of toasted coconut.
For a summer gathering, decorate the cake with fresh pineapple pieces or a few berries. For Christmas and other holidays, use white chocolate curls and toasted coconut to create a beautiful snowy appearance.
This cake is also an excellent choice for potlucks, birthdays, family reunions, baby showers, and weekend dinners because it can be prepared in advance and served directly from the baking pan.
Storage and Make-Ahead Instructions
Refrigerator: Cover the cake tightly and refrigerate for up to 3–4 days. Keep it chilled between servings.
Make ahead: Prepare the cake and coconut filling the day before serving. Add the whipped topping after the cake has cooled completely and absorbed the filling.
Freezing: The cake can be frozen in individual portions in airtight containers, although the texture of the whipped topping may change after thawing. For the best results, freeze portions without the topping when possible, then thaw overnight in the refrigerator and finish with freshly prepared topping.
Serving: Do not leave the dairy-filled cake at room temperature for extended periods. Return leftovers to the refrigerator promptly.
Conclusion
Coconut Cream Dream Cake is the kind of dessert that turns simple ingredients into something special. With its tender white cake, creamy coconut filling, fluffy topping, and generous coconut garnish, it offers a delicious balance of sweetness and tropical flavor.
The recipe is easy enough for beginner bakers, convenient enough for busy weekdays, and beautiful enough for celebrations. Best of all, preparing it ahead of time allows the flavors to blend together, making every slice moist, creamy, and satisfying.
Whether you serve it at a family gathering, bring it to a potluck, or prepare it simply because you are craving a homemade dessert, this coconut cake is a wonderful addition to your baking collection.
For Coconut Cake Lovers
If you love coconut cream pie, classic coconut layer cake, or creamy no-bake coconut desserts, this recipe is sure to become a favorite.
Its soft texture and rich coconut flavor make it especially appealing to anyone who enjoys old-fashioned, comforting desserts. You can keep it simple with a generous layer of whipped topping or dress it up with toasted coconut and white chocolate for a more elegant presentation.
Make it for your family, share it with friends, and save the recipe for the next time you need an easy dessert that feels homemade and tastes wonderful.
Final Recipe Notes
- Preparation time: Approximately 20 minutes
- Baking time: 25–35 minutes
- Chilling time: At least 3–5 hours, preferably overnight
- Total time: Approximately 4–6 hours, depending on chilling
- Yield: 12–15 servings
- Serving style: Chilled cake squares
- Difficulty: Easy
The most important ingredient is patience while the cake chills. Give the coconut filling time to soak in, keep the topping light and fluffy, and serve each slice cold for the full Coconut Cream Dream Cake experience.