
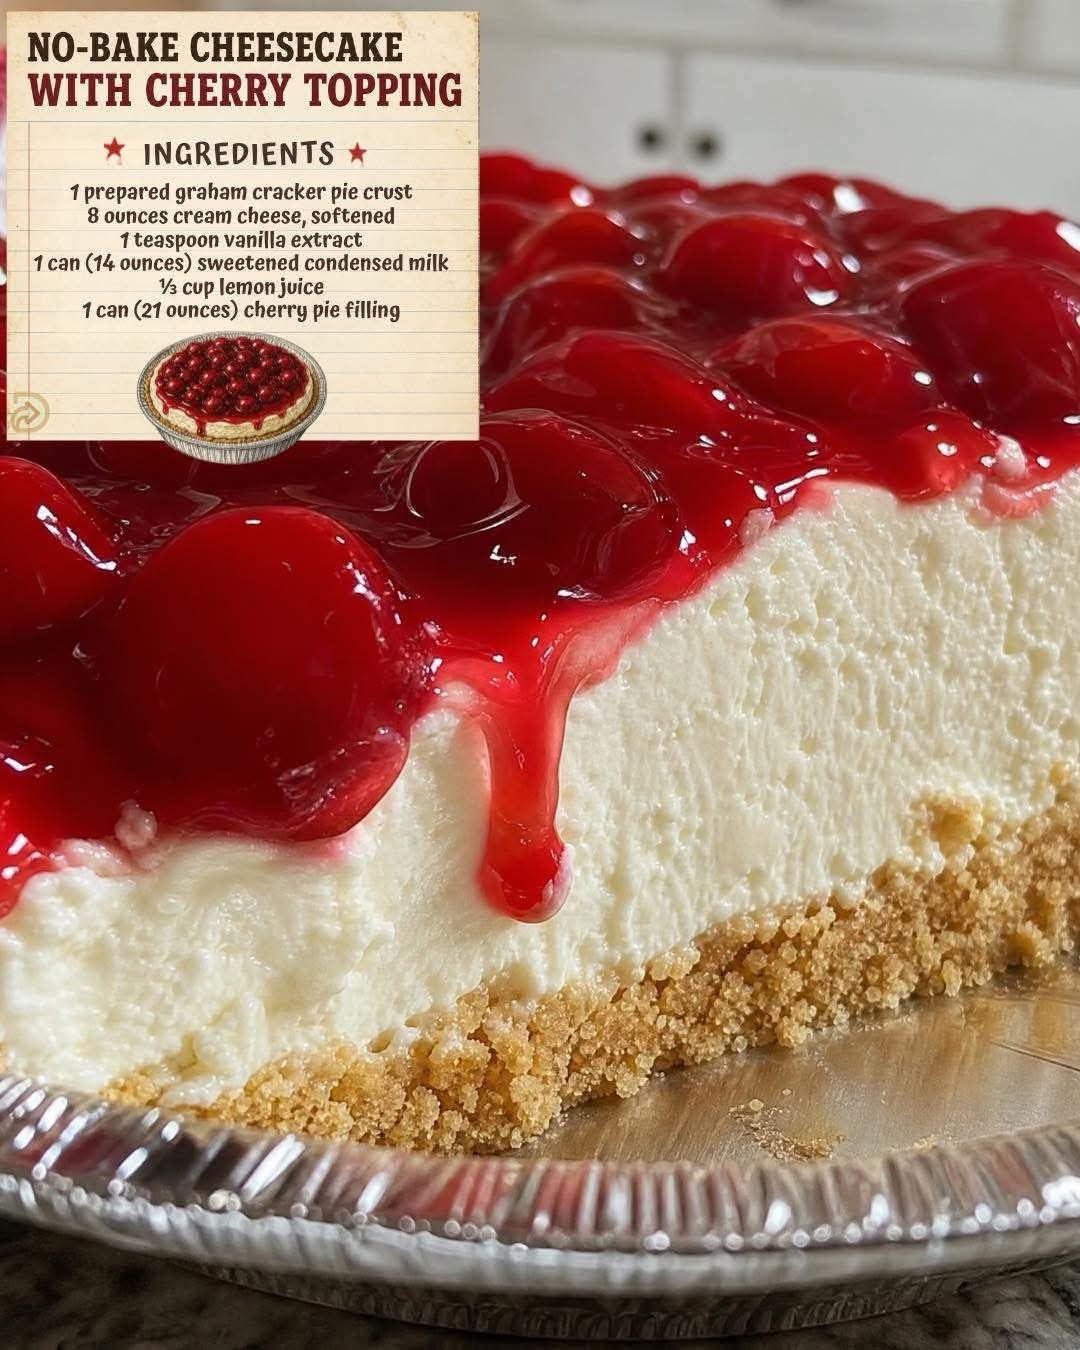
No-Bake Cheesecake with Cherry Topping


Introduction
There is something truly special about a creamy, homemade cheesecake that requires no oven, no complicated baking techniques, and no hours of preparation. This No-Bake Cheesecake with Cherry Topping is a classic dessert that brings together a smooth, rich cream cheese filling, a buttery graham cracker crust, and a beautiful layer of sweet cherry pie filling.
It is the kind of dessert that makes an ordinary family dinner feel like a celebration. Whether you are preparing a dessert for Sunday dinner, a birthday party, a holiday gathering, a summer picnic, or simply a quiet evening at home, this easy cheesecake is always a wonderful choice.
The secret to its creamy texture lies in the combination of softened cream cheese, sweetened condensed milk, vanilla extract, and fresh lemon juice. The cream cheese provides richness, the condensed milk adds sweetness, and the vanilla gives the filling a delicate flavor. Most importantly, the lemon juice helps the filling thicken as it chills, creating a soft, creamy cheesecake texture without the need for baking.
The cherry topping adds the perfect finishing touch. Its sweet, fruity flavor complements the tanginess of the cheesecake, while the glossy red cherries make every slice look inviting.
Best of all, this recipe uses simple ingredients that are easy to find at most grocery stores. With just a few minutes of mixing and some patience while the cheesecake chills, you can prepare a dessert that looks impressive and tastes delicious.
If you love old-fashioned desserts, creamy cheesecake, and easy recipes that do not require turning on the oven, this No-Bake Cheesecake with Cherry Topping deserves a place in your recipe collection.
Ingredients
This recipe makes one 9-inch cheesecake, serving approximately 8 slices.
For the graham cracker crust
- 1 prepared graham cracker pie crust, approximately 9 inches
- Optional: 1 tablespoon melted butter if you want to reinforce a homemade or crumbly crust
For the creamy cheesecake filling
- 8 ounces (225 g) cream cheese, softened to room temperature
- 1 teaspoon vanilla extract
- 1 can (14 ounces or approximately 397 g) sweetened condensed milk
- ⅓ cup (80 ml) lemon juice
For the cherry topping
– 1 can (21 ounces or approximately 595 g) cherry pie filling
Optional garnishes
- Fresh cherries for decoration
- A little finely grated lemon zest
- A small amount of whipped cream for serving
The optional garnishes are not necessary, but they can make the finished cheesecake look especially beautiful when serving guests.
Instructions
Step 1: Prepare the crust
Begin by placing your prepared graham cracker pie crust on a flat surface. If you are using a store-bought crust, it is already prepared and ready to fill.
If you prefer a homemade crust, you can combine approximately 1½ cups of finely crushed graham crackers with 5 tablespoons of melted butter and 2 tablespoons of sugar. Press the mixture firmly into the bottom and sides of a 9-inch pie plate, then refrigerate it for about 20–30 minutes before adding the filling.
Make sure the crust is firm enough to support the creamy cheesecake mixture.
Step 2: Soften the cream cheese
Remove the cream cheese from the refrigerator ahead of time and allow it to soften at room temperature.
Place the softened cream cheese in a large mixing bowl. Using an electric hand mixer or stand mixer, beat it until smooth and creamy.
Scrape down the sides of the bowl as needed to remove any lumps. This step is important because cold or insufficiently softened cream cheese can leave small lumps throughout the filling.
Continue mixing until the cream cheese has a uniform consistency.
Step 3: Add the vanilla extract
Add the vanilla extract to the softened cream cheese.
Beat again until the vanilla is evenly distributed throughout the mixture. It adds a warm, sweet aroma that complements both the cream cheese and the cherry topping.
Although vanilla is a small ingredient, it helps give the cheesecake a more rounded dessert flavor.
Step 4: Slowly incorporate the sweetened condensed milk
Pour the sweetened condensed milk into the cream cheese mixture gradually while mixing on low speed.
Avoid pouring it all in at once if you want the smoothest possible consistency. Scrape the sides and bottom of the bowl occasionally to ensure everything combines evenly.
Continue beating until the filling becomes glossy, creamy, and uniform.
Sweetened condensed milk provides most of the sweetness in this recipe, so additional sugar is generally unnecessary.
Step 5: Add the lemon juice
Measure ⅓ cup of lemon juice and add it gradually to the mixture while beating on low speed.
Continue mixing until the filling becomes smooth and slightly thicker.
The lemon juice is especially important in this no-bake recipe. Its acidity interacts with the dairy proteins, helping the filling thicken as it chills. It also balances the sweetness of the condensed milk and cherry topping.
Freshly squeezed lemon juice works well, provided you strain out any seeds and pulp. Bottled lemon juice can also be used.
Do not expect the filling to become as firm as a baked cheesecake while it is still in the mixing bowl. The refrigerator chilling period is essential for the final texture.
Step 6: Fill the pie crust
Carefully spoon the cheesecake mixture into the prepared graham cracker crust.
Use a silicone spatula or the back of a spoon to spread the filling evenly from the center toward the edges.
Smooth the top so that the cherry topping will sit evenly across the cheesecake later.
If you notice any air bubbles, gently tap the pie plate against the counter to help release them.
Step 7: Chill the cheesecake
Cover the cheesecake carefully with plastic wrap or place it in a covered container, taking care not to let the covering touch the filling.
Transfer it to the refrigerator and chill for at least 4 hours.
For the best results, refrigerate it for 6 hours or overnight. A longer chilling period gives the filling additional time to set and makes slicing easier.
Do not rush this step. Even though the recipe requires no baking, chilling is what allows the cheesecake to develop its proper consistency.
Step 8: Add the cherry topping
Once the cheesecake filling has chilled and become sufficiently firm, remove it from the refrigerator.
Open the can of cherry pie filling and stir it gently to distribute the cherries and sauce.
Spoon the cherry filling over the cheesecake, spreading it evenly across the surface. You can take the topping all the way to the edges or leave a narrow border of the creamy filling visible for a decorative finish.
For the neatest presentation, add the cherry topping shortly before serving.
Step 9: Slice and serve
Use a sharp knife to cut the cheesecake into slices.
For cleaner cuts, dip the knife into warm water, wipe it dry, and repeat between slices.
Serve the cheesecake cold. Each slice should feature the crumbly graham cracker crust, creamy cheesecake filling, and sweet cherry topping.
If desired, add a small swirl of whipped cream or a fresh cherry to each serving.
Methods of Preparation
The mixing method
The first method is the traditional cream cheese mixing method. Softened cream cheese is beaten until smooth before the vanilla and sweetened condensed milk are incorporated.
This creates the foundation of the cheesecake filling. Mixing gradually helps prevent lumps and produces a silky consistency.
The lemon-thickening method
The second method relies on the interaction between the lemon juice and dairy ingredients.
The acid in the lemon juice helps the cream cheese and condensed milk mixture thicken. As the cheesecake rests in the refrigerator, the filling becomes more stable.
However, this recipe does not contain gelatin or whipped cream, so its consistency will generally be softer than a gelatin-set or baked cheesecake. Adequate chilling and careful slicing are especially important.
The refrigeration method
The third method is refrigeration rather than baking.
Instead of using oven heat to cook and set the filling, this recipe depends on the ingredients and a long chilling period to develop its texture.
Keeping the cheesecake cold until serving helps maintain its shape and creamy consistency.
The topping method
The cherry topping is added after the filling has chilled.
This prevents the cherry sauce from mixing into the pale cheesecake filling and creates a beautiful contrast between the white cream cheese layer and the glossy red fruit topping.
For an especially attractive finish, distribute the cherries evenly rather than pouring all the sauce into the center.
History of No-Bake Cheesecake
Cheesecake has a long history, with early versions of cheese-based cakes dating back to ancient civilizations. Over the centuries, recipes evolved as different cultures developed their own combinations of cheese, sweeteners, eggs, and crusts.
Modern American cheesecake became particularly popular with the widespread availability of cream cheese. Its smooth texture and mild flavor made it an ideal ingredient for rich desserts.
No-bake cheesecake became especially appealing to home cooks who wanted a delicious dessert without the work involved in traditional baked cheesecake. Refrigeration, convenient packaged crusts, and ready-made fruit fillings made these recipes easier to prepare.
Cherry topping became a familiar favorite because cherries pair naturally with the mild tang of cream cheese. Their bright color also creates an attractive presentation without requiring elaborate decoration.
This version follows the spirit of classic American no-bake desserts: a few accessible ingredients, a simple preparation method, and a chilled finish that makes the dessert feel special.
Formation and Texture of the Cheesecake
The beauty of this cheesecake comes from the way its three layers work together.
The graham cracker crust: The crust provides a lightly sweet, buttery base with a delicate crunch. Its crumbly texture contrasts with the smooth filling.
The cream cheese layer: This is the heart of the recipe. Cream cheese gives the filling its rich dairy flavor, while sweetened condensed milk contributes sweetness and body. Vanilla adds fragrance, and lemon juice introduces a refreshing tang while helping the mixture thicken.
The cherry topping: The cherries bring fruity sweetness, a little tartness, and a glossy finish. Their vibrant color makes the cheesecake attractive even without elaborate decoration.
When properly chilled, these layers form a dessert that is creamy, sweet, slightly tangy, and pleasantly fruity.
The key to good formation is patience. The filling needs enough time in the refrigerator before the topping is added and the cheesecake is sliced.
Tips for the Best No-Bake Cherry Cheesecake
Use room-temperature cream cheese. Softened cream cheese blends more easily and reduces the risk of lumps.
Mix gradually. Add the condensed milk slowly, then incorporate the lemon juice until the filling is smooth.
Measure the lemon juice accurately. The recipe calls for ⅓ cup. Using substantially less may affect the filling’s ability to thicken, while adding too much can make the flavor overly tart.
Allow sufficient chilling time. Four hours is the minimum, but overnight chilling often produces better slices.
Keep the cheesecake refrigerated. Because this is a dairy-based dessert, return leftovers to the refrigerator promptly.
Use a chilled serving plate. If your kitchen is warm, a cool plate can help the slices remain presentable for longer.
Add the topping at the right time. Waiting until the filling has set helps preserve the distinct layers.
Variations to Try

Blueberry No-Bake Cheesecake
Replace the cherry pie filling with blueberry pie filling. The result is a sweet, fruity cheesecake with a beautiful deep-blue topping.

Strawberry Cheesecake
Use strawberry pie filling or a prepared strawberry topping for a bright, summery variation.

Lemon Cheesecake
Skip the cherry topping and finish with a little lemon zest or a spoonful of lemon curd for a more citrus-forward dessert.

Chocolate-Crust Cherry Cheesecake
Use a prepared chocolate cookie crust instead of graham crackers. Chocolate and cherries create a richer dessert combination.
Serving Suggestions
This cheesecake is versatile enough for many occasions.
- Serve it after Sunday dinner with coffee or tea.
- Include it on a holiday dessert table alongside cookies, cakes, and fruit desserts.
- Bring it to a family gathering or potluck in its pie dish.
- Serve small slices after a rich meal because the filling is creamy and satisfying.
- Add a little whipped cream for birthdays and celebrations.
For a more polished presentation, keep the slices chilled until serving and use a clean knife for every cut.
Storage Instructions
Store leftover cheesecake in the refrigerator, covered, for approximately 3–4 days for best quality.
If you use a store-bought crust with a plastic cover, you can replace the cover after serving, provided it fits securely.
Freezing is possible, although the texture of the filling and cherry topping may change after thawing. For the best results, freeze the cheesecake without the cherry topping if possible, wrap it well, and thaw it overnight in the refrigerator. Add the topping after thawing.
Do not leave the cheesecake at room temperature for more than 2 hours, or 1 hour when temperatures exceed 90°F (32°C).
Common Questions
Can I make this cheesecake the day before?
Yes. Making it the day before is an excellent option. Overnight refrigeration gives the filling plenty of time to firm up.
Why is my cheesecake still soft?
It may not have chilled long enough, or the cream cheese mixture may not have thickened sufficiently. Make sure you measure the lemon juice accurately and allow at least 4 hours of refrigeration. This particular recipe is naturally softer than some no-bake cheesecakes because it does not contain gelatin or whipped cream.
Can I use homemade cherry topping?
Yes. Cooked cherries prepared with sugar and a suitable thickener can replace the canned filling. Cool the topping completely before spreading it over the cheesecake.
Can I use low-fat cream cheese?
You can, but the texture and richness may differ. Full-fat cream cheese generally gives the most satisfying, creamy result.
Does this recipe require an oven?
No. The crust is ready-made, and the filling is mixed rather than baked. The refrigerator does the work of chilling and helping the filling set.
Can I use another pie crust?
Yes. A prepared graham cracker crust is traditional, but a digestive biscuit crust or chocolate cookie crust can also work.
Conclusion
No-Bake Cheesecake with Cherry Topping is proof that a memorable dessert does not need to be complicated. With cream cheese, sweetened condensed milk, vanilla, lemon juice, a prepared graham cracker crust, and cherry pie filling, you can create a dessert that looks beautiful and tastes wonderfully creamy.
The combination of a buttery crust, smooth cheesecake filling, and sweet cherries makes every bite satisfying. The lemon juice adds balance and helps the filling thicken, while the refrigerator brings everything together without the need for baking.
Whether you prepare it for your family, share it with friends, or save it for a special celebration, this simple cheesecake is a dependable choice for anyone who loves classic homemade desserts.
Make it ahead, chill it well, add the cherries, and enjoy a delicious slice whenever you are ready to serve.
For Cheesecake Lovers
If you love desserts that combine convenience with old-fashioned flavor, this recipe is worth keeping close. It is easy enough for a beginner, attractive enough for guests, and flexible enough to customize with your favorite fruit toppings.
Cherry lovers will appreciate the sweet fruit layer, cheesecake lovers will enjoy the rich and creamy filling, and anyone who prefers simple desserts will love the fact that no oven is required.
Sometimes the best family recipes are the ones that use a handful of familiar ingredients and turn them into something everyone looks forward to eating.
Recipe at a Glance
- Preparation time: 15 minutes
- Chilling time: At least 4 hours
- Total time: Approximately 4 hours and 15 minutes
- Servings: 8
- Difficulty: Easy
- Cooking method: No-bake, refrigerator-set dessert
The best tip: Prepare this cheesecake the night before serving. A full night in the refrigerator gives it more time to firm up, making each slice easier to serve and enjoy.