
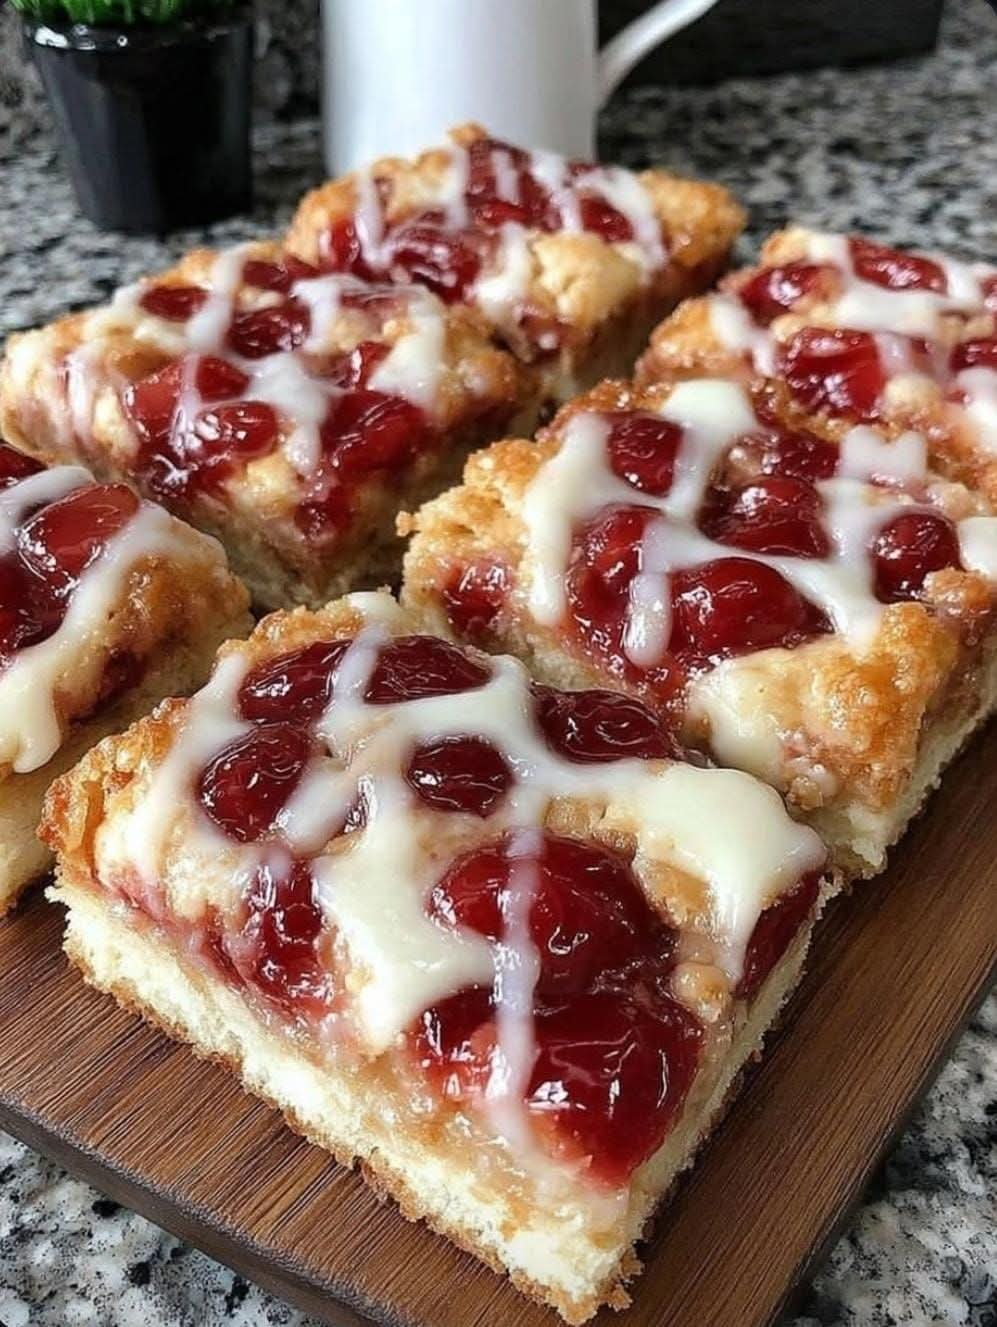
Cherry Bars for a Crowd – Easy Old-Fashioned Cherry Dessert
Introduction
Cherry Bars for a Crowd are a delicious, old-fashioned dessert that brings together a soft, buttery base, sweet cherry filling, and a golden, tender topping. These bars are perfect for family gatherings, birthday parties, potlucks, holidays, bake sales, and Sunday dinners.
If you love the combination of buttery cookie bars and sweet cherries, this recipe is sure to become a favorite. Each square is rich, fruity, and satisfying, with just the right balance of sweetness and a beautiful cherry flavor in every bite.
The best part is that these cherry bars are baked in one large pan, making them easy to slice and share with a crowd. You don’t need to prepare individual pastries or spend hours decorating a complicated cake. Simply mix the ingredients, spread the batter into a pan, add the cherry filling, bake until golden, and cut into delicious squares.
This recipe is especially wonderful when you need a homemade dessert that looks impressive but uses simple pantry ingredients.
Ingredients
For the buttery bar base
- 3/4 cup unsalted butter, softened
- 1 cup packed brown sugar
- 1/2 cup granulated sugar
- 2 large eggs
- 2 teaspoons vanilla extract
- 2 cups all-purpose flour
- 1/2 teaspoon baking powder
- 1/4 teaspoon salt
For the cherry filling
- 1 can (21 ounces) cherry pie filling
- 1 teaspoon lemon juice, optional
- 1/2 teaspoon almond extract, optional
For the optional vanilla glaze
- 1 cup powdered sugar
- 1–2 tablespoons milk
- 1/2 teaspoon vanilla extract
Instructions
Step 1: Prepare the oven and baking pan
Preheat your oven to 350°F (175°C). Grease a 9-by-13-inch baking pan lightly with butter or cooking spray. For easier removal, line the pan with parchment paper, leaving a little overhang on the sides.
Step 2: Cream the butter and sugars
In a large mixing bowl, beat the softened butter, brown sugar, and granulated sugar until the mixture becomes creamy and smooth.
This step helps create a tender, soft texture. Scrape down the sides of the bowl as needed so the ingredients combine evenly.
Step 3: Add the eggs and vanilla
Add the eggs one at a time, mixing well after each addition. Stir in the vanilla extract until everything is fully incorporated.
The mixture should look smooth and creamy before you add the dry ingredients.
Step 4: Combine the dry ingredients
In a separate bowl, whisk together the flour, baking powder, and salt.
Gradually add the dry ingredients to the butter mixture. Mix on low speed or stir with a wooden spoon until a thick, soft dough forms. Avoid overmixing, as this can make the bars less tender.
Step 5: Form the base
Set aside approximately one-third of the dough for the topping.
Press the remaining dough evenly into the prepared baking pan. Use clean hands or the back of a spoon to spread it into an even layer, making sure the corners are covered.
Step 6: Add the cherry filling
Spread the cherry pie filling evenly over the dough. Leave a small border around the edges if desired to help prevent the filling from sticking to the sides of the pan.
For a brighter flavor, stir the cherry filling with a teaspoon of lemon juice before spreading it over the base. A small amount of almond extract can also complement the cherries beautifully.
Step 7: Add the topping
Take the reserved dough and crumble small pieces over the cherry filling. You can distribute it in small patches, allowing some of the red cherry filling to remain visible.
This creates an attractive golden topping while letting the cherry filling peek through.
Step 8: Bake until golden
Place the pan in the preheated oven and bake for approximately 30–40 minutes, or until the edges are lightly golden and the topping is set.
Oven temperatures vary, so begin checking around the 30-minute mark. The cherry filling should be bubbling gently in places, and the dough should no longer look raw.
Step 9: Cool completely
Remove the pan from the oven and place it on a cooling rack. Allow the bars to cool completely before cutting.
Cooling is important because the cherry filling needs time to set. Cutting too early may cause the bars to fall apart.
Step 10: Prepare the optional glaze
In a small bowl, whisk together the powdered sugar, milk, and vanilla extract until smooth. Add a little more milk if necessary to achieve a thin drizzling consistency.
Drizzle the glaze over the cooled bars. Let it set for several minutes before slicing.
Step 11: Slice and serve
Use a sharp knife to cut the dessert into squares or rectangles. For neat slices, wipe the knife between cuts.
Arrange the bars on a serving platter and enjoy with coffee, tea, cold milk, or your favorite dessert beverage.
Cooking Methods
The primary cooking method for this recipe is oven baking. Baking allows the buttery dough to become firm and golden while the cherry filling softens and develops a rich, fruity flavor.
Creaming the butter and sugars first helps create a tender texture. Adding the flour gradually prevents excessive mixing, and reserving some dough for the topping gives the finished bars a pleasant contrast between the soft base and golden upper layer.
For the best results:
- Use softened butter rather than melted butter.
- Spread the base evenly so it bakes at a consistent rate.
- Avoid adding too much liquid to the cherry filling.
- Let the bars cool completely before slicing.
- Store leftovers in an airtight container in the refrigerator.
History of Cherry Bars
Cherry desserts have a long tradition in American home baking, where fruit-filled pies, cobblers, crisps, and cookie bars became popular ways to serve seasonal or preserved fruit.
Cherries are especially well suited to baked desserts because their sweet-tart flavor pairs naturally with butter, sugar, vanilla, and almond extract. As convenient canned pie fillings became common in American kitchens, home bakers found it easier to prepare cherry desserts throughout the year without pitting fresh fruit or cooking a filling from scratch.
Bar desserts also became a favorite for community gatherings because they could be baked in large rectangular pans and divided into many portions. Unlike individual pastries, bars are easy to transport and serve at potlucks, school events, church suppers, and family celebrations.
Although this particular recipe is a modern home-baking variation rather than a documented historical original, it follows the same practical tradition: simple ingredients, a generous fruit filling, and a dessert made for sharing.
Formation and Texture
The success of Cherry Bars for a Crowd comes from the way the three main elements work together.
The buttery base: Butter, sugar, eggs, and flour create a soft, cookie-like foundation. Brown sugar adds a gentle caramel note and helps keep the texture moist.
The cherry center: Cherry pie filling supplies sweetness, fruit flavor, and a juicy texture. Its bright color makes the dessert attractive when sliced.
The golden topping: Small pieces of reserved dough bake into a lightly crisp, tender layer that contrasts with the soft cherry center.
The finishing glaze: The optional vanilla glaze adds sweetness and gives the bars a bakery-style appearance.
When properly cooled, each square should hold its shape while remaining soft enough to bite easily.
Tips for Perfect Cherry Bars
- Measure the flour correctly. Spoon it into the measuring cup and level it off rather than packing it down.
- Use room-temperature ingredients. Softened butter and room-temperature eggs mix more evenly.
- Choose a good cherry filling. A thick filling generally produces neater bars than a very watery one.
- Don’t overbake. Remove the pan when the edges are golden and the dough is set.
- Cool before cutting. This is the key to attractive squares.
- Customize the flavor. Add a little lemon zest, almond extract, or a handful of sliced almonds if desired.
- Make them ahead. Bake the bars a day before your gathering and glaze them after they cool.
Variations to Try
Cherry Almond Bars
Add 1/2 teaspoon almond extract to the dough and sprinkle sliced almonds over the topping before baking.
Cherry Chocolate Bars
Sprinkle 1/2 cup mini chocolate chips over the cherry filling before adding the reserved dough.
Cherry Cream Cheese Bars
Prepare a separate mixture of 8 ounces softened cream cheese, 1/4 cup sugar, and 1 egg. Spread a thin layer over the base before adding the cherry filling. Because this changes the structure of the recipe, allow extra cooling time and refrigerate the finished bars.
Fresh Cherry Bars
If using fresh pitted cherries instead of canned pie filling, cook approximately 3 cups of cherries with 1/2 cup sugar, 1 tablespoon lemon juice, and a cornstarch slurry until thickened. Cool the filling before assembling the bars.
Storage and Make-Ahead Instructions
At room temperature: If your kitchen is cool and the bars are made with shelf-stable canned filling and no cream cheese, keep them covered for up to about two days.
In the refrigerator: Store the bars in an airtight container for up to five days. Allow chilled bars to sit at room temperature briefly before serving for a softer texture.
In the freezer: Freeze fully cooled, unglazed bars in a single layer until firm, then wrap or store them in a freezer-safe container for up to three months for best quality. Thaw in the refrigerator or at room temperature while covered. Add the glaze after thawing.
Serving Suggestions
Cherry Bars for a Crowd are delicious on their own, but they can also be served with a scoop of vanilla ice cream, a spoonful of whipped cream, or a cup of freshly brewed coffee.
For a party, arrange them on a large platter with the cherry filling visible. For holidays, add a light vanilla glaze and a few sliced almonds for a simple, elegant finish.
They also make a thoughtful homemade gift when packed in a small bakery box or arranged in a reusable container.
Conclusion
Cherry Bars for a Crowd are the perfect example of how simple ingredients can create a memorable homemade dessert. With a buttery cookie-like base, a sweet cherry center, and a golden topping, these bars offer a comforting combination of flavors and textures in every bite.
They are easy enough for an ordinary afternoon yet special enough for holidays, potlucks, birthdays, and family celebrations. Since they bake in one pan and can be prepared ahead of time, they are an excellent choice whenever you need dessert for a group.
Make a batch, allow it to cool, cut it into generous squares, and watch these beautiful cherry bars disappear from the dessert table.
For Cherry Dessert Lovers
If you love homemade fruit desserts, these cherry bars deserve a place in your recipe collection. They combine the familiar comfort of a buttery cookie with the bright sweetness of cherries, making them a treat that both children and adults can enjoy.
Serve them at your next family gathering, share them with friends, or save a few squares for a quiet afternoon with your favorite drink. One pan creates plenty of delicious portions, making this recipe a wonderful choice for anyone who believes the best desserts are the ones shared with others.
Recipe Summary
- Preparation time: 20 minutes
- Baking time: 30–40 minutes
- Cooling time: 1–2 hours
- Total time: Approximately 2 hours
- Oven temperature: 350°F (175°C)
- Pan size: 9-by-13-inch baking pan
- Yield: Approximately 20–24 bars, depending on how they are cut
- Difficulty: Easy
- Best for: Parties, potlucks, holidays, family gatherings, and bake sales