
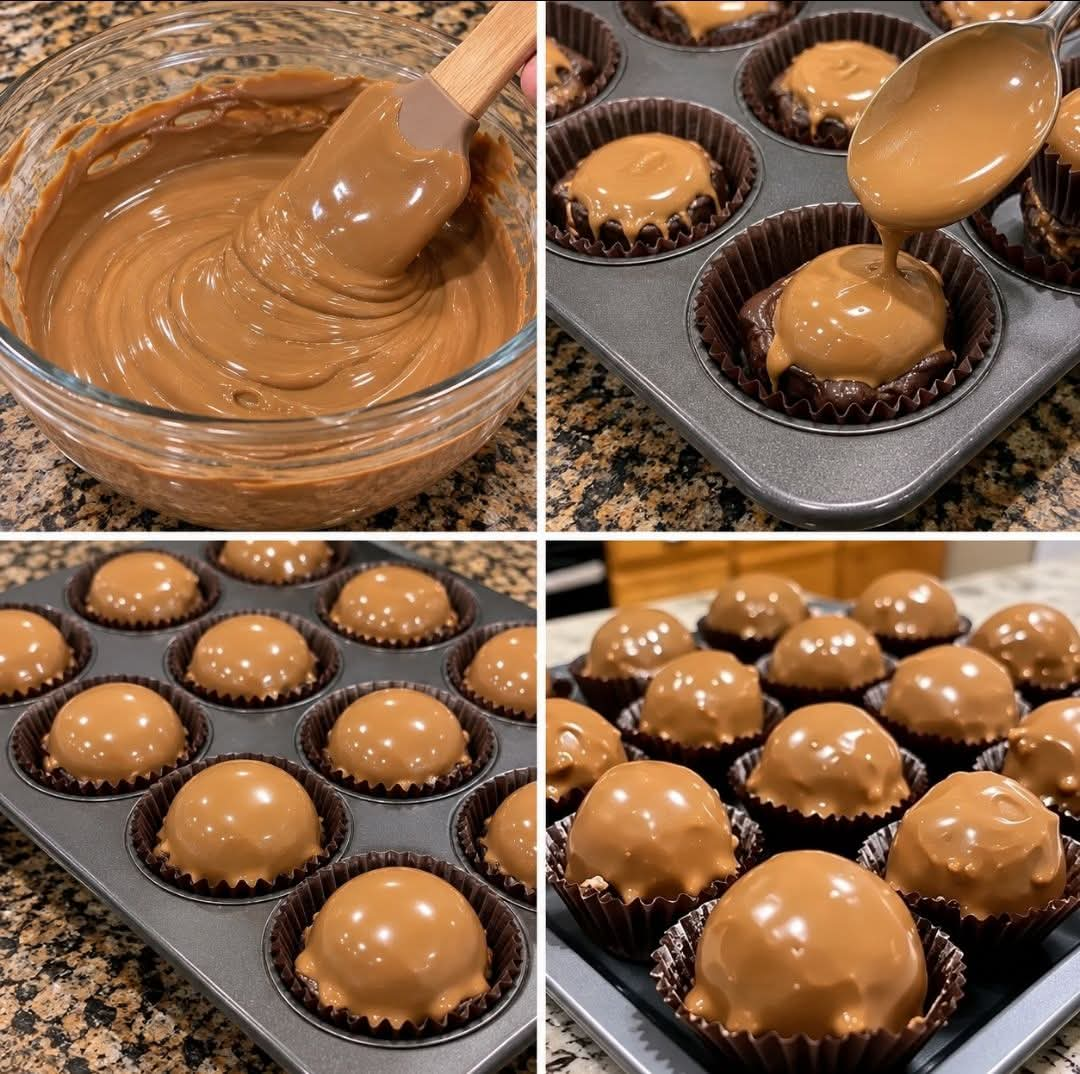
Butterfinger Balls: The Ultimate Christmas No-Bake Candy Recipe
Introduction
There is something truly special about homemade Christmas treats, especially the ones that disappear from the dessert table before the holiday dinner is even finished. Butterfinger Balls are one of those irresistible sweets that bring everyone together with their rich peanut butter flavor, crunchy candy pieces, and smooth chocolate coating.
These delicious no-bake treats are a Christmas favorite because they are simple to prepare, easy to share, and perfect for making in large batches. If you usually prepare dozens of homemade candies for family gatherings, cookie exchanges, holiday parties, or Christmas gift boxes, this recipe deserves a place in your holiday collection.
With a creamy peanut butter center, crushed Butterfinger candy bars, and a delicious chocolate shell, every bite delivers the perfect combination of sweetness and crunch. The best part is that you do not need to turn on the oven.
Whether you are making 20 treats for your family or 100 for a Christmas celebration, these Butterfinger Balls are guaranteed to become a seasonal favorite.
Ingredients
For the Butterfinger Filling
- 1 cup creamy peanut butter
- 4 tablespoons unsalted butter, softened
- 2 cups powdered sugar
- 1 1/2 cups crushed Butterfinger candy bars
- 1 teaspoon vanilla extract
- 1–2 tablespoons milk, only if needed to adjust the texture
For the Chocolate Coating
- 2 cups semi-sweet chocolate chips or melting chocolate
- 1 tablespoon coconut oil or vegetable shortening, optional, for a smoother coating
Optional Decorations
- Extra crushed Butterfinger candy
- White chocolate, melted for drizzling
- Finely chopped peanuts
- Holiday sprinkles, if desired
Instructions
Step 1: Prepare the Butterfinger Candy
Unwrap the Butterfinger candy bars and crush them into small pieces. You can place them in a sealed plastic bag and gently crush them with a rolling pin.
Aim for a mixture of fine crumbs and small crunchy pieces. The finer crumbs help flavor the filling, while the larger pieces provide the signature Butterfinger crunch.
Set aside a small amount of crushed candy for decorating the finished treats.
Step 2: Make the Peanut Butter Mixture
Place the softened butter and creamy peanut butter in a large mixing bowl. Beat them together until the mixture is smooth and creamy.
Add the vanilla extract and mix again until well combined.
Gradually add the powdered sugar, mixing after each addition. The mixture should become thick enough to hold its shape when rolled.
If the filling feels too dry or crumbly, add a small amount of milk, one teaspoon at a time. If it feels too sticky, add a little more powdered sugar.
Step 3: Add the Crushed Butterfinger
Fold the crushed Butterfinger candy into the peanut butter mixture using a sturdy spoon or spatula.
Mix until the candy pieces are evenly distributed throughout the filling.
The mixture should be firm, slightly crumbly but easy to press together, and rich with peanut butter and crunchy candy flavor.
Step 4: Shape the Balls
Line a baking sheet with parchment paper.
Scoop approximately one tablespoon of filling at a time and roll it between your palms to form small, round balls. Place each ball on the prepared baking sheet.
Continue until all the mixture has been used. Depending on the size of your portions, you should make approximately 30–36 balls.
For a Christmas party or a large family gathering, you can easily double or triple the recipe.
Step 5: Chill the Balls
Place the baking sheet in the refrigerator for about 30–45 minutes, or until the balls are firm.
Chilling is important because it helps the centers maintain their shape when dipped into melted chocolate.
If you are short on time, you can place them in the freezer for approximately 15–20 minutes. Avoid freezing them until completely solid if you plan to dip them immediately.
Step 6: Melt the Chocolate
Place the chocolate chips and optional coconut oil in a microwave-safe bowl.
Microwave in 20–30-second intervals, stirring between each interval until the chocolate is smooth and completely melted.
Alternatively, melt the chocolate in a heatproof bowl set over a saucepan of gently simmering water. Make sure no water gets into the chocolate, as this can cause it to seize.
Allow the melted chocolate to cool slightly before dipping the chilled balls.
Step 7: Dip the Butterfinger Balls
Using a fork or dipping tool, lower each chilled ball into the melted chocolate. Turn it gently until completely coated.
Lift the ball out and allow the excess chocolate to drip back into the bowl.
Return each coated ball to the parchment-lined baking sheet. If desired, sprinkle a little crushed Butterfinger candy over the top before the chocolate sets.
Repeat until all the balls are coated.
Step 8: Add the Finishing Touches
For an extra-special Christmas appearance, drizzle melted white chocolate over the hardened chocolate coating.
You can also sprinkle the tops with additional candy crumbs for extra crunch and a beautiful homemade finish.
Place the tray in the refrigerator for 20–30 minutes, or until the chocolate coating has completely set.
Step 9: Serve and Enjoy
Arrange the finished Butterfinger Balls on a holiday platter, place them in small candy cups, or package them in decorative food-safe boxes for gifting.
Allow refrigerated treats to sit at room temperature for a few minutes before serving if you prefer a slightly softer center.
Every bite offers a creamy peanut butter filling, crunchy Butterfinger pieces, and a rich chocolate shell.
Cooking Methods and Preparation Techniques
No-Bake Refrigerator Method
This is the easiest and most reliable method for preparing Butterfinger Balls. The filling is mixed, rolled, chilled, dipped in chocolate, and chilled again. No oven is required.
It is especially convenient during the busy holiday season when oven space is needed for cookies, cakes, and other Christmas dishes.
Food Processor Method
For a smoother filling, you can pulse some of the crushed Butterfinger candy in a food processor before adding it to the peanut butter mixture.
Do not process all the candy into a fine powder if you want the finished treats to retain their characteristic crunch.
Double-Boiler Chocolate Method
If you prefer greater control when melting chocolate, use a double boiler. Stir gently until the chocolate becomes smooth, keeping water and steam away from the bowl.
This method is useful when dipping a large batch because you can keep the chocolate warm and workable while coating the balls.
Tips for Perfect Butterfinger Balls
- Use softened butter so the filling mixes evenly.
- Add powdered sugar gradually to avoid a dusty mess.
- Chill the balls thoroughly before dipping.
- Use a deep, narrow bowl for the chocolate coating to make dipping easier.
- Work in small batches, keeping the remaining centers refrigerated.
- If the chocolate becomes too thick, add a little coconut oil and stir until smooth.
- Let excess chocolate drip off before returning each ball to the tray.
- Store the finished candies in an airtight container in the refrigerator.
The History and Inspiration Behind Butterfinger Balls
Butterfinger Balls are part of the broader tradition of homemade American candy-making, especially popular during Christmas and other festive occasions.
For generations, families have prepared chocolate-covered peanut butter candies, truffles, fudge, and other bite-sized sweets to share with friends and relatives. These treats are especially popular because they can be prepared ahead of time and made in large quantities without complicated equipment.
Butterfinger candy bars, known for their distinctive crisp, flaky peanut-butter-flavored center and chocolate coating, provide a familiar flavor that makes these homemade candies particularly appealing.
Although there is no single established origin for this particular recipe, Butterfinger Balls are a modern variation on the traditional combination of peanut butter, powdered sugar, and chocolate. Adding crushed candy bars gives the filling extra texture and a recognizable Butterfinger flavor.
Today, these candies are a natural fit for Christmas cookie exchanges, dessert tables, holiday potlucks, and homemade edible gifts.
The Formation and Texture of Butterfinger Balls
The secret to excellent Butterfinger Balls is the balance between the filling and the chocolate coating.
The peanut butter and softened butter create a rich base. Powdered sugar gives the filling structure, allowing it to be rolled into neat, round shapes. Vanilla enhances the sweetness, while crushed Butterfinger candy adds its distinctive crunchy texture.
Once chilled, the filling becomes firm enough to dip into melted chocolate without falling apart.
The chocolate coating creates a thin outer shell that contrasts beautifully with the soft, slightly crumbly center. As you bite through the shell, the peanut butter filling and crunchy candy pieces provide layers of texture and flavor.
For the best result, avoid making the centers too large. Smaller balls are easier to coat evenly, look attractive on a platter, and are convenient for guests to enjoy in one or two bites.
How to Make 100 Butterfinger Balls for Christmas
If you want to prepare at least 100 Butterfinger Balls for Christmas, planning ahead makes the process much easier.
For approximately 100–108 small balls, multiply the basic recipe by three:
For the filling:
- 3 cups creamy peanut butter
- 12 tablespoons unsalted butter, softened
- 6 cups powdered sugar
- 4 1/2 cups crushed Butterfinger candy
- 3 teaspoons vanilla extract
- Milk as needed, added gradually
For the coating:
- Approximately 6 cups semi-sweet chocolate chips or melting chocolate
- 3 tablespoons coconut oil or vegetable shortening, optional
The exact yield depends on how much filling you use for each ball and how generously you coat them.
Prepare the filling in a large bowl, then shape the balls in batches. Chill each tray before dipping. If necessary, melt the chocolate in separate batches so it remains smooth and easy to work with.
Once set, divide the candies into airtight containers and refrigerate until needed.
Storage and Make-Ahead Instructions
Refrigerator: Store Butterfinger Balls in an airtight container in the refrigerator for approximately 1–2 weeks for best quality.
Freezer: Freeze the finished candies in a freezer-safe container, separating layers with parchment paper. They generally maintain good quality for about 2–3 months.
Thawing: Transfer frozen candies to the refrigerator and allow them to thaw while still covered. This helps reduce condensation on the chocolate coating.
Food safety: Because this recipe contains peanut butter and butter, keep the finished candies refrigerated when not serving. Do not leave them sitting out for extended periods, especially in warm conditions.
Gift-giving: Pack the candies in food-safe containers and keep them cool during transport. Clearly identify the peanut ingredient when sharing them with others.
Delicious Variations to Try
1. Dark Chocolate Butterfinger Balls
Use dark chocolate instead of semi-sweet chocolate for a richer coating and a less sweet finish.
2. White Chocolate Butterfinger Balls
Dip the chilled centers in melted white chocolate and finish with crushed Butterfinger pieces. This version looks especially attractive on a Christmas dessert tray.
3. Extra-Crunchy Butterfinger Balls
Add a little extra crushed candy to the filling, making sure the mixture still holds together when rolled.
4. Peanut Butter Lovers’ Version
Add a small amount of finely chopped roasted peanuts to the filling for an extra nutty flavor and additional crunch.
5. Christmas Gift Box Version
Make smaller balls and decorate them with white chocolate drizzle or a light sprinkle of candy crumbs. Place them in miniature paper candy cups and arrange them in a holiday gift box.
6. Chocolate Drizzle Version
After the chocolate coating has set, drizzle a contrasting chocolate over the top for an elegant finish.
Common Mistakes to Avoid
The filling is too soft: Add powdered sugar a little at a time and chill the mixture before rolling.
The balls fall apart during dipping: Make sure the centers are firm and cold. Handle them gently with a fork or dipping tool.
The chocolate is too thick: Stir in a small amount of coconut oil or vegetable shortening until the consistency improves.
The chocolate coating cracks: Avoid extreme temperature changes. Let the centers cool slightly after removing them from the freezer before dipping.
The finished candies are overly sweet: Use semi-sweet or dark chocolate to balance the sweetness of the filling and candy bars.
The candy pieces disappear into the filling: Reserve some larger Butterfinger pieces and fold them in gently at the end.
Serving Suggestions
Butterfinger Balls are delicious on their own, but they also fit beautifully into a larger holiday dessert spread.
Serve them alongside Christmas sugar cookies, chocolate fudge, peanut butter blossoms, peppermint candies, brownies, and homemade truffles.
For parties, arrange them on a white serving platter with a mixture of other bite-sized treats. For family gatherings, place a small bowl of Butterfinger Balls beside coffee, tea, or hot chocolate.
They also make thoughtful homemade gifts for neighbors, teachers, coworkers, friends, and relatives.
Conclusion
Butterfinger Balls are proof that a simple recipe can become one of the most memorable treats of the Christmas season. With creamy peanut butter, crunchy Butterfinger candy, and a smooth chocolate coating, these no-bake candies offer everything you want in a homemade holiday sweet.
They require only a handful of basic ingredients, can be prepared ahead of time, and are easy to scale up when you need a large batch.
Whether you make one tray for your family or prepare 100 or more for Christmas celebrations, these little chocolate-covered treats are a wonderful addition to your holiday traditions.
Once your family and friends taste them, do not be surprised if they request them again next year.
For Butterfinger Ball Lovers
If you love the combination of peanut butter, crunchy candy, and chocolate, this recipe is sure to become one of your favorite holiday traditions.
These candies are ideal for anyone who enjoys homemade sweets without the extra work of baking. They are simple enough for beginners, delicious enough for special occasions, and attractive enough to share as edible gifts.
Make a batch, chill them until the chocolate sets, and keep a few aside for yourself before serving them to everyone else. These little treats have a way of disappearing quickly.
A Final Holiday Tip
For the best Christmas preparation, make the Butterfinger Balls a day or two before your celebration. This gives the chocolate time to set completely and allows you to focus on the rest of your holiday menu.
Keep them chilled, arrange them beautifully just before serving, and enjoy a homemade candy that brings sweetness to every festive gathering.
Recipe at a Glance
- Preparation time: 25–35 minutes
- Chilling and setting time: 50–75 minutes
- Cooking time: None
- Total time: Approximately 1 hour 15 minutes to 1 hour 50 minutes
- Yield: Approximately 30–36 balls per batch
- Method: No-bake
- Main flavors: Peanut butter, Butterfinger candy, and chocolate
- Best occasion: Christmas, parties, cookie exchanges, and homemade gifts