
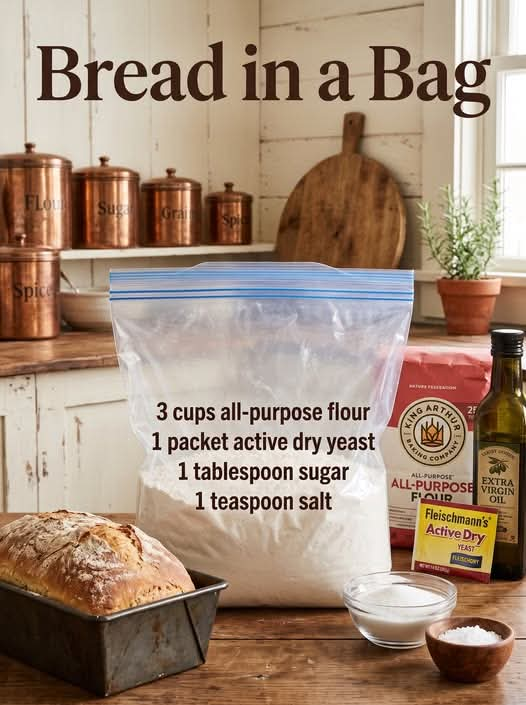
Bread-in-a-Bag: Easy Homemade Bread Recipe
Introduction
There is something truly special about the smell of freshly baked bread filling the kitchen. The warm aroma, the golden crust, and the soft, fluffy center make homemade bread one of the most comforting foods to prepare and share with family.
Bread-in-a-Bag is a simple, fun, and beginner-friendly recipe that makes baking homemade bread less intimidating. Instead of starting with a mixing bowl covered in flour, you combine most of the ingredients inside a large food-safe bag, seal it, and let everyone take turns squishing and mixing the dough.
This recipe is especially wonderful for families with children who want to learn how bread is made. Kids can help measure ingredients, add water and oil, and gently squeeze the bag to bring the dough together. Adults can handle the kneading, shaping, and hot oven.
Made with flour, yeast, sugar, salt, warm water, and olive oil, this homemade loaf uses simple pantry ingredients to create delicious bread that is perfect for breakfast, sandwiches, soups, and afternoon snacks.
Whether you are a first-time baker or an experienced home cook looking for an easy family activity, this Bread-in-a-Bag recipe is a lovely way to bring everyone together in the kitchen.
Ingredients

Preparation details
- Prep time: 15 minutes
- First rise: 30 minutes
- Second rise: 15 minutes
- Baking time: 25–30 minutes
- Total time: Approximately 1 hour 20 minutes, plus cooling
- Yield: 1 small loaf
- Oven temperature: 375°F (190°C)
For the bread dough
- 3 cups all-purpose flour, approximately 375 g
- 1 packet active dry yeast, approximately 7 g or 2¼ teaspoons
- 1 tablespoon granulated sugar
- 1 teaspoon salt
- 1 cup warm water, approximately 110°F (43°C)
- 2 tablespoons olive oil
Optional ingredients and equipment
- A little extra flour for kneading and shaping
- Olive oil or cooking spray for greasing the baking sheet
- A large, sturdy, food-safe resealable bag
- A baking sheet or loaf pan
- A small oven-safe pan of water for creating steam, if desired
Instructions
Step 1: Prepare the ingredients
Before beginning, measure all your ingredients and arrange them on the kitchen counter. Make sure your flour is fresh and your yeast has not expired.
Warm the water to approximately 110°F (43°C). It should feel pleasantly warm, not hot. Water that is too hot can damage the yeast and prevent the bread from rising properly.
Explain to children that yeast is a living microorganism that helps bread become light and fluffy by producing gas as it ferments.
Step 2: Combine the dry ingredients
Place the flour, active dry yeast, sugar, and salt into a large, food-safe resealable plastic bag.
Seal the bag and gently shake it to distribute the ingredients evenly. This helps prevent pockets of yeast or salt from remaining in one area.
For younger children, an adult can hold the bag open while they add the measured ingredients.
Step 3: Add the warm water and olive oil
Carefully pour the warm water and olive oil into the bag.
Press out most of the excess air, leaving enough room for the dough to move and expand, and seal the bag securely.
Gently squeeze and squish the ingredients together through the bag. Continue mixing until the flour absorbs the liquid and the mixture begins to form a rough dough.
This is the most enjoyable part for children because they can help mix without touching the sticky dough directly.
If the mixture appears very dry, add warm water one teaspoon at a time. If it is extremely sticky, sprinkle in a little extra flour.
Step 4: Allow the dough to rest
Place the sealed bag in a warm, draft-free area and allow the dough to rest for approximately 30 minutes.
During this time, the yeast begins fermenting and producing carbon dioxide, which helps the dough expand.
The dough may not double completely during this first rest, especially in a cool kitchen. That is perfectly fine.
Keep the bag away from direct heat, and check that it has enough room for the dough to expand.
Step 5: Knead the dough
Once the dough has rested, open the bag and transfer the dough to a lightly floured work surface.
Knead it by pressing it forward with the heel of your hand, folding it back over itself, and repeating the movement.
Continue for approximately 5–8 minutes, or until the dough becomes smoother, more elastic, and less sticky.
Although the original method suggests kneading for just one minute, a little more kneading helps develop the gluten structure and gives the bread a better texture.
If the dough sticks to your hands, dust the surface with a small amount of flour rather than adding too much at once.
Step 6: Shape the loaf
Gently flatten the dough into a rough rectangle. Fold the sides inward and roll it up tightly to create a compact loaf shape.
Pinch the seam closed and tuck the ends underneath.
Place the shaped loaf seam-side down on a lightly greased baking sheet, or transfer it to a greased loaf pan.
Try to make the loaf evenly shaped so that it bakes at a consistent rate.
Step 7: Let the bread rise again
Cover the loaf loosely with a clean kitchen towel and leave it in a warm place for approximately 15–30 minutes.
The dough should look slightly puffier. If your kitchen is cool, it may need more time.
Avoid letting the dough rise for too long, because an overproofed loaf may collapse or develop a weaker structure during baking.
Meanwhile, preheat the oven to 375°F (190°C).
Step 8: Bake the bread
Place the loaf in the preheated oven and bake for 25–30 minutes, or until the crust is golden brown.
The exact baking time depends on the shape of your loaf and your oven. If the top browns too quickly, loosely cover it with foil near the end of baking.
For a more reliable doneness check, the center of the bread should reach approximately 190–200°F (88–93°C).
An adult should handle putting the loaf into the oven and removing it, especially when children are helping.
Step 9: Create a crustier loaf
If you prefer a crispier crust, place a small oven-safe pan of hot water on a lower rack while the bread bakes, provided your oven manufacturer permits this method.
The steam helps delay crust formation during the early stages of baking.
Use care when handling hot water and opening the oven, as steam can cause burns. Never pour water directly onto the oven floor or a hot glass dish.
Step 10: Cool before slicing
Remove the bread from the oven and transfer it to a wire rack.
Allow it to cool for at least 20–30 minutes before slicing. Cutting into the loaf too soon can make the interior gummy because the crumb is still setting.
Once cooled, slice with a serrated bread knife and serve with butter, jam, honey, olive oil, or your favorite sandwich fillings.
Methods for Making Perfect Bread-in-a-Bag
Method 1: The easy bag-mixing method
This method is ideal for beginners and families. The bag contains the flour, yeast, sugar, salt, water, and oil while everyone gently squeezes the mixture together.
It keeps the initial mixing process tidy and makes it easier for children to participate. However, the bag should be opened before kneading and shaping, and it must never go into the oven.
Method 2: The traditional kneading method
After mixing the dough in the bag, transfer it to a floured surface and knead by hand.
This develops the gluten, which gives the bread its elasticity and helps it hold its shape as it rises.
A properly kneaded dough should feel soft and springy rather than stiff or crumbly.
Method 3: The loaf-pan method
For a more uniform sandwich loaf, place the shaped dough into a greased loaf pan.
This method gives the bread straighter sides and makes it easier to cut into even slices. Baking time may vary slightly depending on the dimensions of the pan.
Method 4: The rustic baking-sheet method
If you prefer homemade bread with a more rustic appearance, shape the dough into a rounded or oval loaf and bake it on a greased baking sheet.
The bread will have a more free-form shape and can develop a pleasantly firm crust.
The History of Bread-in-a-Bag
Bread has been a staple food for thousands of years. Ancient communities discovered that grinding grains, mixing them with water, and cooking the resulting dough could produce nourishing, filling food.
Over time, bread-making developed from simple flatbreads into leavened loaves made with yeast. Bakers learned how fermentation, kneading, resting, and oven temperature affected the flavor and texture of their bread.
Home baking became especially important as families passed recipes and techniques from one generation to the next. Homemade bread was often an economical way to feed a household using flour, water, yeast, and other basic ingredients.
Bread-in-a-Bag is a modern, educational variation on traditional bread-making. The resealable bag simplifies the first mixing stage and turns the process into a hands-on activity that is approachable for beginners and children.
Although the bag method is not a traditional historical bread-making technique, it preserves the essential principles of baking: mixing ingredients, allowing yeast to ferment, developing the dough, shaping, rising, and baking.
Its popularity comes from the combination of simplicity, learning, and the satisfaction of making real bread at home.
Formation: How the Bread Comes Together
Understanding how the ingredients work together helps you achieve a better loaf every time.
1. Flour creates the structure. When flour is mixed with water, its proteins form gluten. Kneading helps develop this network, allowing the dough to stretch and trap gas.
2. Yeast makes the dough rise. The yeast consumes available sugars and produces carbon dioxide. The gas becomes trapped in the dough, creating the small air pockets that give bread its soft interior.
3. Sugar supports fermentation. The small amount of sugar adds a touch of sweetness and provides readily available food for the yeast.
4. Salt adds flavor and strengthens the dough. It also helps regulate yeast activity. Mixing the ingredients evenly distributes the salt throughout the dough.
5. Water hydrates the flour. It allows the proteins to develop and makes the dough pliable. Correct water temperature also helps the yeast begin working effectively.
6. Olive oil improves tenderness. The oil contributes moisture, a softer crumb, and a pleasant flavor.
7. Rising develops volume and flavor. Resting gives the yeast time to produce gas and allows the dough to become more extensible.
8. Baking sets the loaf. Heat expands the gas inside the dough, the proteins and starches set, and the crust develops its golden color.
The result is a loaf with a lightly crisp exterior and a soft, tender center.
Tips for the Best Homemade Bread
- Check your yeast: If the yeast is old or inactive, the dough may not rise properly.
- Measure carefully: Too much flour can make the loaf dense, while too much water can make the dough difficult to shape.
- Use warm, not hot, water: Aim for approximately 110°F (43°C).
- Avoid adding too much flour: A slightly tacky dough usually produces a softer loaf than a very dry dough.
- Allow enough rising time: Watch the dough rather than relying only on the clock.
- Do not skip kneading: A few extra minutes can significantly improve the texture.
- Cool the loaf properly: Cooling allows the interior to finish setting.
- Keep children safe: Use food-safe bags, supervise ingredient handling, and keep children away from knives, hot pans, and the oven.
Delicious Ways to Serve Bread-in-a-Bag

Warm bread and butter
Serve a slice with softened butter for a simple breakfast or afternoon snack.

Homemade sandwiches
Use the cooled slices for cheese sandwiches, egg sandwiches, or classic lunch fillings.

Soup companion
Serve alongside vegetable soup, tomato soup, or a hearty stew.

Sweet breakfast toast
Toast the bread and top it with honey, jam, or cinnamon butter.
Variations to Try
Garlic and herb bread
Add 1 teaspoon of garlic powder and 1–2 teaspoons of dried Italian herbs to the dry ingredients. This creates a savory loaf that pairs beautifully with pasta and soups.
Whole-wheat version
Replace up to 1 cup of the all-purpose flour with whole-wheat flour. You may need a little extra water because whole-wheat flour absorbs more liquid. The finished loaf will be heartier and denser.
Cheesy bread
After the first rise, gently knead ½ cup of shredded cheddar into the dough. Shape and bake as directed. Keep the cheese evenly distributed for the best texture.
Cinnamon breakfast bread
Add 1 teaspoon of ground cinnamon and increase the sugar to 2 tablespoons. For a sweeter loaf, gently knead in a small handful of raisins after the first rise.
Olive and herb bread
Add approximately ⅓ cup of chopped, well-drained olives and 1 teaspoon of dried rosemary. Reduce any additional salt if the olives are particularly salty.
Storage and Make-Ahead Instructions
At room temperature: Once completely cooled, store the bread in an airtight bag or bread container for approximately 2–3 days.
In the refrigerator: Refrigeration can make bread go stale more quickly, so room-temperature storage is generally preferable for short-term use.
In the freezer: Slice the cooled loaf, place the slices in a freezer-safe bag, and freeze for up to 2–3 months for best quality. Individual slices can be thawed or toasted as needed.
To refresh the bread: Warm slices in a toaster or heat a larger piece briefly in the oven until the crust becomes pleasantly crisp.
For advance preparation: You can mix and knead the dough, then refrigerate it in a covered container for a slower first rise. Because fermentation continues more slowly in the refrigerator, allow extra time for the dough to warm and rise before shaping and baking.
Frequently Asked Questions
Can children make Bread-in-a-Bag independently?
Children can help measure, mix, and squeeze the bag with adult supervision. Adults should handle hot water, kneading if needed, sharp knives, and all oven-related tasks.
Why did my bread turn out dense?
Common causes include inactive yeast, water that was too hot, insufficient kneading, inadequate rising time, or too much flour.
Why is my dough sticky?
Some stickiness is normal. Add flour gradually, a tablespoon at a time, until the dough is manageable. Adding too much flour can make the finished bread dry.
Can I use instant yeast instead of active dry yeast?
Yes. Use approximately 2¼ teaspoons of instant yeast. It can be mixed directly with the dry ingredients, and the same general method will work.
Can I leave the dough in the plastic bag while baking?
No. The plastic bag is only for mixing and resting. Remove the dough from the bag before shaping and baking.
How do I know when the bread is ready?
Look for a golden-brown crust and a loaf that sounds slightly hollow when tapped on the bottom. A thermometer reading of approximately 190–200°F (88–93°C) at the center provides a more reliable check.
Conclusion
Bread-in-a-Bag is more than a simple homemade bread recipe. It is an opportunity to teach children useful kitchen skills, introduce beginners to yeast baking, and create something delicious with just a handful of everyday ingredients.
The process is straightforward: mix the ingredients in a bag, let the yeast work, knead and shape the dough, allow it to rise, and bake until golden brown.
The finished loaf is soft, satisfying, and versatile enough for breakfast, sandwiches, dinner, or a comforting slice of warm bread with butter.
Once you have mastered this basic recipe, you can experiment with herbs, cheese, whole-wheat flour, or cinnamon to make it your own. Most importantly, enjoy the process and share the results with the people around your table.
For the Bread Lovers
If you love the smell of fresh bread, the warmth of a homemade loaf, and the simple pleasure of baking with family, this recipe deserves a place in your kitchen.
There is a special kind of happiness in watching a few basic ingredients transform into a golden loaf. Every slice is a reminder that homemade food does not have to be complicated to be wonderful.
Serve it warm with butter, turn it into sandwiches for lunch, or enjoy it beside a bowl of homemade soup. However you choose to serve it, Bread-in-a-Bag is a delicious way to make everyday moments feel special.
Baking question for fellow bread lovers: Would you make the classic version first, or try garlic and herb bread for your next family meal?