
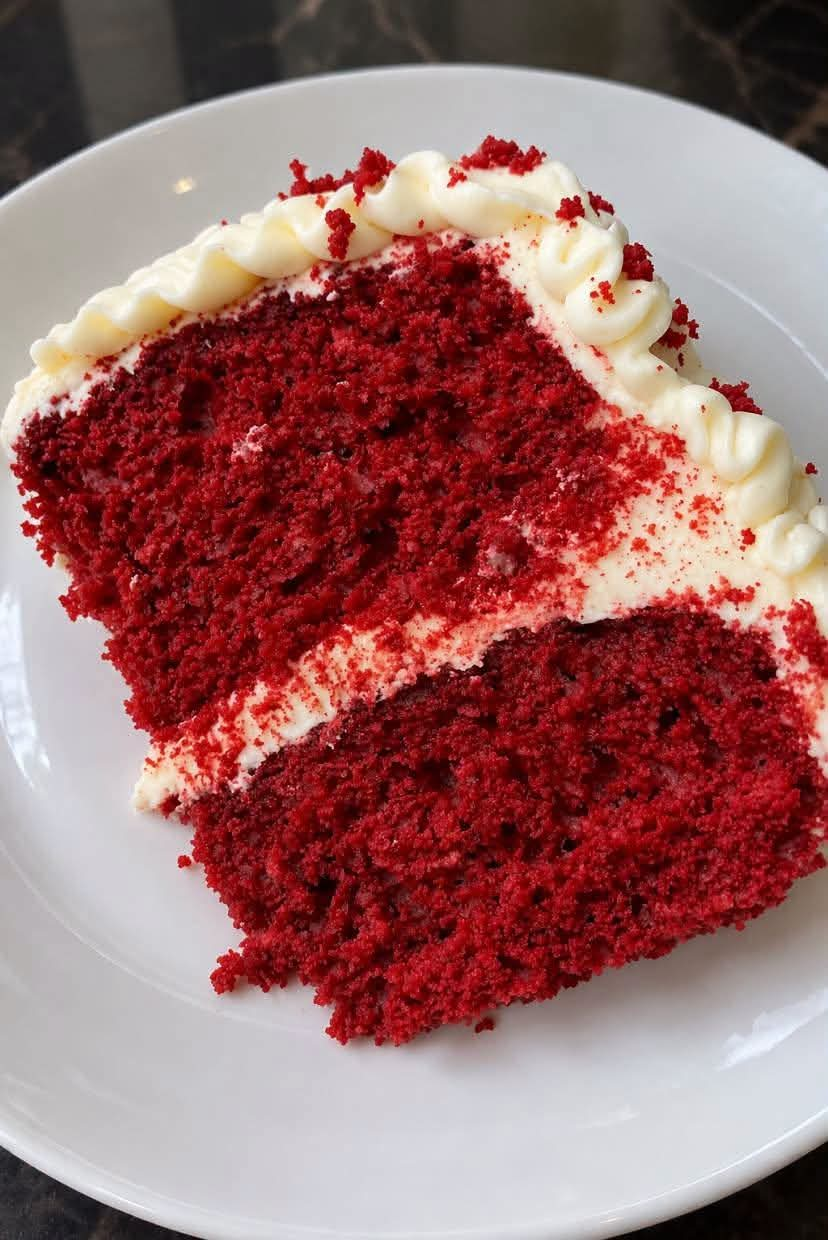
Balanced Red Velvet Egg Cake Recipe: Soft, Moist, Tender, and Perfectly Red
Introduction
A perfect red velvet cake is more than an ordinary chocolate cake with red food colouring. It is a beautifully balanced dessert with a soft, velvety crumb, a delicate cocoa flavour, a gentle tang from buttermilk, and just the right amount of sweetness. Every bite should feel tender, moist, and rich without being too heavy or overly chocolatey.
If you have ever baked a red velvet cake that turned out dry, dense, too dark, or similar to a regular chocolate cake, the problem may be the ingredient ratios, mixing technique, or baking temperature.
This balanced red velvet egg cake recipe combines plain flour, a small amount of cocoa powder, vegetable oil, butter, eggs, buttermilk, and carefully measured raising agents to create two beautiful 8-inch cake layers.
The oil helps retain moisture, while the butter adds a pleasant richness. Buttermilk contributes tenderness and a subtle tang, and the cocoa provides the familiar red velvet flavour without overpowering the cake.
Whether you are baking for a birthday, a wedding, a family celebration, a bakery order, or simply because you love homemade cake, this recipe is a wonderful foundation for creating a delicious red velvet dessert.
Recipe Overview

Preparation time
20–25 minutes
Baking time
25–35 minutes
Cooling time
1–2 hours
Yield
Two 8-inch cake layers
Oven temperature
165–170°C
Ingredients
Dry ingredients
- 280 g plain flour
- 260 g granulated sugar
- 10 g unsweetened cocoa powder
- 4 g baking soda
- 3 g baking powder
- 3 g salt
Wet ingredients
- 100 g whole eggs, approximately 2 large eggs without shells
- 100 g vegetable oil
- 60 g softened unsalted butter or baking margarine
- 220 g buttermilk
- 8 g vanilla extract
- 10 g white vinegar
- 5–8 g red gel food colouring, adjusted to your preferred shade and the strength of your colouring
Optional cream cheese frosting
For a classic red velvet finish, you can prepare this frosting while the cake layers cool.
- 400 g full-fat cream cheese, softened but still cool
- 120 g unsalted butter, softened
- 250–350 g icing sugar, sifted and adjusted to taste
- 5 g vanilla extract
- A small pinch of salt, optional
The frosting is optional; the cake layers can also be served plain or with another filling of your choice.
Instructions and Preparation Method
Step 1: Prepare your baking pans
Preheat your oven to 165–170°C. Grease two 8-inch round cake pans with butter or baking spray, then line the bottoms with baking parchment.
If your oven tends to run hot, use an oven thermometer to check the actual temperature. Excessive heat can cause the edges to bake too quickly before the centres are ready.
Measure all the ingredients with a digital kitchen scale. Accurate weighing is especially important when you want consistent results.
Step 2: Prepare the dry ingredients
Sift the plain flour, cocoa powder, baking soda, baking powder, and salt into a large mixing bowl.
Add the granulated sugar and whisk everything together until evenly distributed.
Sifting helps break up lumps and distributes the cocoa and raising agents throughout the flour. This helps prevent uneven pockets of colour, flavour, or leavening in the finished cake.
Set the bowl aside.
Step 3: Combine the butter and oil
Place the softened butter or margarine in a separate mixing bowl. Beat until smooth and creamy.
Gradually add the vegetable oil while mixing until the two fats are well combined.
The mixture may not become as fluffy as a traditional butter-and-sugar mixture, and that is perfectly fine. The goal is to create a smooth, evenly blended base.
Butter contributes flavour, while oil remains liquid at room temperature and helps the cake stay moist after cooling.
Step 4: Add the eggs
Add the eggs one at a time, mixing well after each addition.
Scrape down the sides and bottom of the bowl to ensure that everything is evenly incorporated.
Add the vanilla extract and red gel food colouring. Mix until the colour is evenly distributed throughout the wet mixture.
Start with a smaller amount of colouring and increase it if necessary. Different brands have different strengths, so the exact quantity needed to achieve a vivid red colour may vary.
Step 5: Prepare the buttermilk
If you have commercial buttermilk, measure out 220 g and set it aside.
If you do not have buttermilk, combine:
- 210 g milk
- 10 g white vinegar
Stir gently and leave for 5–10 minutes. The milk may look slightly thickened or curdled.
Use this mixture as your buttermilk substitute.
Important: If you use this substitute, do not add the additional 10 g vinegar listed separately in the cake ingredients. Otherwise, the batter will contain more vinegar than intended.
If you use commercial buttermilk, retain the recipe’s 10 g vinegar.
Step 6: Combine the wet and dry ingredients
Add approximately one-third of the dry ingredients to the butter-and-oil mixture. Mix on low speed until just combined.
Add approximately half of the buttermilk and mix gently.
Continue alternating between the dry ingredients and buttermilk, beginning and ending with the dry ingredients.
A practical sequence is:
- Add one-third of the dry mixture.
- Add half the buttermilk.
- Add another third of the dry mixture.
- Add the remaining buttermilk.
- Finish with the remaining dry mixture.
Add the 10 g vinegar at the end if you are using commercial buttermilk.
Mix only until the batter becomes smooth and no dry flour remains. Scrape the bowl gently if needed.
Do not beat the batter for too long. Excessive mixing can develop too much gluten, resulting in a tougher cake.
Step 7: Divide the batter
Divide the batter evenly between the two prepared cake pans.
For the most consistent layers, weigh the batter and place half in each pan.
Gently level the surface with a spatula. Tap the pans lightly on the counter once or twice to release any large trapped air bubbles.
Avoid excessive tapping, which is unnecessary and may interfere with the batter’s structure.
Step 8: Bake the cakes
Place the pans on the centre rack of the preheated oven.
Bake at 165–170°C for approximately 25–35 minutes. The exact time depends on your oven, the depth of your pans, and how evenly the heat circulates.
Begin checking around the 25-minute mark.
The cakes are ready when:
- The centres spring back gently when touched.
- A wooden skewer inserted into the centre comes out clean or with a few moist crumbs.
- The edges look set and may begin to pull slightly away from the pans.
If the skewer comes out with wet batter, continue baking for a few minutes before checking again.
Avoid opening the oven repeatedly during the first 20 minutes, because sudden temperature changes may affect the rise.
Step 9: Cool the cake layers
Remove the pans from the oven and let the cakes rest for 10–15 minutes.
Run a thin knife carefully around the edges if necessary, then turn the cakes out onto a wire rack.
Remove the parchment paper and allow the layers to cool completely.
Never frost a warm cake. Heat will soften the frosting and can cause it to slide off the layers.
For easier handling and cleaner slices, you can wrap the completely cooled layers and refrigerate them briefly before decorating.
How to Make the Cream Cheese Frosting
Step 1: Beat the butter
Place the softened butter in a bowl and beat until creamy and smooth.
Step 2: Add the icing sugar
Add the sifted icing sugar gradually, mixing on low speed to prevent it from scattering.
Once incorporated, beat briefly until the mixture is smooth.
Step 3: Add the cream cheese
Add the cool cream cheese, vanilla extract, and optional pinch of salt.
Mix on low to medium speed just until smooth. Avoid prolonged beating because cream cheese frosting can become loose when overmixed.
If the frosting feels too soft, refrigerate it for 20–30 minutes before using.
Step 4: Assemble the cake
Place the first completely cooled cake layer on a serving plate.
Spread a generous layer of frosting over the top. Position the second cake layer on top and cover the top and sides with the remaining frosting.
For a simple bakery-style appearance, smooth the frosting with a spatula and leave the red velvet layers as the star of the dessert.
You can also decorate with small red velvet cake crumbs around the edges.
Because the frosting contains cream cheese, refrigerate the finished cake and follow safe food-storage practices.
The Science Behind a Perfect Red Velvet Cake

1. Why use both butter and oil?
Butter provides a richer flavour, while oil helps retain softness and moisture. Together, they create a balance between flavour and a tender crumb. The amount of each fat must still be balanced with the flour and liquid.

2. Why is cocoa powder used in a small quantity?
Red velvet traditionally has a mild cocoa flavour rather than the intense chocolate taste of a chocolate cake. A modest amount of cocoa supports the flavour without making chocolate the dominant note.

3. What does buttermilk do?
Buttermilk adds moisture and acidity. Its acidity helps tenderize the crumb and reacts with baking soda to produce carbon dioxide, which supports the cake’s rise.

4. Why use baking soda and baking powder together?
Baking soda reacts with acidic ingredients, while baking powder provides additional leavening. Using both can help create the desired texture, but the quantities should be measured carefully to avoid an unpleasant aftertaste or an unstable cake.

5. Why should you avoid overmixing?
Mixing flour with liquid develops gluten. A little structure is necessary, but excessive mixing can make the cake firm, chewy, or less tender.
A Brief History of Red Velvet Cake
Red velvet cake has a long and fascinating history in American baking. Its development is associated with older velvet-style cakes, which were known for their fine texture and tender crumb.
The term “velvet” was used to describe cakes with a particularly soft, smooth texture. Cocoa was sometimes included in these cakes, and its interaction with acidic ingredients could influence the colour of the crumb.
During the twentieth century, red velvet cake became increasingly recognizable for its distinctive red appearance, subtle cocoa flavour, and creamy frosting. The use of red food colouring helped produce the vivid red shade now associated with the dessert.
Cream cheese frosting later became a particularly popular pairing, complementing the gentle cocoa flavour with a creamy, slightly tangy finish.
Today, red velvet cake is enjoyed around the world at birthdays, weddings, anniversaries, holidays, and family gatherings. Although modern recipes often use food colouring for a consistent red colour, the defining character of the cake remains its balance of flavour, texture, and appearance.
Formation: How the Perfect Red Velvet Cake Comes Together
The formation of a successful red velvet cake depends on several stages working together.
First, the dry ingredients must be evenly distributed so that the raising agents work consistently throughout the batter. Next, the butter, oil, eggs, and other wet ingredients must be blended properly to create a uniform mixture.
When the flour and buttermilk are added alternately, the batter develops enough structure to hold its shape while retaining a soft texture. The acidity of the buttermilk and vinegar reacts with the baking soda, helping generate gas that expands during baking.
As the cake heats in the oven, the air bubbles expand, the egg proteins set, and the starches in the flour absorb moisture and form the cake’s structure. The result should be a light, tender crumb that holds together when sliced.
Once cooled, the layers can be filled and decorated without losing their shape.
A beautiful red velvet cake is therefore not created by food colouring alone. It comes from the interaction of ingredients, careful mixing, accurate measurements, and proper baking.
Baker’s Tips for Reliable Results
- Use a kitchen scale. Measuring in grams helps maintain consistent ingredient ratios.
- Bring ingredients to the appropriate temperature. Room-temperature eggs and softened butter generally combine more easily.
- Choose good-quality cocoa. Unsweetened cocoa gives you better control over the chocolate flavour.
- Use gel colouring when possible. It usually provides strong colour without adding as much liquid as some liquid food colourings.
- Do not add too much cocoa. Increasing the cocoa substantially can change both the flavour and colour of the cake.
- Know your oven. Oven temperatures and baking times vary. Use the visual and skewer tests rather than relying only on the clock.
- Cool completely before frosting. This prevents melting and slipping.
- Avoid excessive mixing. Stop as soon as the batter is evenly combined.
- Do not substitute ingredients casually. Changes to the flour, fats, acidity, or raising agents can affect the finished texture.
Common Red Velvet Cake Problems and Solutions
| Problem | Possible reason | Solution |
|---|---|---|
| Cake is dry | Too much flour or overbaking | Weigh ingredients and check the cake early |
| Cake is dense | Overmixing or incorrect raising agents | Mix gently and measure carefully |
| Cake tastes too chocolatey | Too much cocoa powder | Keep the cocoa quantity modest |
| Cake is not red enough | Weak colouring or dark cocoa | Use a suitable red gel colouring and check the cocoa type |
| Cake sinks in the middle | Underbaking or excess leavening | Check doneness and measure raising agents accurately |
| Cake has a bitter or soapy taste | Too much baking soda | Weigh the baking soda precisely |
| Frosting is too soft | Warm cream cheese or excessive mixing | Use cool cream cheese and chill the frosting |
Serving and Storage
Serve the cake at a cool room temperature for the best flavour and texture. A sharp knife wiped clean between slices will help you achieve neat portions.
If the cake is filled or covered with cream cheese frosting, store it in the refrigerator in an airtight container. For best quality, enjoy it within about 3–4 days.
Unfrosted cake layers can be wrapped tightly and frozen for up to 2–3 months for best quality. Thaw them while wrapped to help retain moisture.
Conclusion
This balanced red velvet egg cake recipe is designed to produce two soft, moist, tender cake layers with a gentle cocoa flavour and a beautiful red colour. The combination of butter and oil, the acidity of buttermilk, and the careful use of cocoa and raising agents all contribute to the finished result.
The most important lesson is simple: red velvet is about balance. It should not be so chocolatey that it loses its distinctive character, nor should it be a plain vanilla cake relying entirely on colouring. Its charm comes from the combination of a velvety crumb, subtle cocoa, gentle tang, and creamy frosting.
Follow the measurements carefully, avoid overmixing, and allow the cake to cool completely before decorating. With practice, you can develop a reliable recipe that is suitable for family celebrations or your baking business.
For Red Velvet Cake Lovers
If you love red velvet cake, save this recipe for your next baking session and share it with someone who enjoys making homemade desserts.
Now, let’s talk baking!
What is your biggest challenge when making red velvet cake?
- Getting that beautiful, bright red colour
- Achieving a soft and moist crumb
- Getting the perfect balance of cocoa and sweetness
- Preventing the cake from becoming dense or dry
- Making smooth, delicious cream cheese frosting
Share your experience in the comments. Every baker has something to learn, and every successful cake begins with understanding the ingredients.
The next time you bake red velvet cake, remember: measure carefully, mix gently, bake patiently, and let the balance of flavours do the work.