
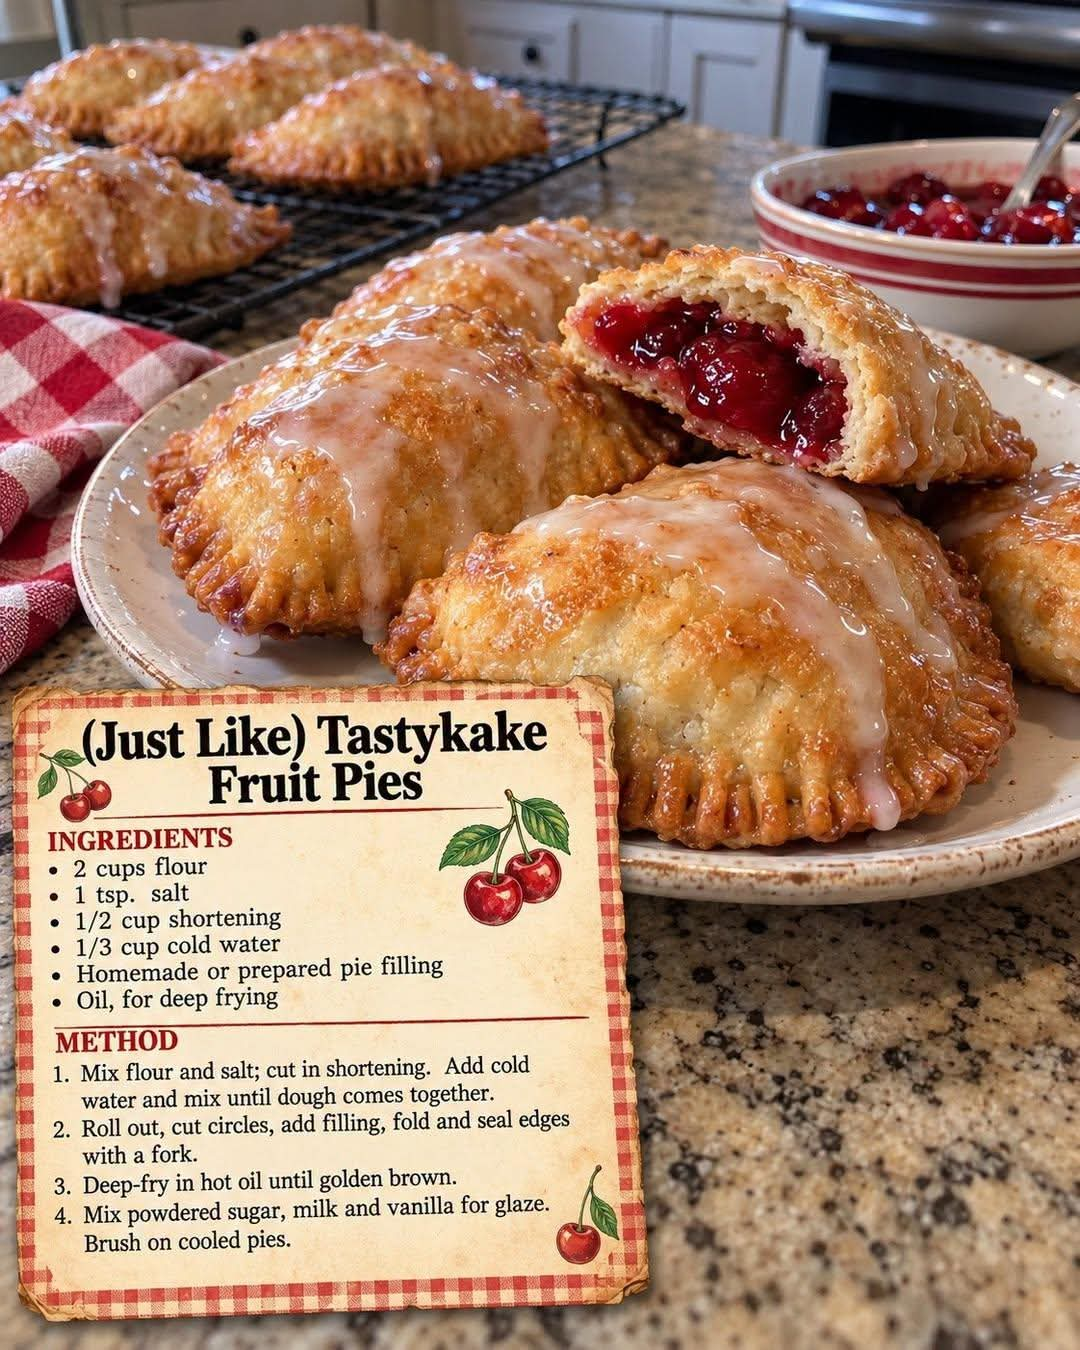
(Just Like) Tastykake Fruit Pies – Homemade Cherry Hand Pies with Vanilla Glaze


Introduction
There is something truly special about biting into a golden, crispy hand pie filled with sweet cherry filling and finished with a smooth vanilla glaze. These homemade cherry fruit pies are inspired by the nostalgic taste of classic bakery and snack-cake fruit pies, bringing that familiar combination of flaky pastry, juicy fruit, and sweet icing right into your kitchen.
Made with simple pantry ingredients, these delicious hand pies are perfect for breakfast treats, afternoon snacks, lunchbox surprises, family gatherings, or homemade desserts after dinner. Each pie features a tender pastry shell with a crisp, golden exterior and a generous cherry filling that delivers sweetness in every bite.
The best part is that you do not need complicated equipment or professional baking skills to make them. The dough comes together with flour, salt, shortening, and cold water, while canned cherry pie filling makes the preparation simple and convenient. Once fried until golden brown, the pies are finished with a delicate vanilla glaze that adds the perfect touch of sweetness.
If you love old-fashioned fruit pastries and nostalgic treats from childhood, this homemade version is a wonderful recipe to keep in your collection.
Ingredients

For the homemade pie dough
- 2 cups all-purpose flour
- 1 teaspoon salt
- 1/2 cup vegetable shortening
- 1/3 cup cold water, added gradually as needed
For the cherry filling
- 1 can (21 ounces) cherry pie filling
- Optional: 1/4 teaspoon almond extract for a slightly richer cherry flavor
For frying
– Vegetable oil, enough for deep-frying
For the vanilla glaze
- 1 cup powdered sugar
- 2 tablespoons milk, plus a little more if needed
- 1/2 teaspoon vanilla extract
Instructions
Step 1: Prepare the pastry dough
In a large mixing bowl, combine the flour and salt. Whisk briefly to distribute the salt evenly throughout the flour.
Add the vegetable shortening. Using a pastry cutter, fork, or your fingertips, work the shortening into the flour until the mixture resembles coarse crumbs. Small pieces of shortening should remain throughout the mixture because they help create a tender pastry.
Gradually add the cold water, one tablespoon at a time, mixing gently until the dough begins to come together. You may not need every drop, depending on the flour and humidity.
Gather the dough into a ball without kneading it excessively. Flatten it into a disk, wrap it, and refrigerate for approximately 20–30 minutes. Chilling makes the dough easier to roll and handle.
Step 2: Prepare the cherry filling
Open the can of cherry pie filling and place it in a bowl.
If the cherries are particularly large, you can gently chop a few pieces to make the filling easier to distribute inside the pies.
For an optional flavor variation, add a small amount of almond extract and stir gently. Almond complements the natural flavor of cherries beautifully.
Keep the filling ready while you prepare the pastry circles.
Step 3: Roll and cut the dough
Lightly flour a clean work surface and rolling pin.
Roll the chilled dough to approximately 1/8 inch thick. Try to keep the thickness even so the pies cook uniformly.
Use a round cutter or small plate to cut circles approximately 5 inches in diameter. Gather any leftover dough, gently reroll it, and cut additional circles.
You should obtain approximately 8–10 hand pies, depending on the thickness of the dough and the size of your circles.
Step 4: Fill the hand pies
Place each dough circle on your work surface.
Spoon approximately 2 tablespoons of cherry pie filling onto one half of each circle, leaving a border of about 1/2 inch around the edges.
Avoid adding too much filling. Overfilled pies may open during frying, allowing the filling to escape into the hot oil.
Lightly moisten the edges with water. Fold the other half of the dough over the filling to create a half-moon shape.
Press the edges together firmly with your fingers, then crimp them with the tines of a fork. Check that every pie is securely sealed.
Step 5: Heat the frying oil
Pour vegetable oil into a deep, heavy-bottomed pot, using enough to allow the pies to float freely without touching the bottom.
Heat the oil to 350°F (175°C), checking with a kitchen thermometer.
Maintaining the correct temperature is important. Oil that is too cool can make the pastry greasy, while oil that is too hot can brown the outside before the pastry cooks properly.
Never fill the pot more than halfway with oil, and keep water away from the hot oil.
Step 6: Fry until golden brown
Carefully lower two or three pies into the hot oil at a time, depending on the size of your pot.
Fry for approximately 2–3 minutes per side, turning carefully when the first side becomes golden brown. The pastry should become crisp and evenly colored.
Adjust the heat as necessary to maintain the oil temperature. Avoid overcrowding the pot because adding too many pies at once can lower the temperature.
Once cooked, transfer the pies to a wire rack or a plate lined with paper towels to drain excess oil.
Allow the pies to cool for several minutes before glazing.
Step 7: Make the vanilla glaze
In a small bowl, combine the powdered sugar, milk, and vanilla extract.
Whisk until the mixture becomes smooth, thick, and pourable.
If the glaze is too thick, add milk a few drops at a time. If it becomes too thin, add a little more powdered sugar.
The ideal glaze should coat the back of a spoon and slowly drip from it.
Step 8: Glaze the cherry pies
Once the pies have cooled slightly, drizzle the vanilla glaze over the tops using a spoon.
For a more traditional snack-pie appearance, spread a thin layer over the entire upper surface of each pie.
Place the glazed pies on a wire rack and allow the icing to set for approximately 15–20 minutes.
For a thicker coating, apply a second light layer after the first layer has begun to set.
Step 9: Serve and enjoy
Serve the cherry hand pies once the glaze has set. The pastry should be golden and crisp, the cherry filling sweet and fruity, and the vanilla icing smooth and delicate.
For the best texture, enjoy them on the day they are prepared.
Cooking Time and Yield
Preparation time
25 minutes
Cooking time
15–20 minutes
Total active preparation and cooking
40–45 minutes, plus chilling and glazing time
Yield
8–10 hand pies
Methods for Making Perfect Cherry Fruit Pies
1. The traditional fried method
Deep-frying gives these pies their characteristic crisp exterior and golden color. Keep the oil close to 350°F and fry in small batches for the most consistent results.
2. The baked method
If you prefer not to deep-fry, preheat the oven to 400°F (200°C). Arrange the sealed pies on a parchment-lined baking sheet, brush the tops lightly with beaten egg, and cut a small vent in each pie.
Bake for approximately 20–25 minutes, or until golden brown. Allow them to cool before applying the vanilla glaze.
The baked version will have a different texture from the fried version, but it is still delicious.
3. The air-fryer method
Preheat your air fryer to 350°F (175°C). Lightly brush the pies with oil and arrange them in a single layer with space between each one.
Air-fry for approximately 8–12 minutes, turning carefully halfway through, until golden and cooked. Timing varies by appliance and pastry thickness.
Let them cool slightly before glazing.
The History and Inspiration Behind Homemade Fruit Pies

Fruit-filled pastries have a long history in home baking. Across many cultures, cooks have wrapped sweet fruit in pastry to create portable desserts that could be carried to work, packed for journeys, or served as convenient treats.
In the United States, hand pies became popular because they were easy to hold and required no plates or forks. Bakers prepared them with seasonal fruits, preserves, and sweet fillings, using pastry dough to keep the filling enclosed.
Commercial fruit pies later brought these familiar flavors to convenience stores, bakeries, and lunchboxes. The combination of fruit filling, flaky pastry, and sweet icing became especially recognizable in packaged snack pies.
This recipe takes inspiration from that nostalgic style, particularly the cherry-filled fruit pies associated with brands such as Tastykake. It is a homemade interpretation rather than an official company recipe.
Making these pies at home allows you to control the size, the amount of filling, the thickness of the icing, and the way the pastry is prepared. It is a delicious way to bring a familiar bakery-style treat into your own kitchen.
How to Form Beautiful, Bakery-Style Hand Pies
The shape and sealing technique make a big difference in the finished result.
- Keep the dough cool: Warm dough can become sticky and difficult to seal.
- Use a moderate amount of filling: Approximately 2 tablespoons per pie is a good starting point.
- Leave a clean border: Cherry syrup on the edges can prevent the dough from sticking together.
- Press firmly: Use a fork to crimp the edges all the way around.
- Avoid stretching the pastry: Stretching can cause the dough to shrink or split during cooking.
- Let the glaze set: Allow enough time for the icing to dry before stacking or storing the pies.
For an especially attractive finish, drizzle a little extra glaze across the top in thin lines after the first layer has set.
Helpful Tips and Common Mistakes
Why did my pies open while frying?
They may have been overfilled or not sealed tightly enough. Keep the filling away from the edges and crimp firmly with a fork.
Why is my pastry greasy?
The oil may have been too cool, or too many pies may have been added to the pot at once. Maintain the recommended frying temperature and cook in batches.
Why is my dough difficult to roll?
It may be too warm or too dry. Chill it briefly if it becomes sticky, or add a tiny amount of cold water if it crumbles and refuses to come together.
When should I add the glaze?
Wait until the pies have cooled enough that the icing will not immediately melt and slide off. Slightly warm pies are fine, but very hot pies need more cooling time.
Can I prepare them ahead of time?
Yes. You can prepare and seal the un-fried pies, then refrigerate them briefly before cooking. For longer storage, freeze them in a single layer before transferring them to a freezer-safe container. Cook from frozen only with an appropriate adjustment to the cooking time, and ensure the pastry is fully cooked.
Serving Ideas


These cherry fruit pies are versatile enough for many occasions.
- Breakfast treat: Enjoy one with coffee, tea, or a glass of milk.
- Afternoon snack: Serve them as a sweet treat during a relaxing break.
- Family dessert: Arrange them on a platter after dinner.
- Party platter: Make smaller pies for birthdays, potlucks, and holiday gatherings.
- Ice cream pairing: Serve a slightly warm pie with vanilla ice cream for an indulgent dessert.
- Homemade gift: Pack completely cooled pies in a suitable food-safe container for friends and family.
Storage and Reheating
Store leftover pies in an airtight container in the refrigerator for up to 3–4 days. Because these pies contain moist fruit filling, refrigeration is the safer choice for leftovers.
For a crispier texture, reheat them in an oven or air fryer at 300–325°F (150–165°C) for several minutes, checking frequently. Allow them to cool before serving.
The glaze may soften during storage, and the pastry will gradually lose some of its original crispness. For the best result, glaze the pies shortly before serving whenever possible.
Conclusion
These homemade Tastykake-inspired cherry fruit pies combine everything that makes a classic hand pie irresistible: crisp golden pastry, sweet cherry filling, and a smooth vanilla glaze.
The recipe uses simple ingredients and straightforward techniques, making it suitable for both beginner bakers and experienced home cooks. Whether you fry them for a traditional crispy finish or choose the baked method for convenience, these little pies offer a comforting, nostalgic dessert that is perfect for sharing.
Prepare a batch for your family, serve them at your next gathering, or save the recipe for a day when you crave a homemade version of a favorite bakery-style treat.
For the Love of Homemade Cherry Pies
Some desserts are special because they remind us of childhood snacks, family kitchens, and the simple pleasure of enjoying something sweet with the people we love.
These cherry hand pies bring that feeling to the table. The first bite reveals a crisp pastry shell, followed by a sweet, fruity center and a delicate vanilla finish. They are simple enough for an ordinary afternoon but special enough to serve to guests.
If you love nostalgic desserts, homemade pastries, and classic fruit-filled treats, this is a recipe worth making again and again. Once you discover how easy it is to prepare these golden cherry pies at home, you may find yourself experimenting with apple, blueberry, peach, or strawberry fillings too.
A little pastry, a sweet cherry filling, and a touch of vanilla glaze can turn an ordinary day into something delicious.