
Beginner-Friendly Sourdough Bread Recipe
Introduction
If you have always wanted to bake homemade sourdough bread but felt that the process was too complicated, this beginner-friendly sourdough recipe is an excellent place to begin. Sourdough may look like an advanced baking project, but once you understand the basic stages of mixing, resting, folding, fermenting, shaping, proofing, and baking, the process becomes much more approachable.
This recipe uses only four essential ingredients: bread flour, water, salt, and an active sourdough starter. There is no commercial yeast and no traditional kneading required. Instead, a series of gentle stretch-and-folds develops the gluten and gives the dough enough strength to rise beautifully.
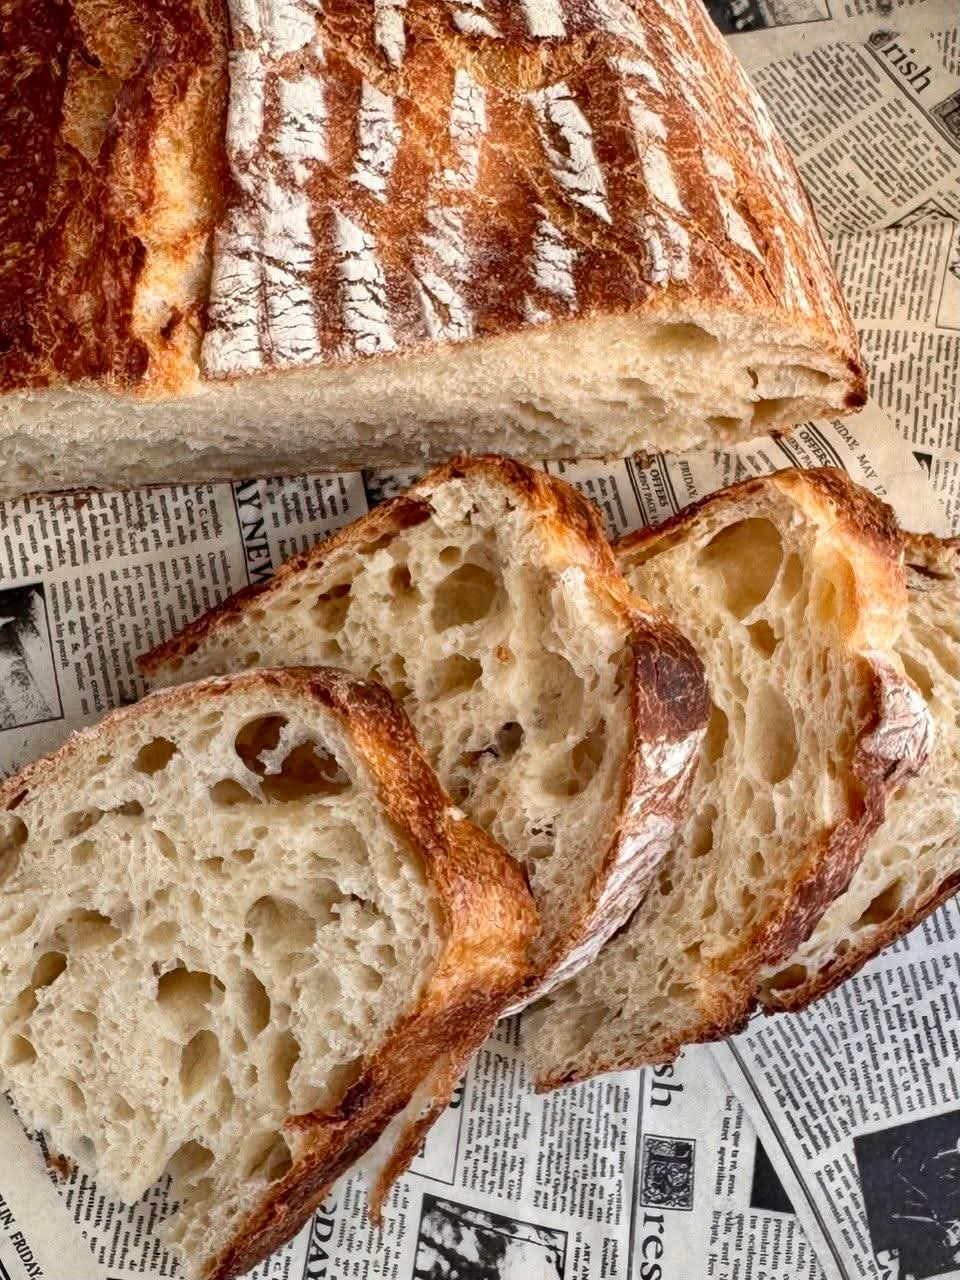
The finished loaf has a crisp, deeply golden crust and a soft, chewy, airy interior. It is wonderful served warm with butter, toasted for breakfast, used for sandwiches, or simply enjoyed with a little olive oil.
The most important ingredient in sourdough is patience. Unlike quick breads, sourdough depends on natural fermentation, so the exact timing can change from one kitchen to another. Once you learn to observe the dough rather than depending entirely on the clock, sourdough baking becomes much easier.
Ingredients
For the Dough
- 100 g active sourdough starter, bubbly and recently fed
- 375 g warm water
- 500 g bread flour
- 10 g salt
Equipment
- Large mixing bowl
- Kitchen scale
- Dough scraper
- Clean kitchen towel or reusable bowl cover
- Proofing basket or medium bowl
- Parchment paper, optional
- Sharp bread lame or razor blade
- Dutch oven or heavy oven-safe pot with lid
- Wire cooling rack
Understanding the Ingredients
Sourdough Starter
The sourdough starter provides the natural fermentation that makes the bread rise. It contains wild yeast and beneficial bacteria that feed on flour and produce gases and acids during fermentation.
For the best results, use a starter that is active, bubbly, and recently fed. A starter that has risen substantially after feeding and has plenty of bubbles is generally a better choice than one that has been sitting dormant for a long time.
Bread Flour
Bread flour is ideal because its higher protein content helps create a strong gluten network. This allows the dough to hold the gases produced during fermentation and helps create a loaf with good height and structure.
Water
Water hydrates the flour and allows the gluten-forming proteins to develop. Lukewarm or moderately warm water can encourage fermentation, but extremely hot water should be avoided because excessive heat can damage the microorganisms in the starter.
Salt
Salt contributes flavor and also helps regulate fermentation and strengthen the dough. Although the amount is small compared with the flour, it makes a noticeable difference in the finished loaf.
Instructions
Step 1: Prepare the Active Starter
Before beginning, make sure your sourdough starter is active and ready to bake with.
A healthy starter should look bubbly and expanded and should have a pleasant fermented aroma. If your starter has been refrigerated or has not been fed recently, give it enough time to become active before mixing the dough.
The strength of your starter can greatly affect fermentation time, so this step is especially important for beginners.
Step 2: Mix the Water and Starter
Pour the warm water into a large mixing bowl.
Add the active sourdough starter and stir until the starter is mostly dispersed throughout the water.
It does not have to completely dissolve. The goal is simply to distribute it evenly so fermentation can begin throughout the dough.
Step 3: Add the Flour and Salt
Add the bread flour and salt to the bowl.
Mix everything together using your hand, a wooden spoon, or a dough scraper. Continue mixing until all of the flour has been incorporated and there are no obvious dry patches.
The dough will probably look rough and feel sticky at this stage. This is completely normal.
Do not add large amounts of extra flour simply because the dough feels sticky. The dough will change considerably as it rests and undergoes stretch-and-folds.
Step 4: Rest the Dough
Cover the bowl with a clean towel or reusable cover.
Allow the dough to rest for approximately 30 minutes at room temperature.
This resting period gives the flour time to absorb the water and allows gluten development to begin naturally. The dough should become somewhat smoother and more cohesive after resting.
This stage is sometimes referred to as an autolyse or resting period, although because the starter and salt are already incorporated, it is more accurately described as a dough rest.
The Stretch-and-Fold Method
Stretch-and-folding is one of the most useful techniques for beginner sourdough bakers.
Instead of kneading the dough aggressively, you gently stretch portions of the dough and fold them back toward the center. Repeating this process gradually strengthens the gluten network.
How to Perform One Stretch-and-Fold
- Wet your hand lightly to prevent excessive sticking.
- Reach underneath one side of the dough.
- Gently lift and stretch the dough upward.
- Fold the stretched portion over the center.
- Rotate the bowl.
- Repeat the same movement on the other three sides.
- After completing all four sides, allow the dough to rest.
Try not to tear the dough. Gentle movements are enough.
Step 5: Complete Several Sets
Over the next two to three hours, perform approximately three to four sets of stretch-and-folds.
You do not need to work continuously. Instead, give the dough time to relax between sets.
For example, you might perform one set after the initial rest and then repeat another set approximately 30 to 45 minutes later.
With every set, the dough should gradually become smoother, stronger, and more elastic.
By the final set, it may hold its shape much better than it did when you first mixed it.
Step 6: Bulk Fermentation
After the stretch-and-fold stage, cover the bowl and allow the dough to continue fermenting at room temperature.
This is called bulk fermentation because the entire quantity of dough ferments together before shaping.
The exact time can vary considerably. A warm kitchen may produce faster fermentation, while a cool kitchen can make the process considerably slower.
Rather than relying exclusively on a specific number of hours, observe the dough.
Look for:
- A noticeable increase in volume
- Bubbles along the sides of the bowl
- A lighter and airier appearance
- A slightly domed surface
- A soft, elastic texture
- Dough that jiggles gently when the bowl is moved
The dough does not necessarily need to double in size. Depending on your flour, starter, and temperature, an increase of approximately 50 to 75 percent can be sufficient.
Under-fermentation is one of the most common problems beginners encounter, so do not rush this stage.
Step 7: Prepare the Work Surface
Once bulk fermentation is complete, lightly flour your work surface.
Gently loosen the dough from the bowl using a dough scraper.
Turn the dough onto the work surface, trying not to knock out all of the accumulated gas.
Handle the dough gently. The goal is to preserve as much of the fermentation as possible.
Step 8: Shape the Loaf
Shape the dough into a round or oval loaf.
One simple method is to gently fold the edges toward the center. Turn the dough as you work, gradually creating tension across the outside surface.
Once shaped, gently turn or tighten the loaf so the surface becomes smooth and taut.
Avoid using excessive flour during shaping. Too much flour can make it difficult for the dough to develop surface tension.
Step 9: Transfer to the Proofing Basket
Place the shaped loaf seam-side up into a well-floured proofing basket.
If you do not have a banneton, use a medium-sized bowl lined with a clean kitchen towel and dusted lightly with flour.
Cover the dough to prevent the surface from drying out.
Step 10: Final Proof
Allow the shaped dough to proof at room temperature for approximately two to four hours.
Again, the actual timing depends on the temperature and the strength of your starter.
For a deeper flavor and easier handling, you can instead place the covered dough in the refrigerator and allow it to proof overnight.
Cold fermentation can produce a more developed sourdough character and makes the dough firmer, which can make scoring and transferring it easier.
Step 11: Preheat the Oven
Place your Dutch oven or heavy oven-safe pot with its lid inside the oven.
Preheat the oven to 475°F (245°C).
Allow the Dutch oven to heat thoroughly. A properly preheated baking vessel helps create the strong initial heat needed for good oven spring and crust development.
Because the pot will become extremely hot, use appropriate oven gloves and handle it carefully.
Step 12: Prepare the Dough for Baking
When you are ready to bake, carefully remove the dough from the refrigerator if you used a cold proof.
Turn the dough onto a piece of parchment paper or another suitable surface for transferring it into the Dutch oven.
Score the surface with a sharp bread lame or razor blade.
A simple slash across the top is enough for a beginner. Scoring gives the expanding bread a controlled place to open during baking.
Without scoring, the loaf may split unpredictably as pressure builds inside the dough.
Step 13: Bake the Sourdough
Carefully transfer the dough into the preheated Dutch oven.
Place it seam-side down and immediately cover the pot with its lid.
Bake at 475°F (245°C) for approximately 20 minutes with the lid on.
The covered environment traps steam released from the dough. This helps keep the crust flexible during the first part of baking and encourages the loaf to expand.
After 20 minutes, carefully remove the lid.
Continue baking uncovered for another 20 to 25 minutes, or until the bread has developed a deep golden-brown crust.
If necessary, adjust the baking time slightly according to your oven and preferred crust color.
Step 14: Cool Completely
Remove the finished loaf from the Dutch oven and place it on a wire rack.
Allow it to cool for at least one hour before slicing.
This step requires patience. The inside of the bread continues to set as it cools. Cutting into the loaf too early can result in a gummy or compressed crumb.
Once completely cooled, use a serrated bread knife to slice the loaf.
Method for Successful Sourdough
The sourdough process can be summarized into several important stages:
Mixing
Combine the active starter, water, flour, and salt until a rough dough forms.
Resting
Allow the flour to hydrate and the dough to begin developing naturally.
Strength Building
Use several rounds of stretch-and-folds to strengthen the dough.
Bulk Fermentation
Allow the microorganisms in the starter to ferment the dough until it becomes lighter, larger, and airy.
Shaping
Create surface tension and form the dough into a round or oval loaf.
Final Proofing
Allow the shaped dough to rise again before baking.
Baking
Use a very hot Dutch oven to create strong oven spring and a crisp crust.
Cooling
Allow the loaf to cool completely so the crumb can finish setting.
How to Tell When Bulk Fermentation Is Ready
Learning to recognize fermentation is more important than memorizing a specific number of hours.
Your dough may be ready when it has increased noticeably in volume and contains visible bubbles.
It should look alive rather than dense and flat. When you gently shake the bowl, the dough may have a soft jiggle.
The surface may also appear slightly domed, and the dough should feel lighter and more elastic.
If the dough is still extremely dense and shows almost no signs of activity, it may need additional fermentation time.
Beginner Sourdough Tips
Use a Kitchen Scale
Sourdough is much more consistent when ingredients are measured by weight.
A digital kitchen scale allows you to accurately measure flour, water, starter, and salt.
Do Not Add Too Much Flour
Sticky dough does not automatically mean something is wrong.
As gluten develops through resting and folding, the dough should become easier to handle.
Adding excessive flour can make the final bread unnecessarily dense.
Watch the Dough
Temperature has a major effect on fermentation.
A dough that takes several hours in a warm kitchen may take much longer in a cool kitchen.
Use visual and textural signs rather than depending entirely on the clock.
Keep Your Starter Healthy
An active starter is essential for reliable fermentation.
If your starter consistently struggles to rise after feeding, the bread may also ferment slowly.
Be Patient
Sourdough is naturally slower than bread made with commercial yeast.
The additional time allows fermentation to develop flavor and structure.
Do Not Expect Every Loaf to Look Identical
Your results can change depending on flour, hydration, room temperature, starter activity, fermentation time, shaping, and oven performance.
Every loaf is part of the learning process.
What Is Sourdough Starter?
Sourdough starter is a simple mixture of flour and water that has been allowed to ferment naturally.
Wild yeast and beneficial bacteria from the environment and flour establish themselves in the mixture.
The yeast produces carbon dioxide during fermentation, which helps the bread rise, while the bacteria contribute acids and the characteristic flavor associated with sourdough.
A mature starter can be maintained by regularly feeding it with fresh flour and water.
When it is active and bubbly, it can be incorporated into bread dough.
A Brief History of Sourdough Bread
Sourdough is one of the oldest naturally leavened forms of bread.
Long before commercial baker’s yeast became widely available, people relied on naturally occurring microorganisms to ferment bread dough.
Ancient civilizations discovered that mixtures of flour and water could ferment and produce gases capable of making bread lighter.
Over centuries, naturally fermented bread became an important part of baking traditions in many regions.
Sourdough methods continued to be passed from one generation to another, with bakers maintaining starters over long periods.
Today, sourdough has experienced renewed popularity because home bakers appreciate its traditional preparation, distinctive flavor, and hands-on process.
The Formation of the Sourdough Crust and Crumb
One of the most satisfying parts of sourdough baking is watching the loaf transform inside the oven.
The intense heat causes the dough to expand rapidly. This is commonly called oven spring.
The water inside the dough produces steam, while the fermentation gases expand. The gluten structure stretches and holds these gases, helping create an airy interior.
At the same time, the outer surface gradually dries and browns.
The result is a crisp crust surrounding a soft, chewy crumb.
A well-fermented and properly shaped loaf may contain a mixture of small and larger air pockets throughout the interior.
Serving Ideas
Fresh sourdough bread can be enjoyed in many ways.
Serve thick slices with softened butter for a simple breakfast.
Toast slices and top them with eggs, avocado, tomatoes, or cheese.
Use the bread for sandwiches, grilled cheese, or hearty toast.
It can also be served alongside soups, stews, roasted vegetables, salads, or pasta dishes.
Day-old sourdough is excellent for French toast, bread pudding, croutons, breadcrumbs, and stuffing.
Storing Homemade Sourdough Bread
Allow the loaf to cool completely before storing it.
For short-term storage, keep the bread at room temperature in a bread box, paper bag, or loosely covered container.
Avoid sealing warm bread in an airtight plastic bag because trapped moisture can soften the crust.
For longer storage, slice the completely cooled loaf and freeze the slices in a freezer-safe bag.
Individual slices can then be removed as needed and toasted directly from frozen.
Common Beginner Problems
Dense Bread
Dense bread can result from an inactive starter, insufficient fermentation, excessive flour, or dough that was not given enough time to develop.
Flat Loaf
A loaf that spreads instead of rising may have been over-fermented, under-strengthened, or insufficiently shaped.
Gummy Interior
A gummy crumb may occur when bread is sliced before cooling completely or when the loaf has not baked sufficiently.
Pale Crust
A pale crust may indicate insufficient baking time or inadequate oven temperature.
Dough That Feels Too Sticky
Sourdough naturally has a sticky texture, especially during the early stages. Give the dough time to rest and strengthen before deciding that it needs additional flour.
Why Beginners Love This Recipe
This recipe is especially approachable because it does not require complicated equipment or intensive kneading.
The ingredients are simple, and the stretch-and-fold technique allows the dough to develop strength gradually.
It is also an excellent recipe for learning how sourdough behaves.
Once you become comfortable recognizing fermentation, shaping, and oven spring, you can begin experimenting with different flours, hydration levels, seeds, herbs, cheeses, and other additions.
Conclusion
Making sourdough bread at home is less about achieving perfection on the first attempt and more about learning how dough behaves.
With only flour, water, salt, and an active sourdough starter, you can create a loaf with a beautifully crisp crust and flavorful, airy crumb.
The most important lessons are to keep your starter active, measure your ingredients carefully, develop strength through gentle folds, give fermentation enough time, and pay attention to the appearance and feel of the dough.
Once you become familiar with these stages, sourdough stops feeling intimidating and becomes a rewarding part of your baking routine.
For Sourdough Lovers
For anyone who loves traditional homemade bread, sourdough offers an especially satisfying baking experience.
There is something wonderfully rewarding about taking a small amount of flour and water, nurturing a living starter, patiently fermenting the dough, and eventually pulling a beautiful golden loaf from the oven.
The first loaf may not look exactly like the one you imagined, and that is perfectly normal. Each bake teaches you something new about temperature, fermentation, hydration, shaping, and timing.
With practice, you will begin to recognize when your dough needs more time, when it has developed enough strength, and when it is ready for the oven.
That is when sourdough becomes less of a recipe and more of a skill you can carry with you for years.
This beginner-friendly loaf is a wonderful place to start, and once you have mastered it, you can continue building your own collection of homemade sourdough favorites.