
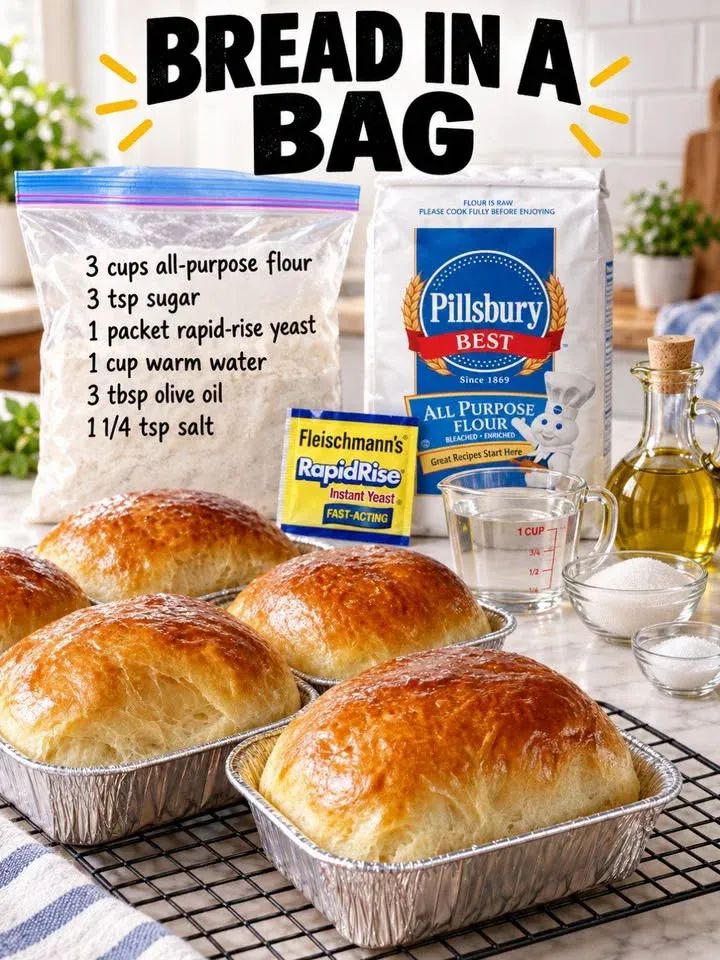
Bread in a Bag
Introduction
Bread in a Bag is a simple homemade bread recipe designed to make the bread-making process easy, approachable, and much less messy. Instead of mixing and kneading the dough directly on the counter, the ingredients are combined inside a sturdy food-safe bag. The bag keeps the flour contained, makes cleanup easier, and gives beginners a comfortable way to learn how bread dough should feel.
The finished loaf is soft, fluffy, lightly golden on the outside, and tender inside. It is delicious served warm with butter, used for sandwiches, or enjoyed alongside soups, stews, eggs, and family dinners.
With only a handful of basic ingredients, you can make a fresh loaf without special equipment or complicated techniques.
Ingredients
- 3 cups all-purpose flour
- 3 teaspoons granulated sugar
- 1 packet rapid-rise yeast
- 1 cup warm water, approximately 110°F
- 3 tablespoons olive oil
- 1 1/4 teaspoons salt
- Extra flour for shaping, if necessary
- A little olive oil or cooking spray for greasing the pan
Instructions
Step 1: Prepare the Bag
Choose a large, sturdy food-safe plastic bag with enough room for the ingredients to expand. Make sure the bag is clean and free from holes or tears.
Add approximately 2 cups of the flour to the bag. Add the sugar, rapid-rise yeast, and salt. Seal the bag while leaving enough air inside for the ingredients to move around.
Gently shake the bag until the dry ingredients are evenly distributed.
Step 2: Add the Warm Water
Warm the water to approximately 110°F. It should feel comfortably warm rather than extremely hot.
Add the warm water and olive oil to the dry ingredients inside the bag. Seal the bag again, leaving a little room for the mixture to move.
Using your hands, gently squeeze and knead the outside of the bag to combine the ingredients.
At first, the mixture will look rough and sticky. Continue working it until most of the flour has been incorporated.
Step 3: Add the Remaining Flour
Add the remaining cup of flour gradually. Seal the bag and continue squeezing and kneading the dough.
The dough should become soft and slightly tacky but should not be extremely wet. If it feels excessively sticky, add a small amount of flour, one tablespoon at a time.
Avoid adding too much flour because an overly stiff dough can produce dense bread.
Step 4: Knead the Dough
Continue kneading the dough through the bag for approximately 5 to 8 minutes.
The dough should gradually become smoother and more elastic. You can also remove the dough from the bag once it has come together and finish kneading it lightly on a lightly floured surface.
The goal is to develop enough gluten to give the bread structure while keeping the dough soft.
Step 5: First Rise
Place the dough back into the lightly oiled bag or into a lightly greased bowl.
Cover it and place it somewhere warm and draft-free.
Allow the dough to rise for approximately 1 hour, or until it has noticeably increased in size and is close to doubled.
The exact rising time can vary depending on the temperature of your kitchen.
Step 6: Shape the Bread
Once the dough has risen, gently press it down to release some of the excess air.
Transfer it to a lightly floured surface and shape it into a smooth loaf.
Place the shaped dough into a greased loaf pan. Cover it loosely and allow it to rise again for approximately 30 to 45 minutes.
The second rise helps create a lighter and softer loaf.
Step 7: Bake
Preheat the oven to 375°F.
Place the risen loaf into the oven and bake for approximately 25 to 35 minutes, depending on the size and shape of the loaf.
The bread should become golden brown on top and should sound hollow when gently tapped.
If the top begins browning too quickly, loosely cover it with aluminum foil during the final portion of baking.
Step 8: Cool
Remove the bread from the oven and allow it to rest in the pan for about 5 to 10 minutes.
Carefully transfer it to a wire rack and allow it to cool further before slicing.
For the softest texture, resist the temptation to cut the bread immediately. Letting it cool allows the interior crumb to finish setting.
Method
The Bread in a Bag method is based on a straightforward bread-making process: combine, knead, rise, shape, rise again, and bake.
The unusual part is the initial mixing and kneading inside the bag. This method helps contain the flour and sticky dough, making the process convenient for beginners and reducing the amount of flour scattered around the kitchen.
The warm water activates the yeast, while sugar provides a small amount of food for the yeast and contributes to browning. Olive oil adds richness and helps create a tender crumb. Salt improves flavor and also helps regulate yeast activity.
Flour provides the structure of the bread. During kneading, proteins in the flour form gluten, creating an elastic network that traps the gases produced by the yeast. This is what allows the dough to rise and gives the finished loaf its characteristic airy texture.
The History of Homemade Bread
Bread is one of the oldest prepared foods in human history. For thousands of years, people have combined grains with water and other ingredients to create nourishing foods that could be baked or cooked.
Yeast-leavened bread became an important part of many culinary traditions because fermentation could transform a simple mixture of flour and water into something lighter, softer, and more flavorful.
Modern home bread recipes continue this tradition while adapting the process to contemporary kitchens. Bread in a Bag is an example of this practical approach: it takes familiar bread-making ingredients and places emphasis on simplicity, minimal cleanup, and accessibility.
Although the bag technique is a modern convenience rather than an ancient bread-making tradition, the basic principles remain the same.
Formation and Texture
The texture of homemade bread depends heavily on hydration, gluten development, fermentation, and baking.
The dough should be soft enough to stretch but firm enough to hold its shape. During the first rise, yeast produces carbon dioxide, which becomes trapped inside the developing gluten structure. This causes the dough to expand.
During the second rise, the shaped loaf develops additional volume. Once it enters the hot oven, the yeast becomes highly active for a short period before the heat stops fermentation. This final expansion contributes to the bread’s light texture.
As the loaf bakes, the crust develops its golden color while the interior sets into a soft crumb.
Tips for Successful Bread
Use water that is warm rather than hot. Very hot water can damage the yeast and prevent the bread from rising properly.
Do not add all the flour at once if the dough already feels firm. Flour can absorb different amounts of water depending on the brand, storage conditions, and humidity.
Do not judge the dough only by the clock. Watch its appearance and size. A warm kitchen may cause the dough to rise faster, while a cool kitchen can significantly slow fermentation.
Avoid adding excessive flour during kneading. A slightly tacky dough can produce a softer loaf than a very dry dough.
Allow the finished bread to cool before slicing. Cutting too early can compress the soft interior.
For a softer crust, brush the warm loaf lightly with butter after baking.
For a more rustic crust, allow the loaf to cool uncovered on a wire rack.
Serving Suggestions
Fresh Bread in a Bag is versatile enough to serve throughout the day.
For breakfast, serve thick slices warm with butter, honey, jam, or eggs.
For lunch, use the bread for turkey, chicken, tuna, cheese, or vegetable sandwiches.
At dinner, serve warm slices alongside soup, chili, pasta, roasted vegetables, or a hearty stew.
The bread can also be toasted and topped with avocado, eggs, cheese, or other favorite toppings.
Storage
Once completely cooled, store the bread in an airtight container or bread bag at room temperature for up to several days.
For longer storage, slice the bread and freeze it in a well-sealed freezer bag. Individual slices can be removed as needed and warmed or toasted directly from frozen.
Avoid storing homemade bread in the refrigerator for extended periods because refrigeration can make bread lose its soft texture more quickly.
Why People Love This Bread
People love Bread in a Bag because it makes homemade bread feel much less intimidating.
There is something especially satisfying about taking a few inexpensive pantry ingredients and turning them into a warm, fragrant loaf of bread. The method is simple enough for beginners, while the final result still has the comforting qualities people expect from homemade bread.
It is also a wonderful recipe for families because children can participate in the mixing and kneading stage under adult supervision. The bag makes the process easier to handle and turns bread-making into a hands-on kitchen activity.
Most importantly, the finished bread is practical. It can become breakfast toast, sandwich bread, dinner bread, or a warm snack with butter.
Conclusion
Bread in a Bag is a convenient way to make fresh homemade bread without complicated equipment or an intimidating preparation process. The combination of flour, yeast, warm water, olive oil, sugar, and salt creates a soft and flavorful loaf with a tender interior and golden crust.
The bag method keeps the early stages simple and minimizes cleanup, while the traditional rising and baking process produces the familiar texture and aroma of homemade yeast bread.
Whether you are making your first loaf of bread or simply want an easy recipe for fresh bread at home, this recipe is a dependable place to begin. Serve it warm from the oven, turn it into sandwiches, toast it for breakfast, or place it beside your favorite dinner. Few things make a kitchen feel more welcoming than the smell of freshly baked bread.