
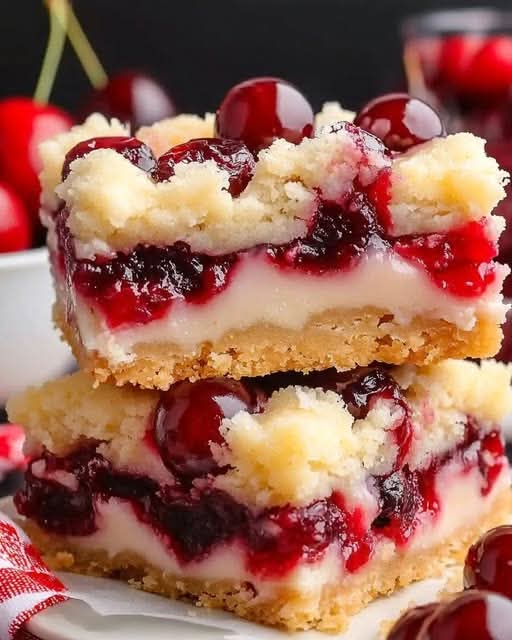
🎄 Christmas Cherry Bars Recipe 🍒✨
Introduction
These Christmas Cherry Bars are the kind of dessert that instantly brings holiday magic into your kitchen. Buttery, soft, and slightly chewy with bursts of sweet-tart cherry pie filling, they taste like a cross between a blondie, a cake bar, and a festive fruit pastry.
Perfect for Christmas parties, cookie exchanges, potlucks, or cozy winter baking days, these bars are easy to slice, easy to serve, and absolutely impossible to resist. The almond glaze on top adds a bakery-style finish that makes them look as beautiful as they taste.
History 🎅
Cherry desserts have long been associated with holiday baking, especially in Europe and North America. Cherries symbolize celebration, warmth, and abundance during winter months when fresh fruit was once scarce.
Fruit bars like these evolved from traditional “sheet cakes” and “tea cakes” baked for gatherings. Over time, bakers began adding canned fruit fillings—like cherry pie filling—to create quicker, more festive desserts without sacrificing flavor.
Today, Christmas Cherry Bars are a holiday classic because they combine simplicity with nostalgic, bakery-style comfort.
Ingredients 🧾
For the Cherry Bar Base
- 1 cup unsalted butter, softened
- 1 ½ cups granulated sugar
- 4 large eggs
- 1 teaspoon vanilla extract
- 3 cups all-purpose flour
- 1 teaspoon baking powder
- ½ teaspoon salt
- 1 can (21 oz) cherry pie filling
Almond Glaze
- 1 cup powdered sugar
- 2 tablespoons milk
- ½ teaspoon almond extract
Optional Holiday Touches
- Red and green sprinkles
- Extra cherries for topping
- White chocolate drizzle
- Crushed pistachios
- Dusting of powdered sugar “snow”
Equipment
- Large mixing bowl
- Electric mixer
- 9×13-inch baking pan
- Spatula
- Cooling rack
- Small bowl for glaze
Step-by-Step Instructions 🍰
Step 1: Prepare the Pan
Preheat oven to 350°F (175°C).
Grease a 9×13-inch baking pan or line it with parchment paper for easy removal.
Step 2: Make the Batter
In a large bowl, cream together:
- Butter
- Sugar
Beat until light and fluffy (about 2–3 minutes).
Add:
- Eggs (one at a time)
- Vanilla extract
Mix until smooth.
Step 3: Add Dry Ingredients
In a separate bowl, whisk together:
- Flour
- Baking powder
- Salt
Gradually add dry ingredients into the wet mixture, mixing until just combined. Do not overmix.
Step 4: Assemble the Bars
Spread about 2/3 of the batter evenly into the prepared pan.
Spoon cherry pie filling evenly over the batter.
Drop remaining batter in small spoonfuls on top of cherries (it doesn’t need to fully cover them).
Step 5: Bake
Bake for 35–40 minutes, or until golden brown and a toothpick comes out mostly clean (some cherry moisture is okay).
Cool completely before glazing.
Step 6: Make the Almond Glaze
In a small bowl, mix:
- Powdered sugar
- Milk
- Almond extract
Stir until smooth and drizzle-ready.
Step 7: Finish the Bars
Drizzle glaze over cooled bars.
Let set for 10–15 minutes, then slice into squares or rectangles.
Methods of Preparation 🔥
Classic Oven Baking
The traditional method creates a soft, cake-like bar with golden edges and juicy cherry pockets.
Cookie-Style Variation
Chill the dough slightly and spread thinner for denser, chewy bars.
Sheet Pan Holiday Style
Double the recipe for large gatherings and bake in a sheet pan for crowd-sized servings.
Layered Dessert Method
Add cream cheese swirls into the batter for a richer, cheesecake-style version.
Formation (How It Comes Together) 🧠
These cherry bars form in three beautiful layers:
- Base layer – soft, buttery vanilla batter
- Fruit layer – sweet cherry filling that melts into the cake
- Top layer – scattered batter that bakes into golden pockets
During baking, the cherry filling slightly sinks and caramelizes while the batter rises around it, creating a marbled, bakery-style texture.
Tips for Perfect Cherry Bars 💡
- Don’t overmix the batter or bars may become dense
- Use room-temperature butter for best texture
- Let bars cool completely before cutting
- Add glaze only after cooling to prevent melting
- Use parchment paper for clean slices
- Chill before serving for firmer texture
Flavor Variations 🍒
- Cherry Almond Cheesecake Bars
- Chocolate Cherry Christmas Bars
- White Chocolate Cherry Blondie Bars
- Raspberry Holiday Bars
- Cranberry Orange Christmas Bars
- Cherry Coconut Snow Bars
Serving Suggestions 🍽️
These bars pair beautifully with:
- Hot chocolate ☕
- Eggnog 🎄
- Coffee or espresso
- Vanilla ice cream
- Whipped cream
- Holiday tea blends
Storage ❄️
- Room temperature: 2–3 days (covered)
- Refrigerator: up to 5–6 days
- Freezer: up to 2 months (wrap tightly)
Why People Love Them ❤️
People love Christmas Cherry Bars because they are:
- Soft, buttery, and rich
- Packed with juicy cherry flavor
- Quick and easy to make
- Perfect for holiday gifting
- Beautiful with minimal decoration
- Nostalgic and comforting
They taste like something straight from a holiday bakery but require very little effort.
Conclusion 🎄✨
Christmas Cherry Bars are the perfect blend of simplicity and celebration. With their soft vanilla base, sweet cherry filling, and delicate almond glaze, they bring warmth and joy to every holiday table.
Whether you’re baking for family gatherings, Christmas parties, or cozy nights at home, these bars deliver festive flavor in every bite. One tray will never be enough—because they disappear almost as fast as they’re made. 🍒🎅