
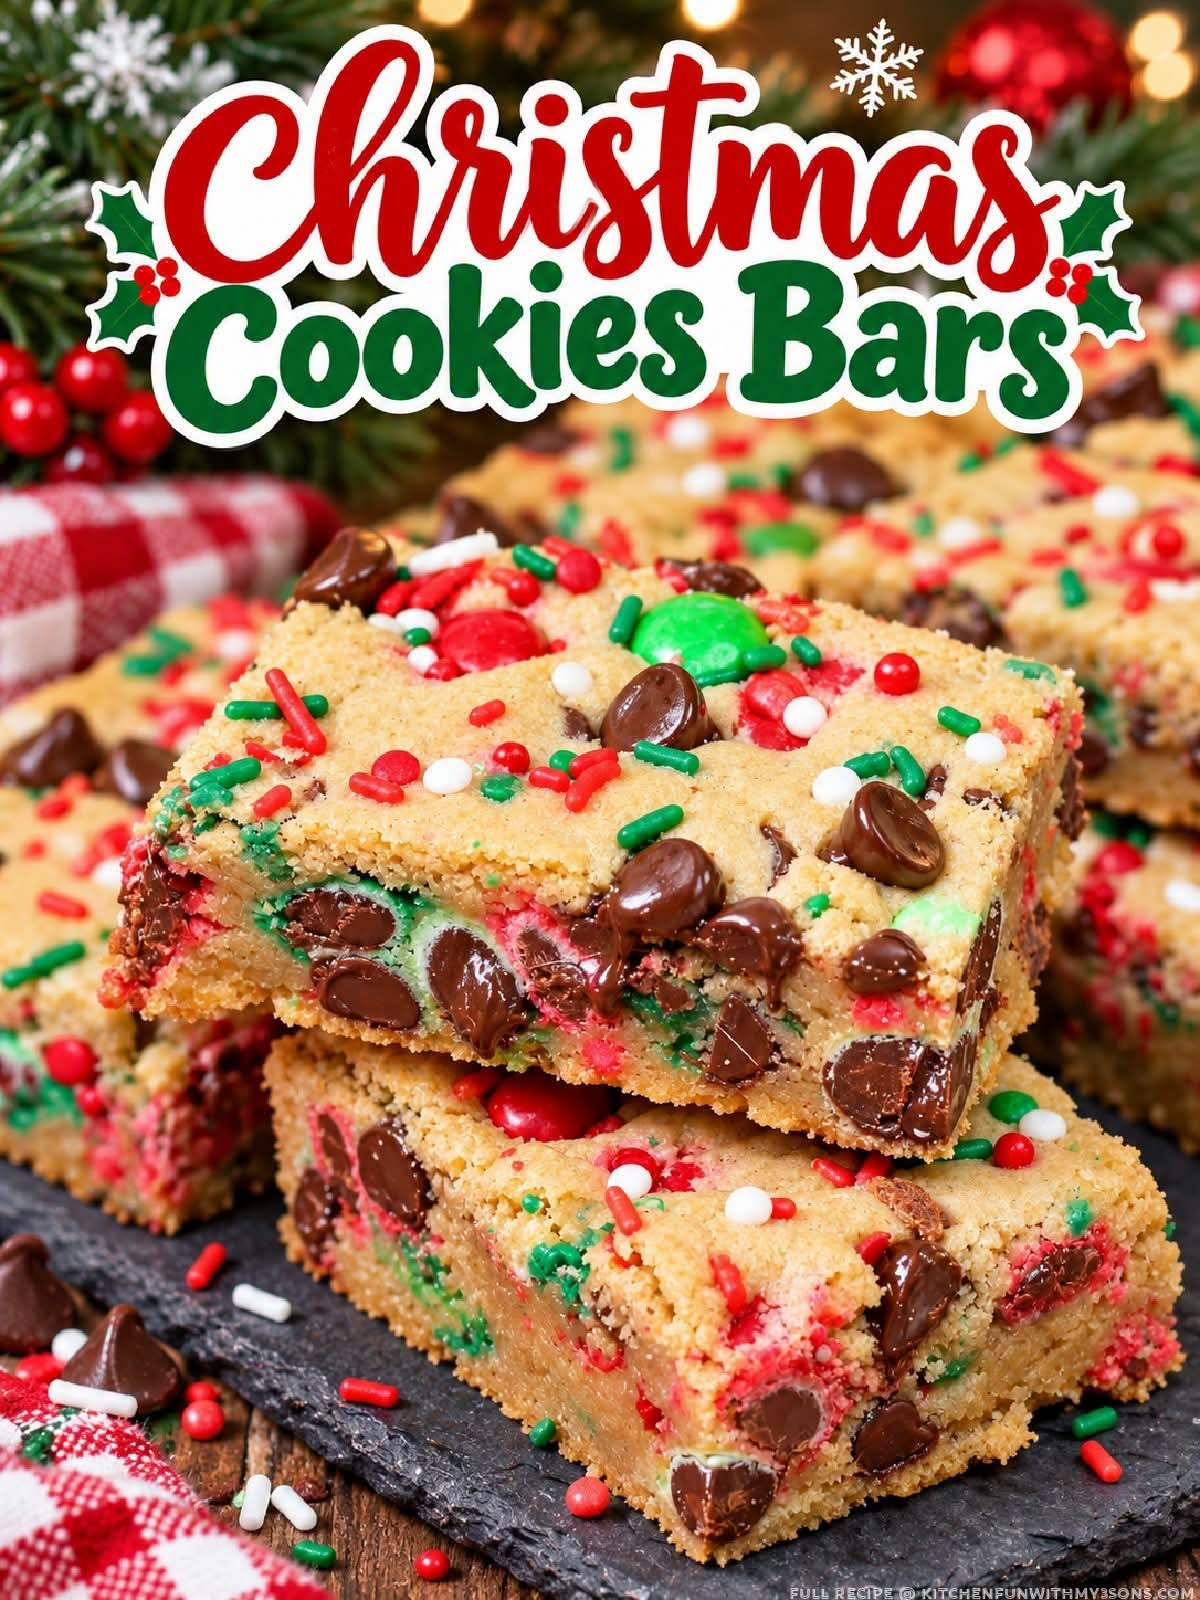
Christmas Cookie Bars: A Festive Holiday Treat for the Whole Family
Introduction
Christmas Cookie Bars are a wonderful addition to any holiday dessert table. Soft, buttery, sweet, and filled with festive colors, these delicious cookie bars bring the comforting taste of homemade Christmas cookies without the extra work of rolling, cutting, and decorating individual cookies.
This easy-to-make dessert combines the familiar flavor of classic sugar cookies with a soft, chewy center and a lightly golden edge. Topped with creamy frosting and colorful Christmas sprinkles, these bars are perfect for holiday parties, cookie exchanges, family gatherings, school celebrations, and homemade edible gifts.
One of the best things about Christmas Cookie Bars is their simplicity. Instead of baking multiple trays of individual cookies, you prepare one batch of dough, spread it into a baking pan, bake it, and cut it into squares. The result is a beautiful collection of festive treats that look impressive but require very little effort.
Whether you are preparing Christmas desserts for a large family gathering or simply looking for something sweet to enjoy with a cup of hot chocolate, these Christmas Cookie Bars deserve a place in your holiday baking tradition.
Ingredients
This recipe makes approximately 24 cookie bars, depending on how large you cut each piece.
For the Cookie Bars
- 2 1/2 cups all-purpose flour
- 1 teaspoon baking powder
- 1/2 teaspoon salt
- 1 cup unsalted butter, softened to room temperature
- 1 cup granulated sugar
- 1 large egg
- 2 teaspoons pure vanilla extract
- 1/2 teaspoon almond extract, optional
- 1/2 cup red and green Christmas sprinkles
For the Creamy Frosting
- 1/2 cup unsalted butter, softened
- 2 cups powdered sugar
- 2 tablespoons milk or heavy cream
- 1 teaspoon vanilla extract
- A small pinch of salt
- Red and green sprinkles for decorating
You can also use cream cheese frosting, vanilla buttercream, or your favorite homemade frosting if you prefer a different finish.
Instructions
Step 1: Prepare the Baking Pan
Preheat your oven to 350°F (175°C).
Line a 9-by-13-inch baking pan with parchment paper, leaving a little overhang on the sides. This makes it much easier to lift the cooled cookie bars out of the pan before cutting.
Lightly grease the parchment paper if needed.
Step 2: Mix the Dry Ingredients
In a medium bowl, whisk together the all-purpose flour, baking powder, and salt.
Mix thoroughly so the baking powder and salt are evenly distributed throughout the flour. Set the bowl aside while you prepare the butter mixture.
Step 3: Cream the Butter and Sugar
In a large mixing bowl, beat the softened butter and granulated sugar together for approximately 2 to 3 minutes.
Continue mixing until the mixture becomes pale, creamy, and fluffy. This step helps create a tender cookie bar with a pleasant texture.
Add the egg, vanilla extract, and optional almond extract. Beat again until everything is well combined.
Scrape down the sides of the bowl to make sure all the ingredients are incorporated evenly.
Step 4: Combine the Dough
Gradually add the dry ingredients to the butter mixture.
Mix on low speed until a soft dough forms. Avoid overmixing, as excessive mixing can make the cookie bars tougher than desired.
Fold in the red and green Christmas sprinkles using a spatula.
The dough should be thick and easy to spread. If it feels slightly sticky, that is normal for this type of cookie bar.
Step 5: Spread the Dough
Transfer the cookie dough into the prepared baking pan.
Use a spatula or clean hands to press the dough into an even layer, reaching all the corners of the pan.
Try to keep the thickness consistent so the bars bake evenly.
Step 6: Bake the Cookie Bars
Place the pan in the preheated oven and bake for approximately 18 to 24 minutes.
The edges should be lightly golden, while the center should look set but remain soft.
Avoid overbaking. The cookie bars will continue to firm up as they cool, and removing them from the oven at the right moment helps preserve their soft, chewy texture.
Allow the bars to cool completely in the pan before adding the frosting.
Step 7: Prepare the Frosting
In a clean mixing bowl, beat the softened butter until smooth and creamy.
Gradually add the powdered sugar, mixing at low speed to prevent it from scattering.
Add the vanilla extract, a pinch of salt, and 2 tablespoons of milk or heavy cream.
Beat until the frosting becomes fluffy and spreadable. If it is too thick, add a little more milk, one teaspoon at a time. If it is too thin, add a little more powdered sugar.
Step 8: Frost and Decorate
Once the cookie bars have cooled completely, spread the frosting evenly over the surface.
Scatter red and green Christmas sprinkles across the top. You can also add crushed peppermint candies, mini chocolate chips, or festive sugar decorations.
For a more elegant presentation, use a piping bag to create decorative swirls or borders.
Step 9: Cut and Serve
Lift the cookie slab out of the pan using the parchment paper.
Place it on a cutting board and use a sharp knife to cut it into 24 squares or rectangles.
For neat edges, wipe the knife clean between cuts.
Arrange the bars on a festive serving platter and serve them at room temperature.
Methods for Making Perfect Christmas Cookie Bars
The Traditional Baking Method
The traditional method begins with creaming butter and sugar, adding the egg and flavorings, and incorporating the dry ingredients. The dough is pressed into a single baking pan and baked until the edges are lightly golden.
This method produces classic sugar-cookie flavor with a soft center and slightly firmer edges.
The Soft and Chewy Method
For especially soft bars, measure the flour carefully and avoid adding too much. Too much flour can make the finished dessert dry and crumbly.
Do not wait for the entire surface to become deeply golden before removing the pan from the oven. The center should be set, but it should not look dry.
Allow the bars to cool completely before frosting so the buttercream does not melt.
The Extra-Festive Method
For a more colorful holiday dessert, divide the dough into portions and gently fold different sprinkle colors into each portion.
You can also use a thin layer of cream cheese frosting, add a drizzle of melted white chocolate, or finish the bars with crushed candy canes.
Keep in mind that some sprinkles may bleed their colors into the dough, so choose baking sprinkles designed to hold their color when exposed to heat.
The Make-Ahead Method
The cookie bars can be baked a day ahead and stored in an airtight container after cooling. Frost them when convenient, or prepare the frosting separately and refrigerate it until needed.
If making the bars ahead for a holiday party, allow enough time for the frosting to set before stacking or transporting them.
A Brief History of Christmas Cookies
Christmas cookies have a long tradition in European and American holiday celebrations. Historically, spices, sugar, butter, and other baking ingredients became important parts of special-occasion cooking, especially during winter festivities.
As baking traditions developed, families created their own recipes for sugar cookies, gingerbread, shortbread, butter cookies, and other seasonal treats. Decorating cookies became a popular way to involve children and bring creativity into the kitchen.
Cookie bars are a more convenient variation of traditional drop cookies and cutout cookies. Instead of shaping every cookie individually, the dough is baked in one pan and divided into portions after cooling.
This practical approach makes cookie bars particularly appealing during Christmas, when home bakers often prepare several desserts for parties, gifts, and family gatherings.
Although Christmas Cookie Bars do not have one universally established origin, they combine the familiar flavors of traditional sugar cookies with the convenience of modern baking.
Formation and Texture
The success of Christmas Cookie Bars depends on the balance of their ingredients.
Butter provides richness and contributes to the tender texture. Sugar adds sweetness and helps the edges develop a light golden color. Eggs bind the ingredients together, while flour creates the structure needed to hold the bars in shape.
Baking powder provides a little lift, helping prevent the bars from becoming too dense. Vanilla adds warmth and sweetness, while almond extract, if used, provides a subtle bakery-style flavor.
The frosting adds another layer of sweetness and creates a smooth surface for the festive decorations.
When properly prepared, the finished bars should have a tender, buttery center, lightly firm edges, creamy frosting, and colorful sprinkles in every bite.
Delicious Variations
1. Christmas Chocolate Chip Cookie Bars
Fold 3/4 cup of semi-sweet chocolate chips into the dough. Add a handful of red and green sprinkles for a festive combination of chocolate and vanilla flavors.
2. White Chocolate Christmas Cookie Bars
Add 1/2 cup of white chocolate chips to the dough. After frosting, drizzle melted white chocolate over the top for a sweet and elegant finish.
3. Peppermint Christmas Cookie Bars
Add a small amount of peppermint extract to the frosting and sprinkle crushed peppermint candies over the top.
Start with approximately 1/8 teaspoon of peppermint extract, as its flavor can quickly become overpowering.
4. Cream Cheese Frosted Cookie Bars
Replace the buttercream frosting with cream cheese frosting made from softened cream cheese, butter, powdered sugar, and vanilla.
This variation provides a slightly tangy topping that balances the sweetness of the cookie base.
5. Christmas Sugar Cookie Bars with Almond Flavor
Use the optional almond extract in the dough and finish the bars with vanilla frosting and festive sprinkles. This combination gives the dessert a flavor reminiscent of bakery-style sugar cookies.
6. Chocolate-Dipped Christmas Cookie Bars
Cut the cooled, unfrosted cookie slab into bars and dip one end of each piece into melted chocolate. Add Christmas sprinkles before the chocolate sets.
This variation is ideal for dessert platters and homemade holiday gift boxes.
Storage and Freezing
Room-Temperature Storage
Unfrosted cookie bars can be stored in an airtight container at room temperature for approximately 3 to 4 days.
Because frosting ingredients and room conditions vary, refrigerate bars topped with cream cheese frosting or other perishable toppings.
Refrigerator Storage
Frosted bars can generally be refrigerated in an airtight container for up to 5 days, depending on the frosting and ingredient freshness.
For the best texture, allow buttercream-frosted bars to sit at room temperature briefly before serving, provided the frosting can safely remain unrefrigerated.
Freezing Instructions
For longer storage, freeze the unfrosted cookie slab or individual bars in a freezer-safe container, separating layers with parchment paper.
They are best used within approximately 2 to 3 months for quality. Thaw in the refrigerator or at room temperature as appropriate, then add fresh frosting and sprinkles if desired.
Serving Suggestions
Christmas Cookie Bars are versatile enough for almost any holiday occasion.
Serve them with hot chocolate, coffee, tea, or a glass of cold milk. Add them to a Christmas cookie platter alongside gingerbread cookies, shortbread, brownies, and chocolate truffles.
For a dessert buffet, arrange the bars in paper cupcake liners or place them on a decorative tray with other festive treats.
They also make thoughtful homemade gifts. Cut the bars into even portions, place them in a food-safe box, and separate the layers with parchment paper to protect the frosting.
If preparing them for a large gathering, consider cutting smaller squares so guests can sample several desserts without taking a full-sized portion.
Helpful Tips for Success
- Use room-temperature butter and egg for easier mixing.
- Measure flour accurately, preferably by weight or by spooning it into a measuring cup and leveling it off.
- Avoid overmixing once the flour has been added.
- Press the dough evenly into the pan for consistent baking.
- Check the bars early because oven temperatures can vary.
- Let the cookie slab cool completely before frosting.
- Use a sharp knife for clean, even squares.
- Add delicate decorations after baking to preserve their color and appearance.
Frequently Asked Questions
Can I make Christmas Cookie Bars without frosting?
Yes. These bars are delicious on their own, especially if you add extra sprinkles or chocolate chips to the dough. A light dusting of powdered sugar is another simple finishing option.
Why did my cookie bars turn out dry?
Too much flour, overbaking, or overmixing can make the bars dry. Measure the ingredients carefully and remove the pan when the center is just set.
Can I prepare the dough ahead of time?
Yes. Cover and refrigerate the dough for up to 24 hours. Let it soften enough to spread evenly before baking. If the dough has been chilled and is very firm, it may need a little additional time in the oven.
Can I use store-bought frosting?
Absolutely. Store-bought vanilla or cream cheese frosting is a convenient alternative when you want to save time during the busy holiday season.
How do I make the bars look professional?
Spread the frosting evenly, use high-quality festive sprinkles, and cut the bars with a clean knife. For an especially polished presentation, trim the outer edges before cutting the remaining slab into squares.
Conclusion
Christmas Cookie Bars are a simple, festive, and delicious dessert that brings homemade holiday baking to the next level. Their buttery sugar-cookie base, creamy frosting, and cheerful red and green decorations make them a beautiful addition to Christmas celebrations.
The recipe is easy enough for beginner bakers and practical enough for anyone preparing treats for a crowd. You can keep it traditional or customize it with chocolate chips, peppermint, white chocolate, or cream cheese frosting.
Best of all, these bars capture the warmth of the holiday season without requiring hours of individual cookie preparation. Bake a batch for your next Christmas gathering, share a few with neighbors, or wrap them as homemade gifts for the people you love.
For Christmas Cookie Lovers
If you love soft sugar cookies, colorful holiday desserts, and easy recipes that bring everyone together, these Christmas Cookie Bars are a wonderful addition to your seasonal baking collection.
They are perfect for baking with children, sharing at holiday parties, preparing for cookie exchanges, or enjoying at home with a warm drink on a cold winter evening.
The beauty of homemade Christmas treats is not only in their flavor but also in the memories created while making and sharing them. A simple pan of cookie bars can become a family favorite that returns to the holiday table year after year.
Prepare your ingredients, preheat the oven, and enjoy making a batch of these cheerful Christmas Cookie Bars. They are a sweet reminder that some of the best holiday traditions begin in the kitchen.