
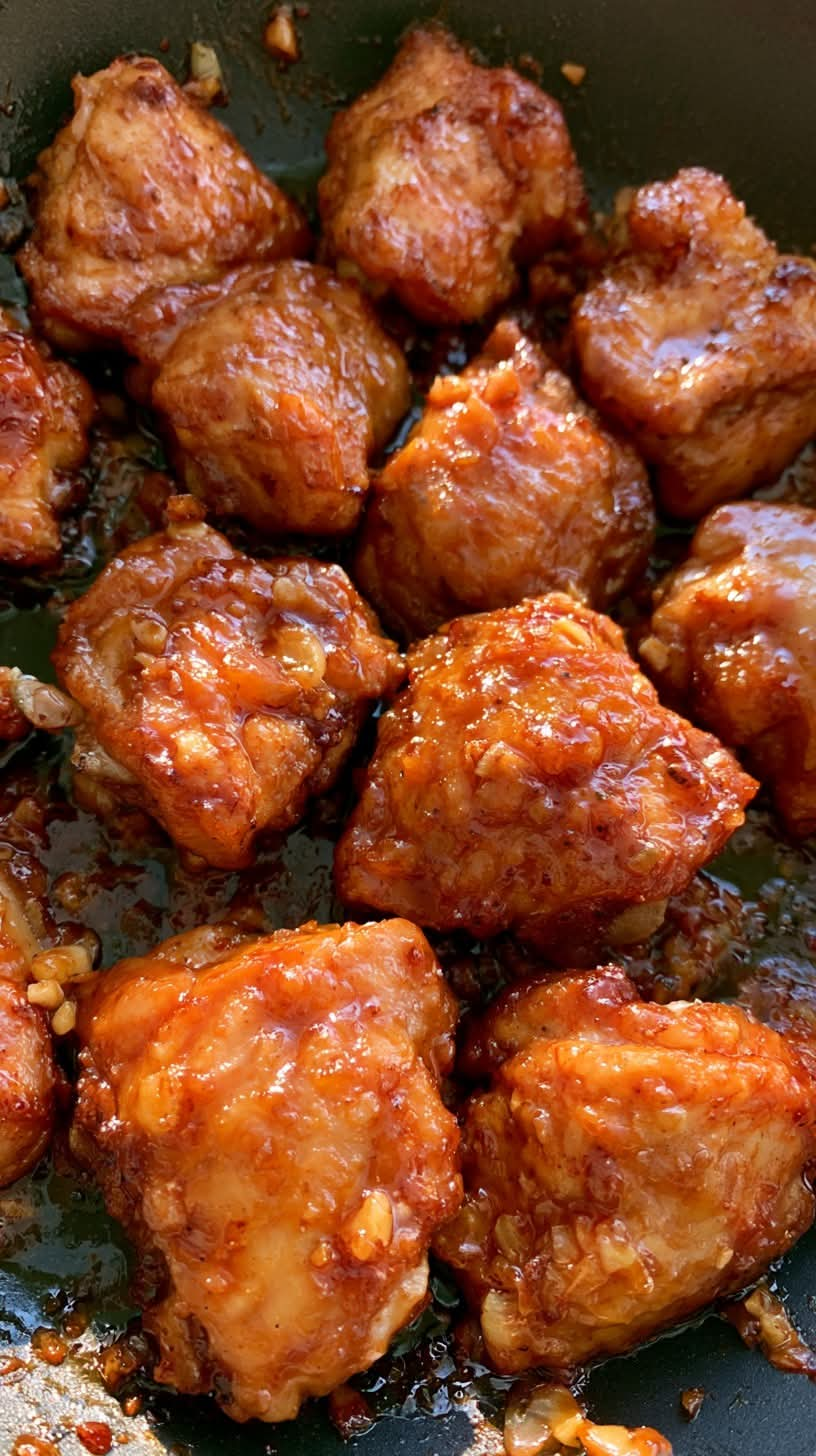
Crispy Honey Garlic Chicken Thighs
Crispy Honey Garlic Chicken Thighs: A Sweet, Savory, and Irresistibly Crispy Dinner
Introduction
There is something truly special about a homemade chicken dinner that combines crispy, golden-brown skin with a rich, sticky, sweet, and savory glaze. These Crispy Honey Garlic Chicken Thighs bring together everything you love about comfort food: juicy chicken, fragrant garlic, buttery honey sauce, and a delicious balance of sweet and tangy flavors.
This recipe transforms simple chicken thighs into a restaurant-quality meal using everyday ingredients. The chicken is first seasoned with a flavorful blend of garlic powder, onion powder, paprika, salt, and black pepper. It is then seared in olive oil until the skin becomes beautifully golden and crisp before being finished in the oven.
The real magic happens when the chicken meets the homemade honey garlic sauce. Honey provides natural sweetness, soy sauce adds a savory depth, fresh garlic creates a wonderful aroma, and butter gives the glaze a smooth, rich finish. A little brown sugar deepens the sweetness, while apple cider vinegar balances everything with a gentle tang.
Finished with sliced green onions and sesame seeds, these chicken thighs look beautiful on the dinner table and taste even better. Serve them with fluffy rice, roasted potatoes, steamed vegetables, or your favorite side dish for a satisfying family meal.
Whether you are preparing a weeknight dinner, hosting friends, or simply looking for a new way to enjoy chicken, this recipe is one worth keeping.
Ingredients
For the Crispy Chicken
- 8 bone-in, skin-on chicken thighs
- 1 tablespoon olive oil
- 1 teaspoon garlic powder
- 1 teaspoon onion powder
- 1 teaspoon paprika
- 1 teaspoon salt, or to taste
- 1/2 teaspoon freshly ground black pepper
For the Honey Garlic Sauce
- 1/3 cup honey
- 1/4 cup low-sodium soy sauce
- 5 cloves garlic, finely minced
- 2 tablespoons unsalted butter
- 1 tablespoon brown sugar
- 1 tablespoon apple cider vinegar
For Thickening the Sauce
- 1 teaspoon cornstarch
- 1 tablespoon cold water
For Garnishing
- 2 green onions, thinly sliced
- 1 teaspoon sesame seeds
Instructions
Step 1: Prepare the Chicken
Preheat your oven to 400°F (200°C).
Remove the chicken thighs from their packaging and pat them thoroughly dry with paper towels. This step is especially important because moisture on the skin prevents it from browning properly.
In a small bowl, combine the garlic powder, onion powder, paprika, salt, and black pepper.
Sprinkle the seasoning mixture evenly over both sides of the chicken thighs. Gently rub the seasonings into the meat, making sure every piece is well coated.
For even better flavor, allow the seasoned chicken to rest for 10–15 minutes while you prepare the sauce ingredients.
Step 2: Sear the Chicken Until Golden and Crispy
Place a large, oven-safe skillet over medium-high heat and add the olive oil.
Once the oil is hot, carefully arrange the chicken thighs in the skillet with the skin facing down. Avoid overcrowding the pan. If necessary, work in batches so that the chicken has enough space to brown properly.
Cook the chicken skin-side down for approximately 5–7 minutes without moving the pieces too much. The skin should become golden brown, crisp, and beautifully rendered.
Turn the thighs over and cook for another 2 minutes.
The chicken does not need to be completely cooked at this stage because it will finish cooking in the oven.
Step 3: Prepare the Honey Garlic Sauce
While the chicken is searing, prepare the sauce.
In a medium bowl, whisk together the honey, low-sodium soy sauce, minced garlic, brown sugar, and apple cider vinegar.
Set the mixture aside.
The honey brings sweetness, the soy sauce provides a savory foundation, the garlic adds aromatic flavor, and the vinegar prevents the sauce from becoming overwhelmingly sweet.
Step 4: Add the Sauce to the Skillet
Reduce the heat slightly if the skillet is extremely hot.
Pour the honey garlic mixture into the skillet around the chicken thighs. Try to keep most of the sauce away from the crispy skin so it remains as crunchy as possible.
Add the butter to the sauce and allow it to melt into the mixture.
As the butter melts, it combines with the honey, garlic, and soy sauce to create a glossy, fragrant coating that will become even more flavorful during baking.
Step 5: Bake the Chicken
Transfer the oven-safe skillet to the preheated oven.
Bake for approximately 20–25 minutes, depending on the size of the chicken thighs and how thoroughly they were cooked during searing.
The sauce will bubble gently around the chicken while the meat becomes tender and absorbs the delicious flavors.
Check the internal temperature by inserting a food thermometer into the thickest part of the meat without touching the bone. The chicken must reach at least 165°F (74°C) for food safety. Chicken thighs can become even more tender when cooked beyond this minimum temperature, provided they do not dry out.
If your chicken pieces are particularly large, they may require additional cooking time.
Step 6: Thicken the Honey Garlic Glaze
Once the chicken is cooked, carefully remove the skillet from the oven and transfer the chicken thighs to a plate. Keep them warm while you finish the sauce.
In a small bowl, combine the cornstarch with one tablespoon of cold water. Stir until the mixture is completely smooth and no lumps remain.
Place the skillet over medium heat on the stovetop. Stir the cornstarch mixture into the sauce and simmer gently for 1–2 minutes, stirring continuously.
The sauce should gradually thicken into a glossy, sticky glaze that coats the back of a spoon.
If the sauce becomes too thick, add a small splash of water. If it is too thin, allow it to simmer for another minute while stirring.
Taste the glaze and adjust it if necessary. A little extra vinegar can balance excessive sweetness, while a small drizzle of honey can add sweetness if desired.
Step 7: Coat and Garnish the Chicken
Return the chicken thighs to the skillet or arrange them on a serving platter.
Spoon the warm honey garlic glaze over the chicken, concentrating the sauce on the meat and sides rather than completely covering the crispy skin.
Sprinkle the sliced green onions and sesame seeds over the top.
The green onions add a fresh, slightly sharp flavor, while the sesame seeds provide a delicate nutty finish.
Serve immediately while the chicken is hot and the glaze is glossy.
Cooking Methods
1. The Skillet-to-Oven Method
This is the recommended method for this recipe because it combines two important cooking techniques.
First, searing the chicken in a hot skillet renders some of the fat beneath the skin and creates a golden, crispy exterior. Second, baking the chicken in the oven allows the meat to cook more evenly while the sauce develops its flavor.
Using an oven-safe skillet also makes the process easier because everything cooks in one pan.
2. The Secret to Extra-Crispy Skin
The most important step for crispy chicken skin is removing excess moisture before cooking.
Always pat the thighs dry with paper towels. Place them skin-side down in a properly heated skillet, and resist the temptation to move them repeatedly.
Do not pour the glaze directly over the skin too early. The moisture and sugar in the sauce can soften the crisp exterior.
For the best contrast, spoon the thickened sauce over the chicken just before serving.
3. The Secret to a Perfect Honey Garlic Glaze
A good honey garlic glaze should be sweet, savory, aromatic, and slightly tangy.
Honey provides the sticky consistency, while soy sauce contributes saltiness and umami. Fresh garlic adds depth, butter creates richness, and apple cider vinegar balances the sweetness.
Cornstarch helps the sauce cling to the chicken instead of running off onto the plate.
Always dissolve the cornstarch in cold water before adding it to the hot sauce. This prevents lumps and helps produce a smooth finish.
4. Adjusting the Flavor
This recipe is easy to customize according to your family’s preferences.
For a sweeter glaze, add a little more honey. For a stronger savory flavor, use a little additional soy sauce, remembering that it also increases the saltiness.
For a spicy version, add red pepper flakes or a small amount of chili sauce.
If you enjoy a stronger garlic flavor, add another clove or two of fresh garlic. For a brighter finish, increase the apple cider vinegar slightly.
Make small adjustments and taste the sauce as you go.
The History and Inspiration Behind Honey Garlic Chicken
Honey and garlic have long been used in cooking across many culinary traditions. Honey adds sweetness and helps create a glossy coating, while garlic contributes a distinctive savory aroma that works well with poultry, vegetables, and meat.
Soy sauce, a traditional fermented seasoning associated with East Asian cuisines, is valued for its salty, deeply savory flavor. Combining soy sauce with honey and garlic has become popular in many modern home kitchens because it produces a delicious balance of sweet and savory tastes.
Honey garlic chicken is not one single historical dish with one universally established origin. Instead, it belongs to a broad family of contemporary recipes inspired by sweet-and-savory sauces used in restaurant cooking and home meals.
This particular version combines those familiar flavors with the Western technique of searing bone-in chicken thighs before roasting them in an oven-safe skillet.
The result is a practical fusion-style dinner that uses accessible ingredients and straightforward cooking methods. It offers the comforting familiarity of roasted chicken alongside the rich, sticky flavor of a honey garlic glaze.
How to Serve Crispy Honey Garlic Chicken Thighs
These chicken thighs are versatile enough to accompany a wide range of side dishes.
With Steamed Rice
Fluffy white or brown rice is an excellent choice because it absorbs the extra honey garlic sauce. Spoon a little glaze over the rice for a flavorful and satisfying meal.
With Roasted Potatoes
Serve the chicken with crispy roasted potatoes seasoned with garlic, black pepper, rosemary, or paprika. Their savory flavor complements the sweet glaze.
With Steamed Vegetables
Broccoli, green beans, carrots, asparagus, or mixed vegetables provide freshness and balance the richness of the chicken.
With Mashed Potatoes
Creamy mashed potatoes make the meal especially comforting. The honey garlic sauce can be spooned over the potatoes as well as the chicken.
With Noodles
Toss cooked noodles with a small amount of the remaining sauce and serve them alongside the chicken. Add sliced green onions and sesame seeds for a complete presentation.
For a Special Dinner
Arrange the chicken on a large serving platter, add roasted vegetables around the edges, and finish with fresh green onions and sesame seeds. Serve the remaining glaze separately so everyone can add as much as they like.
Tips for the Best Results
Choose similarly sized chicken thighs. Pieces of similar size cook more evenly and make it easier to judge when the entire batch is ready.
Use low-sodium soy sauce. Honey and brown sugar provide sweetness, so low-sodium soy sauce helps keep the overall flavor balanced.
Do not burn the garlic. Garlic can become bitter if exposed to excessive heat for too long. Add the sauce after searing the chicken and keep an eye on the skillet.
Protect the crispy skin. Keep most of the sauce around the chicken while it bakes, then spoon the thickened glaze over the meat immediately before serving.
Use a thermometer. Check the thickest part of each thigh to ensure it reaches at least 165°F (74°C).
Allow a short resting period. Let the chicken rest for about 5 minutes before serving. This gives the juices time to settle while you prepare the plates.
Clean the skillet carefully. If the sauce contains browned bits, stir them into the glaze for extra flavor, but remove any blackened or burnt pieces that could make the sauce bitter.
Preparation and Cooking Time
- Preparation time: 15 minutes
- Stovetop searing: 7–9 minutes per batch
- Oven baking: approximately 20–25 minutes
- Sauce finishing: 2–3 minutes
- Resting time: 5 minutes
- Total estimated time: 45–55 minutes, depending on batch size and chicken thickness
- Yield: 4 servings, approximately 2 chicken thighs per person
Storage and Reheating
Allow leftover chicken to cool slightly, then refrigerate it in an airtight container within two hours of cooking.
Store leftovers in the refrigerator for up to 3–4 days. Keep extra sauce with the chicken to help prevent the meat from drying out.
To reheat, place the chicken in an oven-safe dish with a spoonful of sauce. Cover loosely and heat in a 350°F (175°C) oven until the center reaches 165°F (74°C).
For crispier skin, uncover the dish for the final few minutes. You can also reheat the chicken in an air fryer, checking regularly to prevent the glaze from burning.
Avoid repeatedly reheating the same portion. Reheat only what you plan to eat.
Variations to Try
Spicy Honey Garlic Chicken
Add red pepper flakes, cayenne pepper, or a little chili sauce to the glaze. The heat contrasts beautifully with the honey.
Lemon Honey Garlic Chicken
Add a little fresh lemon juice and finely grated lemon zest. This creates a brighter sauce with a refreshing citrus note.
Extra-Garlicky Chicken
Increase the fresh garlic and add a small amount of garlic powder to the sauce. This variation is ideal for garlic lovers.
Honey Garlic Drumsticks
Replace the chicken thighs with drumsticks. Cooking time will vary according to their size, so always check the internal temperature.
Boneless Honey Garlic Chicken Thighs
Use boneless, skinless thighs for a quicker version. Sear them briefly and reduce the oven time as needed, checking the internal temperature carefully.
Honey Garlic Chicken Bowls
Slice the cooked chicken and serve it over rice with broccoli, carrots, cucumber, and green onions. Drizzle with the glaze for a convenient lunch or dinner bowl.
Conclusion
Crispy Honey Garlic Chicken Thighs are proof that a handful of everyday ingredients can create an impressive and memorable meal. The combination of golden chicken skin, tender meat, fresh garlic, buttery honey, and savory soy sauce makes every bite satisfying.
The technique is straightforward: season the chicken well, sear it until golden, finish cooking it in the oven, and thicken the sauce just before serving. Paying attention to moisture, temperature, and the timing of the glaze helps produce the best possible results.
Whether you serve these chicken thighs with rice, potatoes, noodles, or vegetables, they are a wonderful option for family dinners and special occasions alike.
Once you try this sweet-and-savory combination, you may find yourself returning to it whenever you want a comforting homemade meal that feels a little more special than ordinary roasted chicken.
For the Lovers of Crispy Honey Garlic Chicken
If you love chicken with crispy skin, juicy meat, and a glossy homemade sauce, this recipe deserves a place in your regular dinner rotation.
It is perfect for people who enjoy bold garlic flavor, the natural sweetness of honey, and the satisfying contrast between crispy chicken and sticky glaze.
Serve it for a family dinner, share it with friends, or prepare it for a relaxed weekend meal. The ingredients are familiar, the cooking process is manageable, and the finished dish looks beautiful on the table.
For the best experience, serve the chicken immediately after glazing, with the sauce on the side and your favorite vegetables or rice nearby.
This is the kind of meal that brings everyone to the table and makes a simple evening feel special.
Recipe reminder: Keep the chicken skin as dry as possible before searing, cook it to a safe internal temperature, and add the thickened honey garlic glaze at the end to preserve the best texture.
Enjoy these homemade Crispy Honey Garlic Chicken Thighs with your favorite side dishes and make this delicious recipe your own.