
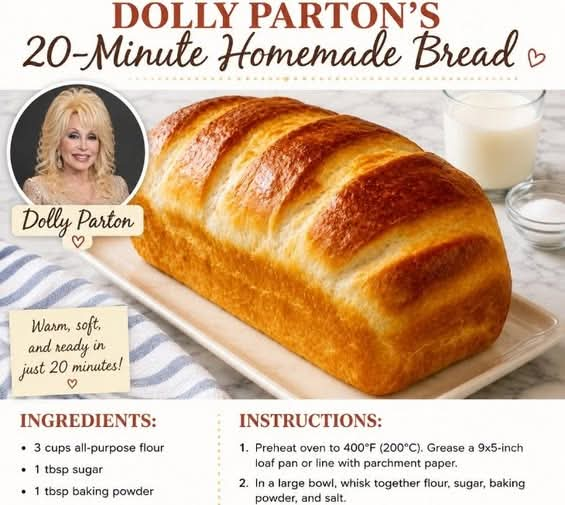
Dolly’s 20-Minute Homemade Bread
Introduction
There is something special about the smell of freshly baked bread filling the kitchen. Warm, comforting, and wonderfully simple, homemade bread is one of those timeless recipes that brings everyone to the table. Dolly’s 20-Minute Homemade Bread is perfect for anyone who loves fresh bread but does not have hours to spend waiting for dough to rise.
This easy bread recipe uses a handful of basic pantry ingredients to create a tender interior with a lightly golden crust. Unlike traditional yeast bread, which requires kneading, proofing, and plenty of patience, this quick bread relies on baking powder to help it rise in the oven.
Whether you are preparing a quick breakfast, serving soup for lunch, or looking for something homemade to accompany a family dinner, this simple bread is a wonderful choice. Serve it warm with butter, drizzle it with honey, or enjoy it alongside your favorite savory dishes.
The recipe is inspired by the traditional spirit of Southern home cooking, where simple ingredients and comforting flavors have always had a special place. Although it is presented as Dolly’s bread, the ingredients are those of a basic quick bread rather than a verified signature recipe from Dolly Parton.
Ingredients
This recipe begins with four simple ingredients. For a softer, richer bread, you can also add a little milk or melted butter.
Main ingredients
- 2 cups (250 g) all-purpose flour
- 1 tablespoon baking powder
- 1 teaspoon salt
- 1 tablespoon granulated sugar
Optional ingredients for a softer texture
- 3/4 cup (180 ml) milk, adding gradually as needed
- 2 tablespoons melted butter
- Extra butter for brushing the finished bread
Important preparation note: The four main ingredients alone will not form a typical bread dough because they contain no liquid. Adding milk or another suitable liquid is necessary to bring the mixture together. The optional milk and butter make this a more practical version of the recipe.
Instructions
Step 1: Prepare the oven
Preheat your oven to 400°F (200°C). Lightly grease a baking sheet or line it with parchment paper.
If you prefer a round loaf, you can also use a small oven-safe baking dish. Preparing the pan before mixing the ingredients makes it easier to transfer the dough without delay.
Step 2: Combine the dry ingredients
Place the flour in a large mixing bowl. Add the baking powder, salt, and granulated sugar.
Whisk everything together until the ingredients are evenly distributed. This step is important because it helps the baking powder work throughout the dough, producing a more consistent rise.
Step 3: Add the liquid
Gradually pour in the milk while stirring with a wooden spoon or spatula. Start with about half the milk and add the remainder little by little until a soft dough forms.
If you are using melted butter, mix it into the milk before adding the liquid to the flour.
The dough should hold together without becoming overly wet or sticky. Depending on your flour and the humidity in your kitchen, you may need slightly more or less milk.
Step 4: Bring the dough together
Turn the dough onto a lightly floured work surface. Gently bring it together with your hands.
Avoid excessive kneading. Unlike yeast bread, this quick bread does not need a long kneading process. Too much handling can make the finished loaf tough rather than tender.
Shape the dough into a small round loaf approximately 1 to 2 inches thick. For faster and more even baking, you can divide it into smaller portions.
Step 5: Prepare the loaf for baking
Place the shaped dough on the prepared baking sheet. If desired, use a sharp knife to make a shallow cross on the top of the loaf.
This traditional-looking cut gives the bread a rustic appearance and can help it open slightly as it bakes.
Step 6: Bake the bread
Place the loaf in the preheated oven and bake for approximately 15 to 20 minutes, depending on its size and thickness.
The outside should become lightly golden, and the center should be fully cooked. Smaller rolls may finish sooner than a single thick loaf.
To check for doneness, insert a toothpick into the center. It should come out without wet dough attached. If the bread is browning too quickly but remains uncooked inside, lower the oven temperature slightly and continue baking.
Step 7: Add the finishing touch
Remove the bread from the oven and allow it to rest for several minutes.
For a softer crust and richer flavor, brush the top with melted butter while the bread is still warm.
Slice and serve immediately, or let it cool further before storing.
Methods for Making the Perfect Quick Bread
The quick-mixing method
The secret to quick bread is keeping the preparation simple. Combine the dry ingredients first, add the liquid gradually, and mix only until the dough comes together.
Overmixing develops too much gluten and can make the bread dense. A gentle touch is the best approach.
The shaping method
A small, relatively flat loaf bakes more quickly than a large, tall loaf. If you want to stay close to the 20-minute preparation-and-baking goal, shape the dough into smaller rounds or rolls.
Remember that the total time depends on your oven, loaf size, and preparation speed. Twenty minutes is an approximate goal, not a guarantee.
The golden-crust method
For a slightly crisp exterior, bake the loaf directly on a prepared baking sheet. For a softer crust, brush the surface with butter immediately after baking and cover it loosely with a clean kitchen towel while it rests.
The tender-crumb method
Measure the flour carefully rather than packing it tightly into the measuring cup. Too much flour can make the dough dry and the finished bread heavy.
Add milk gradually, and stop mixing as soon as the dough becomes cohesive.
The History of Quick Homemade Bread
Bread has been a staple food in households around the world for thousands of years. Traditional yeast breads depend on fermentation to create air pockets and develop their characteristic texture. Although delicious, yeast bread usually requires additional time for the dough to rise.
Quick breads became popular because chemical leavening agents, including baking powder, offered a faster alternative. Instead of waiting for yeast to ferment, home cooks could mix a dough or batter and bake it soon afterward.
In American home cooking, especially in Southern kitchens, simple breads have long accompanied family meals. Biscuits, cornbread, soda breads, and other quick breads have helped families make satisfying food from inexpensive pantry staples.
Dolly Parton is widely associated with Southern culture, hospitality, and traditional comfort food. The name of this recipe evokes that warm, home-style cooking tradition. However, this particular four-ingredient formula should be considered a Dolly-inspired recipe rather than a historically documented personal recipe.
Formation and Texture
The formation of this bread depends on the balance between flour, liquid, and baking powder.
Flour provides the structure. When it comes into contact with liquid, its proteins begin forming gluten, which gives the dough enough strength to hold its shape.
Baking powder releases gas when activated by moisture and heat. Those gas bubbles expand in the oven, helping the bread rise without yeast.
Salt enhances the flavor, while sugar adds a subtle sweetness and encourages browning. Milk contributes moisture and tenderness, and butter adds richness.
Because this bread uses baking powder rather than yeast, it will have a different texture from a traditional sandwich loaf. Expect a relatively close crumb and a texture somewhere between a simple loaf and a soft biscuit-style bread, depending on the amount of liquid and how the dough is handled.
Serving Suggestions
Dolly’s 20-Minute Homemade Bread can be served in many delicious ways.
For breakfast: Serve warm slices with butter, honey, fruit preserves, or homemade jam.
For lunch: Pair the bread with tomato soup, vegetable soup, chicken soup, or a fresh salad.
For dinner: Use it to accompany roasted chicken, grilled meat, vegetables, or a comforting casserole.
For an afternoon snack: Toast a slice and spread it with butter, peanut butter, or your favorite preserve.
For a Southern-inspired meal: Serve it warm with beans, greens, gravy, or a hearty stew.
The bread is best enjoyed fresh from the oven, when the center is tender and the crust is still pleasantly warm.
Variations to Try
Garlic Butter Bread
Mix a little garlic powder into the dry ingredients. After baking, brush the loaf with melted butter mixed with minced garlic and chopped parsley.
Sweet Honey Bread
Replace the granulated sugar with honey, reducing the milk slightly if necessary. This variation pairs especially well with breakfast or afternoon tea.
Herb Bread
Add dried rosemary, thyme, or mixed herbs to the flour mixture. Serve alongside soups, roasted vegetables, or pasta dishes.
Cheesy Quick Bread
Fold in approximately 1/2 cup of grated cheddar cheese before shaping the dough. A little black pepper can add extra flavor.
Mini Bread Rolls
Divide the dough into six to eight small portions and shape them into rounds. Bake until lightly golden and cooked through, checking them earlier than you would a whole loaf.
Storage and Reheating
Allow the bread to cool before storing it in an airtight container.
At room temperature, it is best consumed within one to two days for freshness. For longer storage, wrap it well and freeze it for up to two months.
To reheat, place a slice in a toaster or warm it in an oven at 300°F (150°C) for several minutes. A small amount of butter can help restore moisture.
Because this is a quick bread without preservatives, its texture is best on the day it is baked.
Common Mistakes to Avoid
Adding too much flour: Excess flour can make the bread dry and heavy. Measure carefully and add the liquid gradually.
Overmixing the dough: Mix only until the ingredients come together. Excessive handling can result in a tougher texture.
Using expired baking powder: Baking powder loses its effectiveness over time, which can prevent the bread from rising properly.
Making the loaf too thick: A thick loaf may brown outside before the center is fully baked. Keep the loaf relatively small or divide the dough into rolls.
Slicing too early: Let the bread rest for several minutes after baking. This allows the interior to settle and makes slicing easier.
Conclusion
Dolly’s 20-Minute Homemade Bread is a lovely option for anyone who enjoys simple, comforting food without the long waiting time associated with traditional yeast bread. With flour, baking powder, salt, sugar, and enough milk to bring everything together, you can prepare a rustic homemade loaf using everyday kitchen ingredients.
The best part is its versatility. You can keep it simple with butter, give it a sweet finish with honey, or add herbs and cheese to complement a savory meal.
Although the name celebrates the warmth of Southern home cooking rather than a verified Dolly Parton original, the recipe captures the spirit of easy, welcoming food made to be shared.
Bake a batch when you need something warm and homemade, serve it to family and friends, and enjoy the pleasure of fresh bread straight from your own oven.
For the Lovers of Homemade Bread
This recipe is for everyone who loves the comforting smell of bread baking, the taste of a warm slice spread with butter, and the satisfaction of preparing something from scratch.
It is for busy parents who need a quick addition to dinner, beginners learning their way around the kitchen, and home cooks who appreciate recipes that do not require complicated techniques or expensive ingredients.
Homemade bread does not have to be difficult to be delicious. Sometimes, the simplest recipes are the ones that become part of our regular family routine.
If you love quick, rustic bread with a tender center and a golden crust, this easy recipe is worth keeping in your kitchen collection.
Serve it warm, share it generously, and enjoy every homemade bite.