
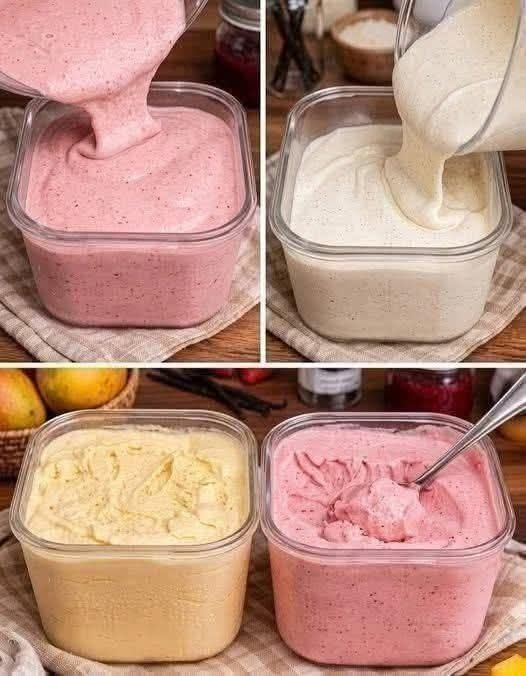
Easy Homemade Low-Carb Vanilla Ice Cream
Introduction
There is something especially satisfying about making ice cream at home. You can control the ingredients, adjust the sweetness to your taste, and create a creamy frozen dessert without needing an ice-cream shop or a long list of complicated ingredients.
This easy low-carb vanilla ice cream is rich, smooth, creamy, and refreshing. It is made without traditional granulated sugar and can be prepared with a low-carb sweetener of your choice. The combination of heavy cream, unsweetened milk, vanilla, and a little sweetener creates a classic homemade dessert with a luxurious texture.
It is important to remember that “low-carb” does not necessarily mean “zero-carb.” Dairy products can naturally contain carbohydrates, so check the nutrition labels of the ingredients you use if you are carefully tracking carbohydrates.
Ingredients
Main Ingredients
- 2 cups heavy whipping cream
- 1 cup unsweetened almond milk
- 1/3 cup powdered erythritol or another granulated low-carb sweetener
- 2 teaspoons pure vanilla extract
- 1/8 teaspoon salt
- 2 large egg yolks, optional, for a richer custard-style texture
Optional Additions
You can customize the basic vanilla base with:
- Unsweetened cocoa powder for chocolate ice cream
- Chopped walnuts or pecans
- Unsweetened shredded coconut
- A small amount of natural peanut or almond butter
- Sugar-free chocolate chips
- Cinnamon
- Instant espresso powder for coffee flavor
Instructions
Step 1: Prepare the Base
Pour the heavy whipping cream and unsweetened almond milk into a medium saucepan.
Add the sweetener and salt.
Warm the mixture over low to medium heat, stirring regularly. Do not allow it to boil.
The purpose of heating is simply to dissolve the sweetener and combine the ingredients smoothly.
Step 2: Add Vanilla
Remove the mixture from the heat and stir in the vanilla extract.
Taste the mixture carefully and adjust the sweetness if necessary.
Remember that freezing reduces the perception of sweetness, so the unfrozen mixture may taste slightly sweeter than the finished ice cream.
Step 3: Optional Custard Method
For an especially rich and creamy ice cream, whisk the egg yolks in a separate bowl.
Slowly add some of the warm cream mixture to the yolks while whisking continuously. This gradually raises the temperature of the eggs without scrambling them.
Return the mixture to the saucepan and cook over low heat, stirring constantly, until it thickens slightly.
Do not boil the mixture.
Allow the custard to cool before proceeding.
Step 4: Chill the Mixture
Transfer the ice cream base to a covered container.
Refrigerate until thoroughly chilled, preferably for several hours.
Starting with a cold mixture helps produce a smoother finished texture.
Step 5: Churn
If you have an ice-cream maker, pour the chilled mixture into the machine and churn according to the manufacturer’s instructions.
Continue until the mixture becomes thick, creamy, and resembles soft-serve ice cream.
Step 6: Freeze
Transfer the churned ice cream to a freezer-safe container.
Smooth the surface and cover tightly.
Freeze for approximately 2 to 4 hours, depending on the texture you prefer.
If the ice cream becomes very firm, allow it to sit at room temperature for several minutes before scooping.
No Ice-Cream Maker Method
You can also make this recipe without an ice-cream machine.
Pour the chilled mixture into a shallow freezer-safe container.
Freeze for approximately 30 to 45 minutes.
Remove it and stir vigorously, breaking up any ice crystals.
Return it to the freezer and repeat the process every 30 to 45 minutes several times.
This helps create a smoother texture than simply freezing the mixture without stirring.
For an even easier method, you can freeze the mixture in small portions and blend the frozen portions in a suitable high-powered blender or food processor until creamy. Work carefully and follow your appliance’s instructions.
Method
The secret to good homemade ice cream is balancing fat, liquid, sweetness, and temperature.
Heavy cream supplies most of the richness and creamy mouthfeel. Unsweetened almond milk lightens the mixture while keeping the flavor relatively neutral.
The sweetener provides sweetness without using ordinary table sugar. Different sweeteners behave differently when frozen, so choose one designed for cold desserts if possible.
Vanilla provides the familiar flavor associated with classic ice cream, while a small amount of salt enhances the overall taste.
Chilling before freezing is another important step. A colder base generally freezes more efficiently and can help reduce the formation of large ice crystals.
Formation and Texture
The finished ice cream should be smooth, creamy, and scoopable after a short period of softening.
If your ice cream becomes unusually hard after freezing, this can happen with homemade recipes that contain less sugar than conventional ice cream. Commercial ice cream often contains ingredients specifically designed to control freezing and maintain a softer texture.
Allowing the container to stand at room temperature for several minutes before serving can make scooping easier.
For an exceptionally creamy result, avoid repeatedly allowing the entire container to melt and refreeze.
A Brief History of Ice Cream
Frozen desserts have a long history and appeared in different forms across several ancient cultures. Early versions were very different from the creamy ice cream we know today and often involved snow or ice combined with sweetened flavorings.
Over centuries, techniques for freezing and enriching desserts developed. Milk, cream, eggs, sugar, fruits, nuts, and spices became common ingredients.
Ice cream eventually became increasingly popular in Europe and later in North America, where improvements in freezing equipment made it easier to produce and serve.
Modern home ice-cream makers have simplified the process considerably, allowing people to create customized frozen desserts in their own kitchens.
Today’s low-carb versions are another adaptation, replacing traditional sugar with alternative sweeteners and adjusting the ingredients to suit different dietary preferences.
Low-Carb Flavor Variations
Chocolate
Add 2 to 3 tablespoons of unsweetened cocoa powder to the base.
Coffee
Add 1 to 2 teaspoons of instant espresso powder for a rich coffee flavor.
Cinnamon Vanilla
Add 1/2 teaspoon of ground cinnamon together with the vanilla.
Walnut
Fold in finely chopped toasted walnuts after churning.
Peanut Butter
Add a small amount of unsweetened peanut butter for a creamy nutty variation.
Important Nutrition Note
Calling this ice cream “zero carb” would be misleading. Heavy cream, almond milk, and other dairy or plant-based ingredients can contain carbohydrates, even when they contain no added sugar.
If you are following a ketogenic or medically prescribed carbohydrate-restricted diet, check the nutrition label of every ingredient and calculate the carbohydrates for the exact brands and quantities you use.
Also, “drying out” usually refers to losing water rather than losing body fat. Intentionally trying to become dehydrated is not a safe weight-loss strategy.
Storage
Keep the ice cream tightly covered in the freezer.
For the best texture and flavor, use it within several days to a couple of weeks rather than storing it indefinitely.
Place a piece of parchment paper directly on the surface before sealing the container if you want to reduce exposure to air and ice crystals.
Conclusion
Homemade low-carb vanilla ice cream is a simple way to enjoy a creamy frozen dessert while having greater control over the ingredients.
The basic combination of cream, unsweetened almond milk, vanilla, and a suitable low-carb sweetener creates a versatile foundation that can be transformed into chocolate, coffee, cinnamon, walnut, or peanut-butter ice cream.
The most important part is not claiming that you can eat unlimited amounts or that the dessert will “dry out” your body. Portion size, total carbohydrate intake, and the ingredients used still matter.
For Ice Cream Lovers
For anyone who loves creamy homemade desserts, this recipe provides a convenient base that can be adapted again and again.
Serve it in a small bowl with toasted walnuts, unsweetened coconut, cocoa powder, or a few berries for a simple finishing touch.
Once you master the basic method, you can create your own freezer-friendly flavors and adjust the sweetness and texture to your preference.