
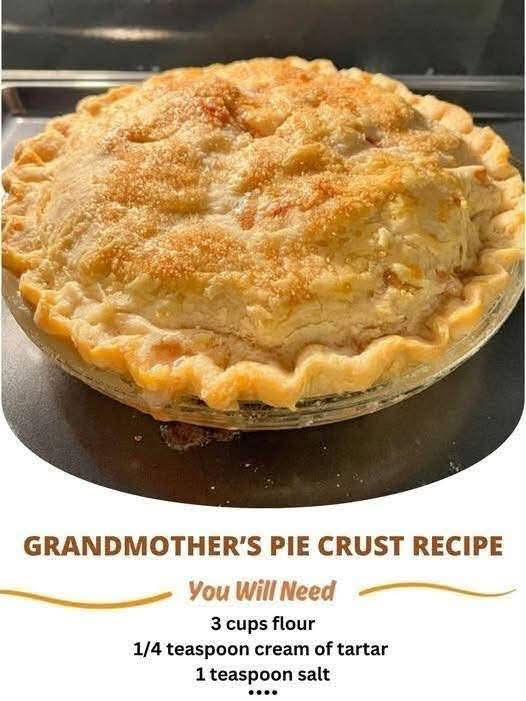
Grandmother’s Old-Fashioned Pie Crust Recipe
Introduction
There is something special about a homemade pie crust made the old-fashioned way. Before convenient refrigerated crusts became common, grandmothers and home cooks relied on a handful of simple ingredients, a light touch, and a little patience to create pastry that was tender, flaky, buttery, and perfectly golden.
This Grandmother’s Pie Crust is the kind of recipe that belongs in a family recipe box. It is simple enough for an everyday fruit pie but special enough for Thanksgiving, Christmas, birthdays, and Sunday dinners. The secret is not complicated: keep the butter cold, use ice water sparingly, and avoid overworking the dough.
The finished crust has a delicate crispness on the outside and beautiful layers throughout. It works wonderfully with apple, peach, cherry, blueberry, pumpkin, pecan, chocolate, and cream pies.
Ingredients
For the Pie Crust
- 1 1/2 cups all-purpose flour
- 1 teaspoon salt
- 1 cup unsalted butter, very cold and cut into small cubes
- 6 to 8 tablespoons ice water
Optional Ingredient
- 1 tablespoon granulated sugar
Sugar is especially nice when making a crust for sweet fruit pies. For savory pies, simply leave it out.
Instructions
1. Prepare the Ingredients
Before beginning, measure everything carefully. Cut the butter into small cubes and place it in the refrigerator or freezer for several minutes if your kitchen is warm.
Fill a glass with ice and cold water. You will use only the cold water, not the ice itself.
Keeping the butter and water cold is one of the most important parts of making a flaky pie crust.
2. Combine the Dry Ingredients
Place the flour and salt in a large mixing bowl. If you are making a sweet pie, add the sugar as well.
Whisk the ingredients together until evenly combined.
3. Cut in the Butter
Add the cold butter cubes to the flour mixture.
Using a pastry cutter, two knives, or your fingertips, work the butter into the flour until the mixture resembles coarse crumbs.
Do not completely blend the butter into the flour. Small pieces of butter should remain visible. Some pieces can be about the size of small peas.
Those pieces of butter are what help create flaky layers in the finished crust.
4. Add the Ice Water
Begin by adding 6 tablespoons of ice water, one tablespoon at a time.
Gently toss the mixture with a fork after each addition.
The dough should begin to come together when pressed between your fingers. If it still looks very dry and crumbly, add another tablespoon of ice water.
Continue adding water one tablespoon at a time only until the dough holds together.
Do not add all 8 tablespoons automatically. Depending on the flour, humidity, and butter, you may need less.
5. Form the Dough
Turn the dough onto a lightly floured work surface.
Gently gather it together with your hands. Do not knead it like bread dough.
Divide the dough into two portions if you are making a double-crust pie. Make each portion into a flat disk.
Wrap the disks tightly in plastic wrap or place them in a covered container.
6. Chill the Dough
Refrigerate the dough for at least 30 minutes.
For even better flavor and texture, you can refrigerate it for 1 to 2 hours.
Chilling allows the butter to firm up again and gives the flour time to absorb the water. This makes the dough easier to roll and helps prevent the crust from shrinking during baking.
Method for Rolling the Crust
Remove one disk of dough from the refrigerator and allow it to sit for a few minutes if it is extremely firm.
Lightly flour your work surface and rolling pin.
Place the dough in the center and gently roll from the center outward.
Turn the dough a quarter turn after every few rolls. This helps maintain an even shape and prevents the dough from sticking.
Continue rolling until the crust is approximately 1/8 inch thick and large enough to fit your pie dish with some extra dough around the edges.
Carefully transfer the crust to the pie dish. You can gently fold it in half and unfold it over the dish, or roll it loosely around the rolling pin and unroll it over the pan.
Do not stretch the dough to make it fit. Stretching can cause the crust to shrink while baking.
Forming the Pie Crust
Gently press the dough into the bottom and sides of the pie dish.
Leave approximately 1 inch of dough hanging over the edge.
Trim away excess dough, then fold the remaining edge underneath itself to create a thicker rim.
Crimp the edge using your fingers or the tines of a fork.
For a double-crust pie, add your prepared filling and place the second rolled crust over the top.
Trim the edges, seal the two crusts together, and create several small vents in the top crust so steam can escape.
Method for a Pre-Baked Crust
Some pies require the crust to be baked before the filling is added.
For a partially baked crust, place the shaped crust in the refrigerator for about 20 to 30 minutes.
Prick the bottom gently with a fork, or line the crust with parchment paper and fill it with pie weights or dried beans.
Bake according to the needs of your particular pie recipe, removing the weights during the final portion of baking.
For a fully baked crust, continue baking until the pastry is golden brown and completely cooked.
Allow the crust to cool before adding a chilled or no-bake filling.
The Secret to a Flaky Crust
The most important technique is keeping the butter cold.
When the cold butter melts in the oven, it releases moisture that creates steam. That steam helps separate the layers of dough, producing the flaky texture everyone loves.
Another important rule is not to overwork the dough.
The more you mix and knead the dough, the more gluten develops. Too much gluten can make a pie crust tough instead of tender.
Work quickly and gently, especially if your kitchen is warm.
Common Mistakes to Avoid
Using Warm Butter
Soft or melted butter can blend too completely into the flour. This may produce a crust that is dense instead of flaky.
Adding Too Much Water
Water helps the dough come together, but too much can make the pastry tough.
Always begin with a smaller amount and add more only when necessary.
Overmixing
Once the dough comes together, stop working it.
A few dry crumbs are better than a heavily kneaded dough.
Skipping the Chilling Step
Chilling is not just for convenience. It firms the butter and relaxes the dough, making it easier to roll and helping the crust hold its shape.
Stretching the Dough
When placing the crust into the pie dish, gently ease it into place rather than pulling it.
A stretched crust often shrinks during baking.
History of Homemade Pie Crust
Pie has a long history in home cooking, with pastry shells appearing in various forms throughout European culinary traditions. As pie-making became part of American home cooking, families developed their own methods for making pastry using ingredients that were readily available.
For generations, recipes were often passed from mother to daughter, grandmother to grandchild, or neighbor to neighbor. Many of these recipes were never written down with precise measurements.
Instead, cooks learned by watching someone make the dough and by feeling when it had reached the right consistency.
That tradition is part of what makes an old-fashioned pie crust so memorable. The recipe may be simple, but the technique carries generations of kitchen knowledge.
Formation and Texture
The dough begins with flour and salt, which provide the structure and seasoning.
Cold butter is then worked into the flour, leaving small pieces distributed throughout the mixture. When water is added, the flour hydrates and allows the dough to come together.
During baking, the butter melts and produces steam. The flour sets around those pockets, creating layers and giving the crust its characteristic flaky texture.
The result should be tender enough to cut easily with a fork while still sturdy enough to hold a generous pie filling.
How to Use This Crust
This versatile pastry can be used for many different pies, including:
- Classic apple pie
- Peach pie
- Cherry pie
- Blueberry pie
- Strawberry pie
- Blackberry pie
- Pumpkin pie
- Pecan pie
- Sweet potato pie
- Lemon pie
- Chocolate cream pie
- Coconut cream pie
- Banana cream pie
- Chicken pot pie
- Vegetable pot pie
For sweet pies, the optional tablespoon of sugar adds a subtle sweetness and encourages a beautiful golden-brown crust.
Storage
Unbaked pie dough can be refrigerated for several days when properly wrapped.
For longer storage, the dough can be frozen. Wrap each dough disk tightly and place it in a freezer-safe bag or container.
When ready to use, thaw the dough in the refrigerator rather than leaving it at room temperature for a long period.
A baked crust can also be stored once completely cooled. Keep it covered to protect it from moisture and odors.
Tips for the Best Grandmother’s Pie Crust
Use very cold butter.
Keep your water ice cold.
Measure the flour accurately.
Add water gradually.
Leave small pieces of butter in the dough.
Do not knead the pastry.
Chill the dough before rolling.
Roll gently from the center outward.
Avoid stretching the crust into the pie plate.
For a golden finish, brush the top crust lightly with an egg wash before baking.
For extra flavor, you can add a small amount of sugar to the dough when making dessert pies.
A Traditional Homemade Method
The beauty of this recipe is that it does not require complicated equipment.
A large bowl, pastry cutter, rolling pin, and pie plate are enough.
In many traditional kitchens, the butter was worked into the flour by hand. The dough was then rolled on a floured wooden counter and carefully placed into a simple pie plate.
The process was practical and straightforward, but the results were often extraordinary.
The key was knowing when to stop mixing. Experienced home cooks could recognize the perfect dough simply by its appearance and feel.
Conclusion
Grandmother’s Pie Crust is proof that some of the best recipes do not need a long list of ingredients.
Flour, salt, butter, and ice water are all you need to create a tender and flaky pastry that can become the foundation for countless homemade pies.
The real magic comes from the method: cold butter, cold water, gentle handling, and enough resting time.
Once you learn these simple techniques, homemade pie crust becomes much less intimidating. Instead of reaching for a prepared crust, you can create one from scratch whenever the craving for a warm, comforting pie arrives.
For the Pie Lovers
This is the kind of recipe pie lovers keep coming back to because it is dependable, versatile, and wonderfully traditional.
There is something deeply comforting about cutting into a homemade pie and seeing those delicate layers of golden pastry surrounding a warm fruit filling. Whether it is an apple pie cooling on the kitchen counter, a pecan pie prepared for the holidays, or a creamy pie served after Sunday dinner, a good crust makes the entire dessert feel homemade.
The recipe can also become your own family tradition. Once you master the basic dough, you can adjust it for different pies, experiment with sweet and savory fillings, and eventually develop your own version to pass down to the next generation.
Final Method Summary
- Combine flour, salt, and optional sugar.
- Cut very cold butter into the flour mixture.
- Add ice water gradually.
- Stop mixing as soon as the dough comes together.
- Divide and shape the dough into disks.
- Chill for at least 30 minutes.
- Roll the dough gently on a lightly floured surface.
- Place it into the pie dish without stretching.
- Trim and crimp the edges.
- Fill and bake according to the specific pie recipe.
- Allow the finished pie to rest before slicing.
A little patience and careful handling are all it takes to make a beautiful old-fashioned pie crust that tastes like it came straight from grandmother’s kitchen.