
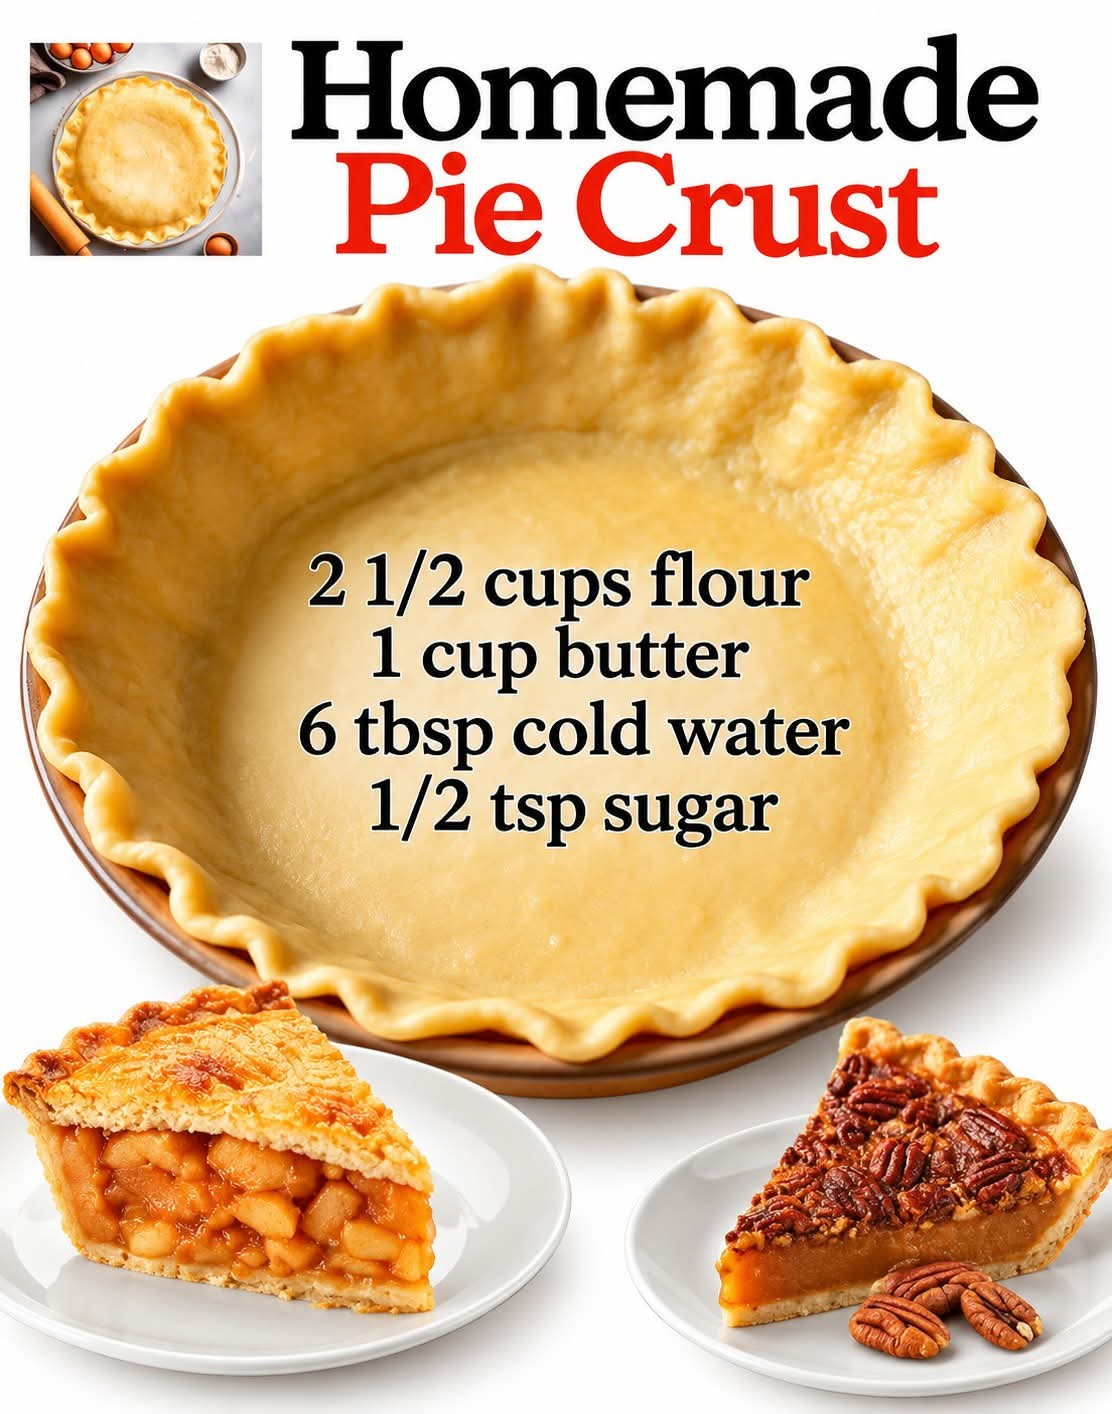
Homemade Butter Pie Crust: The Perfect Flaky Crust for Every Pie
Introduction
There is something special about homemade pie crust during baking season. The smell of butter, the feel of freshly prepared dough, and the excitement of filling a pie with your favorite ingredients make baking a wonderful experience. Whether you are preparing an apple pie for autumn, a pumpkin pie for Thanksgiving, a sweet pecan pie for the holidays, or a savory pie for a family dinner, a homemade butter pie crust is the perfect place to begin.
This classic homemade pie crust recipe is simple, reliable, and made with just four basic ingredients: flour, butter, cold water, and a little sugar. The secret to achieving a tender, flaky crust is keeping the butter cold and handling the dough gently.
Best of all, this recipe makes two 9-inch pie crusts, giving you enough dough for two single-crust pies or one double-crust pie with a top and bottom layer. Once you learn how to make your own pie crust, you may never want to return to store-bought pastry again.
Preparation Time and Yield
- Preparation time: 20 minutes
- Chilling time: 30–60 minutes
- Baking time: Depends on the pie recipe
- Yield: Two 9-inch pie crusts
- Difficulty: Easy
- Best for: Fruit pies, pumpkin pies, pecan pies, cream pies, and savory pies
Ingredients
You will need the following ingredients to prepare two homemade 9-inch pie crusts.
Main Ingredients
- 2½ cups all-purpose flour: Provides the structure for the pastry. Measure the flour accurately to prevent a dry, tough dough.
- 1 cup unsalted butter: Use cold or frozen butter for the best flaky texture. Cut it into manageable pieces before grating if necessary.
- 6 tablespoons cold water: Helps bring the flour and butter together into a workable dough. Add it gradually because the amount needed can vary slightly.
- ½ teaspoon granulated sugar: Adds a subtle sweetness and helps the crust develop a delicate golden color.
Optional Ingredients
- ¼ teaspoon salt, especially if using unsalted butter.
- 1 teaspoon lemon juice or vinegar, if desired, although it is not necessary for this basic recipe.
- A little extra flour for dusting the work surface and rolling pin.
Equipment Needed
- Large mixing bowl
- Box grater
- Measuring cups and spoons
- Fork or pastry cutter
- Rolling pin
- Plastic wrap or reusable food wrap
- Two 9-inch pie plates
- Parchment paper and pie weights, if blind-baking
Instructions
Step 1: Prepare the Butter
Place the butter in the freezer until it becomes very firm but can still be grated. Depending on the size of the butter block, this may take approximately 20–30 minutes.
Grate the cold butter using the large holes of a box grater. Keep the grated butter cold while preparing the remaining ingredients.
Grated butter distributes evenly throughout the flour and creates small pockets of fat that help produce a light, flaky crust.
Step 2: Combine the Dry Ingredients
Place the flour in a large mixing bowl. Add the sugar and optional salt, then stir thoroughly to distribute the ingredients evenly.
A good mixture at this stage ensures that every part of the pastry has a balanced flavor.
Step 3: Add the Grated Butter
Add the grated butter to the flour mixture. Toss gently with a fork until the butter is coated with flour.
Avoid squeezing or kneading the mixture too much. Small pieces of butter should remain visible throughout the flour. These pieces are essential for creating a flaky texture.
If the butter begins to soften, place the bowl in the refrigerator for a few minutes before continuing.
Step 4: Add the Cold Water
Add the six tablespoons of cold water gradually, mixing gently with a fork after each addition.
The dough should begin to hold together when pressed between your fingers. If it remains too crumbly, add another teaspoon of cold water at a time, only as needed.
Do not pour in extra water all at once. Too much moisture can make the pastry sticky and tough.
Step 5: Form the Dough
Gather the mixture gently with your hands and press it together into a rough ball. If the dough is large enough to be difficult to handle, divide it into two equal portions.
Shape each portion into a flat disc rather than a thick ball. Flat discs chill evenly and are easier to roll later.
Wrap each disc securely and refrigerate for at least 30 minutes, or up to two days.
Step 6: Prepare Your Work Surface
Lightly flour a clean countertop or pastry board. Remove one chilled disc from the refrigerator and allow it to rest for a few minutes if it is too firm to roll.
Keep the second disc refrigerated until you are ready to use it.
Place the dough on the floured surface and sprinkle a small amount of flour over the top.
Step 7: Roll Out the Dough
Using a rolling pin, roll the dough from the center outward, turning it occasionally to maintain an even shape.
Continue rolling until the dough forms a circle approximately 12 inches in diameter and about ⅛ inch thick. This provides enough dough to cover the bottom and sides of a 9-inch pie plate.
If the dough cracks along the edges, gently press the cracks together with your fingers.
If it becomes sticky or too soft, return it to the refrigerator for a few minutes.
Step 8: Transfer the Dough to the Pie Plate
Carefully fold the rolled dough in half or loosely roll it around the rolling pin. Transfer it to the pie plate and gently unfold it.
Press the dough into the bottom and sides of the plate without stretching it. Stretching the dough can cause it to shrink during baking.
Trim excess dough, leaving approximately ½ inch beyond the edge. Fold the extra dough underneath itself and crimp the edges with your fingers or press them with a fork.
Step 9: Chill Before Filling
For the best results, refrigerate the shaped pie crust for another 15–30 minutes before filling or baking.
This extra chilling time helps the butter firm up again and reduces the likelihood of the crust shrinking in the oven.
Repeat the rolling and shaping process with the second disc.
Step 10: Add Your Favorite Filling
Your homemade pie crust is now ready for your favorite recipe.
Fill it with apples, pumpkin custard, pecans, cherries, blueberries, lemon filling, or another preferred filling.
For a double-crust pie, use one disc for the bottom and the second for the top. Seal the edges together, trim away excess dough, and cut a few vents in the top crust to allow steam to escape.
Follow the baking temperature and time specified by your chosen pie recipe.
Methods for Making the Perfect Pie Crust
Method 1: The Grated Butter Method
This is the method used in the recipe. Grating frozen butter makes it easier to distribute throughout the flour and helps keep the butter cold.
It is particularly useful for beginners who want a simple way to prepare flaky pastry without specialized equipment.
Method 2: The Pastry Cutter Method
Instead of grating the butter, cut cold butter into small cubes and add it to the flour. Use a pastry cutter or two forks to work the butter into the flour until the mixture resembles coarse crumbs with some pea-sized pieces remaining.
Add the cold water gradually and bring the dough together gently.
This traditional method is excellent for creating a tender, flaky pie crust.
Method 3: The Food Processor Method
Place the flour, sugar, and optional salt in a food processor. Add the cold butter and pulse briefly until the mixture resembles coarse crumbs.
Add the cold water one tablespoon at a time, pulsing just until the dough begins to clump together.
Remove the dough, shape it into discs, wrap, and chill. Avoid processing for too long because excessive mixing can make the crust tough.
Method 4: The Double-Crust Pie Method
To prepare a double-crust pie, place one rolled disc into the pie plate and add your chosen filling. Roll out the second disc and lay it over the filling.
Trim the edges, press the top and bottom crusts together, and crimp to seal. Cut several small slits in the top to release steam.
Brush with an egg wash if desired for a glossy, golden finish. Bake according to your filling recipe.
Method 5: The Blind-Baking Method
Blind-baking means baking the pie crust before adding its filling. It is especially useful for cream pies, custard pies, and some quiches.
Place the shaped crust in the refrigerator to chill thoroughly. Line it with parchment paper and fill it with pie weights or dried beans.
Bake according to your pie recipe’s instructions. Remove the parchment and weights near the end of baking if the crust needs to dry or brown further.
Allow the crust to cool as directed before adding a filling that requires a pre-baked shell.
The History of Homemade Pie Crust
Pie has a long history, with early pastry dishes appearing in ancient civilizations. Early pastry was often made primarily to contain and protect fillings rather than to serve as the delicate, buttery crust enjoyed today.
During the medieval period in Europe, pastry cases were commonly used to hold meat, fish, and other fillings. Some of these early crusts were thick and firm, designed to withstand long cooking times.
As baking traditions developed, pastry techniques improved. Butter and other fats became important ingredients in many European pastry recipes, helping cooks create more tender and flavorful crusts.
Pie-making traditions later spread and evolved across North America and other parts of the world. Fruit pies, pumpkin pies, pecan pies, and savory pot pies became familiar dishes for family meals and seasonal celebrations.
Today, homemade pie crust remains an important part of traditional baking. Although ready-made crusts are convenient, many home bakers still prefer making pastry from scratch because they can control the ingredients, texture, thickness, and flavor.
This simple butter pie crust follows that same tradition: a handful of everyday ingredients transformed into a versatile base for countless homemade pies.
Understanding the Formation of a Flaky Pie Crust
The texture of a good pie crust depends on how the ingredients interact.
The Role of Flour
Flour supplies the structure. When flour is mixed with water, gluten-forming proteins begin to develop. A small amount of gluten helps the dough hold together, but excessive mixing can make the crust chewy rather than tender.
The Role of Butter
Butter provides flavor and tenderness. When cold pieces of butter remain distributed throughout the dough, they create layers and pockets as the pastry bakes.
The water naturally present in butter turns to steam during baking, helping separate those layers and contributing to a flaky texture.
The Role of Cold Water
Cold water helps the flour particles come together while keeping the butter firm. Using only as much water as necessary helps prevent a sticky dough and limits excessive gluten development.
The Role of Chilling
Chilling firms the butter and allows the flour to hydrate. It also relaxes the gluten that develops during mixing and rolling.
These effects make the dough easier to handle and help the crust maintain its shape in the oven.
The Role of Heat
During baking, the butter melts, moisture produces steam, and the pastry structure sets. The crust gradually develops its golden color, crisp edges, and rich buttery flavor.
The result is a crust that can be tender and crisp at the same time.
Tips for the Best Homemade Pie Crust
- Keep everything cold. Cold butter and cold water are the foundation of a flaky crust.
- Measure the flour carefully. Too much flour can make the dough dry and difficult to roll.
- Add water gradually. The dough should hold together without becoming wet or sticky.
- Do not overwork the dough. Mix only until the ingredients come together.
- Leave small pieces of butter visible. They help create the flaky texture.
- Chill before rolling. Cold dough is easier to handle and less likely to tear.
- Avoid stretching the pastry. Gently fit it into the pie plate to help prevent shrinkage.
- Use minimal flour when rolling. Too much extra flour can make the crust dry.
- Refrigerate scraps before rerolling. This helps keep the butter firm.
- Follow the filling recipe for baking. Different pies require different temperatures and baking times.
Common Pie Crust Problems and Solutions
Why Is My Dough Too Crumbly?
The flour may have absorbed more moisture than expected, or the dough may need a little more water. Add cold water one teaspoon at a time and press the dough gently until it holds together.
Why Is My Dough Sticky?
It may be too warm or contain too much water. Wrap it and refrigerate it for 15–20 minutes before rolling. Add only a light dusting of flour if necessary.
Why Is My Crust Tough?
Overmixing, excessive kneading, or adding too much water can develop too much gluten. Handle the dough gently and stop mixing as soon as it comes together.
Why Did My Crust Shrink?
The dough may have been stretched during shaping, insufficiently chilled, or overworked. Fit the dough into the pie plate without pulling it, then chill it before baking.
Why Is the Bottom of My Pie Soggy?
Wet fillings can release moisture into the pastry. Depending on the recipe, blind-baking the crust, using a metal pie plate, or placing the pie on a preheated baking sheet can help improve bottom-crust browning.
Delicious Ways to Use This Pie Crust
This versatile pastry can be used for many sweet and savory dishes.
- Classic Apple Pie: Fill the crust with sliced apples, cinnamon, sugar, and a little lemon juice.
- Pumpkin Pie: Use a single crust for a smooth pumpkin custard filling.
- Pecan Pie: Fill the crust with pecans and a sweet syrup-based custard.
- Cherry Pie: Combine cherries with sugar, lemon juice, and an appropriate thickener.
- Blueberry Pie: Use blueberries, sugar, lemon zest, and cornstarch for a fruity filling.
- Lemon Cream Pie: Bake the crust first, then fill it with lemon custard or cream.
- Chicken Pot Pie: Omit the sugar if preferred and use the pastry for a savory filling of chicken and vegetables.
- Mini Hand Pies: Roll out leftover dough, cut it into smaller circles, fill, seal, and bake according to the filling recipe.
Storage Instructions
Refrigerating the Dough
Wrap the dough discs tightly and refrigerate them for up to two days. If the dough becomes very firm, allow it to soften slightly at room temperature before rolling.
Freezing the Dough
Wrap each disc securely in plastic wrap or another freezer-safe covering and place it in a freezer bag or airtight container. Freeze for up to three months for best quality.
Thaw the dough overnight in the refrigerator before rolling.
Freezing a Shaped Crust
You can also freeze a shaped, unbaked pie shell in its pie plate. Wrap it securely to protect it from freezer odors and drying. Bake from frozen only if your pie recipe allows it, adjusting the baking time as necessary.
Storing Baked Crust
Allow a baked crust to cool completely before storing it in an airtight container. Use it promptly for the best crispness, particularly when preparing a crust for a cream pie.
Frequently Asked Questions
Can I make this pie crust without a food processor?
Yes. A box grater, mixing bowl, and fork are enough. Grating the cold butter makes this recipe especially convenient for home bakers.
Can I use salted butter?
Yes. If you use salted butter, omit the optional added salt or adjust it to your taste.
Can I leave out the sugar?
Yes. The sugar adds a slight sweetness and may help with browning, but you can omit it for a more neutral or savory crust.
Can I make this recipe ahead of time?
Absolutely. Prepare the dough in advance and refrigerate it for up to two days or freeze it for longer storage.
Does every pie crust need to be blind-baked?
No. Some pies are filled before baking, while others require a fully or partially baked crust. Follow the instructions for your specific filling.
Can I use this recipe for both sweet and savory pies?
Yes. The small amount of sugar gives the crust a mild sweetness, but it is versatile enough for many savory fillings. You can omit the sugar for a more savory result.
Conclusion
Homemade butter pie crust is one of the most useful recipes to have in your baking collection. With only flour, butter, cold water, and a little sugar, you can create two versatile 9-inch pie crusts for family desserts, holiday celebrations, and comforting homemade meals.
The secret is simple: keep the butter cold, add water gradually, handle the dough gently, and allow enough time for chilling. These small steps help produce a crust that is tender, flavorful, and beautifully flaky.
Once you become comfortable with the process, you can experiment with different fillings, decorative edges, lattice tops, and seasonal flavors. Homemade pie crust turns ordinary ingredients into something special and makes every pie feel a little more personal.
For Pie Lovers
For anyone who loves the taste of a freshly baked pie, this recipe is a wonderful place to start. Imagine cutting into a warm apple pie with a golden, buttery crust, serving a creamy pumpkin pie after a holiday dinner, or sharing a homemade cherry pie with friends and family.
The best part of making pie crust from scratch is the freedom to create exactly what you enjoy. You can prepare it ahead of time, keep a batch in the freezer, and have homemade pastry ready whenever inspiration strikes.
Whether you are an experienced baker or making your first pie, this simple recipe can become a trusted kitchen favorite.
Final Baking Reminder
This recipe makes two 9-inch pie crusts. Keep the butter cold, avoid adding too much water, and chill the dough before rolling. For a single-crust pie, save the second portion for another recipe; for a double-crust pie, use one portion for the bottom and the other for the top.
Choose your favorite filling, follow its baking instructions, and enjoy the wonderful flavor of homemade pie.